What Is Aquatint? – The Art of Etching With Tonal Depth
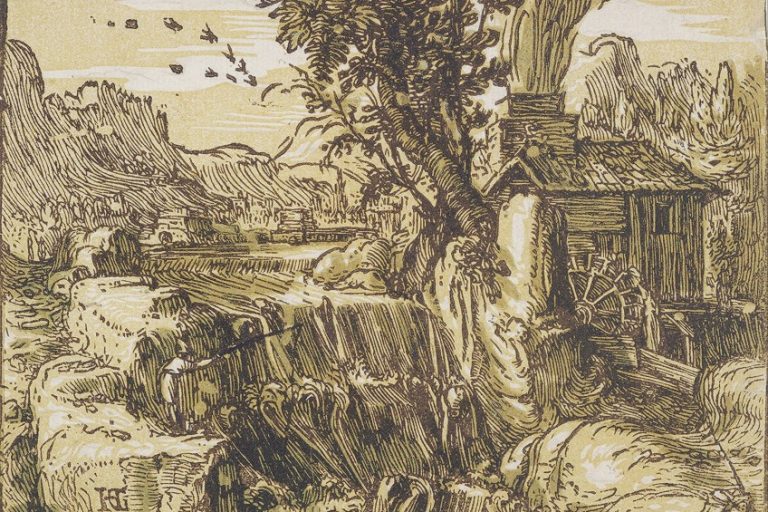
What is aquatint? This term may seem strange to you, especially if you have little knowledge of etching and printmaking. Printing using ink is a process or an art form that has been around since the latter part of the 14th century, and consists of layering pigments and inks on paper or wood, which creates amazing artwork. Aquatint is a printing technique where an artist can create beautiful works of art with intricate details, using toned areas instead of lines, and produce subtle changes between dark and light areas. Let us now consider the question, “what is aquatint?”.
Table of Contents
- 1 What Is Aquatint?
- 2 Brief History of Aquatint
- 3 Intaglio Printing Processes
- 4 Aquatint Technique and Process
- 5 Achieving Different Tonal Values
- 6 Aquatint vs. Other Printmaking Techniques
- 7 Renowned Aquatint Artists
- 8 Modern Applications of Aquatint in Fine Art
- 9 Preservation and Care of Aquatint Prints
- 10 Frequently Asked Questions
What Is Aquatint?
Aquatint is an intaglio printing technique, very similar to etching, which enables the artist to create a large range of tonal effects. Etching consists of cut or engraved lines on a metal plate that can hold ink that allows the image to be printed on paper. Aquatint, on the other hand, is a series of dots etched onto the printed surface, creating a more textured and tonal effect on the final print. The more detailed or finer the dots are, the subtler and softer the transition from deepest blacks to lightest grays will be.
The process of aquatint printing can also create images in color and monochrome.
What is a characteristic of the aquatint process? This technique can produce prints that resemble watercolors or wash drawings, as well as textured and highly detailed prints that would be a lot more difficult to create using any other techniques. For instance, if the artist wanted to create a specific detailed surface finish like wood grain, then aquatint would be the perfect technique to use for a more realistic surface representation.
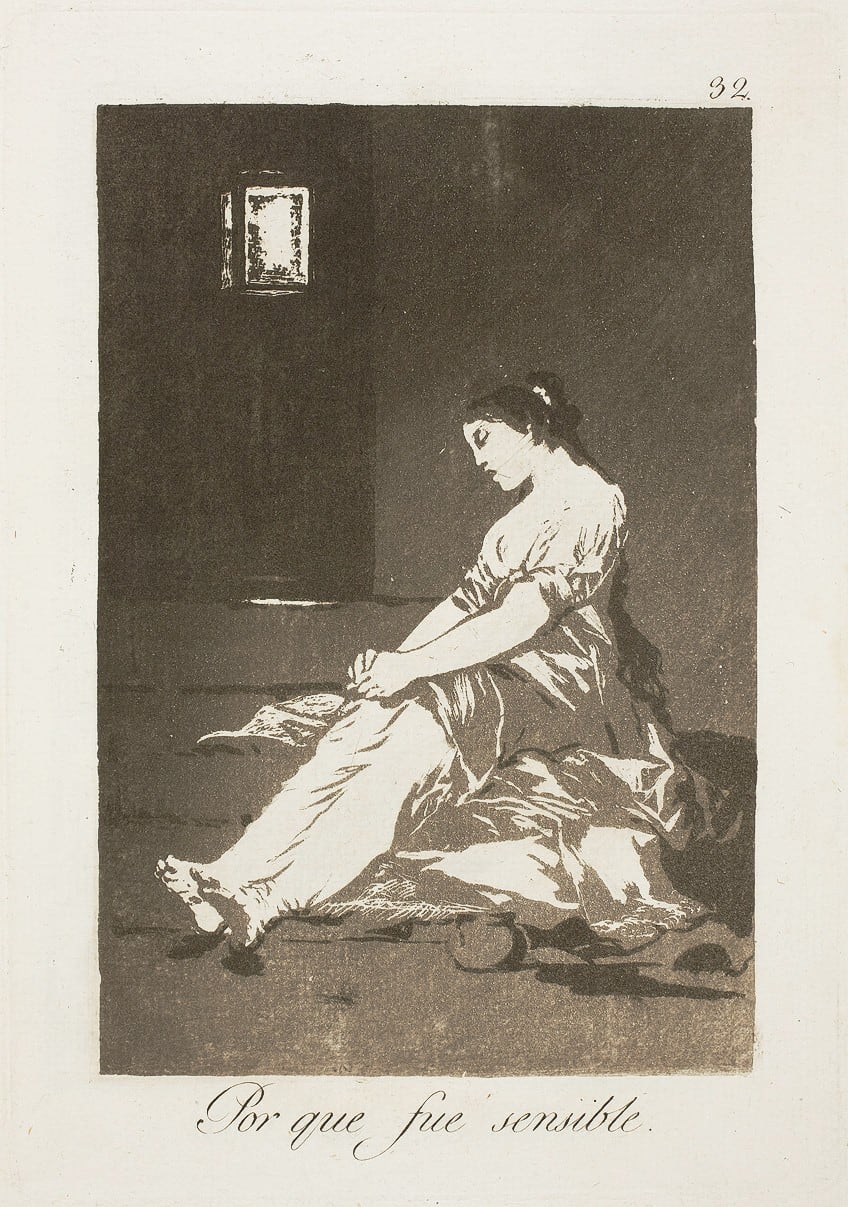
This technique of producing shaded areas from light to dark can prove to be very useful when the artist is busy with portraits, landscapes, or figure studies, where atmospheric tones or modeling may produce a more realistic or dramatic effect or impression.
Brief History of Aquatint
During the 17th century, several artists experimented with etching, including the first use of resin ground dust by Dutch printmaker and painter Jan van de Velde (1593-1641). Other artists included Per Floding (1731-1791) from Sweden and Francois-Philippe Charpentier (1734-1817) from France. All these artists produced but failed to master the technique of aquatint successfully. Historical archives refer to the French artist Jean-Claude Richard de Saint-Non (1727-1791) as the successful inventor of aquatint printing. He passed the technique over to a well-known etcher Jean Baptiste Le Prince (1734-1781), around the middle of the 1700s.
It was Le Prince who improved on the technique of producing the first aquatint prints, by using a special technique.
English etchers viewed his aquatint technique as a breakthrough, as it was vital for developing landscape watercolors. Le Prince modified the technique still further to enable the creation of prints with a wide range of shades and tones, creating some earlier aquatint prints that featured religious motifs and landscapes. England was the country that used the aquatint technique the most. The first English aquatint artist was Peter Perez Burdett (1734-1793), a cartographer who exhibited his prints in 1772, which was noticed by watercolorist Paul Sandby (1731-1809), who refined the technique even further. He also invented the name aquatint. In France, over the same period, the aquatint technique sustained a lot of interest in color printing and printmaking techniques.
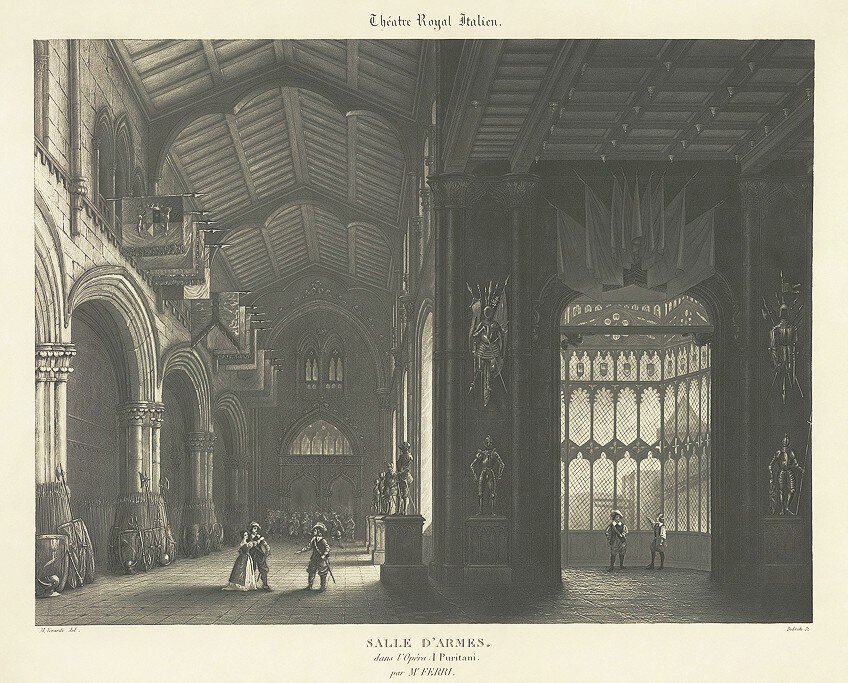
In the late 18th century, the aquatint technique developed into the best method for producing toned prints, particularly by illustrators. However, the textural details remained unexplored by most of the well-known artists until the Spanish printmaker and painter, Francisco Goya (1746-1828), who produced some canonical prints using the aquatint technique. He was later regarded as the greatest master of the aquatint technique. In 1790, the German actor and playwright, Alois Seinfelder (1771-1834), invented the printing technique lithography, causing several printing techniques, especially those techniques with tonal values, to lose their appeal and were used less and less by artists and newspaper publishers alike.
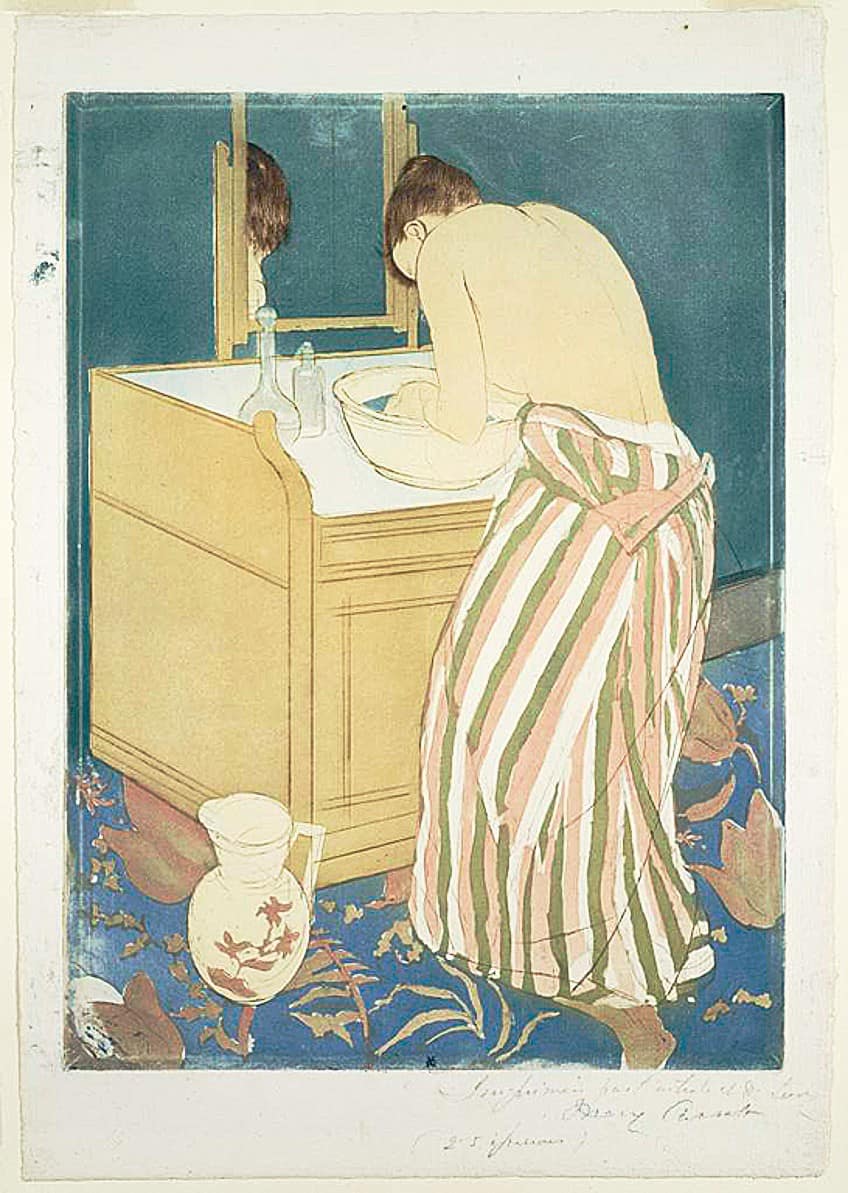
In the late 19th century, at the World Art Exhibition in Paris, Mary Cassatt (1844-1926) exhibited a variety of original colored aquatint prints. Soon after, other impressionists like Felicien Ropp, Edouard Manet, Camille Pissarro, Jacques Villon, and Edgar Degas, also began to use the aquatint technique. In today’s modern world with its advanced technology, aquatint is still widely used by printmakers who want to create prints with incredible shades, textures, and details.
Intaglio Printing Processes
Aquatint printmaking is one of the five intaglio printing processes, which include engraving, etching, drypoint, mezzotint, and aquatint. Each process produces prints that have their own distinct feel and look, and many of those prints are produced using a combination of two or more of these processes. In the intaglio printing process, the ink that forms the design is printed only from the recessed areas of the metal plate, where the design is etched, cut, or scratched onto the printing surface of the metal plate.
The ink is pushed into the grooves using a roller, and then the excess ink is wiped off. The inked plate is placed face down onto a printing bed with a sheet of wet printing paper placed on top of it. Finally, a blanket is then placed on top of everything.
Next, a second, or upper roller, of the printing press is turned on and the printing bed is drawn through the press. Considerable pressure of several tons is applied to the blanket, forcing the wet printing paper into the ink-filled grooves of the plate, and producing your printed design or image ready for printing.
Aquatint Technique and Process
Each printing technique has its own set of rules, and the aquatint process is one of the most lengthy and difficult of them all. This is because it does not depend only on etching lines, but rather whole areas that resemble wash drawings or watercolor drawings. Let us now consider the aquatint printmaking processes and techniques.
Tools and Materials
As each printing process and technique is different, the materials and tools needed for each technique are also going to be different. The tools and materials needed for an aquatint print are as follows:
- Paper (correct size for the copper plate)
- Tracing paper
- HB pencil or higher
- Rosin powder
- Copper metal printing plate
- Acid bath
- Air pump
- Heating equipment (torch or oven)
- Varnish

Preparing the Copper Plate
As aquatint prints produce tonal effects on the finished product, the copper plate must be perfectly clean so as not to interfere with the result. Use methylated spirits to clean off all debris and oil, then apply some varnish to the surfaces you want to remain white.
Draw the Etching Sketch
Consider the dimensions of the copper plate, select a piece of paper that will suit that size, and sketch the etching. Next, trace the drawing on a piece of tracing paper using an HB pencil or darker to ensure that you can see the design once it is transferred to the copper plate. Fold the tracing paper and fit it to the copper plate.
Copy the design onto the copper plate, and remove the tracing paper.
Dusting the Printing Plate With Rosin
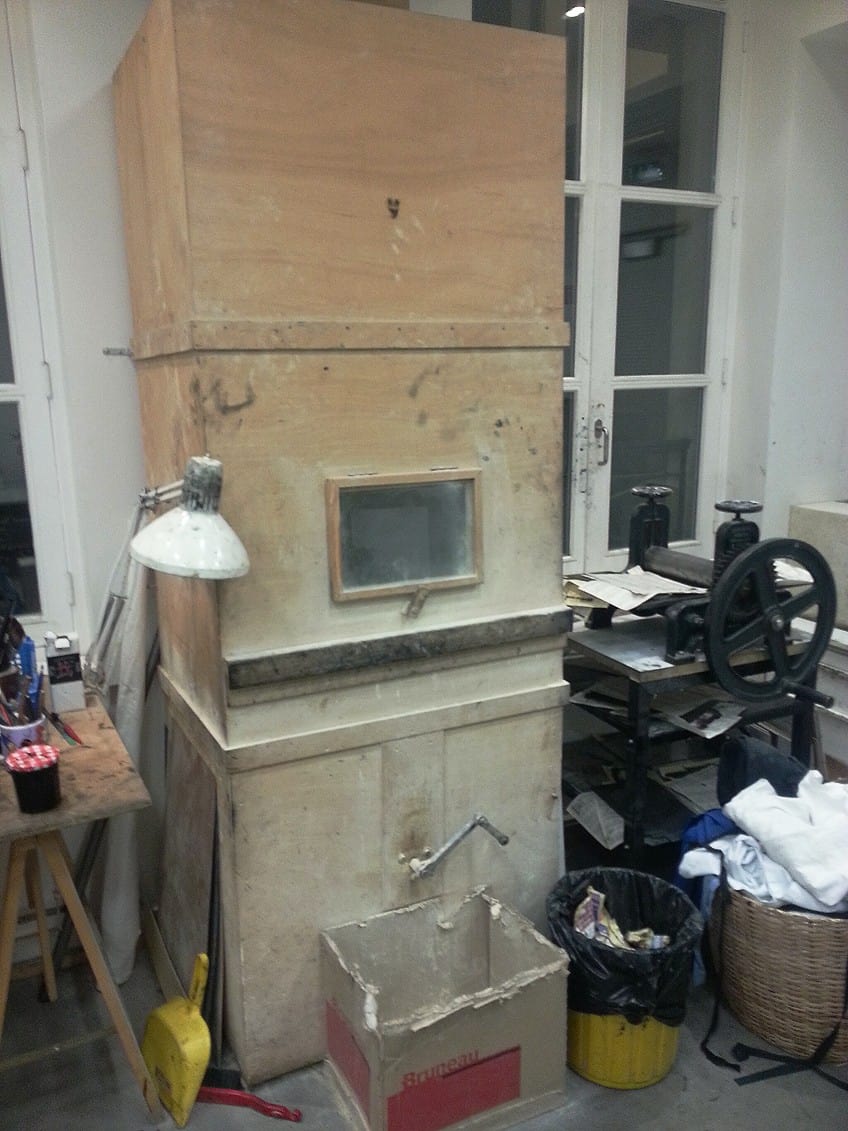
Take the metal printing plate and dust it with the rosin powder, which comes from the pine tree resin and is ground into a fine powder. Be careful to ensure the resin powder is spread evenly over the printing plate, which can be a tricky process. Some printmakers make use of a rosin box to apply the rosin powder, which lies on the bottom of the rosin box. A bellows is then used to blow the rosin powder into the air, allowing it to fall onto the printing plate.
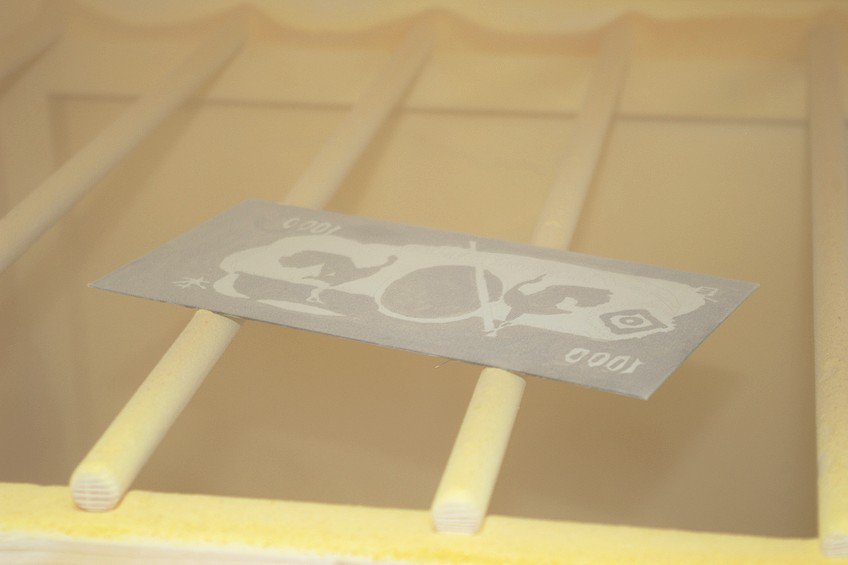
As soon as the powder covers the plate, the box is removed and ready for the next operation. Other printmakers would collect the rosin dust and stuff it into a silkscreen rug or stocking. The box is then spun and by hitting the stocking or rug, the rosin powder in the form of a cloud of dust, is released and gently falls onto the printing plate.
Heating and Fusing the Rosin
The metal plate that has been covered with rosin powder is now heated by using an alcohol flame, a light torch, or even an oven. The heating process melts the rosin, allowing it to form a fine and even coating over the entire metal plate. The heat distribution needs to be even and precise to ensure an even flow of rosin. The heat applied to the plate lowers the viscosity of the rosin, changing the oil texture and forming a wax.
Small variances in temperature can produce small texture flaws and produce mixed texture changes.
Etching Process
The plate is now immersed in an acid bath where the acid bites into the plate where there is no rosin, producing a fine level of corrosion. At this stage, the plate will be able to produce a 50 percent halftone. This means that if the plate was printed now, it would show a gray color that is between white with no ink and black with full ink. This first etching process should be very short, about 30 to 60 seconds. Everything should be checked to see if the desired tone has been achieved in certain areas, then stop out those areas with ground or wax, protecting them from further acid biting.
These tones give aquatints that distinctive watery look and provide large areas of tone without cross-hatching.
The plate is then progressively immersed in the acid bath, and if the time exceeds 30 minutes or longer than an hour, it will produce a very dark area. Deep etching will produce raised ink when the plate is printed on paper. The longer you leave the plate in the acid bath, the darker the tone, and the surface of the plate will be like sandpaper. There are various ways of making an aquatint print like the spit bite aquatint, which gives you a watercolor wash effect. There is also the soap ground, where liquid soap is added, creating irregular tones. Another way is using a sugar-lift aquatint, where sugar is melted into the ink, allowing the artist more freedom to play with the tones.
Hard vs. Soft Etching Ground
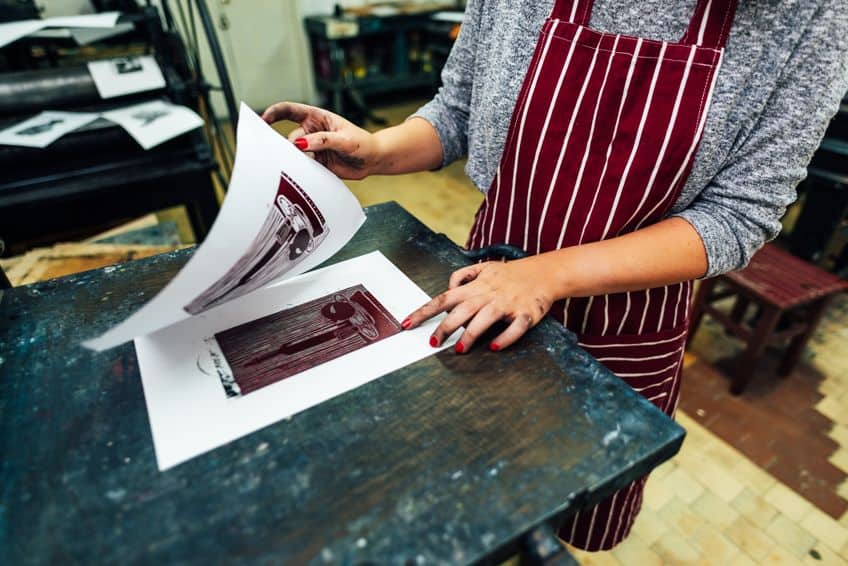
Hard and soft ground are waxy acid resists that are applied to the surface of the copper plate. The plate is then heated, melting the ground, which protects the plate from being bitten by the acid. Hard ground is stable and easier to handle once it is dried, whereas soft ground is a great deal softer and needs to be handled with extreme care once applied to the plate, as it could result in destroying the print if damaged in any way.
Hard ground can be applied by using a hard roller, whereas soft ground needs to be applied using a soft brush.
Achieving Different Tonal Values
Aquatint is an intaglio printing technique that enables the artist to create a wide range of tonal effects, and these tonal effects are created by acid eating or etching into the copper plate, producing the tonal effect that the artist is looking for. Let us now explain a few of the tonal effects that are possible with the aquatint technique.
Stopping Out Technique
The stopping-out process is achieved by applying varnish to certain parts of the copper plate, where the artist does not want the acid to reach. This simply means the varnish “stops out” the acid from burning that area of the plate.
The more or less of the varnish you use, will give you different tonal effects in the final print.
Biting and Layering
Powdered rosin is applied to the copper plate and the plate is then heated, causing the rosin to melt. The melted particles then form a granular pattern consisting of small, indented rings. The plate is then fully submerged in an acid bath, which allows the acid to sink into the plate wherever the rosin has not been applied. The sunken areas caused by the acid will hold the ink, and the varnish-protected areas of the plate will appear white in the final aquatint print. The artist can vary the graduations of the tone of the print by keeping the plate immersed for longer periods. The longer the time in the acid bath, the darker the print will be, and the shorter the time, the lighter the print will be.
Aquatint Screens
An aquatint screen is used to produce textures and patterns but to be able to work with tonal drawings on photographic printmaking film, you need to use an aquatint screen to provide the dot pattern. The aquatint screen is custom-made and consists of random patterns of opaque dots that stimulate the fine dot structure of a fine aquatint. The screen is put in direct contact with light-sensitive plates and film during exposure, which will provide a rich black aquatint base that can be used for a second exposure to a photographic positive or drawing.
The aquatint screen can create an organic tonal range and is generated from silver-based graphic arts film, which is reusable, and durable.
Aquatint vs. Other Printmaking Techniques
Printmaking is an artistic process that is based on transferring certain images or designs from the master plate, which can be wood, metal, or glass, onto some other type of material, which is normally paper but could also be fabric. Traditional printmaking is divided into four categories:
- Planography or lithography
- Serigraphy or silk screening
- Relief (includes techniques like linocut or woodcut)
- Intaglio
Intaglio includes techniques like engraving, etching, aquatint, mezzotint, and dry point. We have already dealt with the aquatint technique, let us now consider some of the other intaglio printing techniques.
Engraving
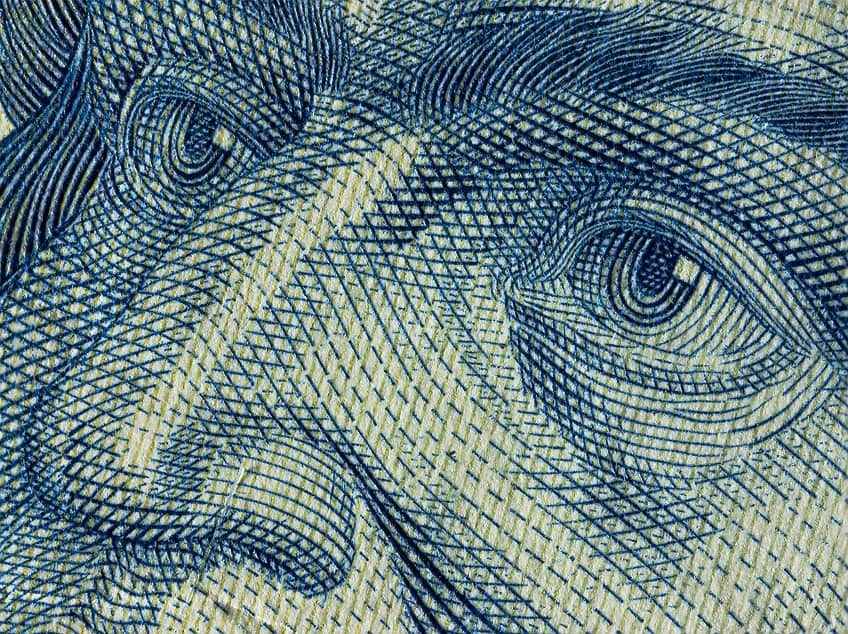
Engraving is the most common and oldest of all the intaglio techniques that were developed in the Middle Ages. The process involves cutting an image or design into a copper plate with the use of a special tool called a burin. Unlike aquatint, the engraving technique requires straight lines cut into the copper plate, which produces shading through the process of cross-hatching and hatching, creating unique prints with curves.
This requires the artist to turn the burin while pushing it, which takes a lot of skill and patience.
The burin’s tip is in the shape of a diamond, which allows the artist to accomplish tone and depth that can vary according to the depth of the lines cut into the copper plate. When the burin makes deeper lines into the plate, the lines become wider which results in the design or image getting darker or lighter.
Etching
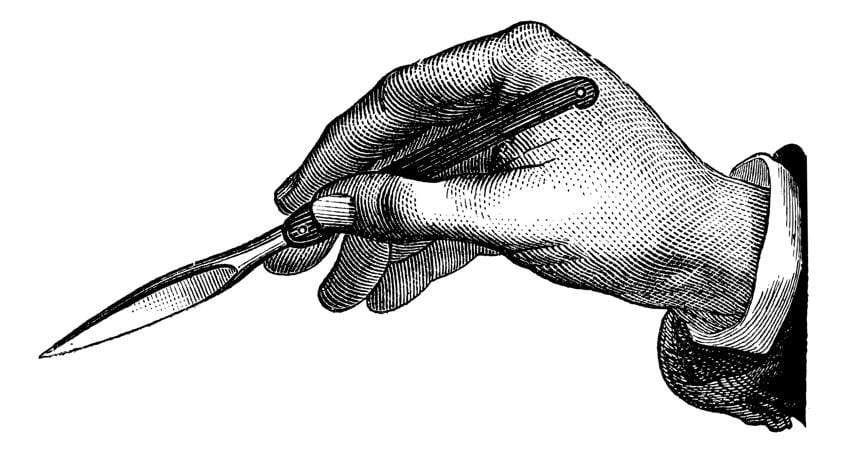
The printmaking technique of etching was developed in the 1500s when it was used to decorate motifs on armor. This same process is still practiced by many artists today. With the etching process, the copper plate is first covered with a thin layer of ground that is acid-resistant, then the artist will take a needle and draw the design or image onto the plate. These lines drawn into the plate expose the copper, and when the plate is immersed in an acid bath, the acid bites into those exposed lines. The longer the plate is in the acid, the more the acid eats into the plate, causing darker and deeper lines. These lines hold the ink when the plate moves through the printing press.
Advantages and Unique Characteristics of Aquatint Prints
The aquatint technique is very similar to the etching technique but can produce a wider range of tonal effects when the copper plate is exposed to acid through the melted granulated rosin. The main advantage of an aquatint print is that it can produce a distinctive watery look like watercolor drawings.
The aquatint technique also creates larger tonal areas without the cumbersome cross-hatching, and its plates are usually more durable than those of the mezzotint technique.
Renowned Aquatint Artists
The aquatint technique was a process developed by various artists in the second half of the 18th century, who were able to use the technique to create subtle tonal variations that mimic watercolor drawings with a watery look. The artists were able to create compositions of scenes of faraway places, imaginary visions, and scientific phenomena. Most of these unique prints have been housed in National Galleries around the world, apart from some early aquatint prints that were never out on public view. Let us now consider some historical artists who used the aquatint technique.
Jean-Baptiste Le Prince (1734 – 1781)
| Date of Birth | 1734 |
| Date of Death | 1781 |
| Nationality | French |
| Famous Artworks |
|

Le Prince was a French etcher and painter who based his compositions solely on his own designs and was credited as the first artist who introduced aquatint into his engraving plates. He may even be acknowledged as the artist who invented aquatint with its tonal effects. Let us now discuss one of his well-known aquatint prints.
The Rest (1771)
| Date | 1771 |
| Medium | Aquatint and etching printed in brown ink on paper |
| Dimensions (cm) | 45.72 x 60.96 |
| Location | The Metropolitan Museum of Art, New York City, United States |
This art piece demonstrates his skill in wielding the tonal effect of the aquatint technique, showing clearly the two figures to the left with numerous fishnets and ropes hanging from the beams that dissolve into the depths of the room. The sleeping woman is the main object of the old man and the woman’s attention, which is displayed to attract the viewer’s attention.
The broken eggs in the bottom left corner suggest that the woman has lost her virtue, and the delicate details of the tangle of fabric around the woman perfectly capture the aquatint textures and patterns.
Francisco de Goya (1746 – 1828)
| Date of Birth | 1746 |
| Date of Death | 1828 |
| Nationality | Spanish |
| Famous Artworks |
|
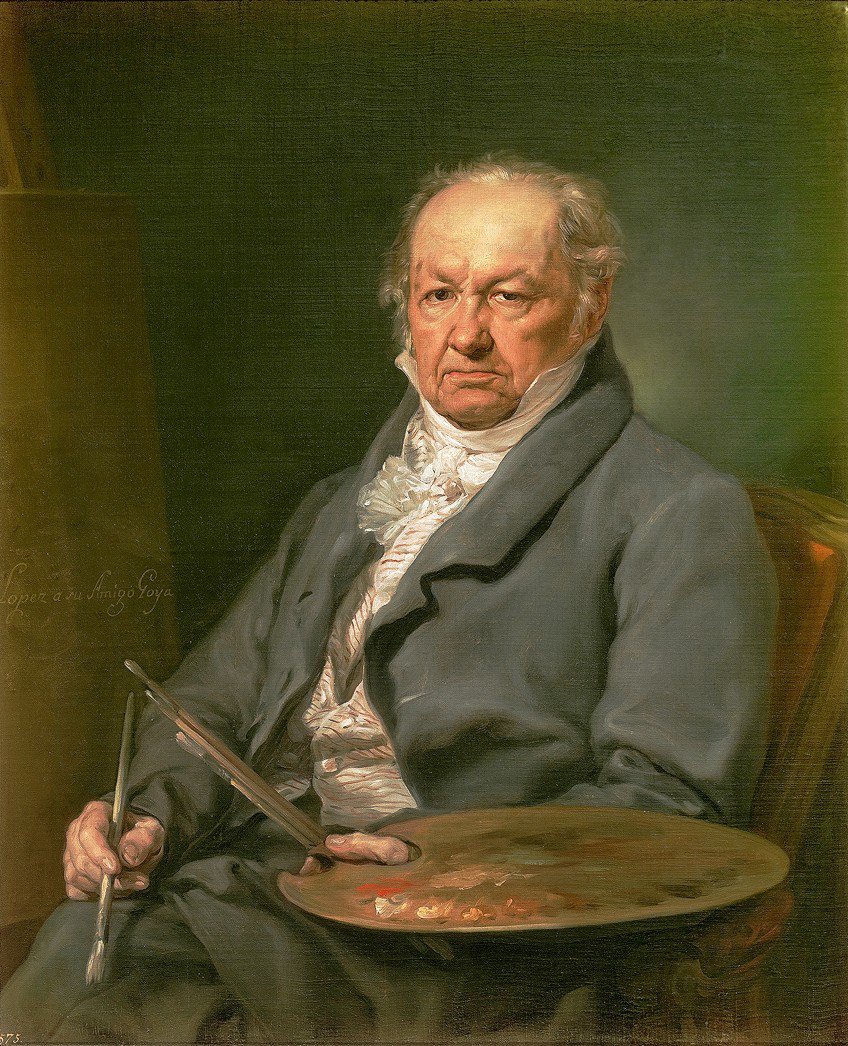
Some of the most famous and renowned aquatint prints were done by Francisco de Goya and are some of the finest aquatint prints that were ever produced. Let us now discuss one of his well-known aquatint prints.
Los disparates (1815 – 1824)
| Date | 1815 – 1824 |
| Medium | Aquatint, etching, and drypoint on paper |
| Dimensions (cm) | 24.4 x 35.3 |
| Location | Metropolitan Museum of Art, New York City, United States |
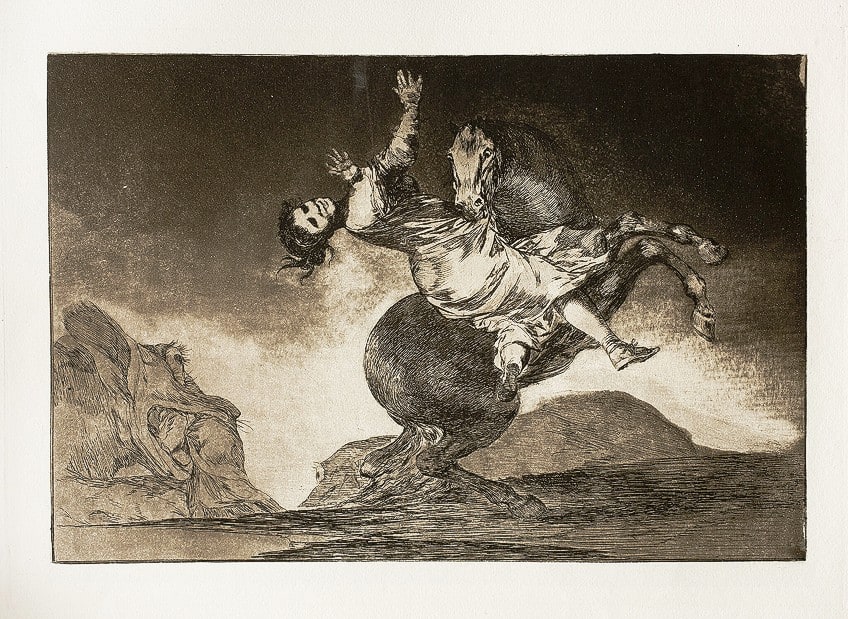
Los disparates (1815-1824) was an aquatint print created by De Goya that is known by two names. Some refer to it as Suenos (Dreams), while others call it Proverbios (Proverbs). This aquatint in art was one of a series of prints that were born in circumstances referring to the fanatic religious practices of that day. The dilemma of political prisoners, the aristocracy, and the corruption of court life, is portrayed in his remarkable aquatint etchings that show witches, fantastical creatures, and ghosts, invading his mind. It remains a stern warning of a world that is without reason. His prints show clearly how he mastered the aquatint technique, where he also incorporated etching and drypoint to perfect the artwork.
Modern Applications of Aquatint in Fine Art
The aquatint technique is still practiced in the 20th century by many artists like T.F. Simon, Johnny Friedlaender, and Pedro Joseph de Lemos, mainly in the fine arts. Modern and contemporary printmakers have often used spray paint instead of powder, especially when using the sugar-lift aquatint technique.
Johnny Friedlaender (1912 – 1992)
| Date of Birth | 1912 |
| Date of Death | 1992 |
| Nationality | French/German |
| Famous Artworks |
|
Johnny Friedlaender was a French/German artist, and many of his artworks have been exhibited in France, Germany, Japan, Italy, the Netherlands, and the United States. Although he used watercolors and oil paints as a medium for his aquatint in art, he preferred aquatint and etching and has often been described as the pioneer of the aquatint technique or process.
Let us now discuss one of his well-known aquatint prints.
Le Cheval et Son Ombre (1956)
| Date | 1956 |
| Medium | Aquatint and etching print on BFK Rive paper |
| Dimensions (cm) | 60 x 42.9 |
| Location | The Museum of Modern Art, New York City, United States |
This is an aquatint etching of a horse rising towards the moon. His abstract visions of animals and human figures portrayed nature as a mystical and majestic force that drew on Expressionism and Surrealism, which were modernist and cultural movements in Europe in the 20th century.
Preservation and Care of Aquatint Prints
Aquatint art prints, like all artworks, are very durable and can last for a long time. However, to ensure that you protect their beauty, you need to take certain precautions and care in handling and displaying them. Here are some tips that you can use to protect and preserve your aquatint artworks.
- Try to avoid touching the printed area with your hands, as traces of your fingers will stay visible, and the damage caused can be irreversible.
- For archival purposes for storing or shipping your art prints, you can use plastic. Ensure there is no adhesive on the plastic that may come into contact with the art print.
- You can also use tissue paper for storing or shipping your artwork, but ensure you only use archival tissue that is smooth without texture, and it must be acid-free.
- The best option is to frame your artwork. Ensure the framers only use archival acids and glue in the process and use non-reflective glass to protect the print from any UV rays.
- Keep your art prints inside in a cool and dry place, and out of direct sunlight. Also, avoid humidity.
- You can also give your art prints a protective spray to protect them from UV light, fingerprints, moisture, and dirt.
- Keep food and drink away from your art prints, as accidents can happen and destroy your prints.
If you are thinking about trying out the aquatint technique, then take note that it is a complex process and involves a lot of trial and error. So, do not become too stressed out if you find you are not achieving the result you expected. Rather enjoy the process and try out different techniques, including etching or engraving in your artwork, and notice the different effects that they have!
Frequently Asked Questions
What Is a Characteristic of the Aquatint Process?
A characteristic of the aquatint process is the ability to achieve a wide range of tonal values. It is also called the aquatint process because the finished prints resemble a wash or watercolor drawings with a large range of various textures.
How Do You Identify an Aquatint Print?
It is a fairly easy process to identify an aquatint print, as it will normally have a smooth tonal variation of shades and colors. Also, because it is an intaglio printmaking technique, you should easily be able to identify the fine lines in the print.
When Was the Aquatint Technique Used?
The aquatint technique was developed in the 18th century by different artists, and the process was used by artists to give the impression of watercolor washes that were very popular at that time. They were also used in color-plate books.
In 2005, Charlene completed her Wellness Diplomas in Therapeutic Aromatherapy and Reflexology from the International School of Reflexology and Meridian Therapy. She worked for a company offering corporate wellness programs for a couple of years, before opening up her own therapy practice. It was in 2015 that a friend, who was a digital marketer, asked her to join her company as a content creator, and this is where she found her excitement for writing.
Since joining the content writing world, she has gained a lot of experience over the years writing on a diverse selection of topics, from beauty, health, wellness, travel, and more. Due to various circumstances, she had to close her therapy practice and is now a full-time freelance writer. Being a creative person, she could not pass up the opportunity to contribute to the Art in Context team, where is was in her element, writing about a variety of art and craft topics. Contributing articles for over three years now, her knowledge in this area has grown, and she has gotten to explore her creativity and improve her research and writing skills.
Charlene Lewis has been working for artincontext.org since the relaunch in 2020. She is an experienced writer and mainly focuses on the topics of color theory, painting and drawing.
Learn more about Charlene Lewis and the Art in Context Team.
Cite this Article
Charlene, Lewis, “What Is Aquatint? – The Art of Etching With Tonal Depth.” Art in Context. September 29, 2023. URL: https://artincontext.org/what-is-aquatint/
Lewis, C. (2023, 29 September). What Is Aquatint? – The Art of Etching With Tonal Depth. Art in Context. https://artincontext.org/what-is-aquatint/
Lewis, Charlene. “What Is Aquatint? – The Art of Etching With Tonal Depth.” Art in Context, September 29, 2023. https://artincontext.org/what-is-aquatint/.


