Wet-on-Wet Watercolor – Tips for Wet-on-Wet Painting Techniques
Wet-on-wet watercolor is by far the most popular method for working with watercolor paint. Wet-on-wet painting is a vital watercolor procedure to master. You can create a wide range of lovely gradients, and also various color mixtures and effects, using our wet-on-wet watercolor painting tips. Making smooth backgrounds with the wet-on-wet technique is also a nice method. We will go over some watercolor tips and tricks in this guide to help you improve your wet-on-wet painting abilities.
Table of Contents
Watercolor Painting Tips and Techniques
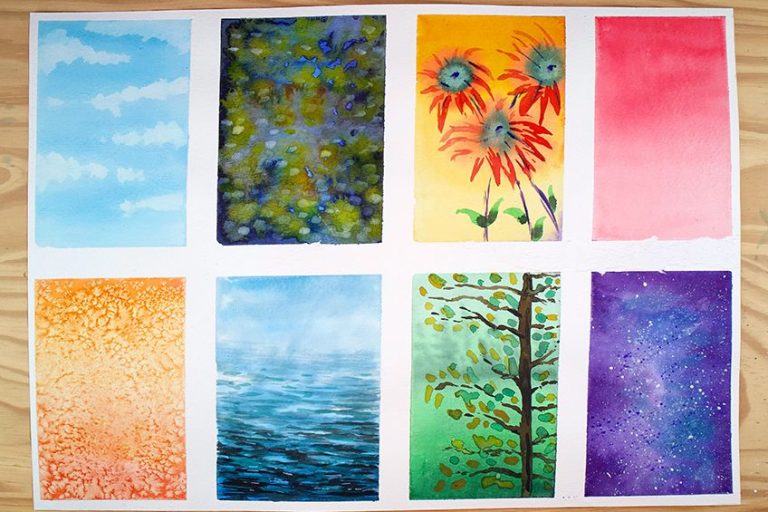
We will go over three various ways to use wet-on-wet watercolor techniques in our wet-on-wet painting tutorial. First, we will go over some basic wet-on-wet painting techniques to get a better understanding of the method. We will show you how to create two kinds of gradients: a type with one single color and the other with a couple of colors that mix into each other smoothly.
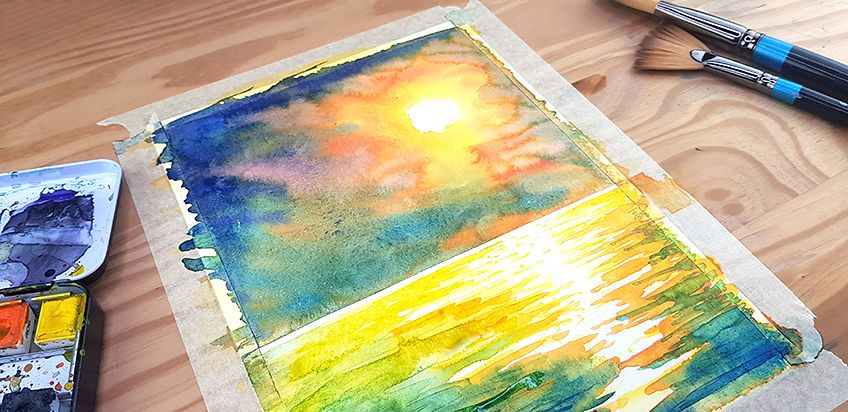
We’ll then use our wet-on-wet painting skills to create a landscape painting. Backgrounds and beautiful clouds can be created with the wet-on-wet technique. We will create some clouds in this wet-on-wet watercolor guide that you could indeed utilize as a background to portray landscapes on top. With all of that in mind, let us now go over the fundamentals of wet-on-wet watercolor painting.
Proper Preparation
Let’s make sure we have all of our materials prepared and in the correct spot for our guide before we start. As we work through this wet-on-wet watercolor lesson, we’ll want to find a quiet spot where we can focus on the steps. Furthermore, when producing wet-on-wet watercolor, you’ll need a bit of water. Make absolutely sure you have two water jars on hand for rinsing your bristles. Finally, make sure you enjoy yourself.
Learning a new skill necessitates some concentration, but creating art is a task that can be both relaxing and enjoyable.
Creating Gradients
For generating gradients, wet-on-wet is a fantastic technique. We’ll go over some watercolor tips and tricks in this first portion of the lesson to help us comprehend how to make gorgeous and smooth gradients.
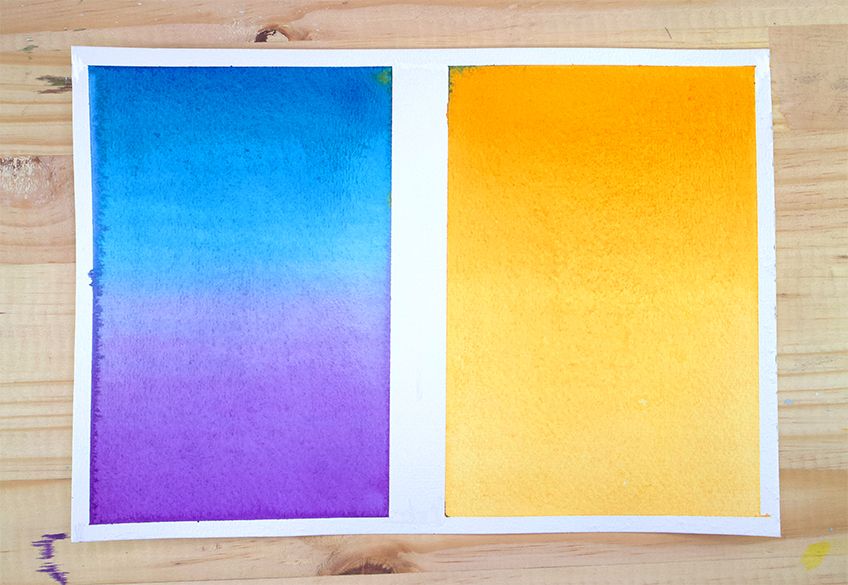
Creating Single Color Gradients
The most prevalent and helpful job to learn first when studying wet-on-wet painting is how to create a simple gradient. To begin, we use scotch tape to divide our page into two sections.
We’ll continue to coat one part of our page with water once we’ve split our page into two halves. We accomplish this by using a clean brush that has been loaded with water and applying a thin coat of water to the entire surface area.
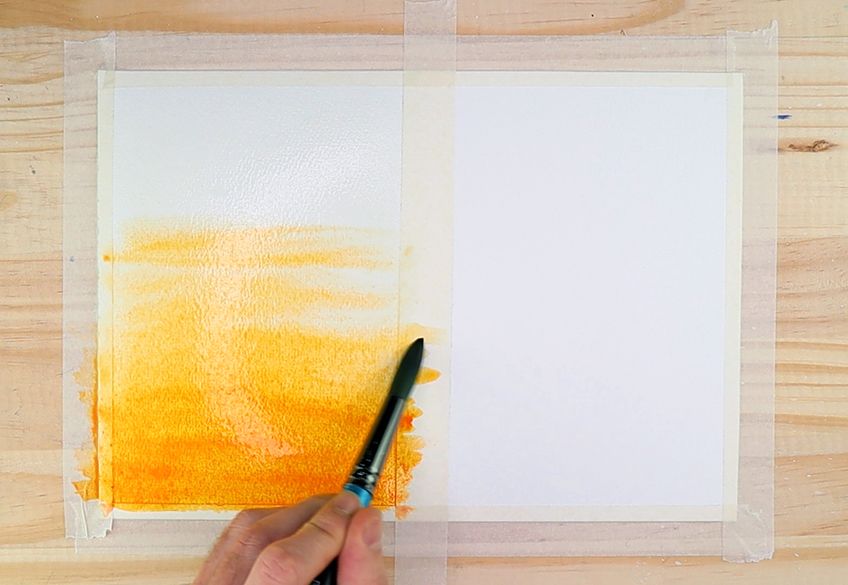
After that, we’ll mix a color; you can choose any color or the one shown in this orange guide. For this first gradient, we’re only going to use one color. After which, at the lower part of our sectioned-off area of the paper, we’ll make strokes.
The goal is to add full bush strokes to the page from left to right. The wet strokes should move across the entire wet page. We want to gradually work these areas up the page as we make these brush strokes. As we do this, we’ll observe how the paint gradually fades as we progress up the page.
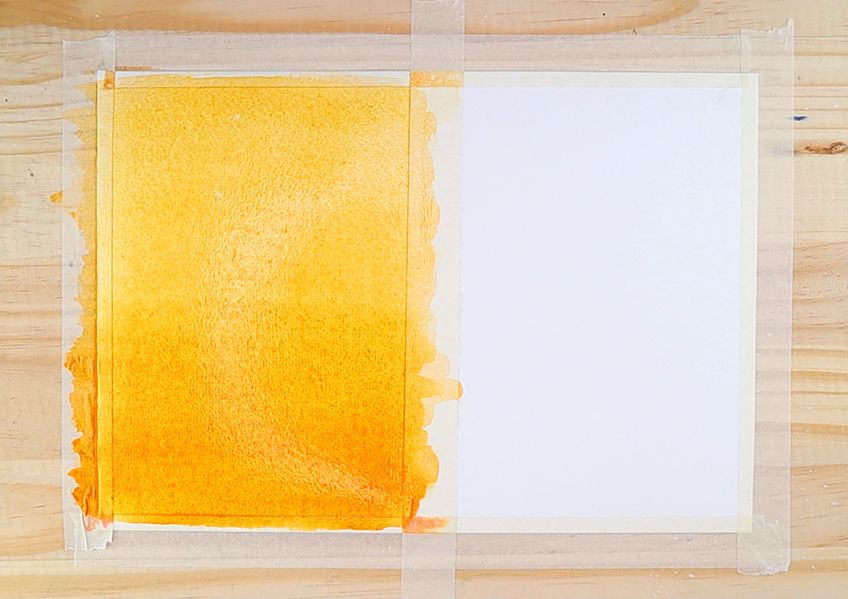
What we want to do now is make our way up the entire off-page wet segment. We do this by trying to make brush strokes up the page from side to side until we have reached part of the upper. The water, of course, allows the coat to dry uniformly, leaving no visible lines between the palest and most saturated areas of the color. If we just want the color to pop, we should immediately begin at the bottom of the section rather than the top. We want to make sure that we’re going to paint a dark-to-light gradient.
We’ll proceed at the bottom of the page and work our way up to make this as smooth as possible.
Creating Dual Color Gradients
While our first painting dries, we will wet the next segment of our surface. Once more, we do this by filling a clean brush with water and applying it evenly across the entire surface of the section. We want a layer of water to cover the entire section.
We’ll now create a gradient with two colors that will blend together. Let’s go with purple and blue. To start, we’ll add blue to the bottom of the page, which has been divided into sections. We’ll use thrusts to relocate the color up the section, comparable to the first gradient, allowing it to fade intuitively.
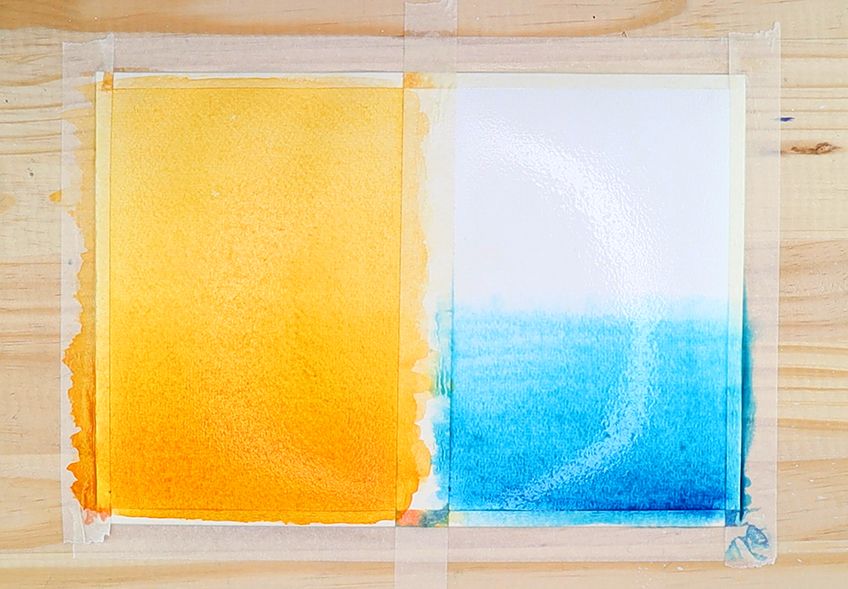
We’ll then repeat the process with a different color, which we’ll use at the top of the page. We’ll make side-to-side strokes in the same way we did in the previous phase, but this time we’ll move the color downward. The colors should be able to blend together. We want the surface to remain wet, so try to be rapid with this.
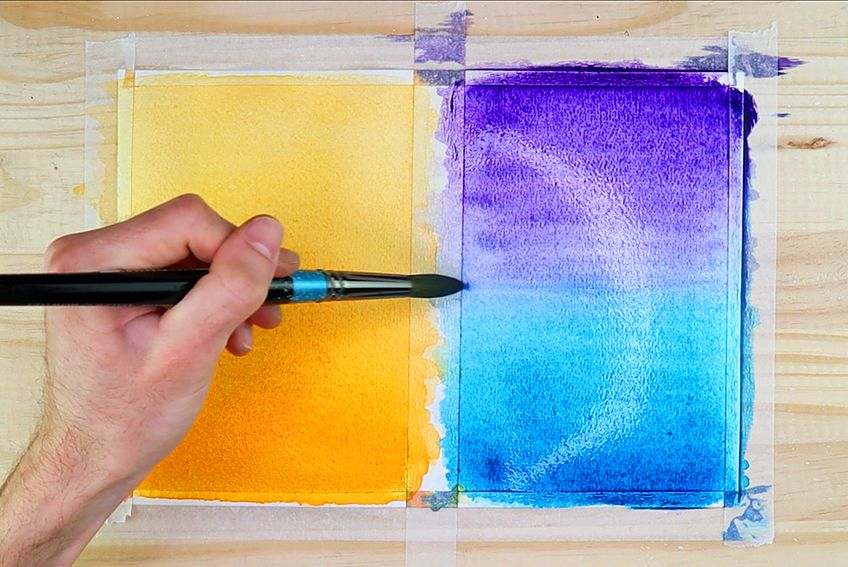
Another great tip is to keep your paintbrush wet as you layer on more color to increase the saturation of the gradients. You should paint both colors from the top or bottom of the page, gradually blending the colors together. Start at the bottom and brush strokes into the purple color along with the surface if you want to make the blue more overloaded with color. As it dries, the two colors should blend together seamlessly.
We can detach the tape from our page now. You don’t want to destroy your page, so move slowly. We should ideally now have lovely white-bordered areas surrounding our gradients. Don’t be concerned if there are perhaps a few small amounts of paint on the edges.
You can also simply ensure that your tape firmly adheres to the page.
Creating a Wet-on-Wet Watercolor Sky
Wet-on-wet is an excellent method for creating skies and clouds. The most notable about skies is that they are all unique. This implies we can be really creative with the color schemes and paint stroke shapes we use. We will now try to create our own sky using the wet-on-wet technique, which allows the colors to blend seamlessly and can be used to create clouds.
Generating the Sky
Now we will continue this lesson by creating clouds with the wet-on-wet technique by creating a landscape. Clouds are an excellent subject for wet-on-wet watercolor painting. This is due to the fact that all clouds are unique and come in a variety of shapes and colors. To start, we tape a fresh piece of paper to our surface. We’ll then apply a thin layer of water to the entire page. We want to ensure that we add a uniform layer of water to the entire area surface of the page. We want water to cover all areas of the page, allowing color to blend into the overall design.
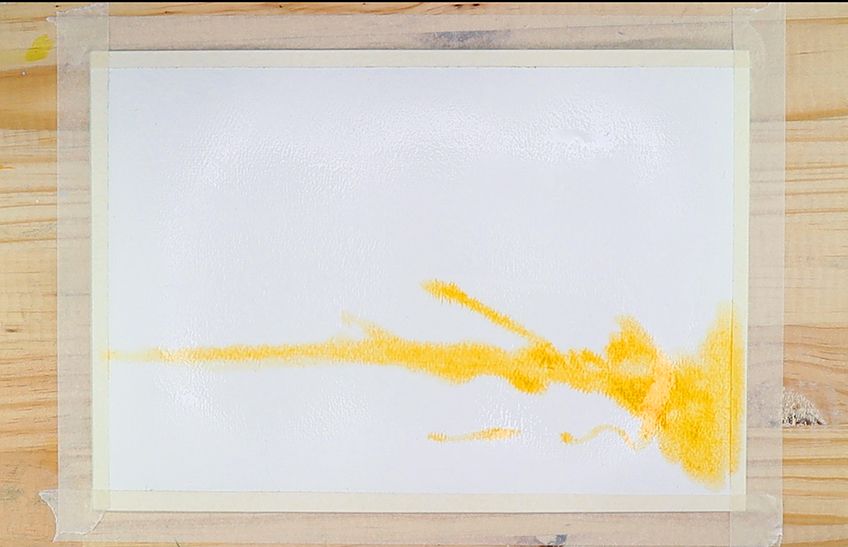
While the surface is still wet, we want to begin adding color strokes to it. Sky and clouds can be distinguished in a variety of ways, including color. A good color combination, on the other hand, is often yellow, blue, red, and purple. Start to add strokes of various colors in varying directions across the surface of the page.
We want to portray other colors moving in different directions at the same time. When you utilize these different colors on the wet page, the colors will blend together seamlessly. The wet layer will allow the colors to flow and spread across the page, resulting in interesting organic shapes.
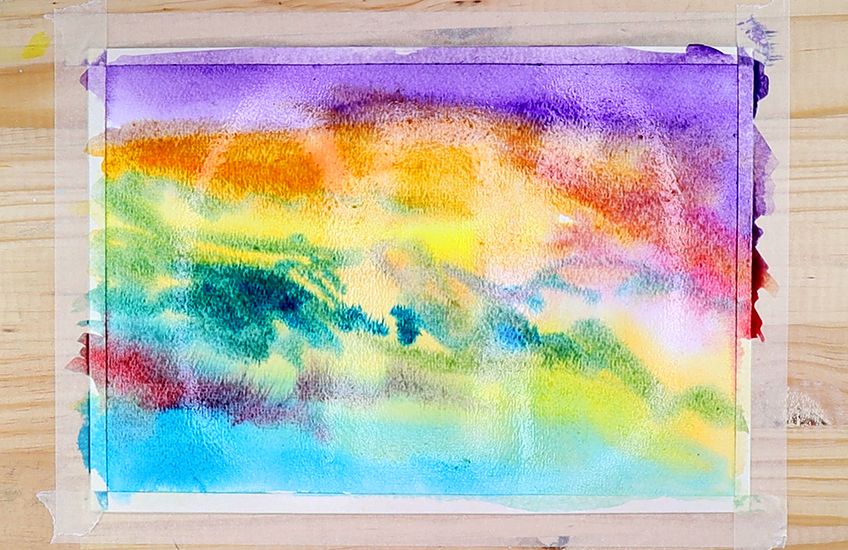
Consider the form and shape of various clouds as you go through this process. Permit yourself to leave light occasions in your painting as you color these marks on the surface of your page. This will result in darker and lighter patches of the skies that mirror the aspects of the clouds in our skies.
You can be very creative at this point because all skies and clouds differ in a variety of ways. The only way to contextualize the sky is to draw a line for the horizon. This can be accomplished by creating a long stroke across the page’s bottom part.
To start giving the quality of the ground, you only need to fill it in with a single color.
Creating the Scenery
At this juncture, we will have to let our sky fully dry. Wet-on-dry watercolor is an excellent technique to use in conjunction with wet-on-wet watercolor. We can see that with no subject matter drawn onto the background, we are left with a picture of interconnected colors.
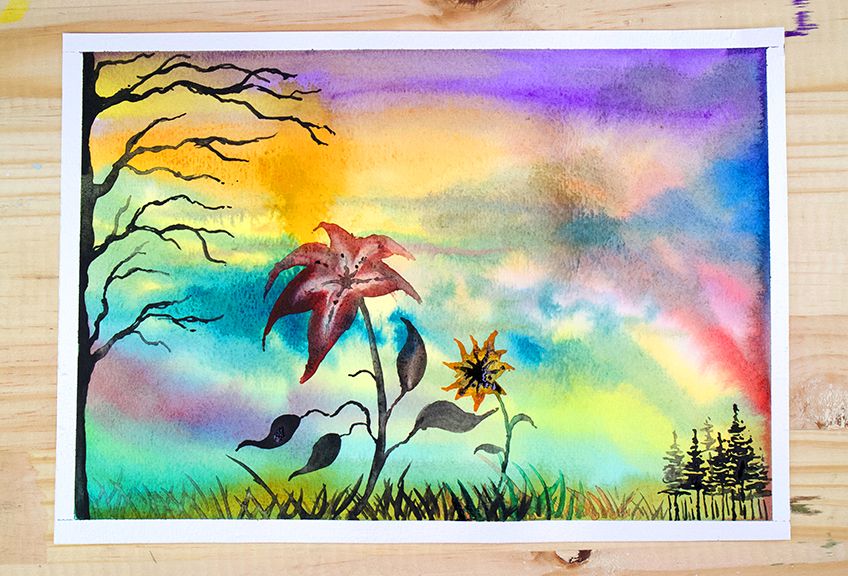
When your sky has dried completely, we will be left with a vibrantly colored background in which all of the different colors appear to flow into one another. This can serve as a backdrop for various features that may appear in the foreground and reframe it, such as a sky. You could, for example, paint flowers.
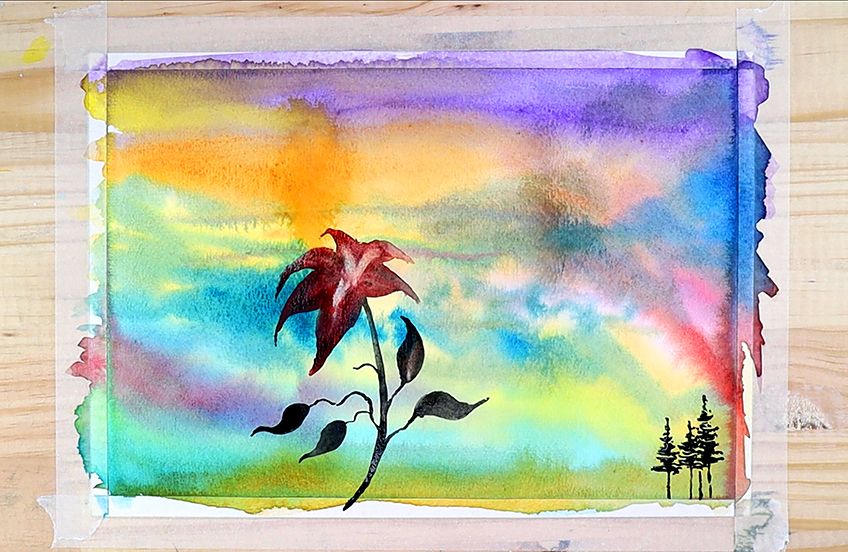
If you’re painting flowers, you can experiment with object scale to characterize the depth of field in which your landscape is set. Painting blossoms in the foreground, for example, can be taken in context as being close up by drawing smaller trees in the background.
It’s really up to you at this moment how you want to put the colorful sky into context. Paint a pasture, trees, or flowers to accomplish this. The goal of this segment of the lesson is to show you how to use the background for artwork.
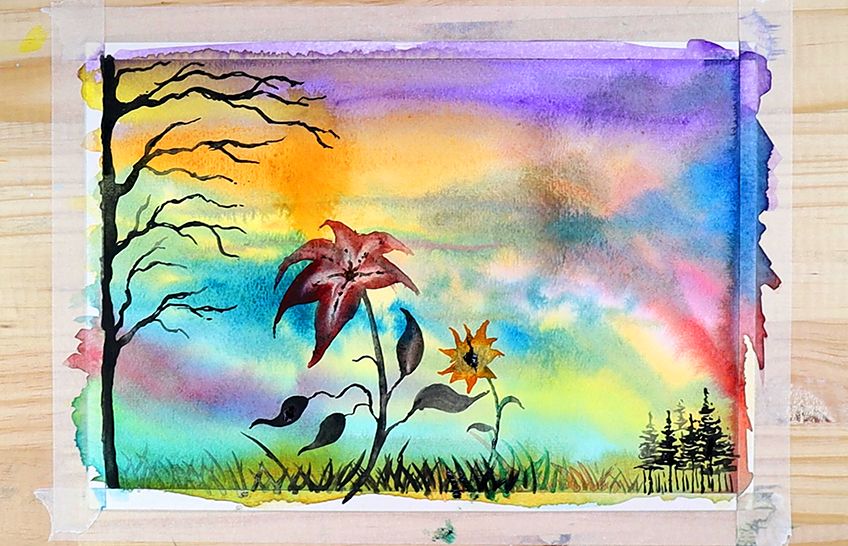
With the wet-on-wet watercolor technique, you can create a sky like this. Wet-on-wet watercolor can be used in a variety of ways; in this tutorial, we only went over a few simple examples. Wet-on-dry watercolor can also be used in conjunction with wet-on-wet watercolor.
You’ve learned a few watercolor techniques that you can use in your watercolor paintings.
More Watercolor Painting Tips
Wet-on-wet watercolor painting is both one of the most accommodating and one of the most difficult techniques to master. It’s essential to let your imagination run wild, but if you get stuck, here are some of our best watercolor painting tips.
- While doing this lesson, try to set aside time. It will take some time and effort.
- When you wet your section, strive to maintain the water layer thin and even on the page.
- Working with wet-on-wet requires working while the page is still wet. As you paint, try to maintain a wet page.
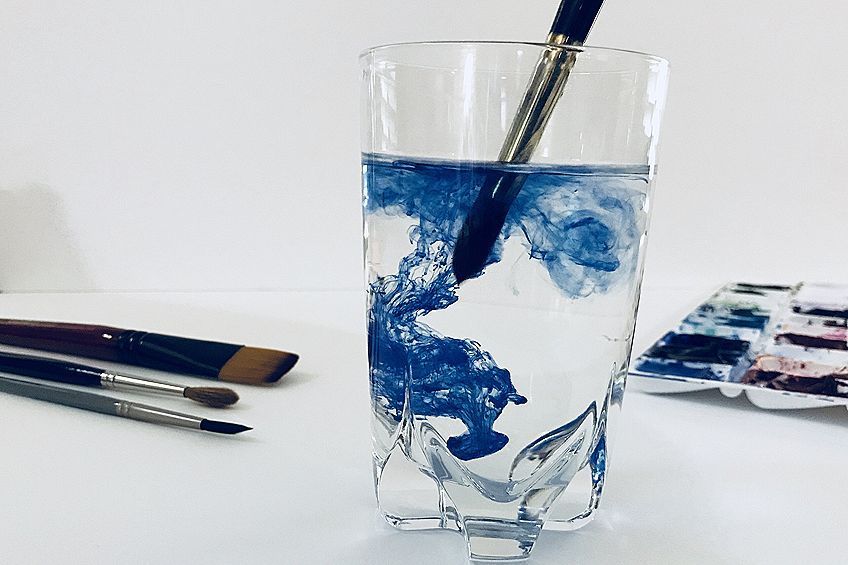
- When ready to paint, have always two jars of water on hand.
- You would like to paint the color all the way to the end of the page when making smooth gradients that cover a large area.
- When applying water to your paper, always use bigger brushes.
- Always paint areas on your page with the water you want to be colored on. Keep an eye out for the page’s corners, as they are sometimes rather easy to overlook.
You’ll notice that the colors continue to flow into regions of the surface where the water has been implemented in this wet-on-wet watercolor lesson. Colors easily blend without any noticeable lines thanks to the water. It can be a lovely quality to include in works of art that can be utilized for a variety of purposes, such as our clouds in this lesson. You want to work quickly when using the wet-on-wet watercolor technique.
Frequently Asked Questions
What Exactly Occurs When You Produce Wet-on-Wet in Watercolor?
Wet-on-wet watercolor is a technique for painting with watercolor paints in which the paper is often sprayed with water before the paint is applied. As the color expands across the page via the channel of water, it moves more smoothly. This technique can produce smooth and lovely drying effects on paper, which is frequently used as background for more distinct and fine lines. The wet-on-dry technique is one of the best watercolor painting tips for wet-on-wet watercolor. Utilizing new paint on top of the dried backdrops, known as the wet-on-dry watercolor technique, can be a wonderful way to improve the wet-on-wet characteristics of a painting after you’ve produced a beautiful background utilizing the wet-on-wet technique. This is typically how wet-on-wet is used in conjunction with other watercolor mediums.
What Differs Between the Wet-on-Dry Watercolor Technique and the Wet-on-Wet Technique?
When we use wet paint on a wet surface, we call it wet-on-wet watercolor. This method of application can produce seamless gradients by allowing the paint to blend into one another without leaving any visible lines. Wet-on-dry, on the other hand, is a more traditional method of painting in which wet paint adheres to dry surfaces, likely to result in more distinguishing traits in a painting. Wet-on-wet watercolor is ideal for creating hazy backgrounds, gradients, clouds, and other subtle line compositions. Wet-on-dry is ideal for highlighting stark features such as trees, animal life, and other subject matter in the foreground.
What Can Be Painted With the Wet-On-Wet Technique?
The most common and traditional method of trying to paint with watercolor is to wet a section and then apply paint to that wet surface. This technique is known as wet-on-wet watercolor, and it can be used to paint a variety of subjects. Wet-on-wet watercolor is a great way to create backgrounds in paintings. This is due to the water in wet-on-wet painting, which allows the paint to blend seamlessly into the page. When you paint new spots over that dry surface, it can start creating a blurring effect, giving the page a sense of depth. Wet-on-wet watercolor clouds are another enjoyable topic to paint in. Because clouds have always been uniquely different, and come in various shapes and colors, the wet-on-wet technique appears to work well with painting clouds. Wet-on-wet watercolor is an entertaining way to create clouds by scribbling with your colors on a wet surface, which will result in a variety of shapes and colors. After that has dried, you can conveniently reframe the wet-on-wet watercolor as clouds by painting landscape landscapes like mountains or trees. It really is just about experimentation when it comes to painting.
Matthew Matthysen is an educated multidisciplinary artist and illustrator. He successfully completed his art degree at the University of Witwatersrand in South Africa, majoring in art history and contemporary drawing. The focus of his thesis was to explore the philosophical implications of the macro and micro-universe on the human experience. Matthew uses diverse media, such as written and hands-on components, to explore various approaches that are on the border between philosophy and science.
Matthew organized various exhibitions before and during his years as a student and is still passionate about doing so today. He currently works as a freelance artist and writer in various fields. He also has a permanent position at a renowned online gallery (ArtGazette) where he produces various works on commission. As a freelance artist, he creates several series and successfully sells them to galleries and collectors. He loves to use his work and skills in various fields of interest.
Matthew has been creating drawing and painting tutorials since the relaunch in 2020. Through his involvement with artincontext.org, he has been able to deepen his knowledge of various painting mediums. For example, watercolor techniques, calligraphy and lately digital drawing, which is becoming more and more popular.
Learn more about Matthew Matthysen and the Art in Context Team.
Cite this Article
Matthew, Matthysen, “Wet-on-Wet Watercolor – Tips for Wet-on-Wet Painting Techniques.” Art in Context. June 2, 2022. URL: https://artincontext.org/wet-on-wet-watercolor/
Matthysen, M. (2022, 2 June). Wet-on-Wet Watercolor – Tips for Wet-on-Wet Painting Techniques. Art in Context. https://artincontext.org/wet-on-wet-watercolor/
Matthysen, Matthew. “Wet-on-Wet Watercolor – Tips for Wet-on-Wet Painting Techniques.” Art in Context, June 2, 2022. https://artincontext.org/wet-on-wet-watercolor/.


