Watercolor Skin Tones – How to Make Skin Color With Watercolor
Painting different watercolor skin tones can be really helpful for figure painting. As we learn different watercolor flesh tones, we will find that there is quite a spectrum. Learning how to paint different watercolor skin tones helps us navigate how to indicate shadows and moments of light which are essential to figuring out painting. However, it is helpful to understand the basics before utilizing them in a figure painting. This tutorial teaches you the fundamentals of a skin tone chart so that you can experiment and try out different combinations. Ultimately, helping you gain confidence through watercolor skin tone mixing. This will develop your understanding of how to paint different kinds of watercolor skin tones.
Table of Contents
An Easy Guide to Painting Watercolor Skin Tones
Watercolor Skin tones can be tricky if you do not know the fundamentals of what makes different kinds of skin tones. The trick with skin tones is that it is about understanding watercolor skin tone mixing. We need to first understand the primary colors as the fundamental elements that are manipulated to create variations between dark and light watercolor skin tones. How we understand the ratios of these three colors will ultimately describe what kinds of watercolor skin tones we create. With that being said, let us see what materials we will need.
Necessary Materials
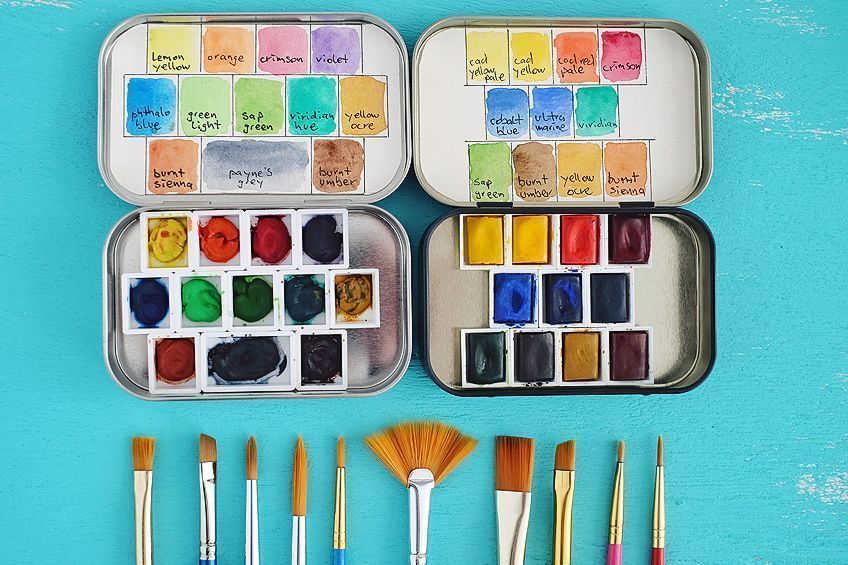
As we learn different watercolor skin tones, there are a few items we will need for this tutorial starting with a pencil to make some blocks for a skin tone chart. We want to draw a series of blocks in which we will paint various skin tones. This will allow us to compare different watercolor skin tones to one another, giving us a good sense of the spectrum and variety we can achieve within this exercise. We will need some good paintbrushes, watercolor pan paints as well as good paper, preferably 300GSM in thickness. All items can be found online through the links below:
Preparation
As we learn how to make skin color with watercolor, we want to make sure that we place ourselves in a space that is quiet and conducive to focusing. With this watercolor skin tone tutorial, we will be experimenting with a skin tone chart which means we don’t need to worry about perfecting the skin tones. Rather, this is an exercise that introduces us to the basic concepts associated with making watercolor skin tones.
So, with all our materials ready let us go through this tutorial on how to paint watercolor skin tones.
Instructions for Painting Watercolor Skin Tones
In this tutorial we will be making a skin tone chart, experimenting with different skin tones colors and mixes. As we go through this tutorial, we will go through the basic color mixing process of the three primary colors. Red, blue, and yellow are the essential colors that are the foundation for all watercolor skin tones. We will also learn how to use opacity as a key tool that can help to define a lighter or darker skin tone.

We will also learn how we can add more pigmentation to give a thicker consistency in the skin tone. We will also see how adding layers can also help to dark skin tones or how light washes can create lighter skin tones. All skin tones are different so let us approach this tutorial with experimentation as we play around with color combinations to achieve a variety of different skin tones. With all that said, let us get into it:
Making a Skin Tone Chart
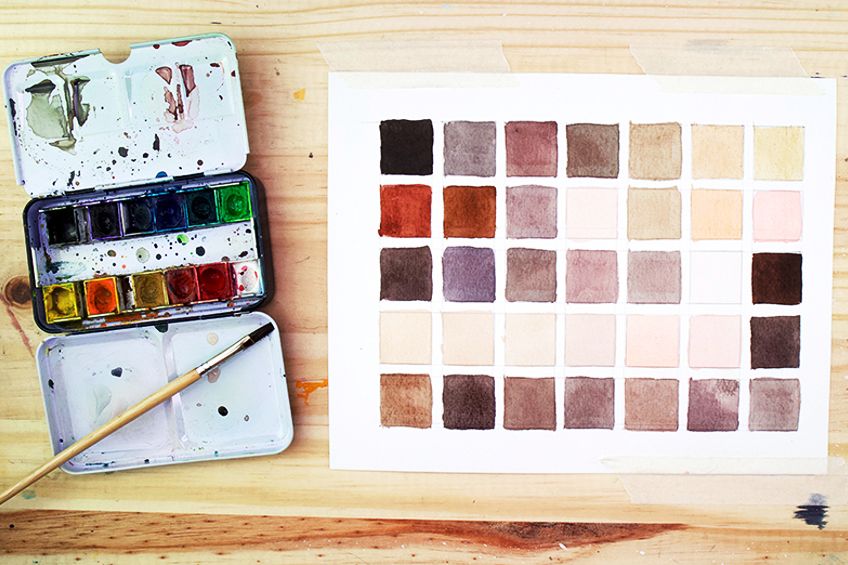
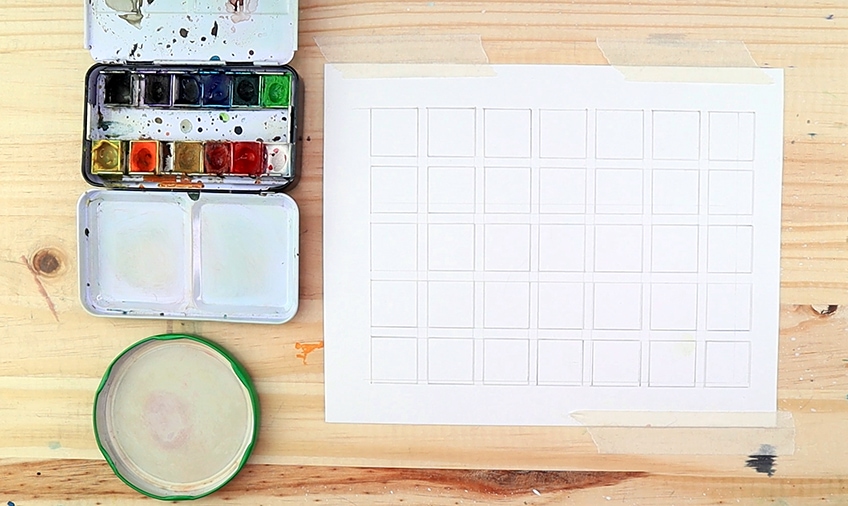
Let us begin by making a skin tone chart. You can make as many squares as you would like in your chart. However, try to make them the same size and separate them by at least a centimeter. A good suggestion is to make a chart of five by seven blocks. We want enough to explore a good number of skin tone variations.
Experimenting With Primary Color Ratios
We first want to understand that the ratio between the three primary colors is the foundation for achieving whichever skin tone we want. Essentially what we will do is experiment with just the primary colors by adding a little more or less of one of the colors to a mix to achieve different watercolor skin tones. Let us begin with a lighter skin tone by making a diluted mix of just red. Give the watered-down red a really small hint of yellow. We want to keep our mixes highly diluted for lighter skin tones. A diluted mix of predominantly red with a hint of yellow will create a soft brown.
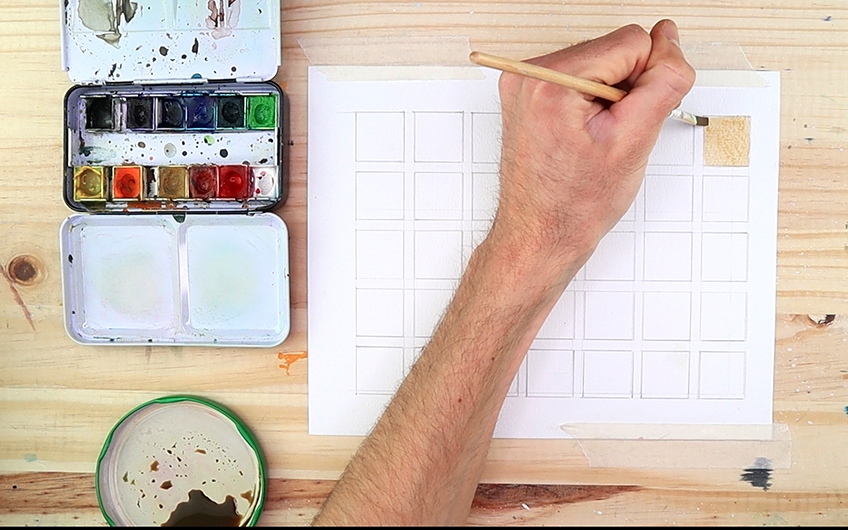
We are also trying to experiment with opacity, given that watercolor can affect the transparency of a color. This is why we want to keep our mixes highly diluted as opacity works as another method of making light skin tones. If we want to make the next color slightly more peachy, we can simply add a bit more red to the mix. Try to be very subtle when adding pigment to your mixes.

As we start to create darker skin tones, we will slowly work in hints of blue to our already existing mix of diluted red and yellow. We want to keep this mix which will have pigment slowly added to it each time we want to make a darker skin tone. As we add blue to the mix, we will see that the mix will start to darken slightly.

Now what we want to do is slowly start adding a little bit of yellow, red, or blue to our current mix of paint, slowly darkening the skin tone each time. Pay attention to the color as you add it to the paper. The paint on the paper is going to look different from the paint mix on your palette.
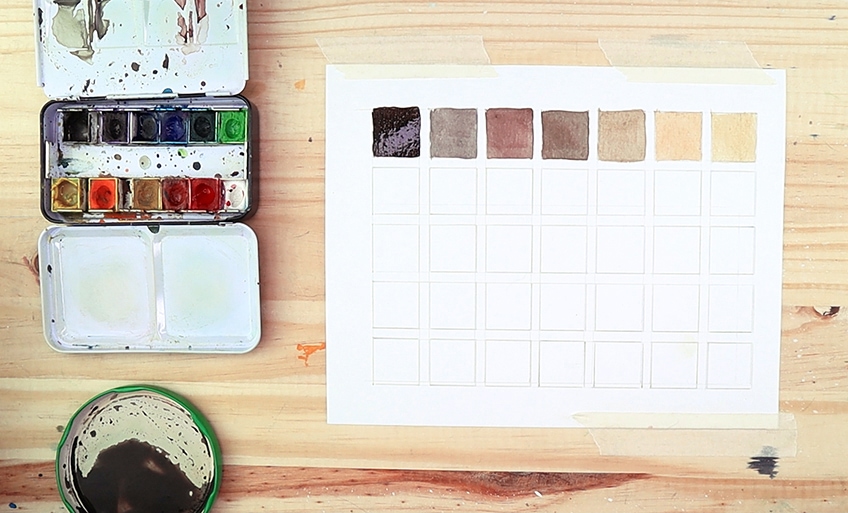
As you add more hints of blue and red, a great concept to keep in the back of your mind is that if the ratios are in equal parts the color will neutralize and resemble a grey color. We change this to a warmer human color by adding a touch more of either blue or red with smaller hints of yellow. This will not only darken the skin tone but will also give it a peachy warm tone within the darker skin tone.
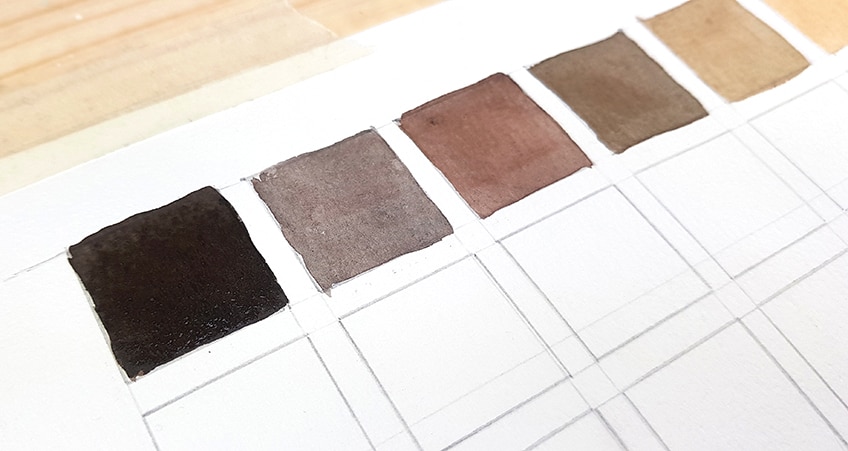
Trying Different Primary Color Mixes
Once you have completed a full row of different skin tone variations, clean your brushes and your palettes until they are completely clean. A good idea is also to change the water in your jar. Again, use the aforementioned concept of the primary color ratios to begin a new row of experimentation. This time let us focus on the subtleties of lighter skin tones. Again, there are two concepts to make sense of for achieving the right skin tone. The first is the color ratio and the second is the opacity or how diluted our mix of paint is. Start again with a light hint of just red in a little pool of water on your palette. Then proceed to apply this to a square.
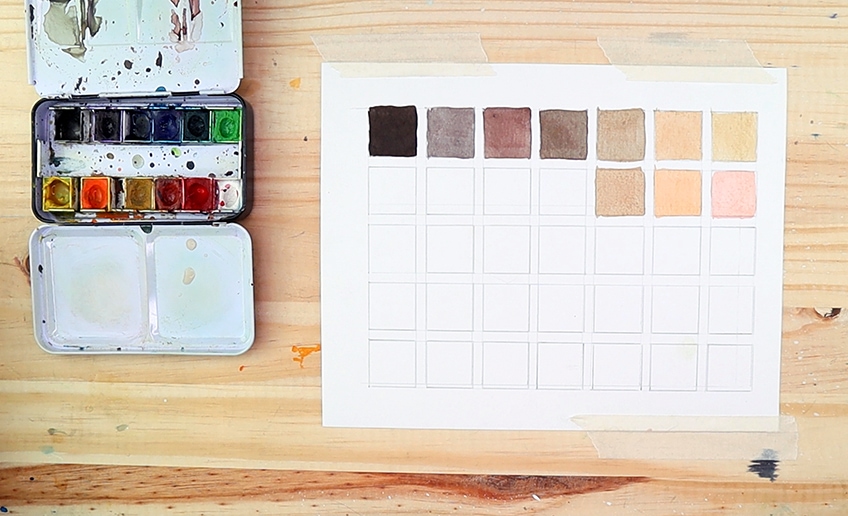
Again, allow yourself to play around with the ratios between blue, red, and yellow paint. Again, even skin tones that are darker but have a low opacity are achieved by the dilution of the mix of colors. This means that we can achieve darker skin tones that are relatively light due to the transparent nature of the mix.
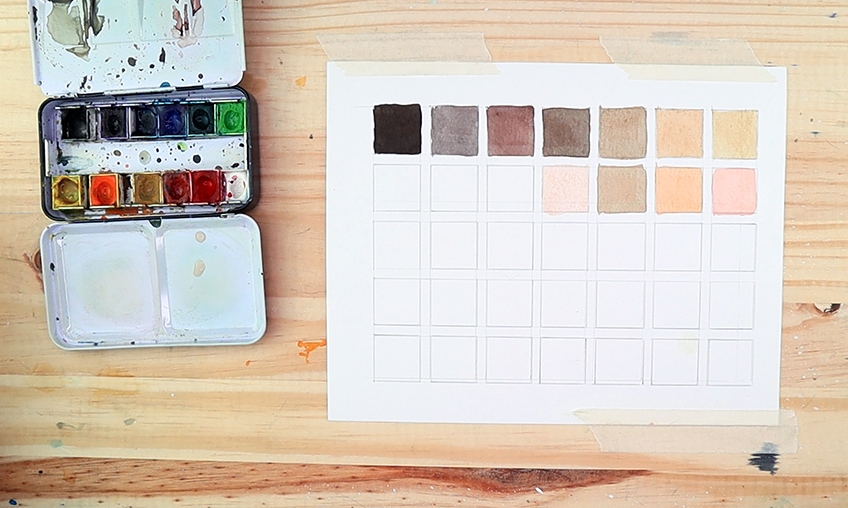
A good suggestion is to make a few separate mixes of the primary colors so that you can figure out how to lighten and darken skin tones. Keeping a high red low blue will give you more peach colors. Having a higher blue with a medium-to-low red combination will give you a darker tone. Add small bits each time to build up different skin tones.
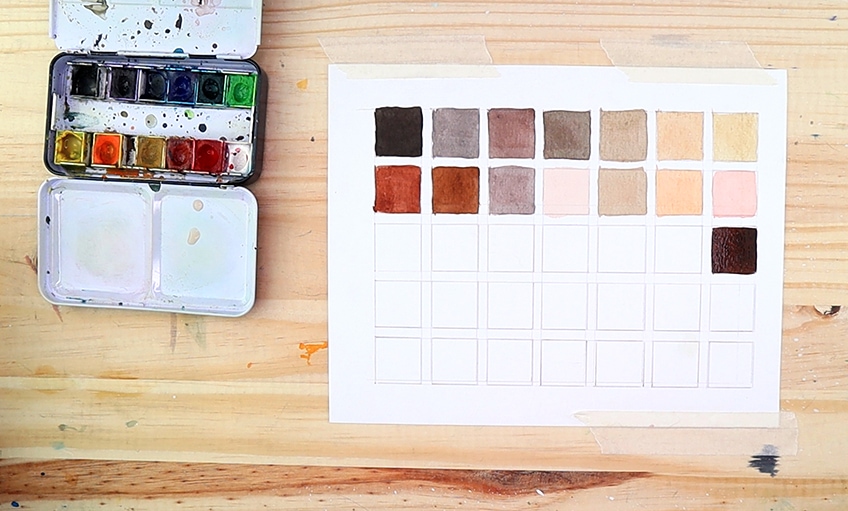
Mixing with Orange, Purple, and Green
Now that you have the basic concept of how to mix the primary colors for different skin tones, we can now start to experiment a little more with different colors. Using complementary colors is also a great way to either make a skin tone colder or warmer.
The same concept applies in this scenario, whereby, for example, if a mix seems to be blue, we can neutralize it with its complementary color.
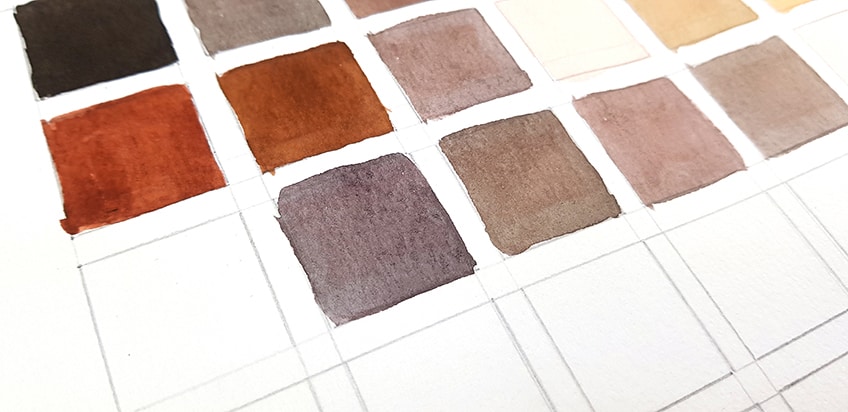
Clean your brushes and refill your water once again for recreating new mixes. You always want the mix to be clean for better mixing control. As we mix, let us consider another darker skin tone, whereby we make a mix of predominantly blue with a medium ratio of red and a small hint of yellow. We can darken this mix with a touch of purple and if it is too purple neutralize it a little with its complementary color, yellow.
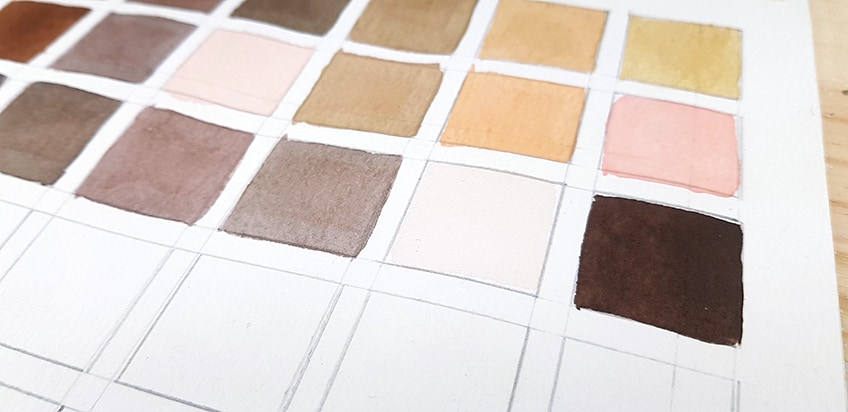
Again, allow yourself to play around with the two key concepts here: color ratios and opacity. For instance, we can create a light skin color with a highly diluted red that will come out as a peach. And on the opposite end of the spectrum, we can make much darker colors with highly pigmented mixes with predominantly blues and purples.
Understanding Yellow and Red as a Tool for Lightening Skin Tones
Whether we are aiming to make darker or lighter skin tones a good exercise is to understand the values of reds and yellows. With reds, we can imagine how it works like blood at the surface of the skin. When we utilize red as a dominant color it will create a warmer value in the skin tone and resemble the peachy quality blood near the surface of the skin.
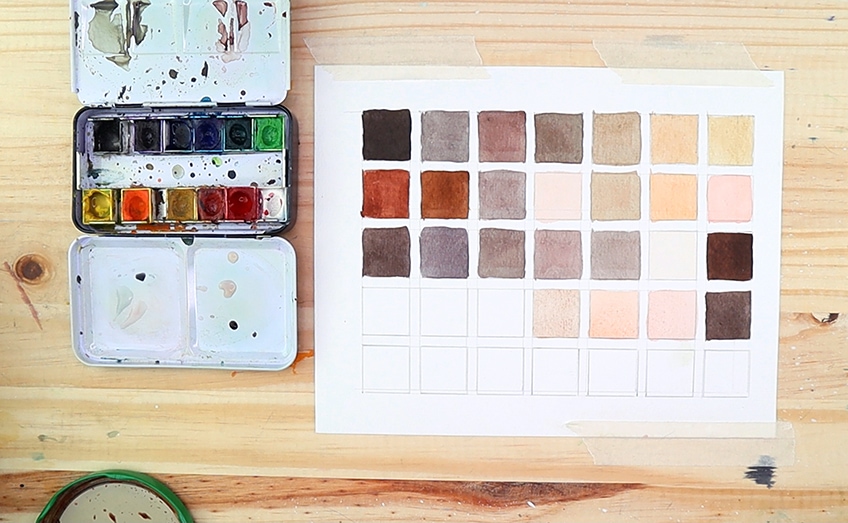
With yellow, we can imagine how it resembles a lightning quality. The colors are quite literal in the effects they can have on different skin tones. With yellow we can add it to both light and darker skin tones, and it will have the same effect of lightening a skin tone.
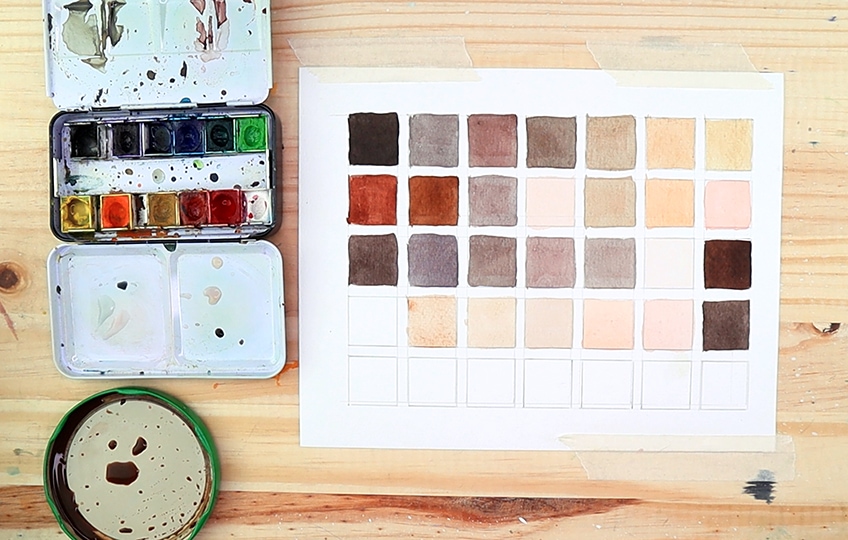
With lighter skin tones we can get away with using just yellow and red. This is where we make note of adding tiny bits into the mix. By adding tiny bits of paint into a highly diluted mix, we will see subtle variations in the skin tone, however, remember the concept of red for blood and yellow for light.
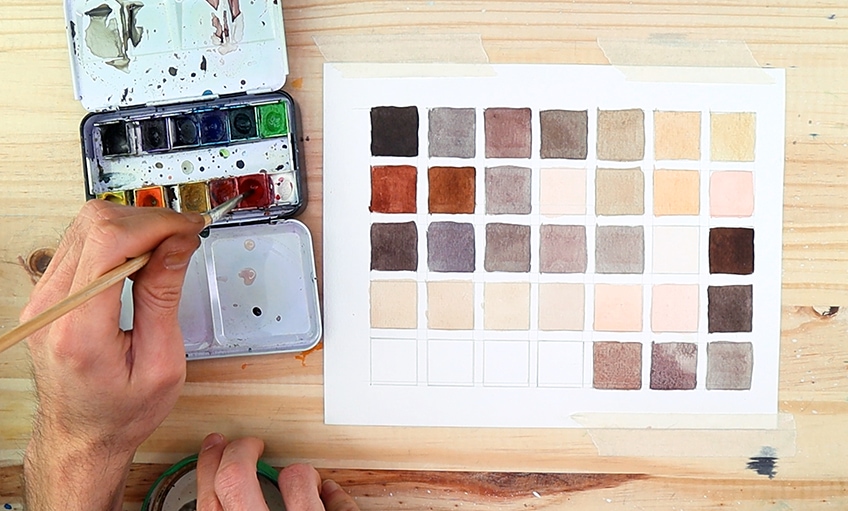
Understanding Blue and Red as Tools for Darker Skin Tones
With darker skin tones, again, it is not simply a matter of darkening a color with black or brown paint. We could do that but it doesn’t help in capturing the nuances of darker skin tones. In this case, again, we want to know color ratios paired with opacity. For instance, mixes with blues as the dominant color work well to add darker tonality to a skin tone. When they start to seem perhaps too blue, we slowly add more red
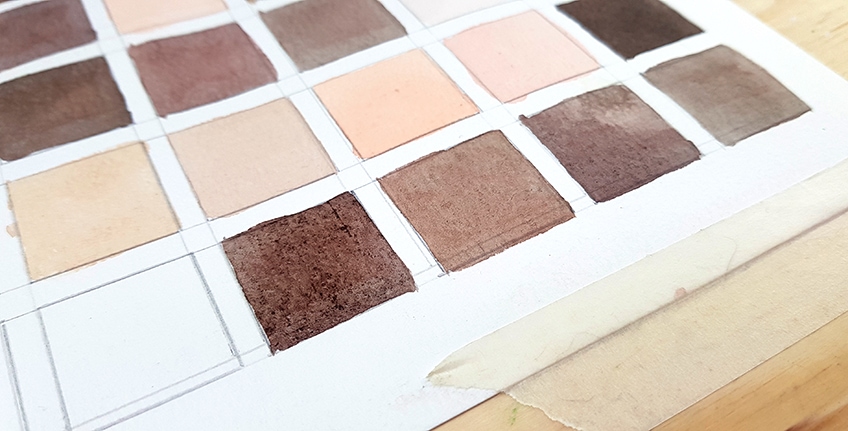
As we darken a skin tone with blues and slowly produce a more natural and warmer feel with red, the skin tone will resemble a more human quality. Again, think of red as blood, blood carries the connotation of life and vitality that we associate instinctually with skin. So, we can darken the skin tone with blues and slowly make them warmer with reds.

Again, we can also have a slightly less diluted mix whereby we slowly add bit by bit of blues and reds until we come to the color value that we are satisfied with. We can also then neutralize and lighten with hints of yellow and then start to experiment with our complimentary colors to achieve more variety in color value.
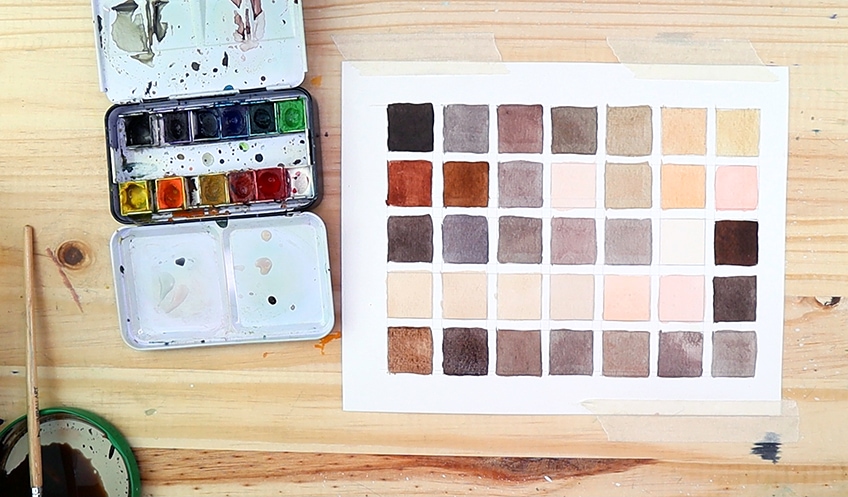
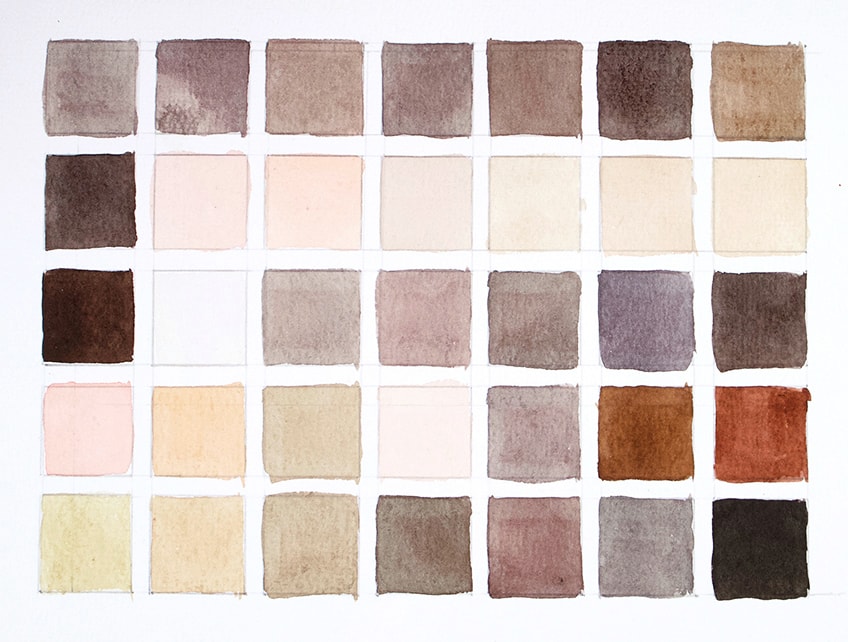
All skin tones are different, some have pink hues and some have purple hues but if we understand and explore the potential of both the concept of opacities and color ratios, we can gain more confidence in our watercolor skin tones. This also helps us understand moments of shadow and light on the skin, overall, developing our watercolor skin tone mixing skills.
Tips to Remember
Learning how to mix watercolor paints can be a tricky process as it is very different from other paint mediums. Here are some of our top tips to help you out!
- Having two jars of water helps clean our brushes thoroughly before new applications of paint.
- Remember that there are so many different types of skin tones. Some are slightly more peachy, whilst others are slightly more purple. All are determined by the mix of paint.
- Have a good palette for mixing. A great suggestion is a plate from your kitchen.
- Try to have fun, again this is experimentation of different skin tone variations.
- Always keep the concept of blood, light source, and opacity in mind when figuring out skin tones.
This tutorial breaks down the basics of watercolor skin tone mixing. In this tutorial we went through the general process of understanding how to mix the three primary colors, yellow, blue, and red, to help us determine different watercolor skin tones. With watercolor, we are also dealing with a water-soluble medium. This means that the nature of the medium represents dark and lighter colors through different methods. Adding more pigment into a mix is one way, but then another way to control darker and lighter skin tones is by the opacity of the paint. This tutorial is a great introduction to the basic concepts associated with creating various skin tones.
Frequently Asked Questions
How Do You Paint Darker Skin Tones With Watercolor?
Painting darker skin tones can be done in a few ways. This is why we make a skin tone chart; so that we can explore the ways in which one can achieve various skin tones through different methods. One method is by adding more pigment to the mix, which in turn will thicken the paint and allow for darker tonal values. However, if you do this, we want to pay attention to the ratio between reds and blues. The combination between reds and blues can really change the makeup of the tonal value in watercolor skin tones. Blues work well to slightly darken the skin, whereas reds work well to enrich the skin with a warmer quality. The color combination paired with the opacity of paint will determine the tonal value of skin tones, so allow yourself to experiment with different applications of each method.
How Do You Paint Realistic Skin With Watercolor?
What makes skin seem realistic is the understanding of light in combination with color mixing. This tutorial breaks down the color mixing aspect of how to achieve realistic skin tones, however, when you are painting features of the body we often are interacting with shadow and light. This is what makes features realistic and can be controlled through the opacity of color applications. Another key element in skin tones is the color red. Think of it as blood, whereby we use red as the neutralizing color that can either make the skin tone warmer or paler. In turn, As we add more blue and yellow pigment into our color mixes, we will find that red works as a balancing component that can shift the skin color to lighter and darker tones. Red paint, opacity, and the concept of light are three aspects to keep in mind when figuring out how to achieve realistic skin tones.
How Do I Make My Watercolor Pigmented?
Basically, what we are doing when we make watercolor more pigmented is we are thickening consistency by either adding more paint to a mix or adding more layers. There are a few ways to make skin tones either darker or lighter, however, when we want to make skin tones darker, we want to pay attention to how we want the skin tone to interact with light. This will have a great effect on the opacity of paint that we will use for different parts of the skin. Even though the skin is generally a consistent color throughout, the colors of skin can also change according to the amount of light it is exposed to. So, as you paint skin tones and use this tutorial as a reference, think of opacity and light sources as two key aspects that can change the degree of pigmentation.
Matthew Matthysen is an educated multidisciplinary artist and illustrator. He successfully completed his art degree at the University of Witwatersrand in South Africa, majoring in art history and contemporary drawing. The focus of his thesis was to explore the philosophical implications of the macro and micro-universe on the human experience. Matthew uses diverse media, such as written and hands-on components, to explore various approaches that are on the border between philosophy and science.
Matthew organized various exhibitions before and during his years as a student and is still passionate about doing so today. He currently works as a freelance artist and writer in various fields. He also has a permanent position at a renowned online gallery (ArtGazette) where he produces various works on commission. As a freelance artist, he creates several series and successfully sells them to galleries and collectors. He loves to use his work and skills in various fields of interest.
Matthew has been creating drawing and painting tutorials since the relaunch in 2020. Through his involvement with artincontext.org, he has been able to deepen his knowledge of various painting mediums. For example, watercolor techniques, calligraphy and lately digital drawing, which is becoming more and more popular.
Learn more about Matthew Matthysen and the Art in Context Team.
Cite this Article
Matthew, Matthysen, “Watercolor Skin Tones – How to Make Skin Color With Watercolor.” Art in Context. March 4, 2022. URL: https://artincontext.org/watercolor-skin-tones/
Matthysen, M. (2022, 4 March). Watercolor Skin Tones – How to Make Skin Color With Watercolor. Art in Context. https://artincontext.org/watercolor-skin-tones/
Matthysen, Matthew. “Watercolor Skin Tones – How to Make Skin Color With Watercolor.” Art in Context, March 4, 2022. https://artincontext.org/watercolor-skin-tones/.


