How to Draw a Sparrow – An Easy Beginners Drawing Tutorial
There are so many fascinating bird species and they provide an almost endless supply of artistic inspiration. One of the most beautiful birds that are quite common is the sparrow. This unique bird makes for an amazing drawing subject due to its classic form and unique features. A sparrow drawing is also great for being incorporated into other drawings as an additional feature that can be used as a focal point or a background feature. Whichever way one might choose to utilize a drawing of a sparrow, it’s a great creature to know how to draw.
Table of Contents
An Easy Guide to Drawing a Sparrow With Colored Pencils
Birds are quite simple creatures to draw and, in many ways, can be developed from a range of basic fundamental shapes. This tutorial on how to draw a sparrow defines the basic process of constructing a sparrow through simple and effective steps. We will find that the process of creating a sparrow drawing is quite fun and provides unique lessons in shading, coloring, and sketching through the drawing process.
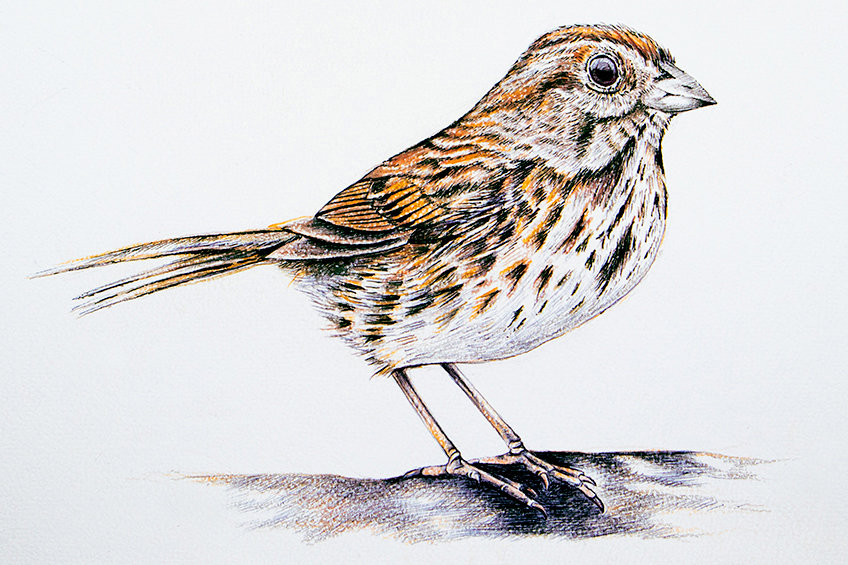
How to Draw a Sparrow Step-by-Step
In this tutorial on how to draw a sparrow, we will start by developing a simple sparrow sketch with our pencils. From there, we will proceed to utilize our coloring pencils to create interesting coloration within the sparrow. This will set an undertone of colored details which we will draw over in pen to give more detail and contrast.
As we go through this simple sparrow drawing, we will find that the sparrow drawing will slowly develop into a refined and realistic drawing of a sparrow.
Step 1: Sketching the Sparrow
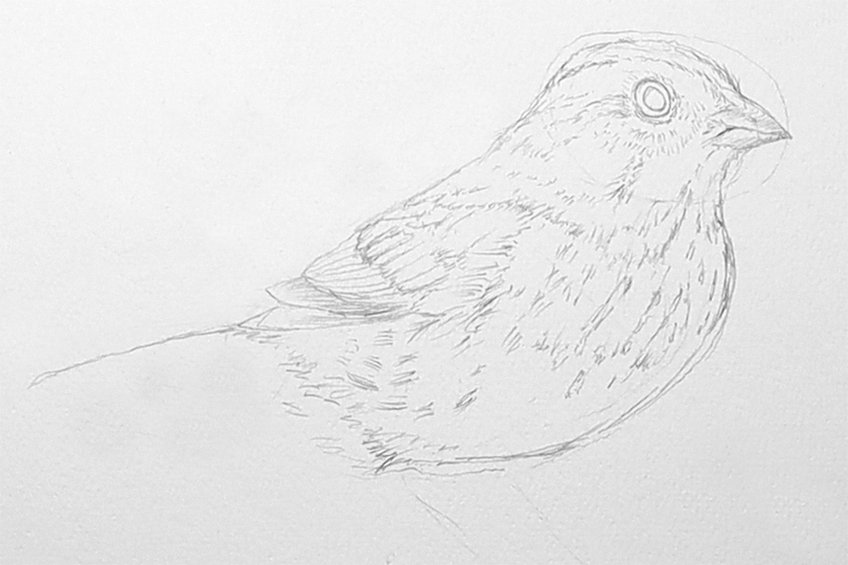
We can begin the drawing process by creating a light pencil sketch of the sparrow. We must first establish the basic fundamental shapes that encapsulate the form of the sparrow. This could be described as a larger circle for the body and a smaller oval shape for the head.
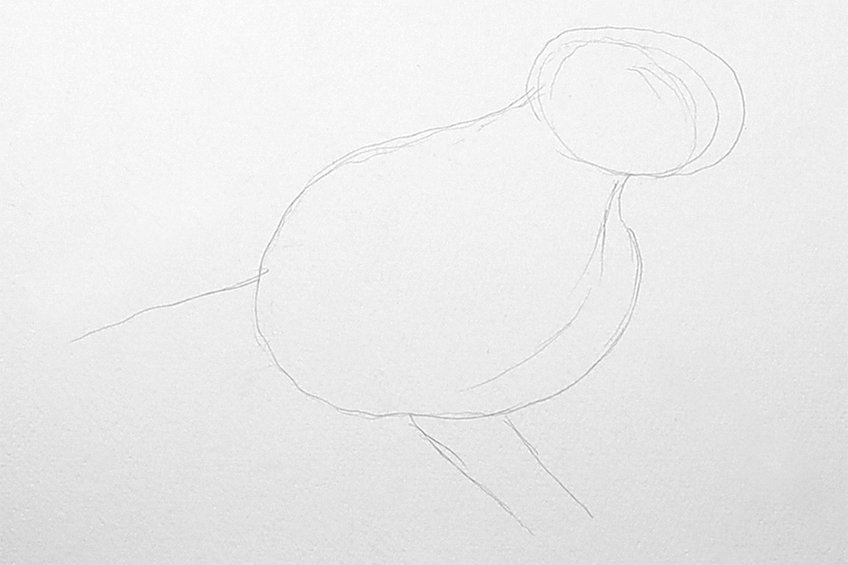
From there, we want to start refining the sparrow sketch by forming the bird within the basic shapes. The beak of a sparrow can be described as short and spearheaded, with two segments that establish the upper and lower parts of the beak.

The body of the sparrow is quite rounded, as if the bird has a larger chest or belly. This larger belly shape curves towards the underbelly area of the bird and flows to the back end where the feathers sit.
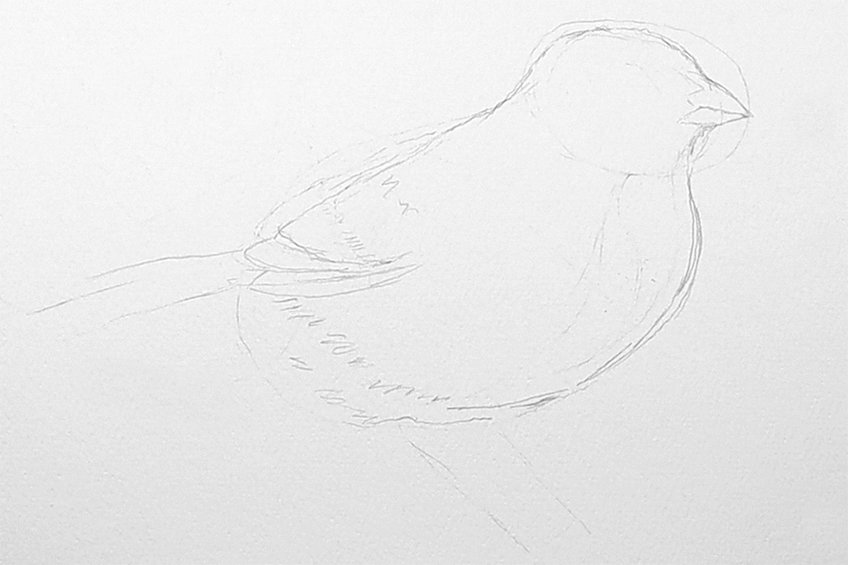
The feathers of the sparrow appear quite small on the bird when its wings are resting. This can be described as small arrow-head shapes that point downward and sit on the upper section of the sparrow. The eyes of the sparrow are quite rounded and are placed in the middle of the head. The eyes are also in line with the beak of the sparrow. We can use the beak as a reference point for the placement of the eye.

Step 2: Sketching Light Details in the Sparrow
Once we have the sparrow outline established, we can start to be more creative with linework to establish a feathery quality in the bird drawing. The way in which we do this is by using lines to establish details as opposed to smooth shading.
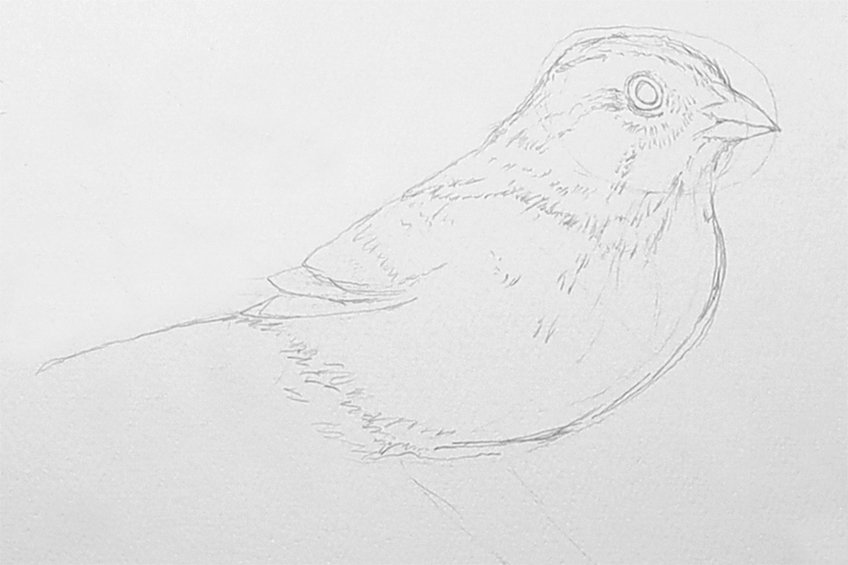
As we add features to the sparrow sketch, we can start to create the segments within the feathers. The feathers are almost layered and stacked on top of one another near the upper-back area of the sparrow.
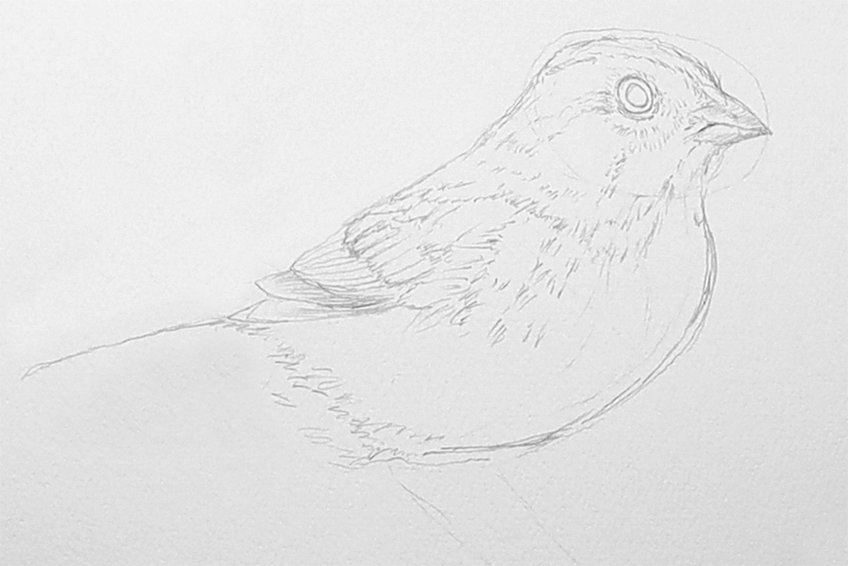
We can also start to add smaller lines that flow in rows along the body of the sparrow. Sparrows almost have a dotted, stripey aesthetic which is unique to the bird’s identity. We want to sketch some light lines to establish this feature, to be colored in the next step.
Step 3: Adding a Base Layer of Color to the Sparrow
Using a set of brown pencils, we now want to start adding some color to the sparrow sketch. Sparrows have an array of brown tones and are striped with darker brown colors. We want to establish lighter layers of brown first, which we can then darken slowly as we progress. Starting near the head, let us take time to color in the eyes. We want to make sure that we darken the pupil and iris while trying to keep light tones to establish a highlight in the eye.
We can also add color through the use of linework again; this will help to emphasize the feathery quality of the sparrow.
Really take your time around the head area, as this is where the details of the bird are quite tricky. Especially when coloring the eye, try to leave a few highlights to establish a reflective quality on its glossy surface.
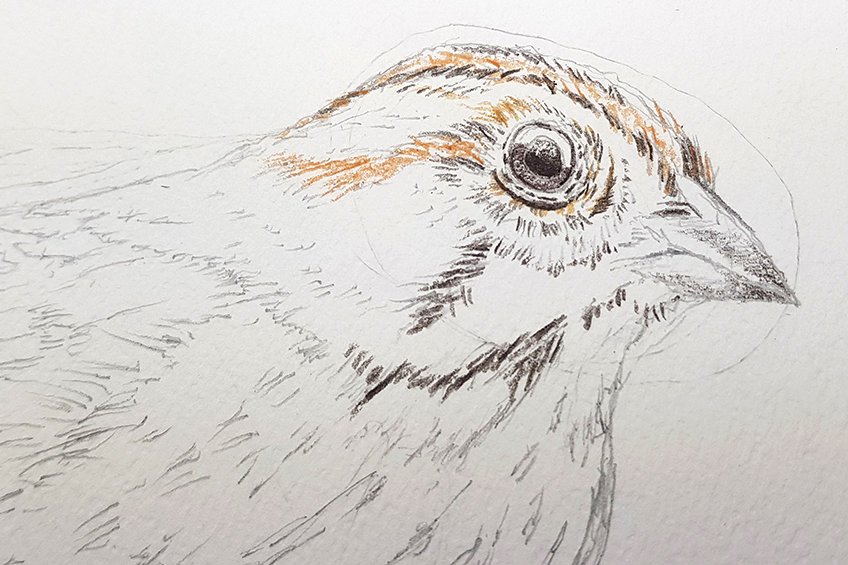
Think of coloring the bird as layering in lines of color, using the sketch to guide your coloring process. However, we want to build our colors from light to dark, which means that we want to make sure that we work from light to darker colors.
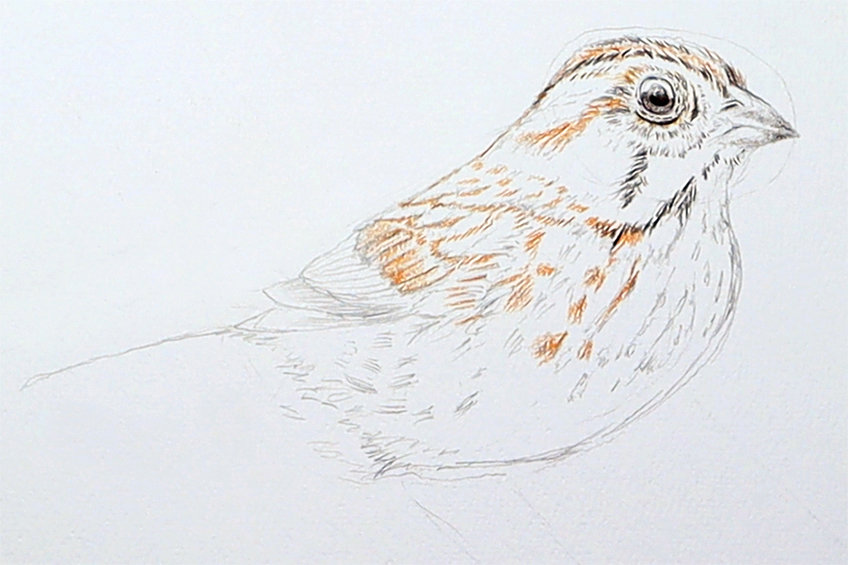
The sparrow has spots that sit on the belly, we want to use our lighter brown pencil to establish these patterns in the belly area. We also want to make sure that we give color to the layered segments within the feathers of the sparrow.

Now, we can start using some darker browns to distinguish layers within the feather of the sparrow. Again, the sparrow has various segments within the feathers, as they sit on one another. We want to make sure that we can distinguish between them by the use of shading with brown pencils. The feathers can also start to seem quite messy in a way, which is okay, this is why we want to use linework as its flowing visual quality creates the effect of feathers. We also want to make sure that our lines flow in a singular direction with the body of the sparrow.
Allow yourself to use a reference from the internet to assist you, if need be – the goal is to slowly add colored lines. We want to make sure that the lines flow in a singular direction and that we layer them from light to dark.
Step 4: Adding Pen Lines to the Sparrow
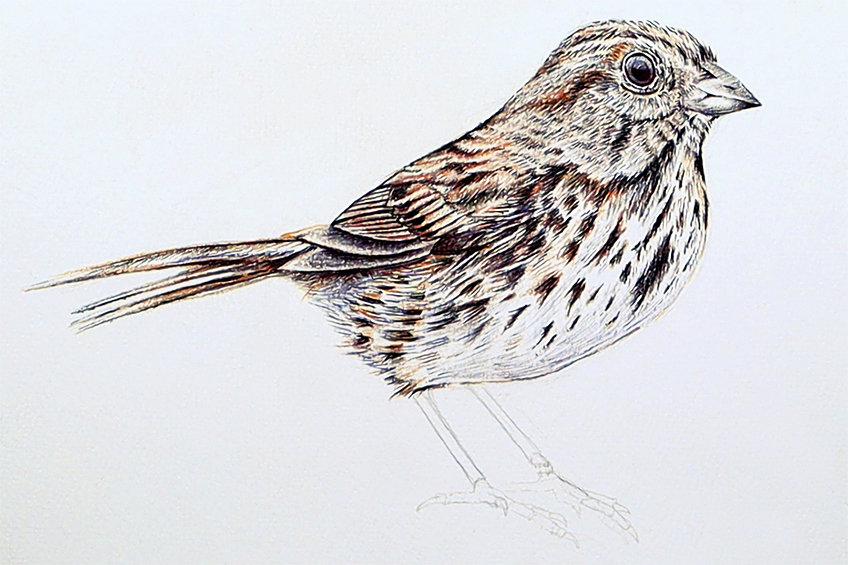
Once we have established the basic foundational layer of color, we now want to start incorporating some pen lines into the drawing to bring out more contrast and definition. Again, we will simply do this by applying lines with our pens and using the pencil sketch to assist us.

Try to start from the head area again, and slowly work your way down the bird, making sure that you use the pencil lines to help you place the pen lines. When working around the head of the bird, we want to make sure that the lines are shorter to establish smaller tufts of feathers.
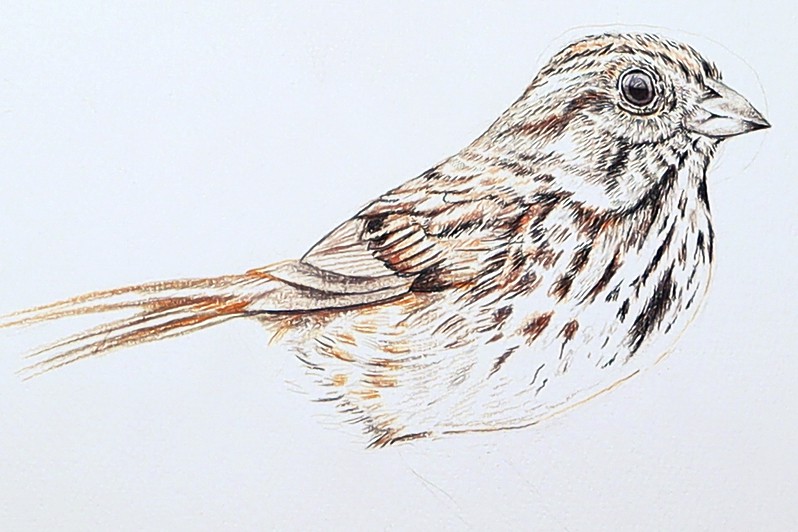
The sparrow has both long and short feathers in different areas of the body. We want to make sure that we keep the lines shorter near the head area and longer near the belly area to distinguish between the various feather lengths.

The more time we take in slowly adding little lines with a thin pen, we will start to see how this creates the effect of short feathers in the drawing. We can also start to darken certain areas of the bird, such as the beak and the eyes, giving them a little more definition and structure.

Again, spend time near the head area, as it contains finer details. This is especially true for the eye and its surrounding scales, which we can represent with dark pen lines. We can also darken the tip of the beak to establish shadowing on its surface. We can work with ballpoint pens and Micron pens to have a variety of line thicknesses. Again, we can also add some darker pen shading near the segments within the feathers to emphasize the layers.
We can also begin to draw the legs at this point to contextualize the sparrow bird drawing even further.
Step 5: Adding Contextualizing Features
Now we can add in the legs of the sparrow to establish its position within the space and how it is placed in the environment. The legs are simple, as they stem out from the bottom of the sparrow in a diagonal fashion each with four claws.
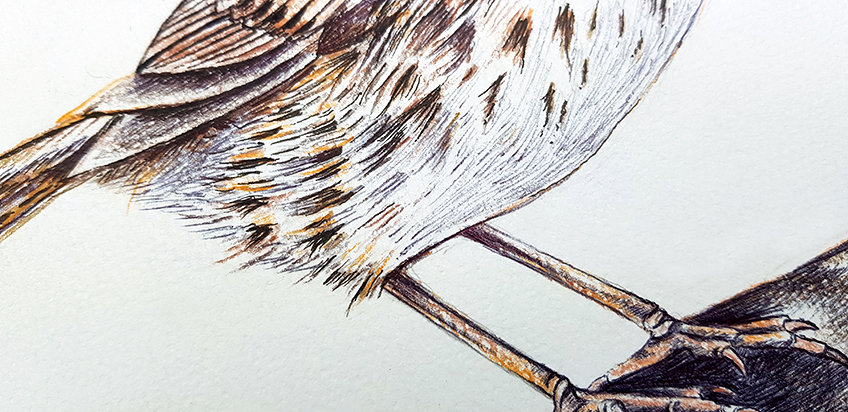
The claws are relatively the same size, with the middle claw being slightly longer than the rest. We can also draw a structure beneath the sparrow to define an object on which the sparrow is placed.
Step 6: Adding the Last Layer of Color to the Sparrow
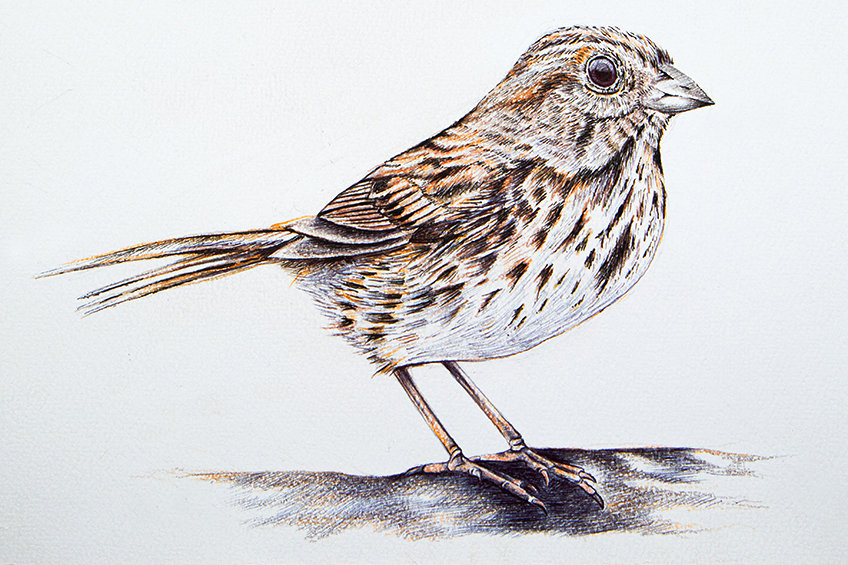
At this point, our sparrow drawing is technically complete. However, we may want to use our brown colored pencils one last time to make the coloration in the bird slightly more vivid. We simply want to work over the areas with color a second time to make them pop a little more. Try to maintain the stroke action of each line as you continue to place color for the last time on the drawing. This keeps the feathery quality in the sparrow consistent and enhances the rest of the linework present.

We can also use our pens at this point in tandem with colored pencils, simply to work in details that need a little more contrast and distinct lines. At this point, we are simply trying to make sure that all areas of the sparrow bird drawing have been attended to with color and linework. Make sure that you take your time and that you patiently go through the drawing process, slowly working in color and pen lines when necessary.
Other than that, you are done, and that’s how to draw a sparrow!
Tips to Remember
- Work out the sketch as best you can. Once you have the sparrow sketch drawn accurately, this will help the rest of the drawing process to flow more seamlessly.
- Consider subtleties of light and shadow. This is where you want to use your brown colored pencils to establish different tonal values within the feathers.
- Consider the textural qualities of the feathers. This is where linework becomes a useful drawing and shading technique that helps to emphasize the feathery quality of a bird.
- Take your time and enjoy the process. Learning how to draw a sparrow is interesting, try to absorb the tips and tricks as you go.
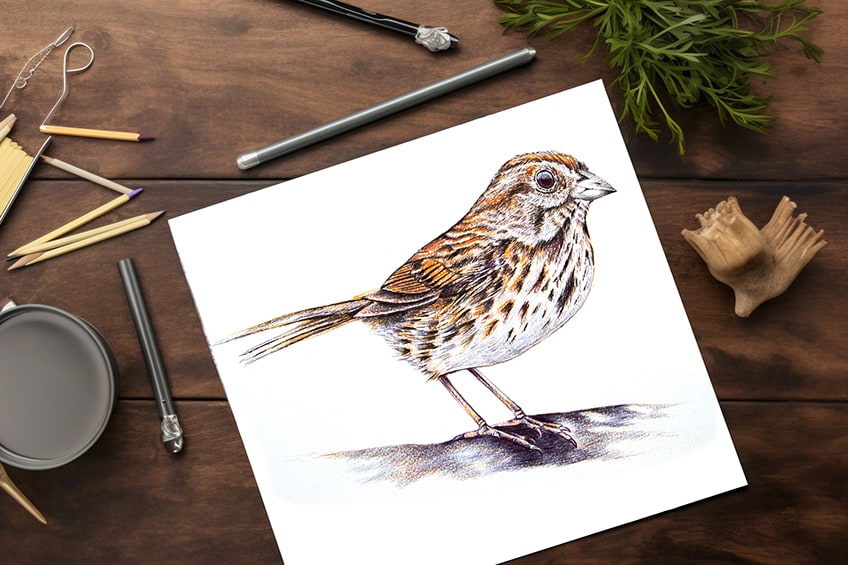
A sparrow drawing is a simple exercise once you understand the basic construction process, from sketching to details. This structure can also be applied quite easily to other bird drawings, as the sparrow bird is quite similar in shape and form to many other bird species.
Frequently Asked Questions
How Do You Draw the Eyes of a Sparrow?
In a drawing of a sparrow, the eyes are generally circular and completely black. However, they are also glossy, which means that they will reflect light. The way in which we draw this feature of the sparrow is by drawing the eye pitch black with negative spaces in the eye. The negative space within the eye will represent the reflection of light and give the eye a more realistic aesthetic. Sparrow eyes also have scales around the edges of the eye, which we can add in with linework. Utilizing lines to create the effect of scales around the eye is a great way of capturing the scales’ quality.
What Is the Best Way to Color a Sparrow Drawing?
There are many ways to approach a drawing of a sparrow, and in this tutorial, we go through the basic process of constructing a sparrow drawing through a layering process. Once a general sketch of the sparrow bird is established, we can then proceed to add the base color layer which will then be drawn over with a pen at a later stage. Sparrows are also brown and have various tones of brown in their feathers. We want to add these brown layers to set the undertone of color for the sparrow. From there, it is a matter of refining the drawing by adding shading and linework with your pen to emphasize the feathery quality of the sparrow. Instead of simply coloring a sparrow, a good suggestion is to add color through the method of linework, which will help to capture the feathery quality of the bird.
Matthew Matthysen is an educated multidisciplinary artist and illustrator. He successfully completed his art degree at the University of Witwatersrand in South Africa, majoring in art history and contemporary drawing. The focus of his thesis was to explore the philosophical implications of the macro and micro-universe on the human experience. Matthew uses diverse media, such as written and hands-on components, to explore various approaches that are on the border between philosophy and science.
Matthew organized various exhibitions before and during his years as a student and is still passionate about doing so today. He currently works as a freelance artist and writer in various fields. He also has a permanent position at a renowned online gallery (ArtGazette) where he produces various works on commission. As a freelance artist, he creates several series and successfully sells them to galleries and collectors. He loves to use his work and skills in various fields of interest.
Matthew has been creating drawing and painting tutorials since the relaunch in 2020. Through his involvement with artincontext.org, he has been able to deepen his knowledge of various painting mediums. For example, watercolor techniques, calligraphy and lately digital drawing, which is becoming more and more popular.
Learn more about Matthew Matthysen and the Art in Context Team.
Cite this Article
Matthew, Matthysen, “How to Draw a Sparrow – An Easy Beginners Drawing Tutorial.” Art in Context. March 1, 2024. URL: https://artincontext.org/how-to-draw-a-sparrow/
Matthysen, M. (2024, 1 March). How to Draw a Sparrow – An Easy Beginners Drawing Tutorial. Art in Context. https://artincontext.org/how-to-draw-a-sparrow/
Matthysen, Matthew. “How to Draw a Sparrow – An Easy Beginners Drawing Tutorial.” Art in Context, March 1, 2024. https://artincontext.org/how-to-draw-a-sparrow/.


