How to Draw a Robot – A Guide to Creating Robotic Characters
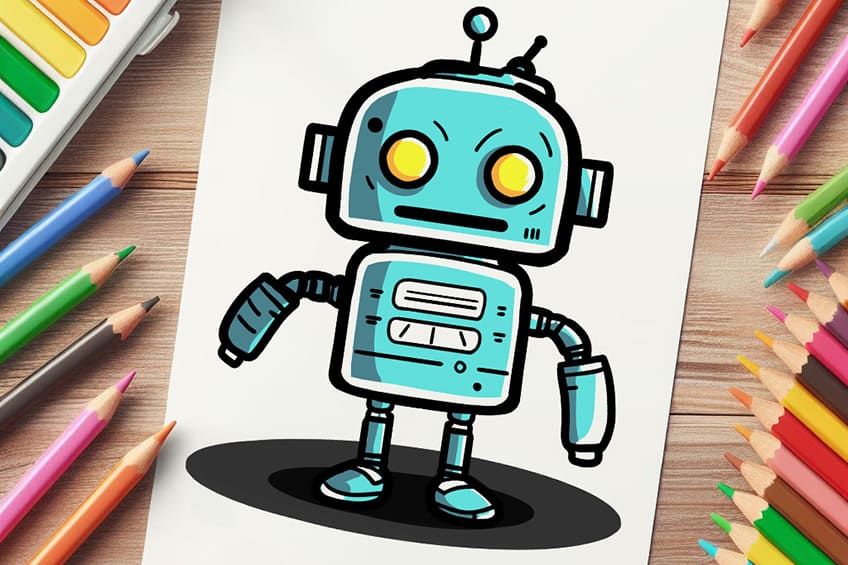
Participate in our straightforward 15-step tutorial on how to draw a robot, an awe-inspiring and potent entity within our cosmos! Discover how to depict its vibrant energy and lively beams, animating this cosmic titan on your canvas. This clear and easy-to-follow guide is designed for artists of every skill level, ensuring the process of illustrating the robot is both attainable and pleasurable.
Table of Contents
- 1 Robot Rendering: A Step-by-Step Guide to Drawing Bots
- 1.1 Step 1: Begin to Draw a Realistic Robot
- 1.2 Step 2: Draw the Guidelines
- 1.3 Step 3: Incorporate the Lower Section into Your Robot Drawing
- 1.4 Step 4: Attach the Arms and Hands
- 1.5 Step 5: Detail the Head on Your Easy Robot Drawing
- 1.6 Step 6: Outline the Main Body
- 1.7 Step 7: Continue to Outline the Legs
- 1.8 Step 8: Move On to Outlining the Arms and Hands
- 1.9 Step 9: Begin to Outline the Ears on Your Robot Drawing
- 1.10 Step 10: Start to Draw the Facial Features
- 1.11 Step 11: Apply the First Layer of Color on Your Robot Sketch
- 1.12 Step 12: Start to Shade Your Robot Drawing
- 1.13 Step 13: Add Highlights to Your Robot
- 1.14 Step 14: Add a Ground Shadow to Your Easy Robot Drawing
- 1.15 Step 15: Finish Off Your Robot Sketch
- 2 Frequently Asked Questions
Robot Rendering: A Step-by-Step Guide to Drawing Bots
This collage visually represents each step taken towards achieving the final result. By following it, you will also master the method of learning how to draw a robot!

Step 1: Begin to Draw a Realistic Robot
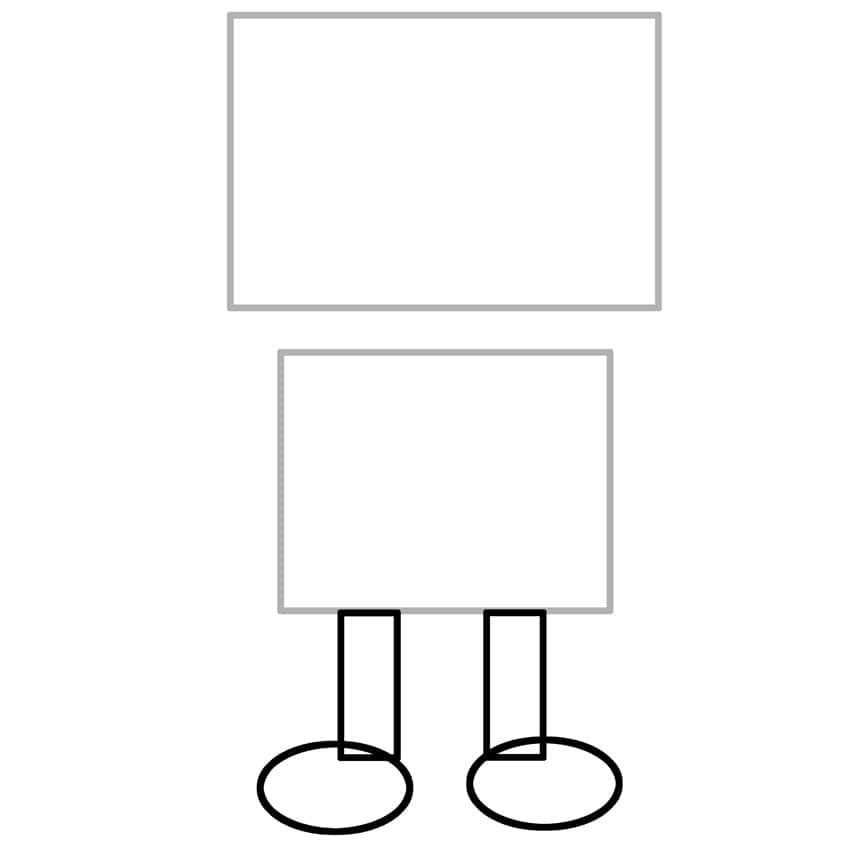
Start by sketching a rectangle in the center of your page. This will symbolize the robot’s head.

Step 2: Draw the Guidelines
Draw a smaller rectangle beneath the head to represent the main body on your robot drawing.

Step 3: Incorporate the Lower Section into Your Robot Drawing
Sketch two upright rectangles to depict the legs and, over these, draw two oval figures to illustrate the feet.
Step 4: Attach the Arms and Hands
On either side of the main body, sketch the arms and add small rectangles for the hands. Finish this step by drawing a rectangle on each side of the head to symbolize the robot’s ears.
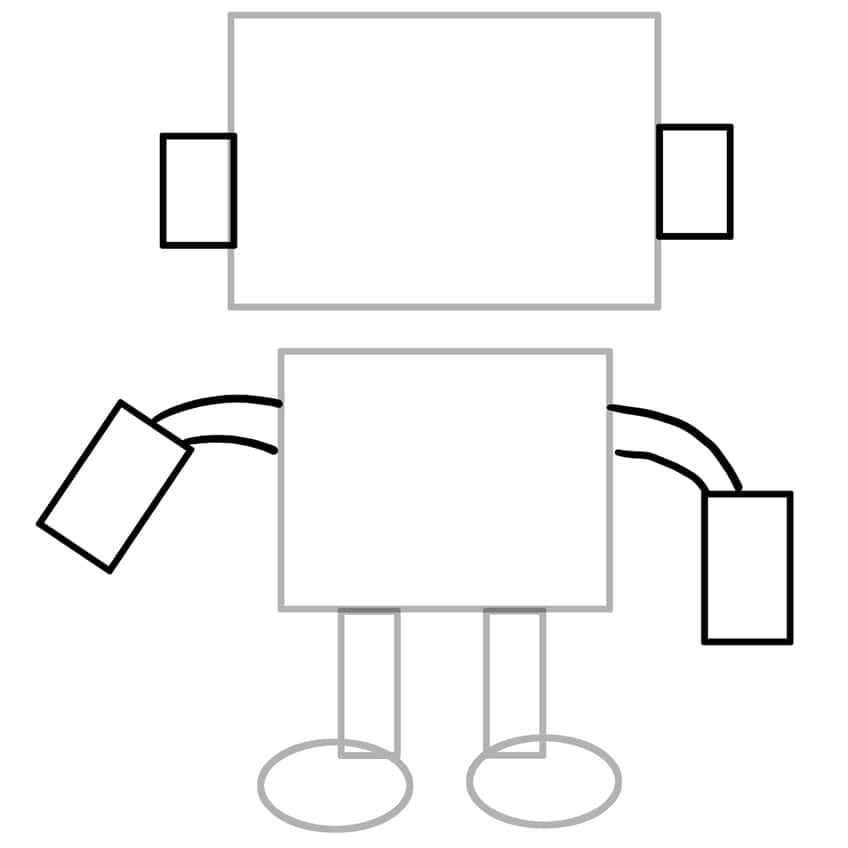
Step 5: Detail the Head on Your Easy Robot Drawing
Utilize the construction lines you’ve already drawn as a guide to outline the robot’s head, ensuring the edges are curved.
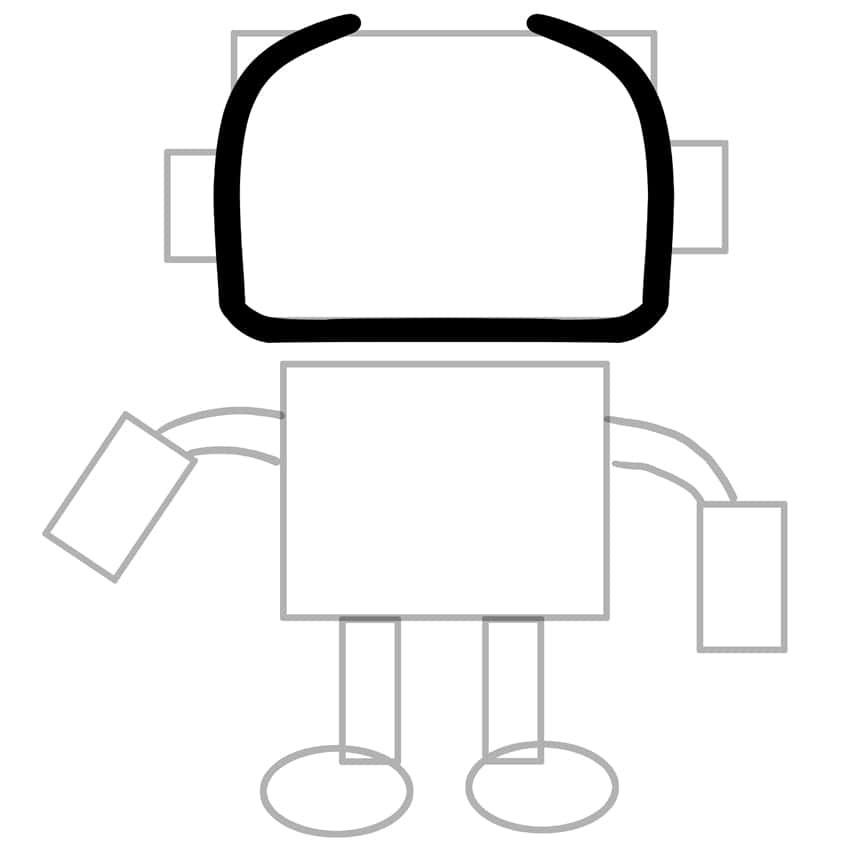
Step 6: Outline the Main Body
Similar to the head, continue to outline a rounded corner main body.
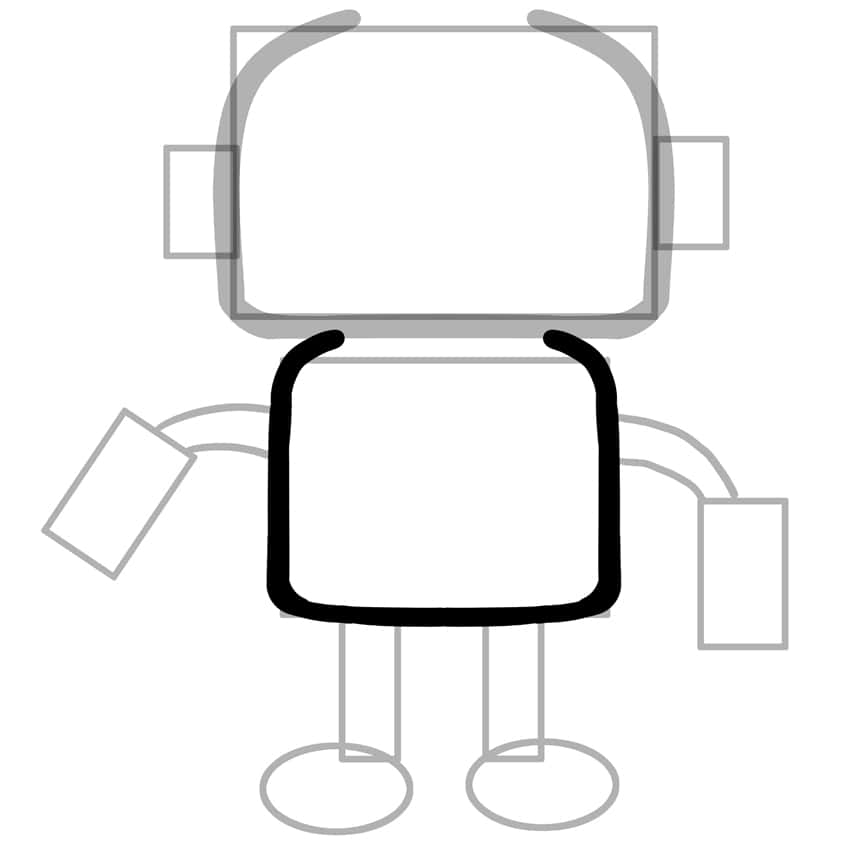
Step 7: Continue to Outline the Legs
Use the previously drawn construction lines to aid you in outlining each of the legs and feet. Between the feet and the legs draw the separating joints.

Step 8: Move On to Outlining the Arms and Hands
Continue to outline the arms and hands of your robot sketch. In addition, add the separation joints and fine horizontal line texture lines.

Step 9: Begin to Outline the Ears on Your Robot Drawing
Refer to the construction lines you’ve already drawn to help sketch the outlines of each ear, and add a vertical line inside each ear. Finish this step by drawing an antenna atop the robot’s head. After completing this, remove any construction lines that remain visible.

Step 10: Start to Draw the Facial Features
Start by sketching two circles on the face to depict the eyes, and beneath them, draw a horizontal line for the robot’s mouth. Proceed by illustrating the main body panels. Conclude this step by incorporating final detail lines around the eyes, face, and main body, adding some circular knobs for additional detail.

Step 11: Apply the First Layer of Color on Your Robot Sketch
Utilize a fine, sharp brush and vibrant teal paint to apply an even coat across the robot.

Step 12: Start to Shade Your Robot Drawing
Employ a small, soft brush with gray paint to create shading on the left edges of the robot, encompassing the eyes, ears, face, main body, arms, and legs.

Step 13: Add Highlights to Your Robot
Employ a fine, sharp brush with white paint to outline the inner edges of the robot, including the head, ears, main body, arms, hands, legs, and feet. Finish this step using yellow paint to fill in both eyes, then apply orange paint to half of each eye’s edges and white paint to the other half.

Step 14: Add a Ground Shadow to Your Easy Robot Drawing
Utilizing the same brush and black paint, craft a shaded oval beneath the robot. Repeat this process with dark gray paint to extend the size of the oval.

Step 15: Finish Off Your Robot Sketch
To finalize your robot drawing, select a fine, sharp brush and black paint, and carefully trace the outlines and any inner texture and detail lines of the robot to achieve the final result!

Congratulations, aspiring artist! As you raise your eyes from the completed robot on your canvas, revel in the warmth of achievement that surrounds you. You’ve evolved from a mere student into a creator, skillfully capturing the essence of the robot’s brilliance with your own imaginative brushstrokes. This robot, brought to life through your creativity, now radiates with vibrant colors and intricate details. Embrace this moment, as it represents not only a drawing but also an odyssey of self-exploration through the realm of art. Your robot isn’t merely a mechanical creation; it serves as evidence of your commitment and the infinite potential your imagination can summon!
Frequently Asked Questions
What Are the Fundamental Stages for Sketching a Basic Robot?
Drawing a basic robot can be broken down into several key steps. Start by sketching the robot’s basic shape, which often consists of geometric forms like rectangles and circles. Next, add details such as joints, bolts, and mechanical features to give your robot a realistic look. Pay attention to symmetry, as robots are typically symmetrical machines. You can also customize your robot’s design by adding unique elements, like antennas or robotic arms. Finally, outline your robot with clean lines, erase any unnecessary sketch lines, and add shading or color to bring your creation to life. If you are unsure of how to do this, follow along on our step-by-step tutorial on how to draw a robot.
How Can I Add Details and Complexity to My Robot Drawings?
Adding complexity and details to your robot drawings can make them more visually appealing. To achieve this, focus on texture and precision. Use hatching and cross-hatching techniques to create the appearance of metal surfaces and shadows. Experiment with various shapes and sizes of mechanical parts to add intricacy to your robot’s design. Additionally, consider adding fine lines for wiring, buttons, and small details. Don’t be afraid to reference real-world machinery and technology to inspire your designs and ensure they have a sense of authenticity and depth.
Matthew Matthysen is an educated multidisciplinary artist and illustrator. He successfully completed his art degree at the University of Witwatersrand in South Africa, majoring in art history and contemporary drawing. The focus of his thesis was to explore the philosophical implications of the macro and micro-universe on the human experience. Matthew uses diverse media, such as written and hands-on components, to explore various approaches that are on the border between philosophy and science.
Matthew organized various exhibitions before and during his years as a student and is still passionate about doing so today. He currently works as a freelance artist and writer in various fields. He also has a permanent position at a renowned online gallery (ArtGazette) where he produces various works on commission. As a freelance artist, he creates several series and successfully sells them to galleries and collectors. He loves to use his work and skills in various fields of interest.
Matthew has been creating drawing and painting tutorials since the relaunch in 2020. Through his involvement with artincontext.org, he has been able to deepen his knowledge of various painting mediums. For example, watercolor techniques, calligraphy and lately digital drawing, which is becoming more and more popular.
Learn more about Matthew Matthysen and the Art in Context Team.


