How to Draw a Chameleon – Easy Drawing these Beautiful Reptiles
There are so many strange animals that exist and often can be a great source of inspiration for weird, creative drawings. Chameleons are perhaps the strangest of them all and can seem as if they are aliens that live among us. A chameleon drawing is a great little artwork to know how to do as its aesthetics can be a great addition to many different quirky drawings. Chameleons are also beautiful enough to be the focal point of artwork due to their fascinating exterior. This chameleon drawing tutorial will provide us with a special set of skills to draw such an idiosyncratic creature beautifully.
Table of Contents
- 1 An Easy Guide to Drawing a Chameleon With Colored Pencils
- 2 How to Draw a Chameleon Step by Step
- 2.1 Step 1: Sketching the Chameleon
- 2.2 Step 2: Adding Foundational Color With a light Green Pencil
- 2.3 Step 3: Adding Mid-Tone Shadows With Dark Green Pencil
- 2.4 Step 4: Darkening the Shadows With Dark Green Pencil
- 2.5 Step 5: Adding Pen Details for Structure and Contrast
- 2.6 Step 6: Working on Contextualizing Features
- 3 Tips to Remember
- 4 Frequently Asked Questions
An Easy Guide to Drawing a Chameleon With Colored Pencils
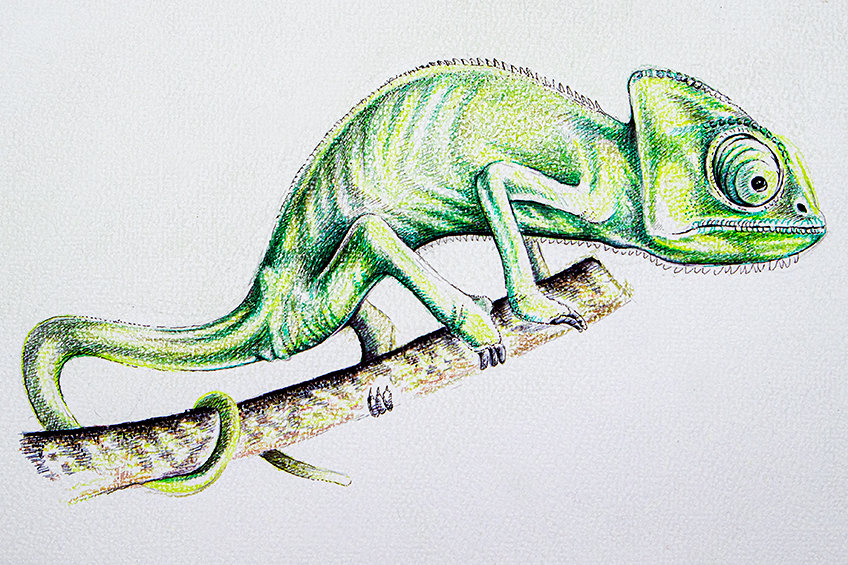
Chameleons can seem complicated and the idea of replicating their distinct characteristics may seem a difficult task. However, this beginner tutorial will help you not only with learning to draw a realistic and beautiful chameleon, but also with breaking down the process into a few simple digestible steps. Often, the drawing process can provide a lot of hacks to create effects that seem similar to the subject that is being drawn, which is exactly what we will learn in this tutorial on how to draw a chameleon.
How to Draw a Chameleon Step by Step
In this tutorial on how to draw a chameleon, we will be drawing the creature with a set of different green pencils and pens for contrast. We will start by developing a basic chameleon sketch from the side view. We want to capture the general shape, form, and structure of the chameleon with a simple pencil sketch. From there, we will move on to add some color to the chameleon drawing, slowly working out the shadows and coloration in different areas. Lastly, we will work with a pen and marker to add more contrast and refined lines to the drawing.
Step 1: Sketching the Chameleon
We will begin by creating a light sketch of the chameleon using our HB pencils. We want to start establishing the basic shape of the head, body, and legs of the chameleon.
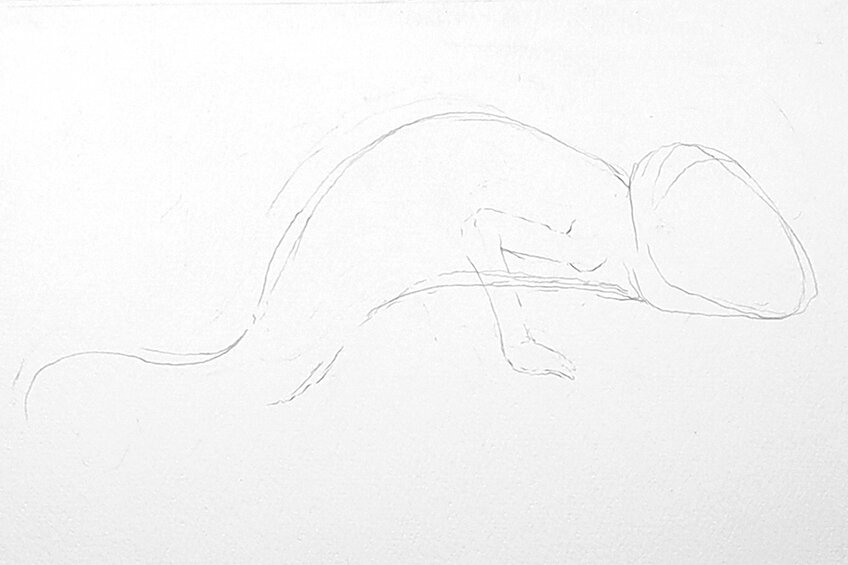
The body of the chameleon generally has an arch in the back and the legs will be joined near the bottom of the chameleon’s body. The legs also move in a lateral direction, which means they move out sideways from the body.
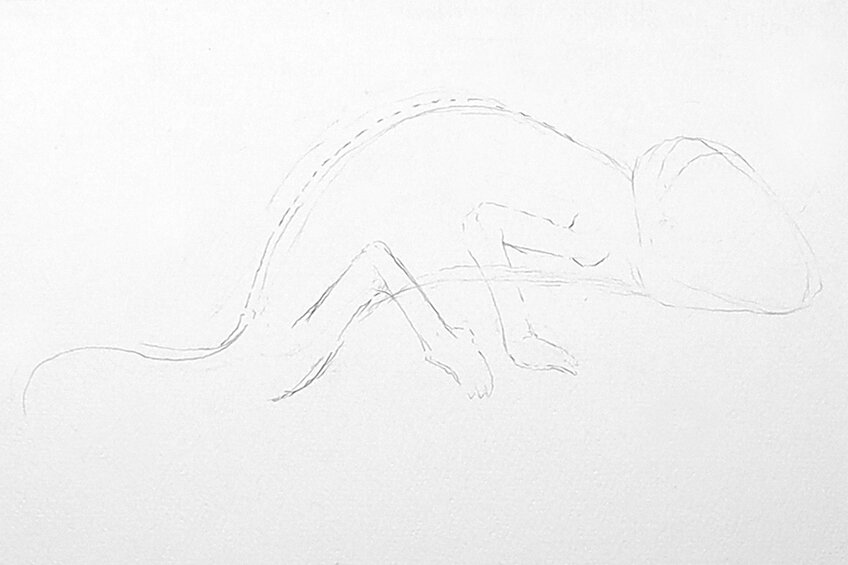
The tail of a chameleon is generally about the length of a chameleon’s body and often is coiled up. We want to contextualize the chameleon body, which means we want to draw a branch on which the chameleon is placed.
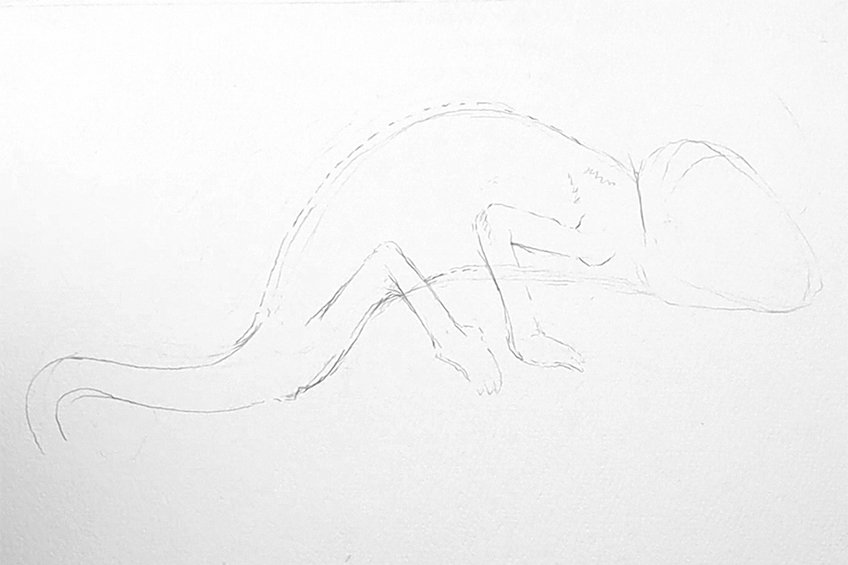
The eyes of the chameleon are like segmented circles that get smaller and smaller. Think of the mechanics of the chameleon’s eye as a telescope that extends with each segment, except it is more domed rather than coned-shaped.
The nose of the chameleon is generally a small opening that is placed just beneath the eye. Beneath the nose, the mouth can be drawn as a horizontal line, almost creating a dismayed expression on the chameleon’s face.
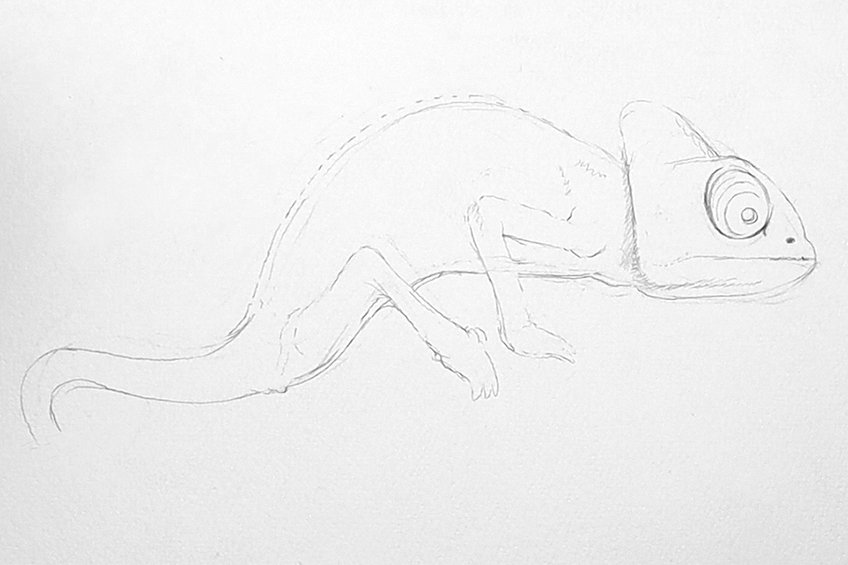
We want both the front and hind legs of the chameleon to move towards each other, almost as if they nearly touch. Think about their legs and arms almost as human arms and legs, with two main sections.
Chameleons have clawed digits on their front and hind limbs, which enable them to grab onto objects. We want to draw these digits almost like mittens, with the front three digits visibly grabbing the branch.
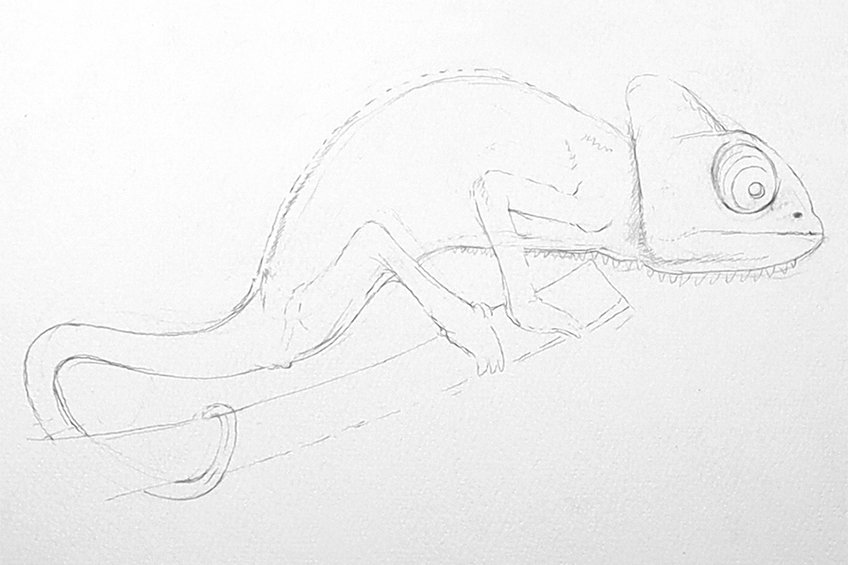
We can also draw a row of little horns along the spine of the chameleon and its bottom stomach areas. This is an essential characteristic of the chameleon and is unique to their aesthetic.
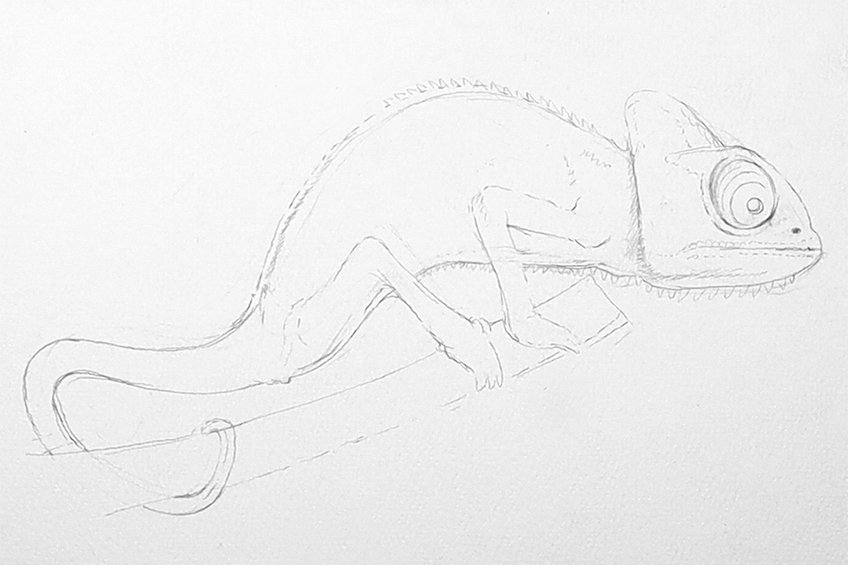
Be sure to draw in a branch that the chameleon can sit on, as this gives a little more context to the body position of the chameleon. We want to make sure that the chameleon fits along the shape of the branch.
Take your time with sketching and tweaking your chameleon drawing, making sure that you have an adequately proportional creature. Take time on the face mostly and make sure you add in all the necessary details correctly.
Step 2: Adding Foundational Color With a light Green Pencil
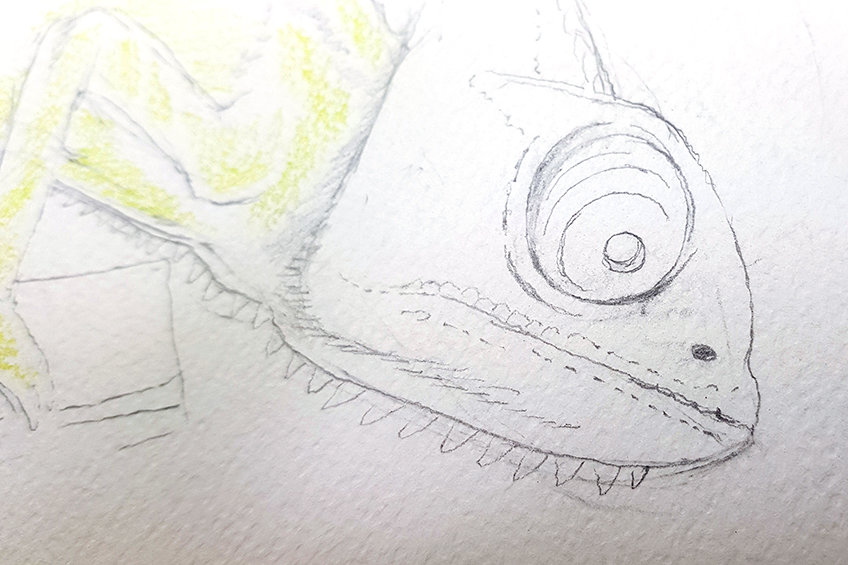
Using a light green pencil, start to work in some light pencil shading, slowly giving the chameleon some foundational color to work over. We want to start with the lighter layers and then work over these later with darker greens for shadowing.
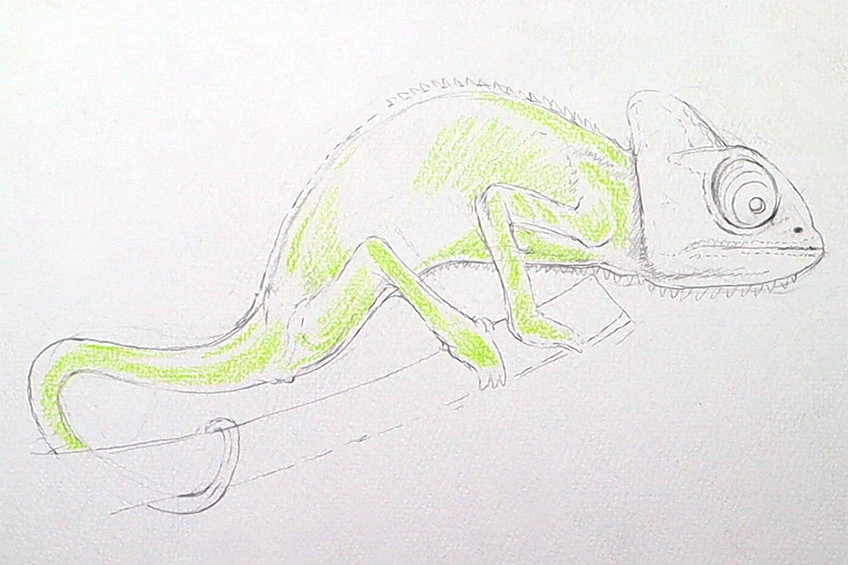
The intention should be to add in some light green, as we are adding in the lightest areas of color in the body. You can also use a reference on the internet to assist you in your coloring phase.
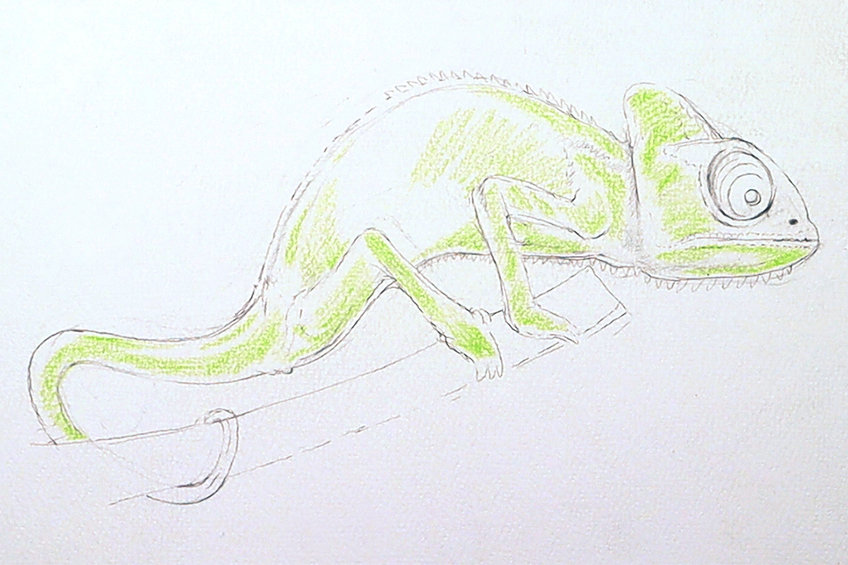
Try to shade the chameleon with your light green pencil. What is meant by this is that we want to work from head to tail, going through each aspect of the body, slowly working in some light green shading to emphasize the three-dimensionality of the chameleon’s body.
Step 3: Adding Mid-Tone Shadows With Dark Green Pencil
Once we have established some basic light green coloration with the chameleon, we want to start slowly working in some shadows. We do this by working from head to tail, again, with the intention of shading to emphasize form.
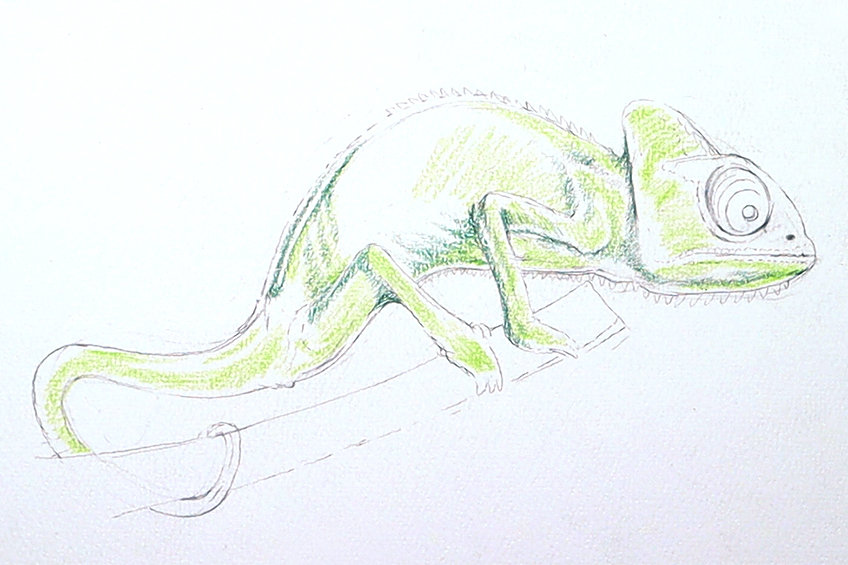
When adding in darker green pencil shading, we want to consider the body of the chameleon. This means we want to consider all the indentations and protrusions beneath and on the surface of the skin that would cast shadows.
Take your time with shading in the details, especially within the face. Try to consider the little segments in the eye and the bone structure beneath the skin. These little details create shadowing along the surface of the chameleon.
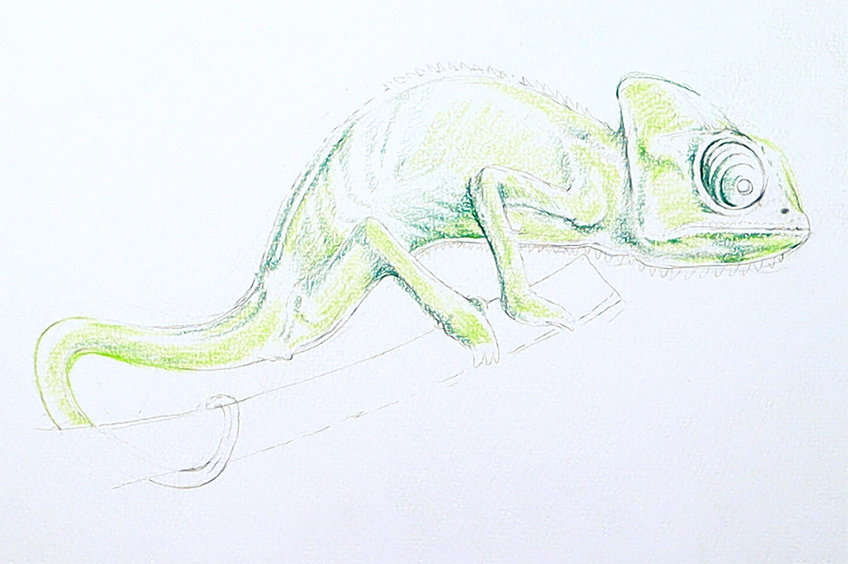
We also want to consider the rib cage area that slightly protrudes beneath the skin of the chameleon. This will create subtle shadowing along the body of the chameleon, which will produce slightly darkened ridges within the body.
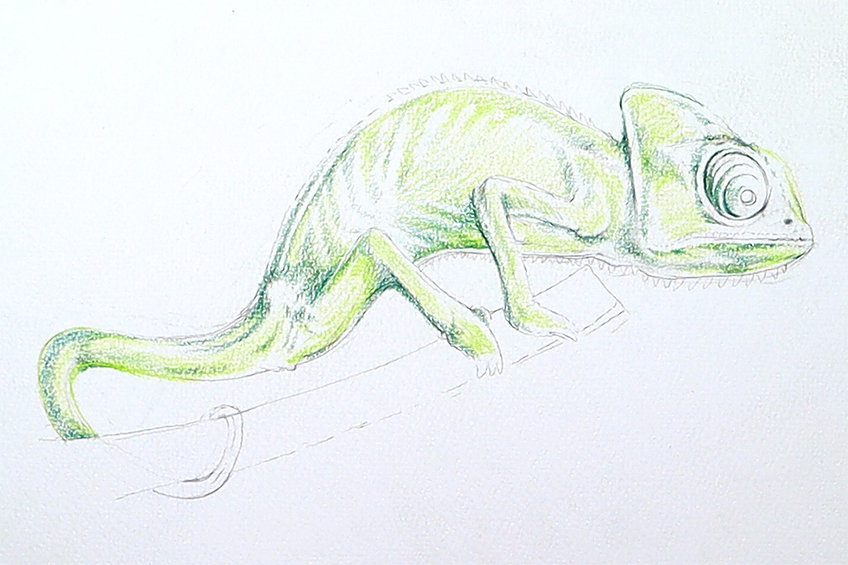
Step 4: Darkening the Shadows With Dark Green Pencil
Once we have established the general areas in which the shadows appear, we want to start emphasizing the contrast a little more with darker green pencils. The intention is to build layer upon layer of shadows; this way, we have more control over how dark they should be.
Again, consider the areas of the chameleon’s body where shadowing will be greatest. This means that we want to add shadows to the areas least exposed to light as well as along the creases, indentations, and protruding features.
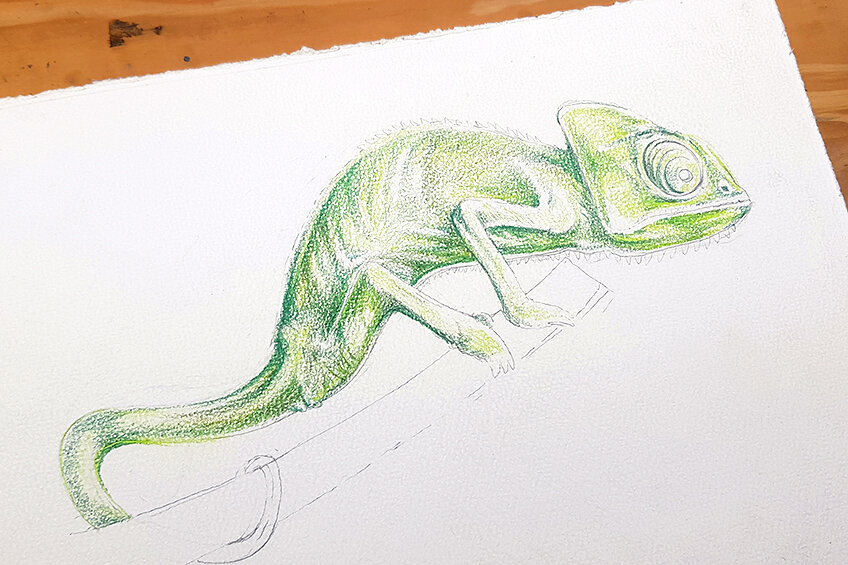
It’s also important to have a general idea of which direction the light source would be coming from. This means that we want to have shadowing forming predominantly along one side throughout the body for a more realistic shadow effect.
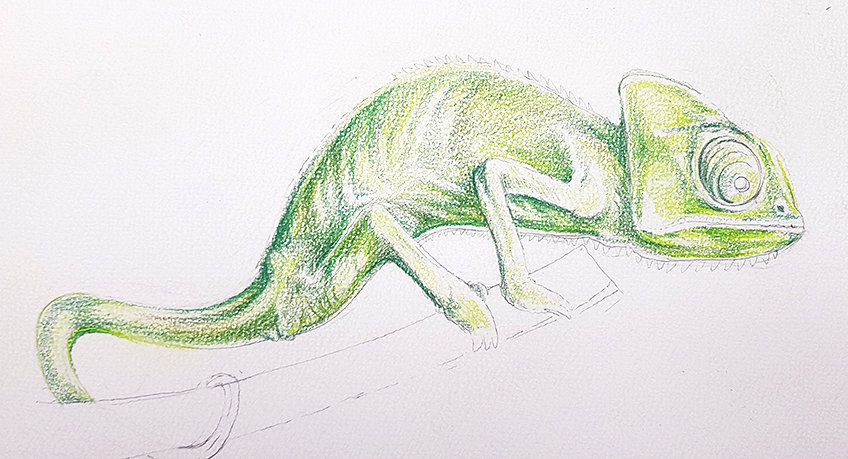
Take your time building up these darker green layers, going through each area of the chameleon’s body one at a time. You want to think about the twisting and bending of its body and how this will cause shadows in particular areas.
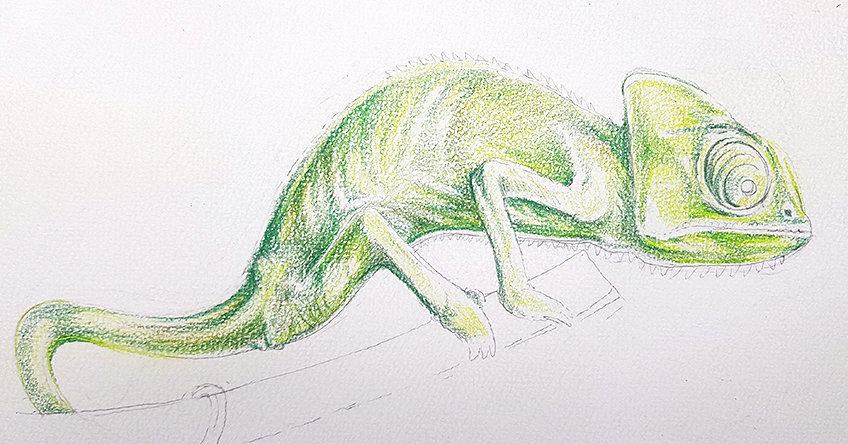
Step 5: Adding Pen Details for Structure and Contrast
At this point, we should have a fairly decent drawing of a chameleon. Now, we want to work with some pen details to enhance the different features. Starting with the face, let’s add some black pen details to emphasize the features.
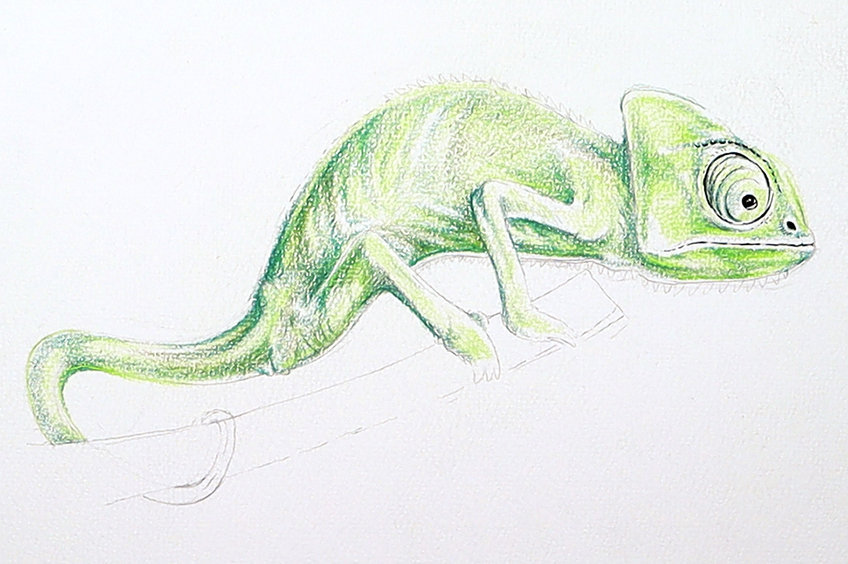
It is best to work from head to tail, slowly going through each feature one at a time. We want to use green and black micron pens to add outlines or little sketching marks in the shadows.
The intention should be to use the pen marks strategically, as we want to enhance the already-drawn features, not distract from them. Thus, we don’t want to overpower the pencil drawing with pen marks.
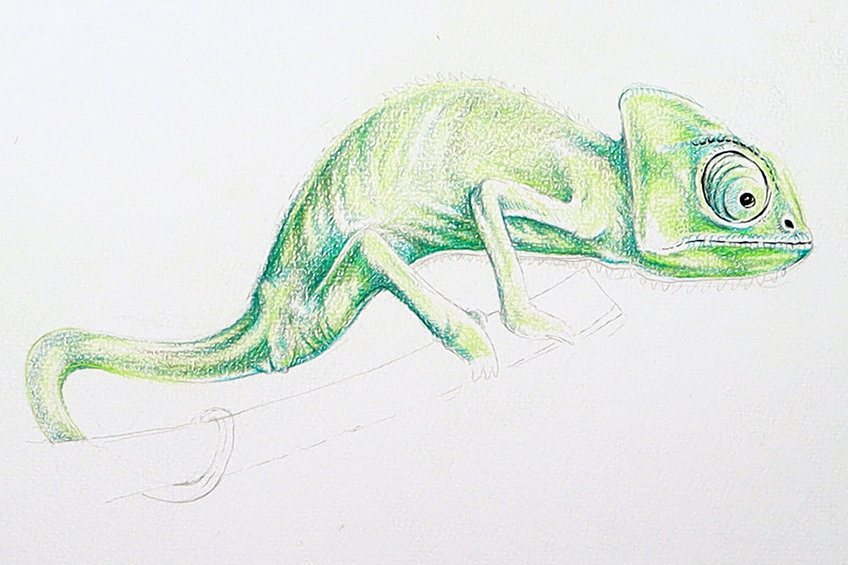
Consider the scaley, bone-like structures within the face and how a little linework of the pen can enhance these features. We can use our micron pens here, especially for the spiked ridges that form along the body of the chameleon.
We can also use a softer ballpoint pen to go over shadows. incorporating some pen shading into the shadowed areas is a great way to emphasize the darker Shadowed moments within the chameleon.
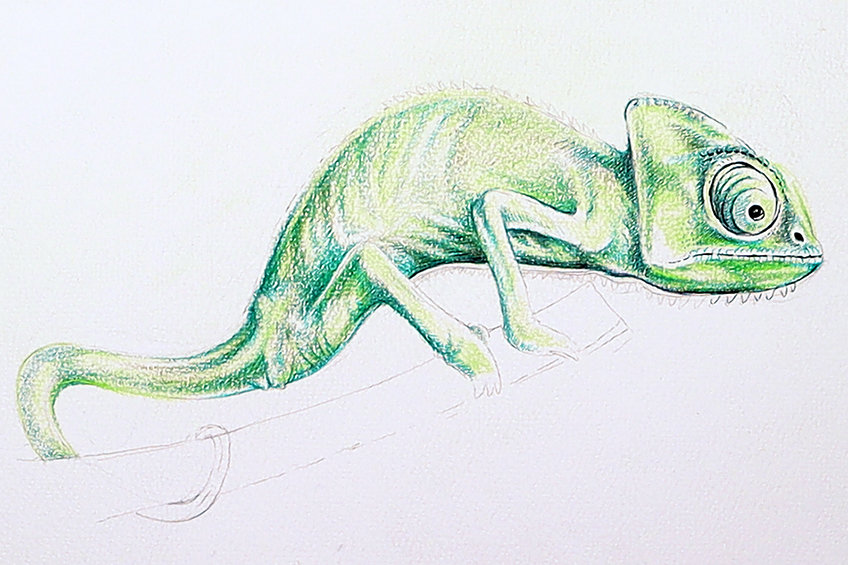
Try to use both a ballpoint pen for shading and a micron pen for refined lines, as you work your way through the entire chameleon body. Again, be cautious and take your time, especially when drawing with a pen.
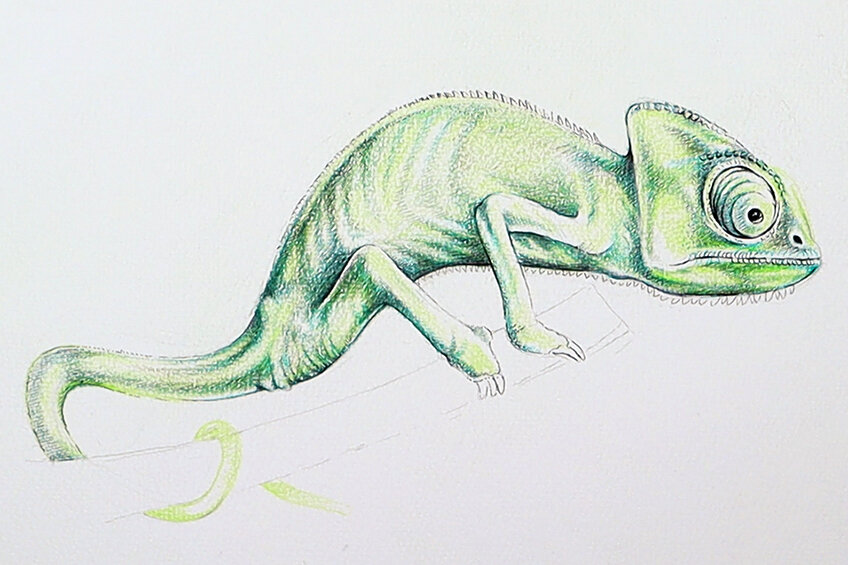
Using micron pen lines is good for finer features that need to be formed or outlined, such as the digits in the claws. A ballpoint pen works well as an additional layer to shaded areas, such as shadows.
We want to be more strategic with our ballpoint pen shading as we start to move toward the tail, where there are fewer harsh features like sharp bones. We want to make sure that the shading forms smoothly along the flow of the tail.
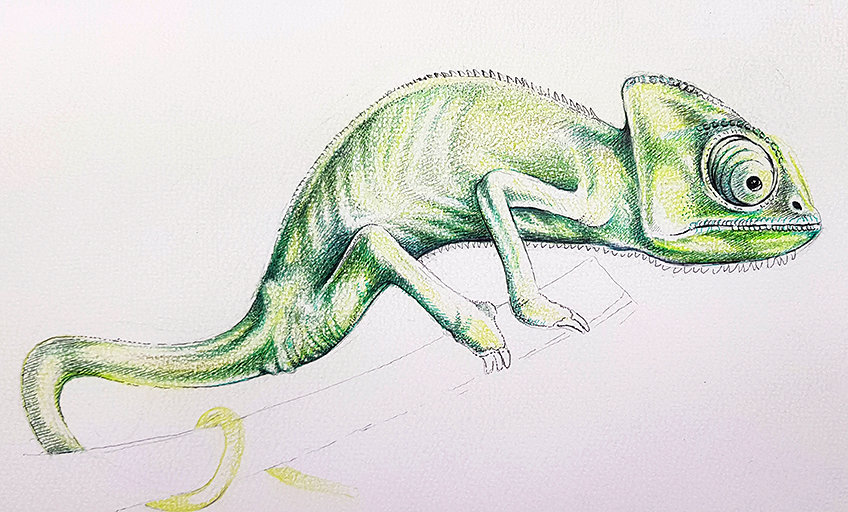
Make sure you come back to the face to work with both your micron and ballpoint pens. We want to make sure that we are refining the little scales within the face and around the mouth with our micron pens.
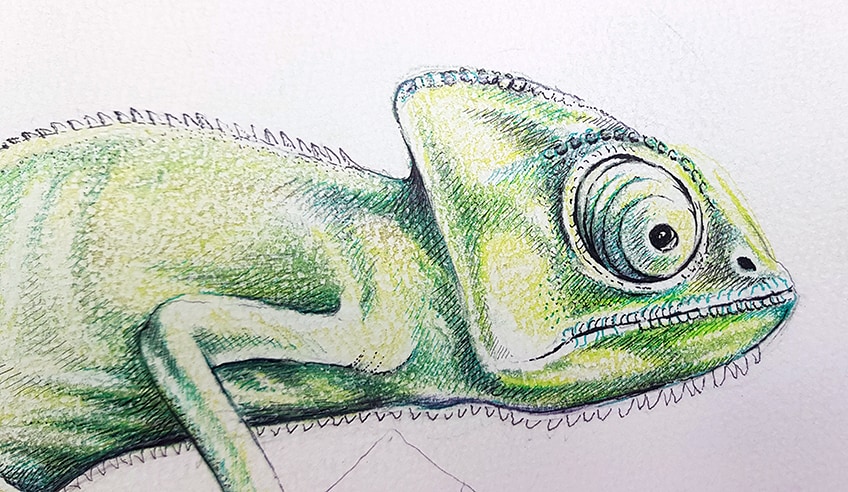
We also want to make sure we work in some pen shading along the shadowed areas with our ballpoint pens. Ballpoint pen ink is quite soft, which means we can shade over the shadowed areas as we would with a pencil.
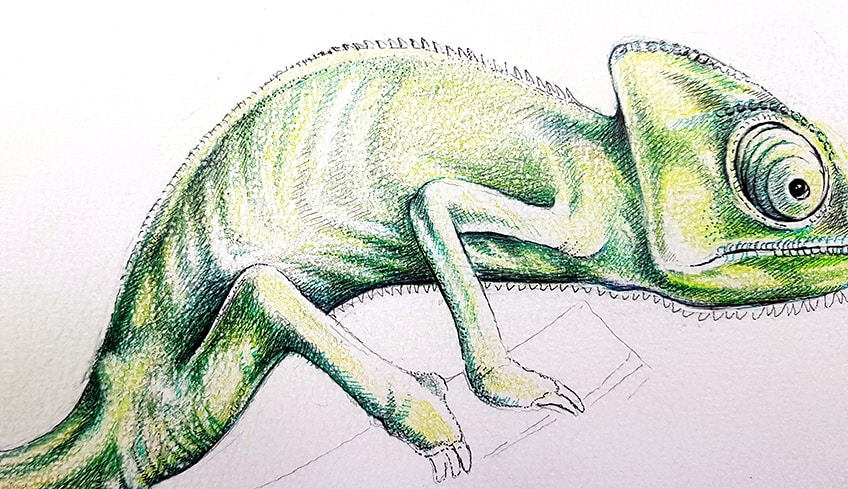
Step 6: Working on Contextualizing Features
Once our chameleon drawing is done, we can start to add some pencil marks and pen details to the branch. We can also add a lighter and softer sketch of the limbs that are less visible on the other side of the chameleon.
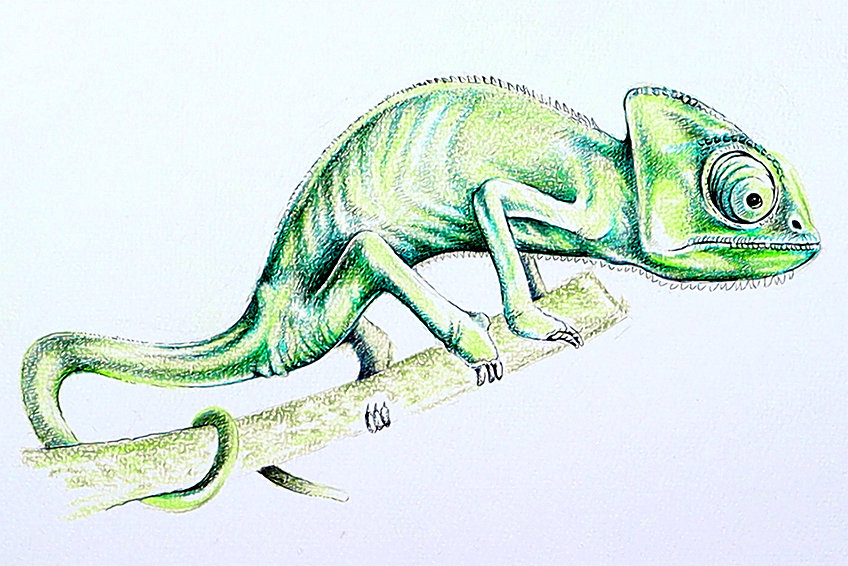
We can be quite subtle with the less visible limbs, making them less detailed to suggest that they are a little further in the distance therefore less detailed. We can also layer our branch with browns and greens to create a more natural color for the branch.

Spend a little time on these details, making sure you work both foundational layers of color and then refined linework and shading with your pens. Proceed with these details as you have with the other aspects of the chameleon drawing, and then you are done!
Tips to Remember
- Build your Layers. Be conscious of building your layers, making sure that you start with lighter layers and then add on darker layers.
- Work strategically when adding in pen work. A micron pen works well for refined line work, whereas a ballpoint pen works well for layering over shading.
- Use a reference image if needed. This common green chameleon can be found on the internet, so use an image to assist you if you need extra help.
- Take your time. Drawing is a skill that requires practice and patience, so try to take your time and take breaks when you feel tired.
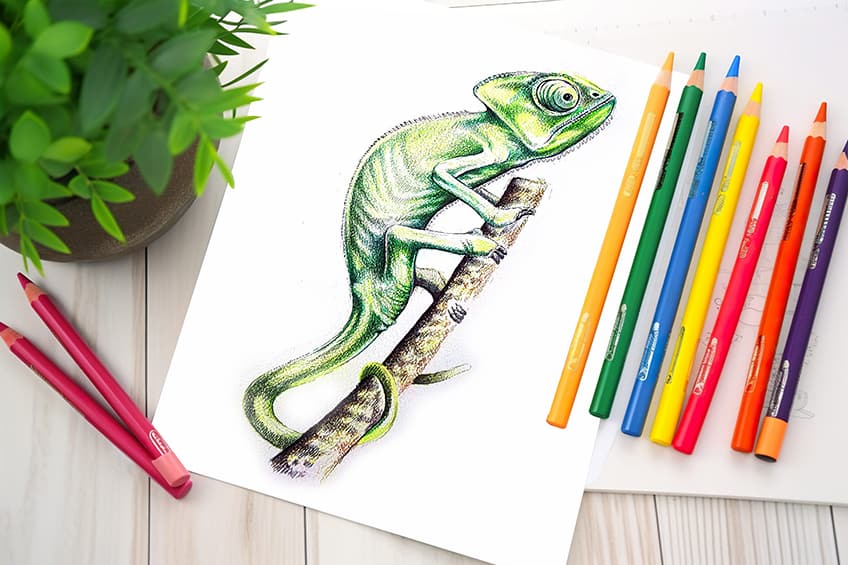
A realistic chameleon drawing is not difficult once you break up the chameleon sketch into digestible steps. This tutorial provides you with the necessary skills to create a beautiful chameleon drawing one layer at a time. This process is a good step-by-step guide that can be applied to various creature drawings, so use it to help you in your work.
Frequently Asked Questions
How Do You Draw the Eyes of a Chameleon?
Chameleon eyes are like telescopes that expand outward with contracting and dilating segments. However, we don’t necessarily draw the eyes as elongated telescope shapes, but rather, we draw them more like a dome shape. As we draw this dome shape, we want to make the segments smaller and smaller until we are left with a slight opening that reveals the eye of the chameleon. This is the general structure of a chameleon eye however, you can choose to make the eye slightly larger to suggest that it is dilated, although chameleon eyes are never enlarged much.
What Is the Best Way to Color a Chameleon Drawing?
There are many ways to color a chameleon because there are various species of chameleons to draw. A great coloring exercise is to draw the common Chamaeleonidae species, as it provides a unique coloring challenge where you work with variations of green. However, the challenge comes with learning how to utilize different green colors to create shadowing, ripples, and textural differences in the chameleon drawing. This common green chameleon is a great color exploration as it teaches you technical drawing skills and how to achieve form and structure through the use of coloring.
Matthew Matthysen is an educated multidisciplinary artist and illustrator. He successfully completed his art degree at the University of Witwatersrand in South Africa, majoring in art history and contemporary drawing. The focus of his thesis was to explore the philosophical implications of the macro and micro-universe on the human experience. Matthew uses diverse media, such as written and hands-on components, to explore various approaches that are on the border between philosophy and science.
Matthew organized various exhibitions before and during his years as a student and is still passionate about doing so today. He currently works as a freelance artist and writer in various fields. He also has a permanent position at a renowned online gallery (ArtGazette) where he produces various works on commission. As a freelance artist, he creates several series and successfully sells them to galleries and collectors. He loves to use his work and skills in various fields of interest.
Matthew has been creating drawing and painting tutorials since the relaunch in 2020. Through his involvement with artincontext.org, he has been able to deepen his knowledge of various painting mediums. For example, watercolor techniques, calligraphy and lately digital drawing, which is becoming more and more popular.
Learn more about Matthew Matthysen and the Art in Context Team.
Cite this Article
Matthew, Matthysen, “How to Draw a Chameleon – Easy Drawing these Beautiful Reptiles.” Art in Context. September 14, 2023. URL: https://artincontext.org/how-to-draw-a-chameleon/
Matthysen, M. (2023, 14 September). How to Draw a Chameleon – Easy Drawing these Beautiful Reptiles. Art in Context. https://artincontext.org/how-to-draw-a-chameleon/
Matthysen, Matthew. “How to Draw a Chameleon – Easy Drawing these Beautiful Reptiles.” Art in Context, September 14, 2023. https://artincontext.org/how-to-draw-a-chameleon/.


