How to Draw a Lizard – Create a Realistic Lizard Drawing
A lizard drawing is a really fun art exercise because lizards are strange creatures that come in various different shapes and colors. Lizards also have hypermobility, which gives their body a unique ability to curl, curve and move in weird ways. In this tutorial on how to draw a lizard, we will create a realistic lizard drawing that has a strange form and an interesting color formation. Lizards also have a strange aline-like quality which allows them to be utilized in various contexts-this can be within surrealist work, natural landscapes, or as a subject matter on its one. There are many reasons for learning how to draw a lizard, as it provides the unique opportunity to enhance one’s coloring abilities as well as shading skills. However a lizard drawing may be utilized, this is a great little creature to know how to draw for various reasons.
Table of Contents
An Easy Guide to Drawing a Lizard With Colored Pencils
In this easy lizard drawing tutorial, we will learn how to create a realistic lizard drawing through a set of a few simple steps. A realistic lizard drawing is not as difficult as it may seem, as once the process is broken up into a few digestible steps, we will find that it is quite an easy drawing exercise. In this easy lizard drawing tutorial, we will be exploring how the use of both coloring and shading can work well together to create an interesting and realistic lizard drawing. We will find that developing a basic lizard sketch into a more refined and realistic lizard drawing is easier than we think, as long as we have the right tools and break down the process into its fundamental steps, we will have a beautiful drawing in the end.
Necessary Materials
There are many ways to create an easy lizard drawing, however, in this tutorial, we will be working specifically with colored pencils and a ballpoint pen. We will want to make sure we have an HB pencil for the early stages of drawing, and we will then proceed to work with colored pencils and a ballpoint pen in the later stages. We will also want to make sure that we have an eraser and sharpener to minimize any silly mistakes along the way.
- HB Pencil
- Ballpoint Pen
- Marker Pen
- Eraser
- Sharpener
- Derwent Coloring Pencils
- Good Paper (200 g/m – 250 g/m recommended)
How to Draw a Lizard Step by Step
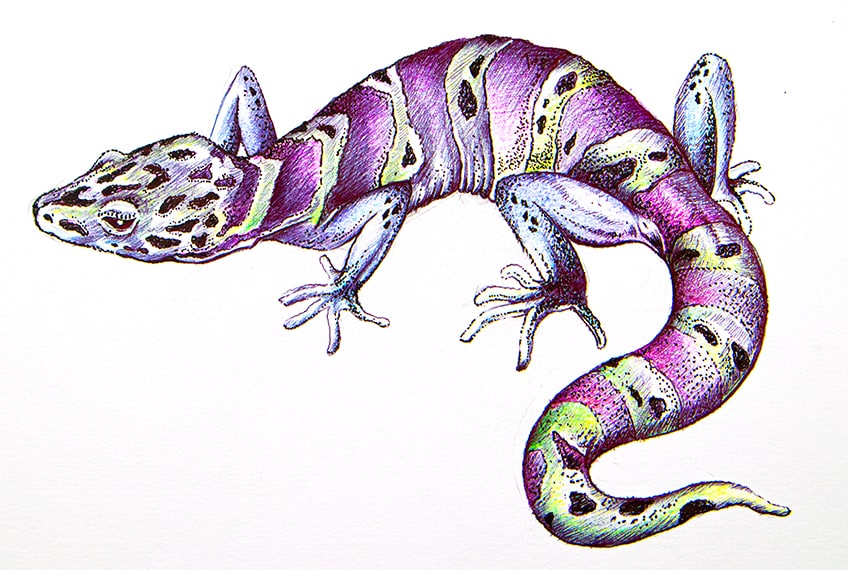
In this tutorial on how to draw a lizard from a side angle, we will start by developing the form and structure of the lizard through a simple pencil sketch. From there, we will work in some light details and patterns into the lizard drawing. We will then proceed to color in the lizard working in different colors for different features within the lizard drawing. Then, lastly, we will work with ballpoint pens to add more contrast and enhanced shading, giving the lizard more three-dimensionality and structure. Now that we know what to expect, let us get into this tutorial on how to draw a lizard.
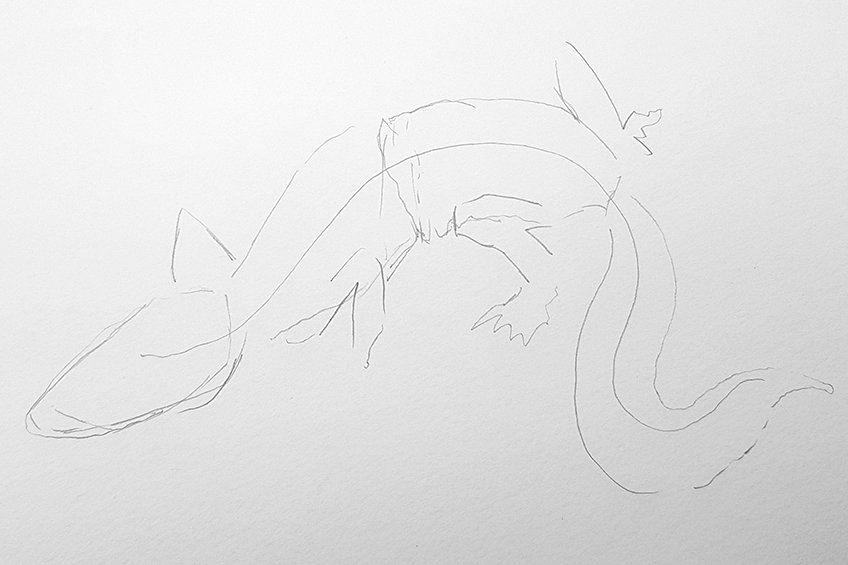
Step 1: Sketching the Lizard’s Body
Using our HB pencils, we want to begin by drawing a curved line on the page. This is going to establish the flow of the lizard’s body.
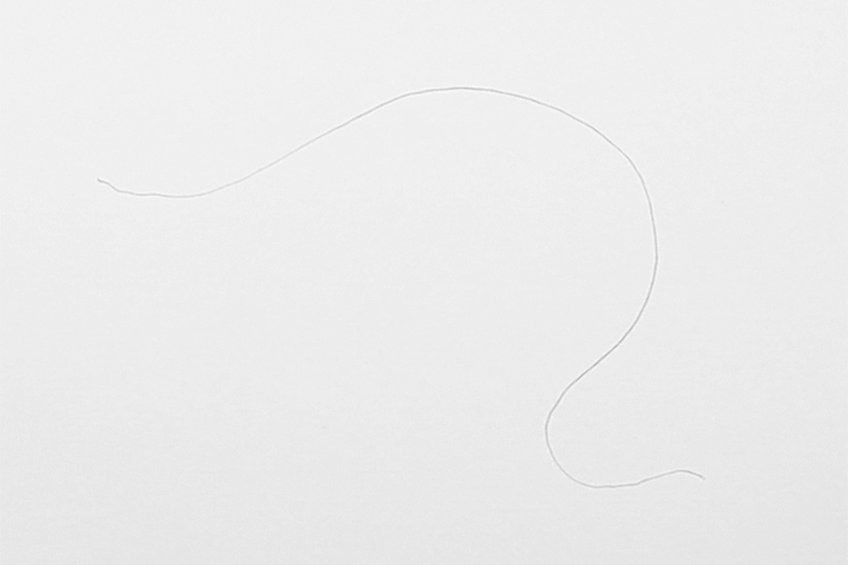
From there, we can proceed by drawing an arrowhead shape at one end of the line. This is going to be the head of the lizard.

We want to make sure that as we draw the body along the curved line, it is narrower than the head of the gecko. We will also want to make sure that the body gets narrower as it flows into the tail.

From there, we want to place the limbs of the gecko, which can be drawn in a zig-zag fashion. By drawing the limbs in a zig-zag shape, we give more insight into the functionality of the legs.
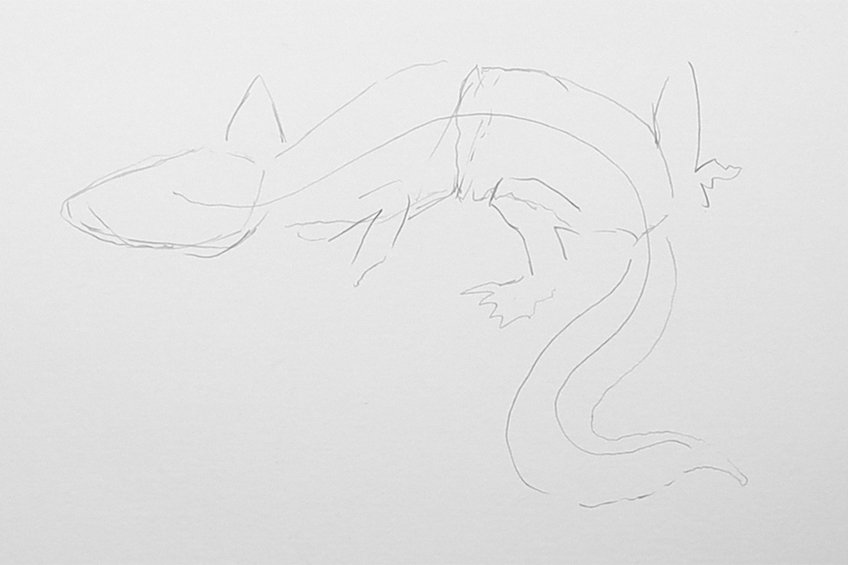
Since we are drawing the lizard from a side angle, we want to keep in mind how one side of the lizard will be less visible. This means we will only partially see one side of the legs of the lizard. Try to keep the drawing loose, whereby we work out the basic structure of the lizard drawing.
Step 2: Refining the Lizard Sketch
Using your eraser, proceed to lightly erase the lizard body sketch. By doing this, we leave a faint pencil sketch of the lizard body to be used as an outline for a more refined drawing.

Starting with the head, begin to formalize the shape of the lizard’s head, whereby we add in little bulging curves to represent the eye on the less visible side of the lizard. We can also start to form the shape of the limbs more adequately.
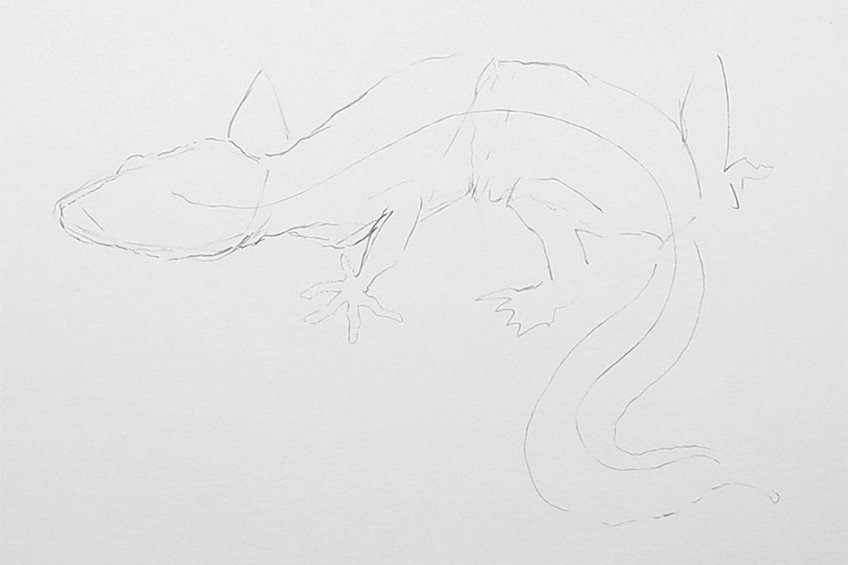
We can also add another eye on the more visible side of the lizard. This eye can be drawn as a leaf shape, with some circular line work around it to indicate its bulging form.
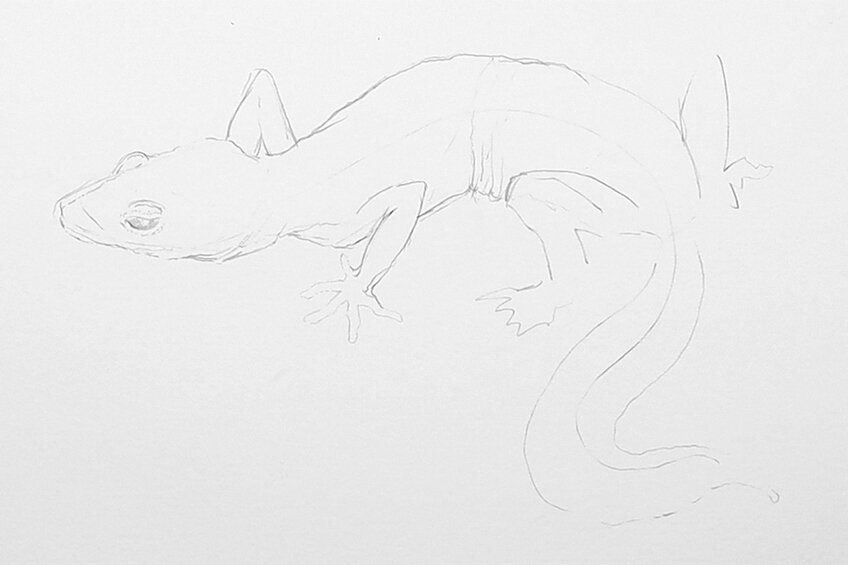
As we work with our pencils and erasers, we want to go through the body of the lizard, slowly adding more lines that define its form more clearly. We can also make the hind legs slightly larger, and give the visible legs five digits.

As we work our way through the lizard’s body and arrive at the tail, we can also slightly thicken the tail. From here, we can proceed to give the lizard some patterns. This can be your own design but stripes are often a common feature and a good suggestion.
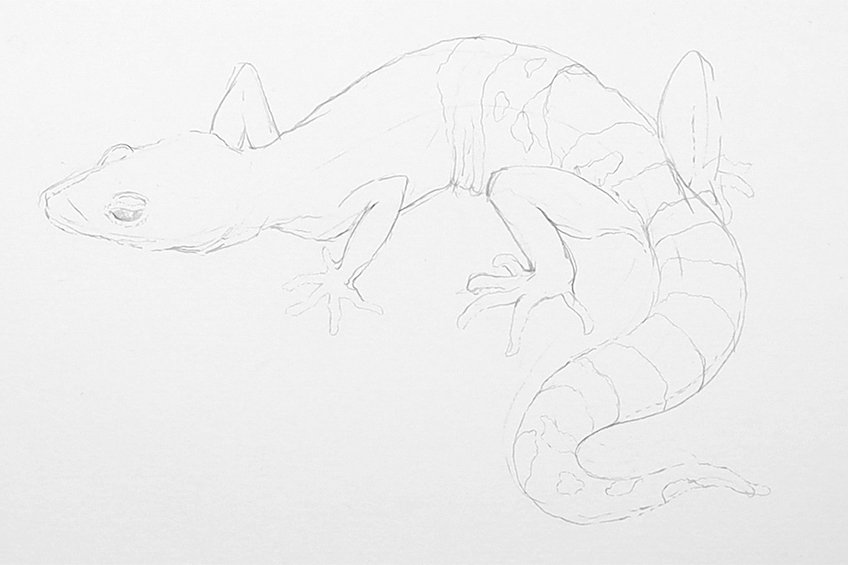
Consider how the stripes further contextualize the lizard’s form by wrapping around the lizard’s body. We can also add in some spots here and there, perhaps keeping them in between the stripes.
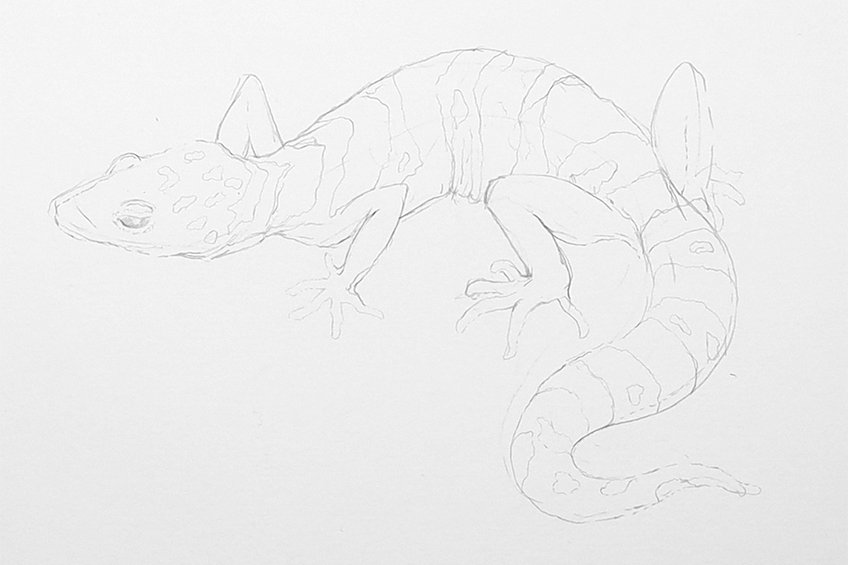
Basically, we want to set up an outlined version of the lizard drawing, helping us understand where to color as move into the later steps. Again, make sure that the stripes flow with the form of the lizard’s body.

Another little feature to get right is to keep the body of the tail fat and its tip narrowed to a point. We also want to make sure that the area where the tail connects to the body is slightly narrower than the tail itself.
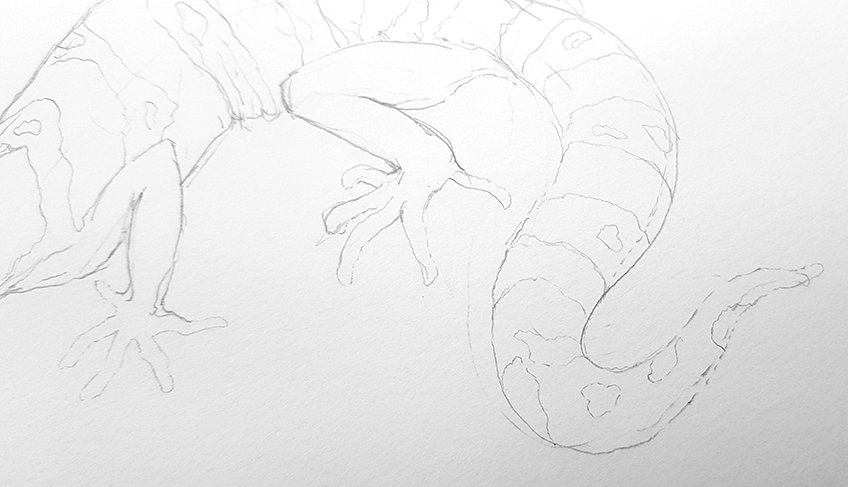
Try to take some time working out the lizard sketch, making sure the features make sense and are consistent. Make sure you attend to all areas of the lizard drawing before adding in color.
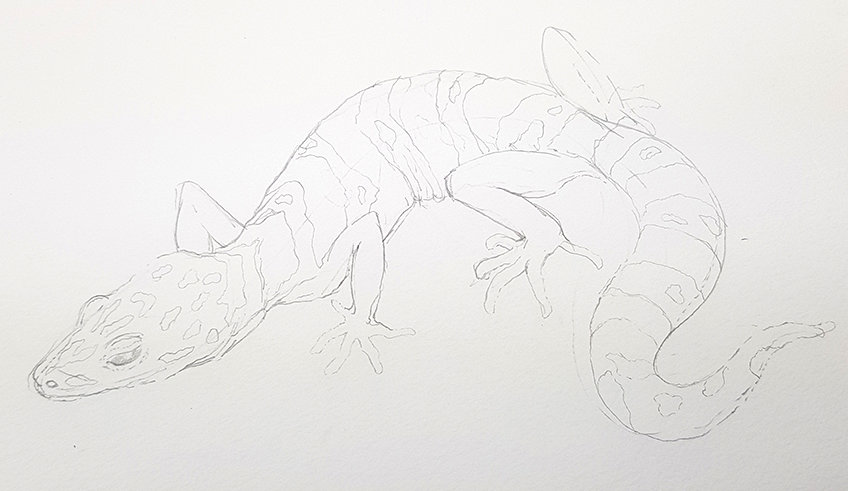
Step 3: Adding Color to the Lizard Drawing
From your colored pencils, choose a nice bright color. Starting with the stripes, lets us begin to shade in the stripes a bit. This will help us also keep consistency in coloration throughout the entire lizard.

Allow yourself to explore variations of a single color to give it more depth. For instance, you can blend pinks and purples in the stripes to give the stripes a richer coloration.
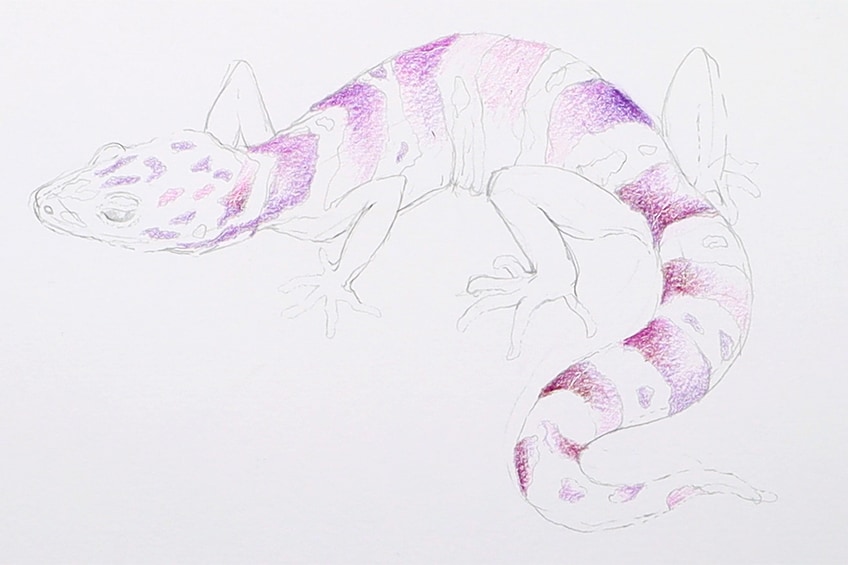
Play around with color combinations for your lizard drawing. This means that you can add different colors to different features, as long as you keep the choices consistent for different features.
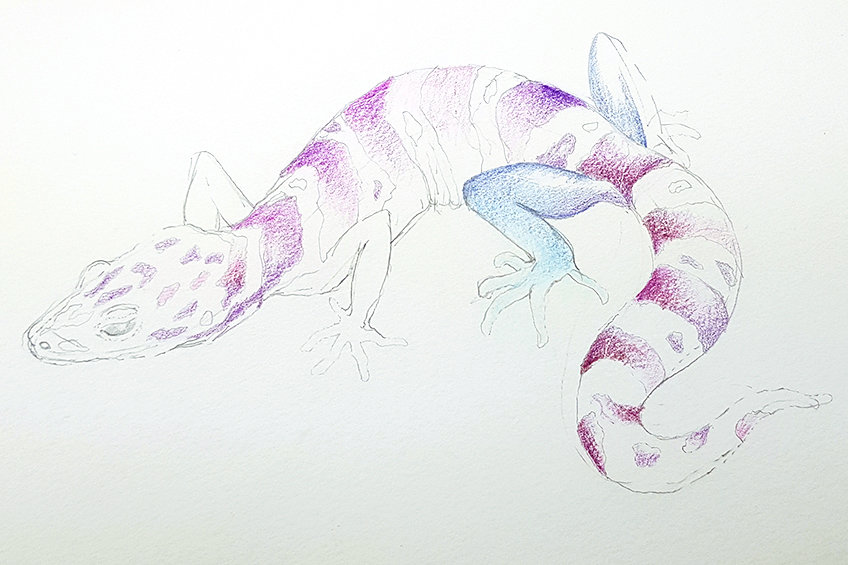
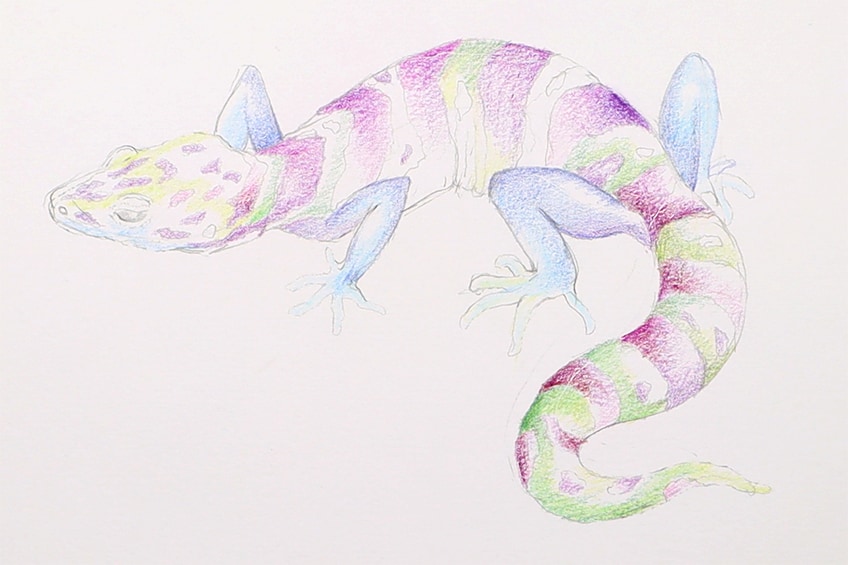
Perhaps make the limbs a different color from the stripes and the main skin color of the lizard. Again, explore blends of colors in the different features of the lizard to create more enriched colorations.
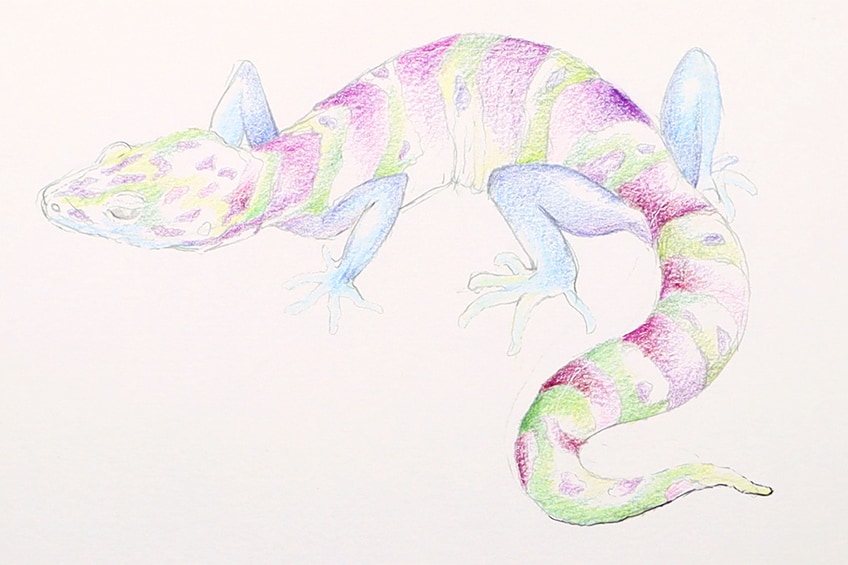
You can also explore gradients and shades with your colored pencils. This means we can explore shading with colored pencils to create more dimension in the lizard drawing.
Step 4: Shading the Lizard With Pen
Once we have established some base colors in our lizard, we want to add some contrast with pen shading. Starting from the tail, let’s begin to add shading to the different features of the lizard.
Try to use your ballpoint pen to enhance the form of the lizard by creating gradients to establish three-dimensionality in the creature. This means we want to start considering how we add more shading to certain parts of the lizard.

Creating gradients gives the lizard a more three-dimensional quality because it suggests lighter and darker areas on the surface of the lizard’s body. You can also explore different line work, stippling, and shading styles to emphasize different features.

Since the lizard is seen from an angle, a good suggestion would be to make one side of the lizard slightly darker. By doing this, we create shadowing on the creature, making it seem more realistic.
We can also use shading to darken the stripes or skin areas of the lizard. This is a great way of emphasizing tonal differences in coloration in the lizard drawing.
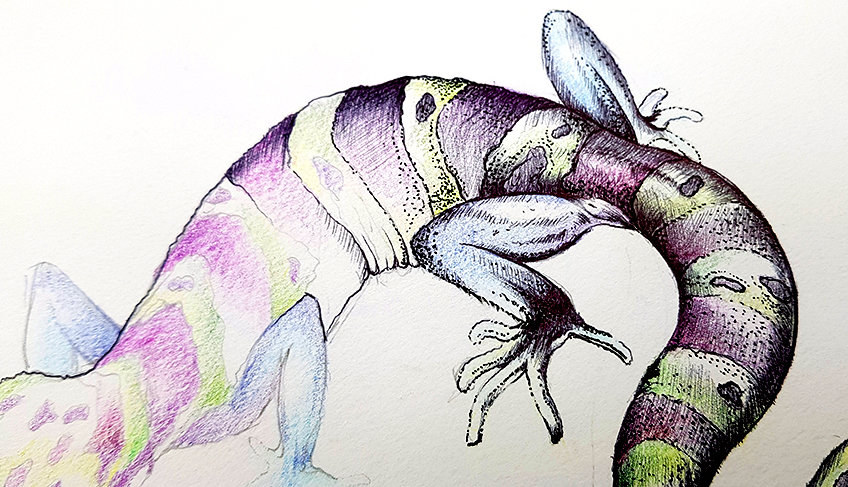
As you work your way through the body of the lizard, think about the limbs and how you can use lines and dots to enhance textural differences within the lizard drawing.

In many ways, adding little stippling marks can also be a great way of representing the scaly quality of the lizard’s skin. We also want to make sure that we add these marks around the eye of the lizard to suggest scales in the facial features.
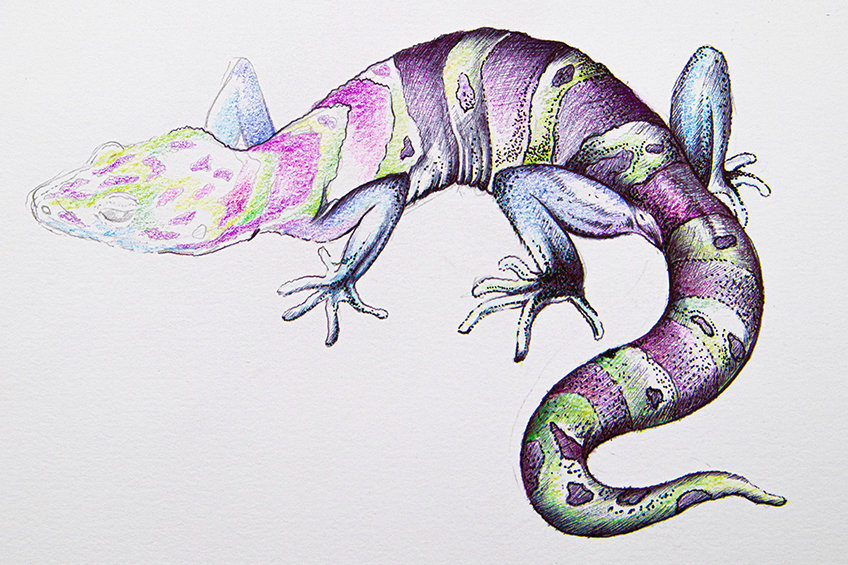
Make sure that there is a consistency in contrast between the stripes and the skin color. This means that if you darken the stripes and spots, make sure this extends through the entire lizard.
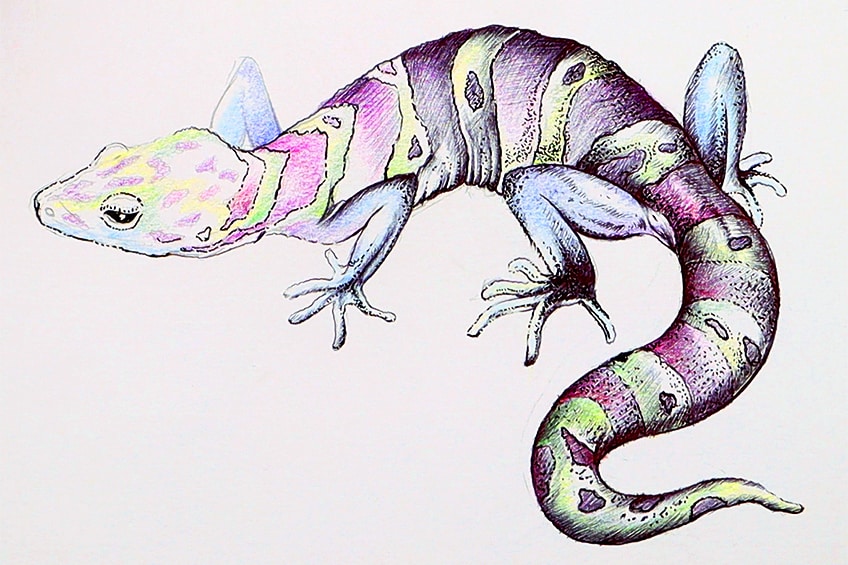
We also make the creases around the limbs of the lizard slightly darker. This suggests that any loose overlapping skin is creating little moments of shadowing. We can also make the entire eye of the lizard black with a little negative spot to suggest a reflection of light.

At this point, you can use your ballpoint pen to also darken certain angles in the lizard. Don’t be afraid to shade directly over the color in the lizard- the shading will seem natural once you have shaded the entire lizard.
Again, make sure the eye has a little highlight, giving it a more realistic quality of glossy reflection. Try to take your time with the head, as you add some shading to refine its form and structure.
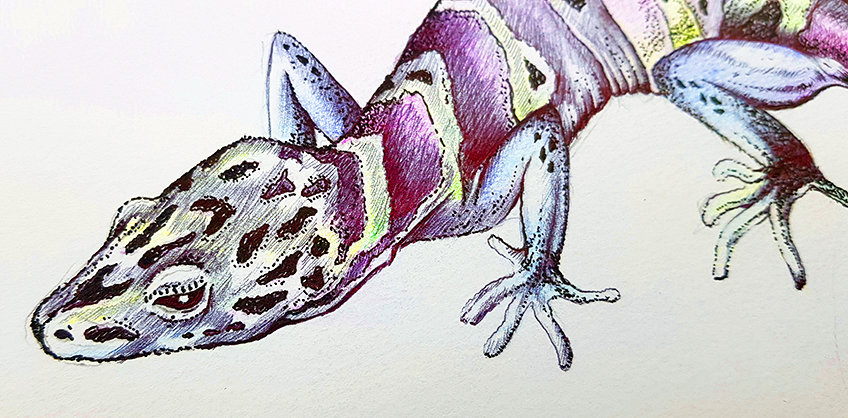
Make sure you go through your lizard again, tweaking any little details as you feel necessary. As long as you keep consistency throughout the lizard drawing, you should have a realistic lizard drawing as a result.

Tips to Remember
- Spend time on the lizard sketch. You want to make sure you work out the pencil sketch of the lizard drawing before adding in color and ballpoint pen.
- Work out the pattern and flow. A realistic lizard drawing requires attention to detail. This is especially true about the patterns and how they form around the three-dimensional structure of the lizard.
- Keep consistency within the details. You want to make sure that the coloration is consistent within the lizard, making sure the patterns are the same and the skin color is the same.
- Take your time with a ballpoint pen. When shading with a ballpoint pen, you really want to make sure you are patient and take it slow, as the ballpoint pen is easy to mess up.
- Enjoy the process. Learning how to draw a lizard is a unique drawing exercise, so try to enjoy the process
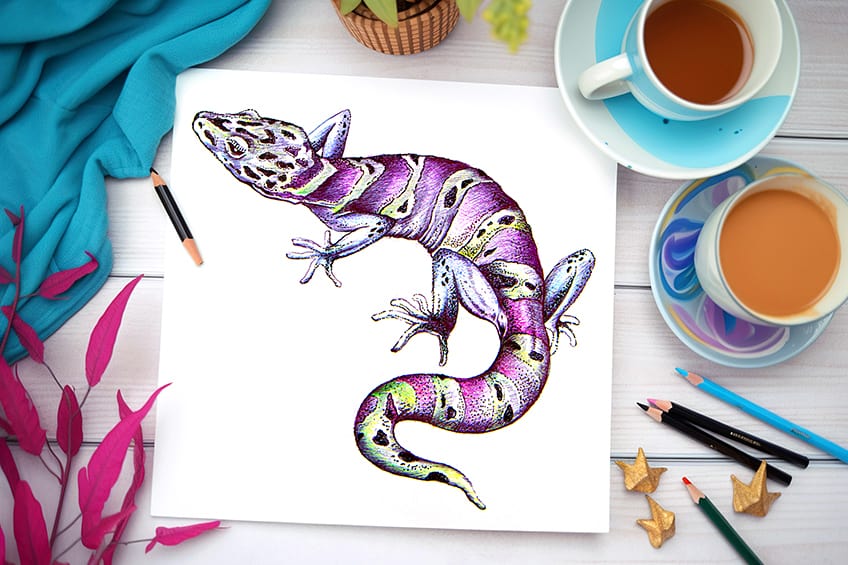
A realistic lizard drawing is really easy to create once you know how to break up the process into simple steps. The most important aspects are consistency in color choice and shading over the colors for a more three-dimensional effect. Don’t be afraid to shade over the colors as the shading enhances the colored qualities of the lizard drawing and transforms the simple lizard sketch into a beautiful and realistic lizard drawing.
Frequently Asked Questions
How Do You Add Patterns to a Lizard?
The process of drawing patterns into a lizard is really fun because there are so many different types of lizard species with different types of patterns and colorations. This allows you to add patterns as you would please and create your own pattern. You can often play around with adding stripes, spots, blobs, and other shapes. However, the most important thing to remember when creating a realistic lizard drawing is that you want to keep consistency in color and three-dimensional flow. This means you want to make sure that features within the patterns and throughout the lizard drawing are consistently the same. You also want to make sure that patterns flow along the three-dimensional flow of the lizard, wrapping around the creature in certain areas. When adding patterns to the lizard drawing, consider the three-dimensionality of the lizard’s structure and consistency within coloration.
How Do You Draw the Eyes of a Lizard?
The face of a lizard often is quite subtle and the only features that really stand out are the eyes. Depending on what type of lizard you are drawing the eyes will differ, however, in the case of this tutorial, we have looked at how to draw a gecko. The eyes of a gecko slightly bulge outward, which gives them a rounded quality that protrudes from the head. The eyes of the gecko don’t have eyelids which gives them a specific eye shape, which can be seen as a leaf-like or spearhead shape. Around the eyes is generally a hard scaly texture, whereas the eyes themself are often completely black and glossy. The glossy effect allows for light to reflect off of their surface, which gives the eye a white highlight. This can be drawn as negative space within the eye to give the lizard drawing a more realistic quality.
Matthew Matthysen is an educated multidisciplinary artist and illustrator. He successfully completed his art degree at the University of Witwatersrand in South Africa, majoring in art history and contemporary drawing. The focus of his thesis was to explore the philosophical implications of the macro and micro-universe on the human experience. Matthew uses diverse media, such as written and hands-on components, to explore various approaches that are on the border between philosophy and science.
Matthew organized various exhibitions before and during his years as a student and is still passionate about doing so today. He currently works as a freelance artist and writer in various fields. He also has a permanent position at a renowned online gallery (ArtGazette) where he produces various works on commission. As a freelance artist, he creates several series and successfully sells them to galleries and collectors. He loves to use his work and skills in various fields of interest.
Matthew has been creating drawing and painting tutorials since the relaunch in 2020. Through his involvement with artincontext.org, he has been able to deepen his knowledge of various painting mediums. For example, watercolor techniques, calligraphy and lately digital drawing, which is becoming more and more popular.
Learn more about Matthew Matthysen and the Art in Context Team.
Cite this Article
Matthew, Matthysen, “How to Draw a Lizard – Create a Realistic Lizard Drawing.” Art in Context. July 21, 2023. URL: https://artincontext.org/how-to-draw-a-lizard/
Matthysen, M. (2023, 21 July). How to Draw a Lizard – Create a Realistic Lizard Drawing. Art in Context. https://artincontext.org/how-to-draw-a-lizard/
Matthysen, Matthew. “How to Draw a Lizard – Create a Realistic Lizard Drawing.” Art in Context, July 21, 2023. https://artincontext.org/how-to-draw-a-lizard/.


