How to Draw an Ant – Ant Drawing Step-by-Step Tutorial
Ants are unique little creatures and have a valuable role within the ecosystem. An Ant’s body structure enables them with tremendous strength, allowing them to carry over 40 times their body weight. These little soldiers are often not seen up close, and within this tutorial, we will be learning how to draw an ant in detail. An ant drawing can serve many purposes, as they are also quite strange and creepy-looking, which makes them great additions to surrealist and horror-styled artworks. Your ant drawing can also be blown up and placed into a scene as a large creature, creating a strange distortion in a landscape or scenario. However fantastical your creativity gets in this how-to-draw-an-ant drawing, this little creature is a great addition to anyone’s drawing toolkit.
Table of Contents
An Easy Guide to Drawing an Ant
In this tutorial, we will be learning how to create an easy ant drawing, whereby we will be drawing inspiration from the common ant. Ants are not difficult to draw but if you are to spend time on the drawing process, you are more likely to result in a realistic ant drawing. We will learn how to develop the simple structure of an ant shape into a detailed ant sketch, breaking the process up into digestible bites that are easy to follow. Ants have a very simple structure to draw and, in the case of this tutorial, we will find that the process of drawing an ant is as if we are assembling the insect one step at a time.
Necessary Materials
There are many ants to draw but in this tutorial on how to draw an ant, we will be looking at the structure of the common black ant. These insects require very few simple tools, such as a pencil, a ballpoint pen, an eraser, and a sharpener. We want to lean into the black vivid qualities of the black ant by using a medium that is conducive to creating a realistic ant illustration. An ant is like a little mechanical structure with various lines, and the use of pencil and pen is conducive to beautifully capturing these details. All the necessary materials can be found through the links below:
- HB Pencil
- Ballpoint Pen
- Eraser
- Sharpener
- Good Paper (200 g/m – 250 g/m recommended)
Preparation
Once we have all our materials prepared, we want to begin to prepare a space for our drawing process. Make sure you have your tools as well as some paper laid out on a table, preferably within a quiet space. This tutorial is an easy ant drawing, although we will be adding in some fine shading and line work, which requires a bit of focus. We want to make our ant illustration as beautiful as possible, so want to be in a space that will be conducive to focusing. Most importantly, relax, enjoy the process, and take your time with it.
Step-by-Step Instructions on How to Draw an Ant
In this easy ant drawing tutorial, we will break up the process into a few digestible steps. We will begin by establishing the form and scale of the ant with some simple line work, whereby we develop the angle and perspective at which the ant will be seen. From there, we will work slowly with our pencils and erasers to create a simple sketch, going through each section of the ant and making sure we capture all the necessary details. From there, we will work with our pencils and proceed to add some light shading. Lastly, once we are satisfied with our ant sketch, we will move on to using a ballpoint pen to add more contrast to our drawing, allowing the pencil marks and shading to guide us. If we are patient and take our time, we should have a realistic ant drawing by the end of this tutorial.
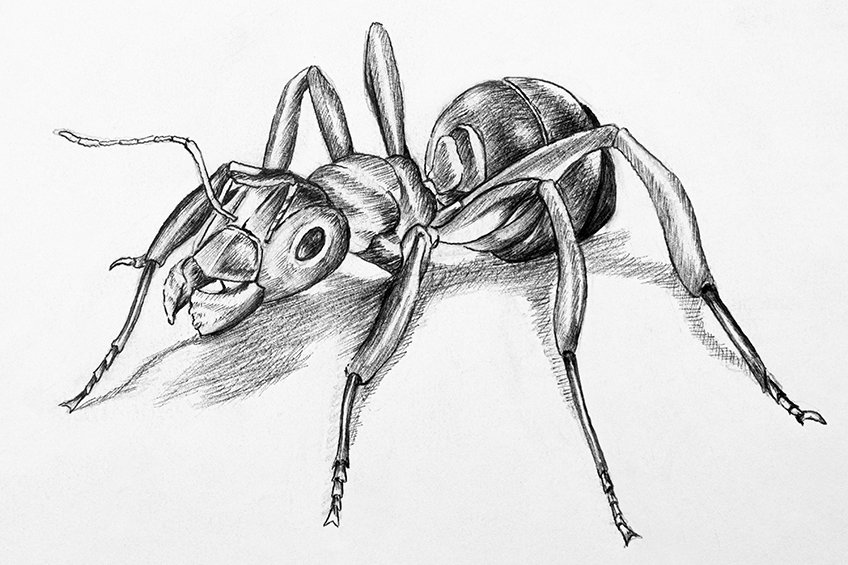
Step 1: Forming the Ant With Linework
We are going to begin by creating a basic sketch of the ant with some simple line work to configure its form into its essential parts. Using your HB pencil, we want to begin by drawing a spear-headed shape for the head.
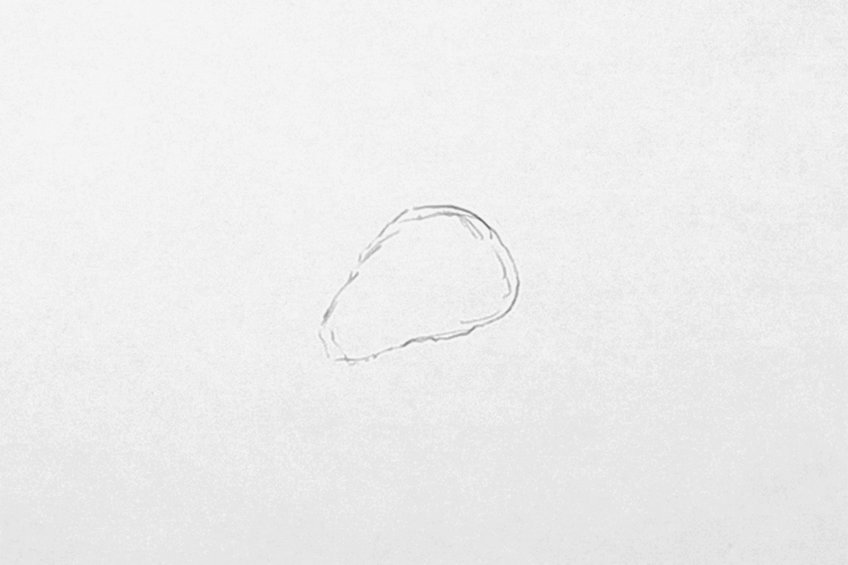
From there, we want to draw the thorax, which we can do by drawing a smaller circular shape directly next to the spear-headed shape. We want it to be slightly smaller than the spear-headed shape.

From there, we want to draw another slightly larger circle connected to the thorax, which will represent the abdomen. We are drawing the ant from a side view angle, which means that the features will have subtle distortion. For now, we can just draw the abdomen as a simple circle shape connected to the thorax.
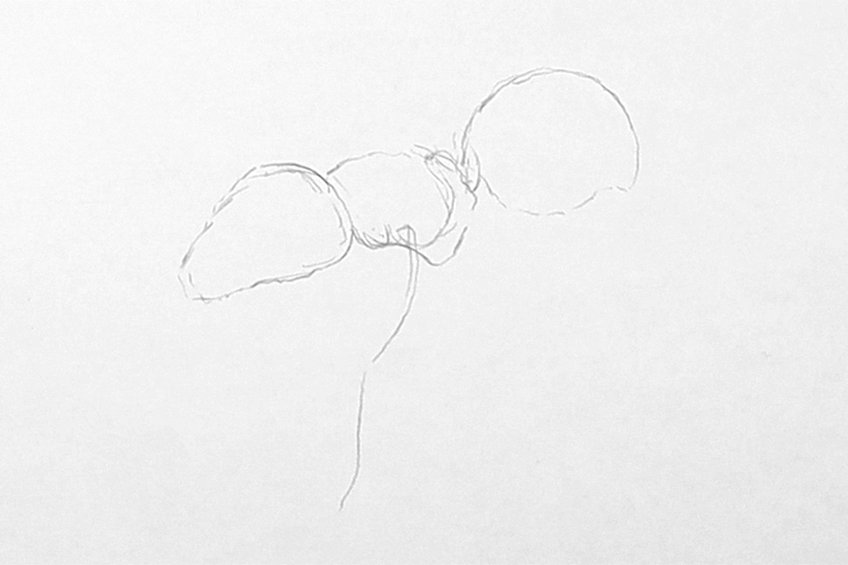
From there, we want to draw the leg formation with some simple line work. Since we will be drawing the ant from a side view, only one set of legs on a single side of the ant will be predominantly visible.
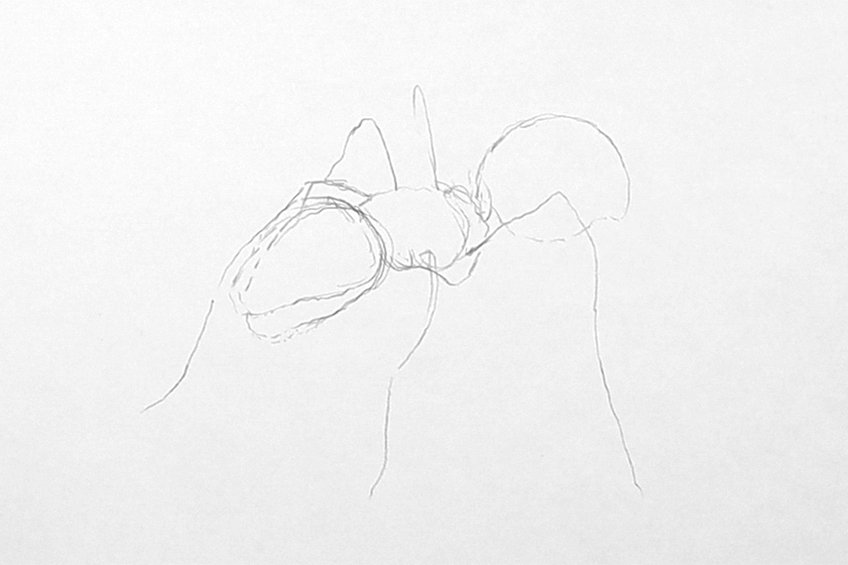
The legs of the ant are six in total and move from either side of the thorax in a lateral direction. They also have two six segments. The legs form an arched shape that will then move downward to plant the ant stably onto the ground.
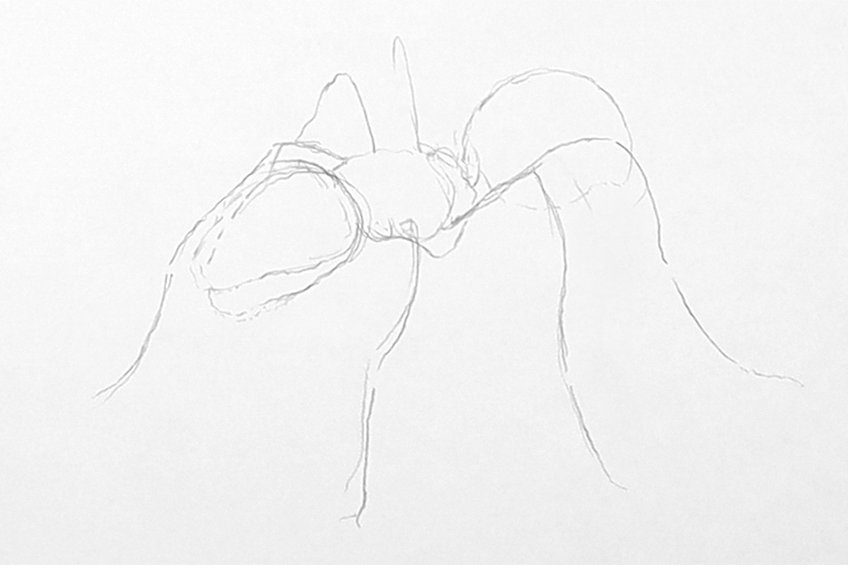
This first step intends to work with both the pencil and eraser, whereby we slowly shape and form the ant correctly into its form. We want to take our time forming the basic elements of the ant’s structure.

Step 2: Refining Our Ant Sketch
Once we have the basic structure of the ant formed with simple line work, we will want to start refining the ant sketch into an identifiable insect. We want to begin with the head of the ant, starting with the jaws and head. As you proceed to draw the eyes and head, consider how one side will be slightly more visible than the other.
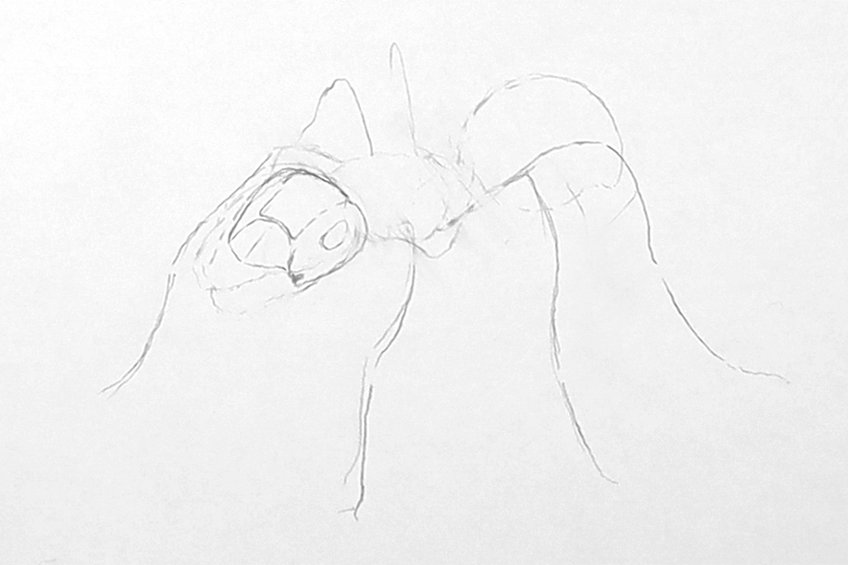
The main features of the head will be the eyes, antennae, jaws, and how they connect. The eyes will be slightly smaller on either side of the head, whereas the jaws extend out from the head quite a bit.

We want to slowly work through the entire ant by going through its structure from head to abdomen. We want to make sure that as we come to the thorax, we add some segmentation to the structure, which should arch around the thorax shape.
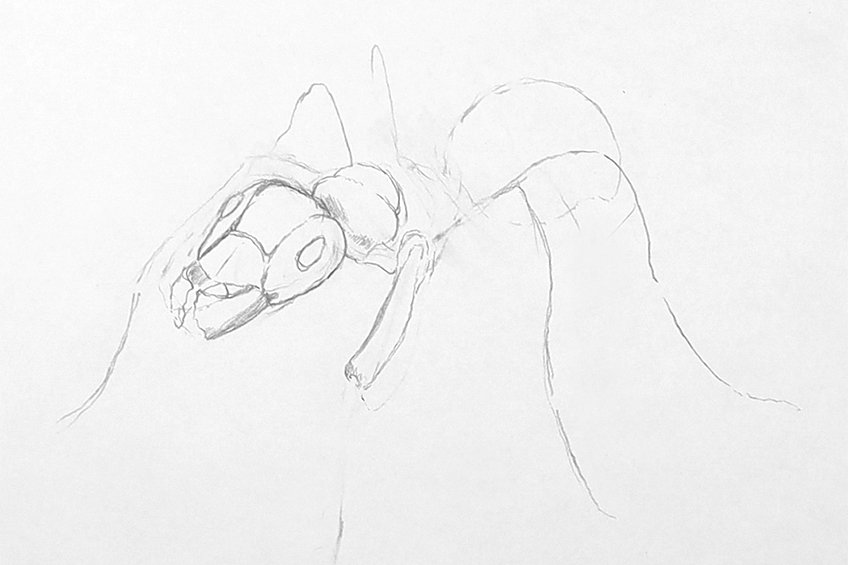
We will want to make sure that we are working on all features within the foreground simultaneously. By doing so, we keep attention to the proportions of the insect’s different elements. Looking at images on the internet can also be a great help in guiding your drawing process.

The first segment for each leg is quite long and it is the thickest of all six segments in the legs. These segments also connect to the thorax of the ant. Make sure you consider how the front legs also move in a forward direction.
You want to make sure you take your time working through each leg of the ant, ensuring that the segment attached to the thorax extends in an upward direction. Remember, the ant is mostly visible from one side which means that the legs on the other side will not be visible in their entirety.
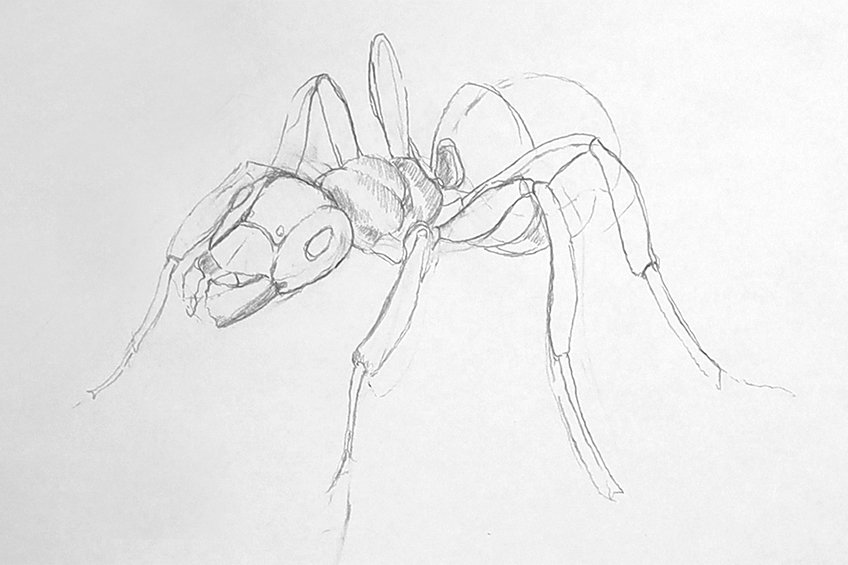
The legs also slightly curve as they move down to the lower segments – this is so the ant has more stability. As we go through the ant drawing, we also want to make sure that we add segments that curve around the abdomen.
Another component to keep in mind at this point is the antennae. We want to draw the antennae like an L-shape that sprouts from beneath the eyes and extends beyond the head of the ant.
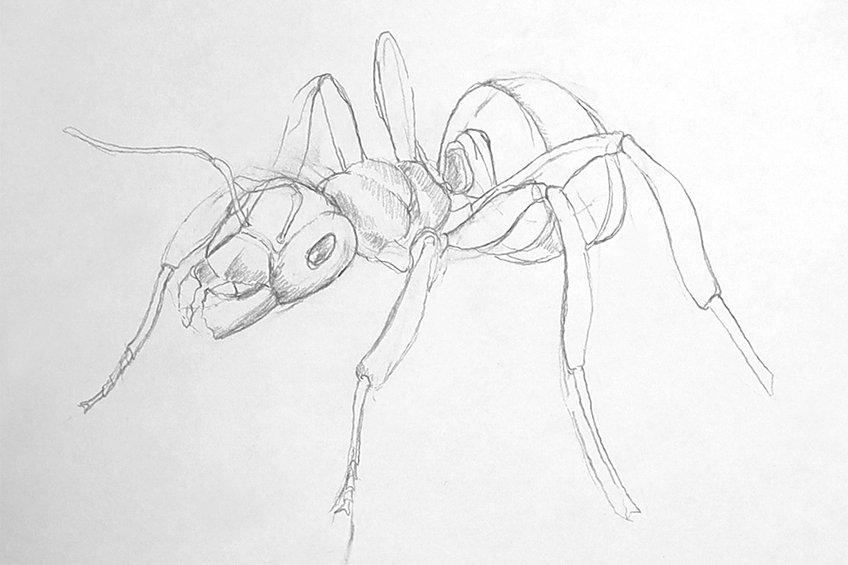
The abdomen should have three segments and should be the largest in its middle area. We want to consider how the legs also extend higher than the abdomen, which means the abdomen will be slightly visible underneath the legs as well.
The legs extend higher than the ant’s entire body structure, which means we want to make sure that we capture this proportion correctly. The ant’s legs should go slightly higher than the body structure and then curve down towards the ground, extending below the body.
Step 3: Adding Light Pencil Shading to Our Ant Sketch
Once we have developed the basic ant sketch, making sure we have all the features drawn correctly, we can now add in some light pencil shading. We want to begin from the head and move our way through the ant structure.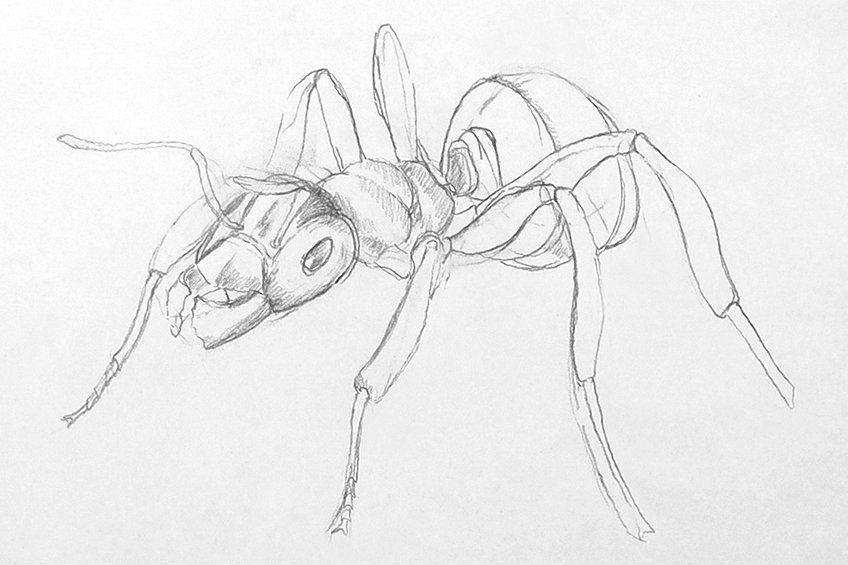
As we go through the entire structure of the ant, we want to work with our HB pencils and slowly work in some light shading. We want to consider how our shading can enhance each feature within the drawing.
A good suggestion is to consider how each aspect of the ant’s structure is two-dimensional without shadows. Shading helps us to bring three-dimensionality to the creature.
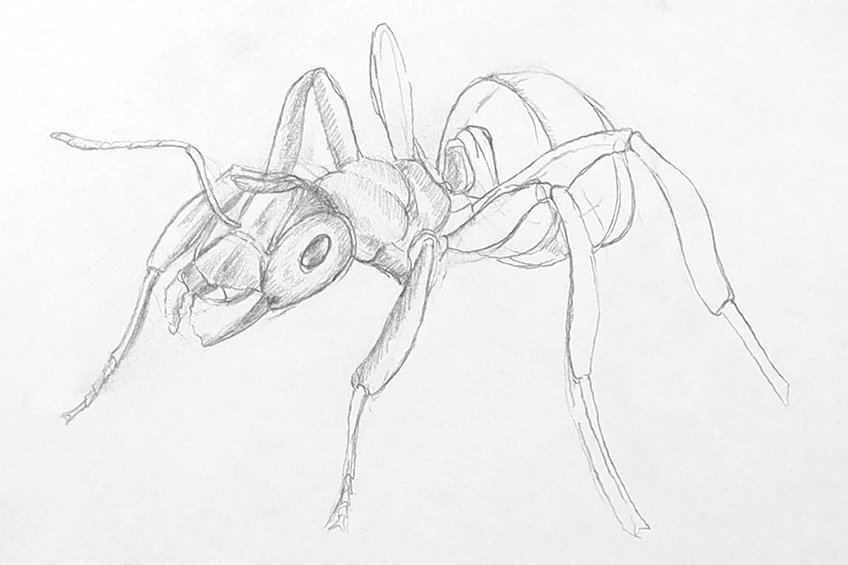
Try to think about the shape of each component that makes up the ant. For instance, you can add shading along one side of the legs so that there is a shaded and highlighted section. You could also add shading along the segment lines to bring more depth to the ant’s structure.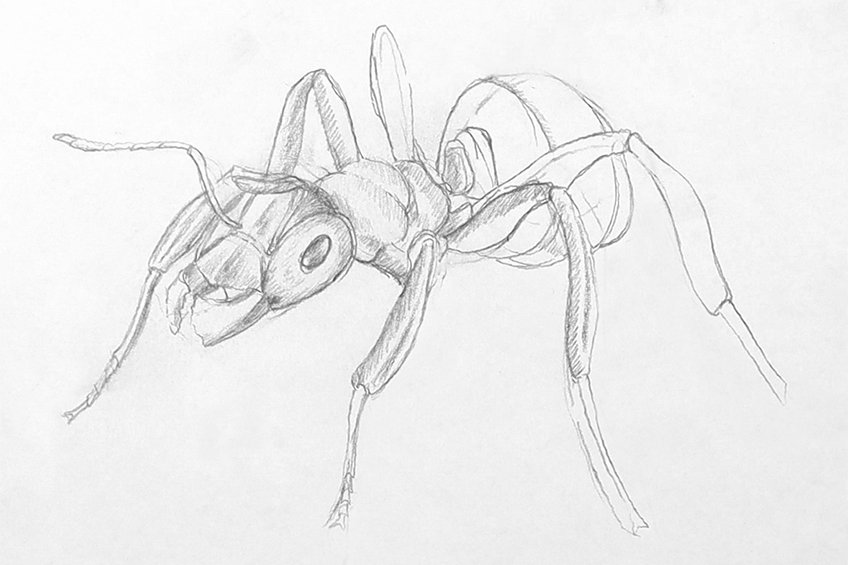
We want to work slowly with the shading process, whereby we take our time with each component of the ant. We want to make sure that we add some light shading to every aspect of the ant. We can still work with our erasers at this point to tweak any little bits that might need readjustment.
Make sure you pay close attention to the form of the ant. You want to consider the three-dimensionality of the insect and utilize the shading process to enhance this quality in the ant.
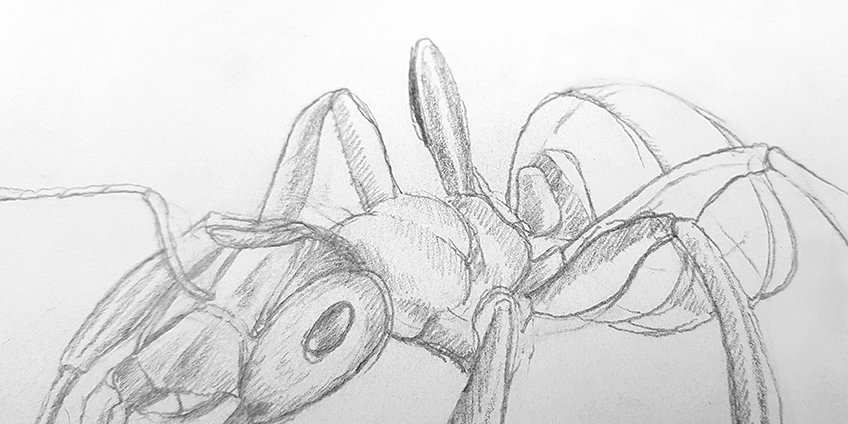
We also want to make sure that we create moments of highlights within the ant drawing. This is why we want to be strategic about our shading placement and how it refines the form of the ant’s exoskeleton structure.
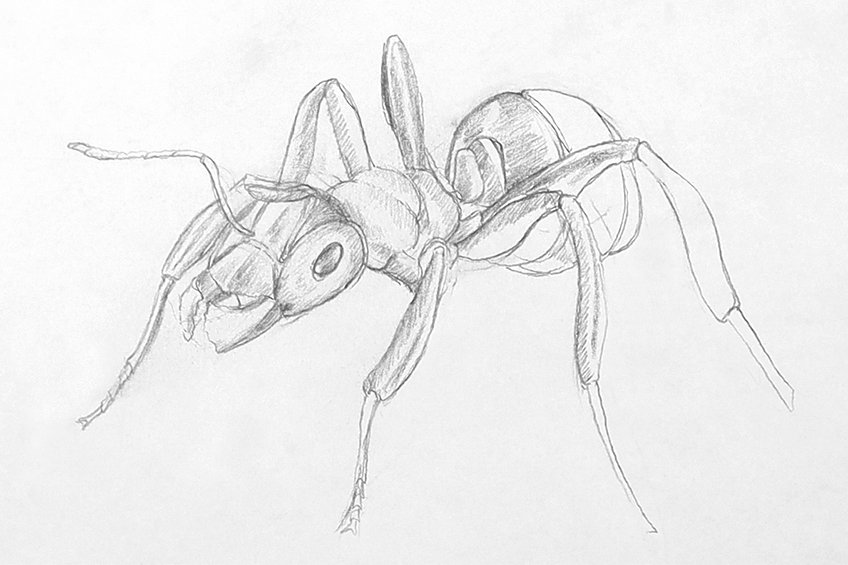
As we get to the abdomen of the ant, we can also add a little more shading. We want to keep the abdomen fairly dark, which means that we want to add more shading to the abdomen.
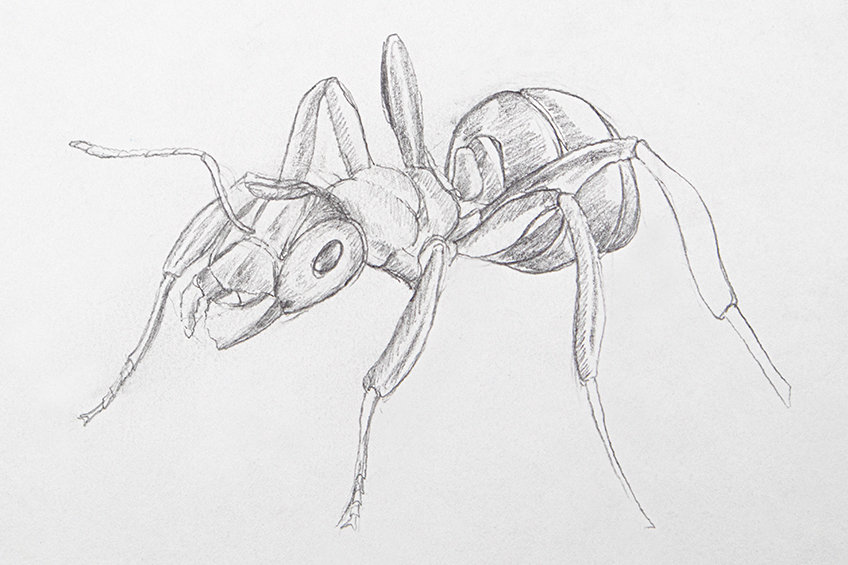
Again, take your time adding pencil shading to all aspects of the ant before moving on to the pen. If you need to, you can use a reference image to guide you in your shading process. This may give you some insight into how the highlights and shadows are present on the surface of the ant’s skeletal surface.
Step 4: Shading the Ant With Ballpoint Pen
At this point, we should have an ant drawing done completely in pencil. However, we now want to go over our pencil shading with a pen to give it more contrast and a vivid aesthetic.
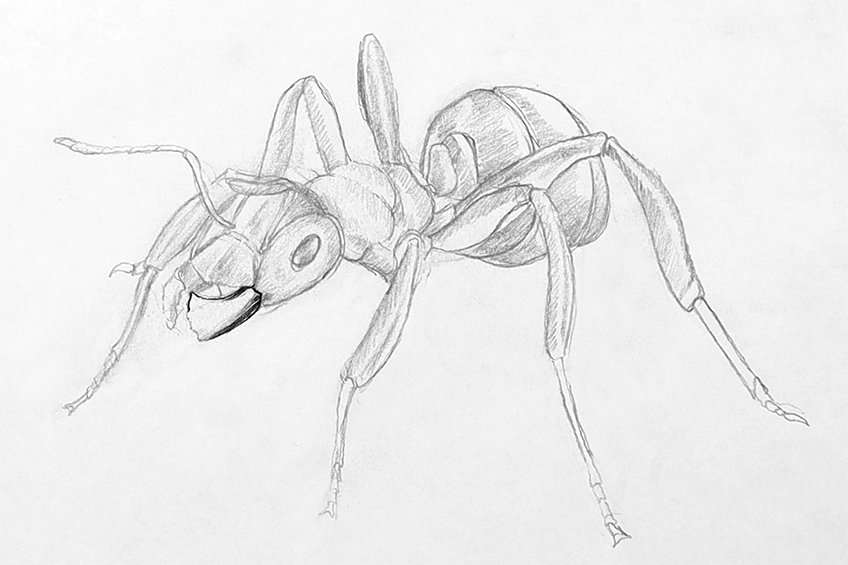
Spend some time slowly going over the shading within your ant drawing. We want to be particularly careful when it comes to shading the head with a pen. Make sure you are careful with the antennae, ensuring that you darken them so that they stand out amongst the other features in the head.
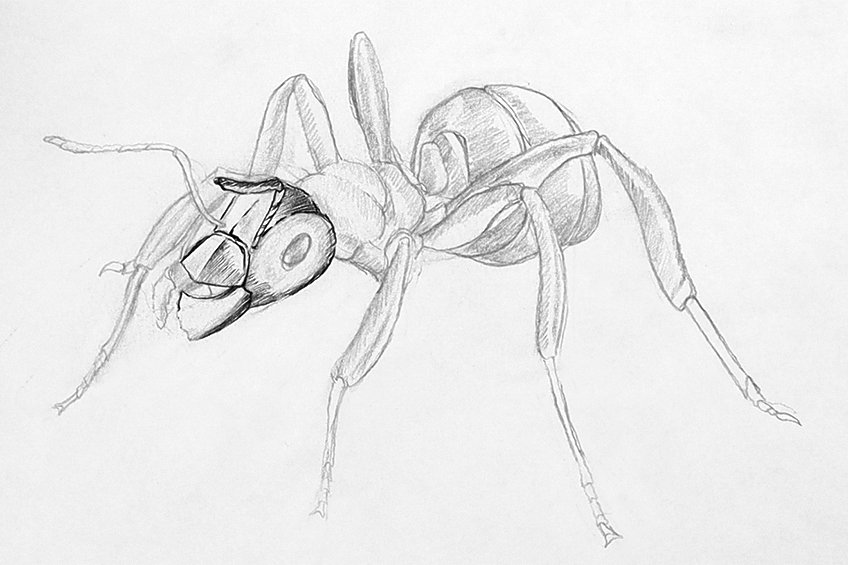
Make sure you spend some time on the head, slowly going through the various delicate details. The eyes can be colored in black with a little bit of white to suggest a reflection on the surface of the eye.
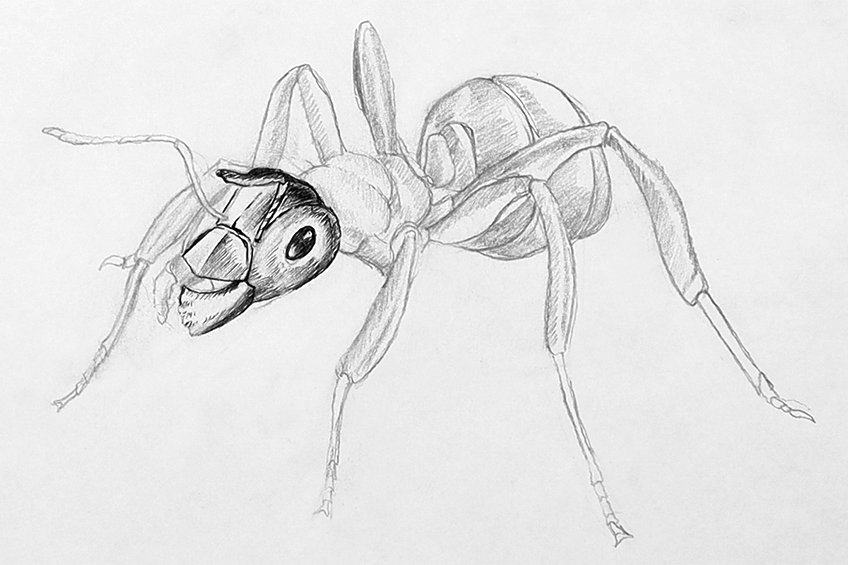
As we work our way through the entire drawing of the ant, we want to allow the pencil marks to guide our shading process. This means that you want to go over your pencil marks while allowing yourself to add in any necessary darker marks with your pen.
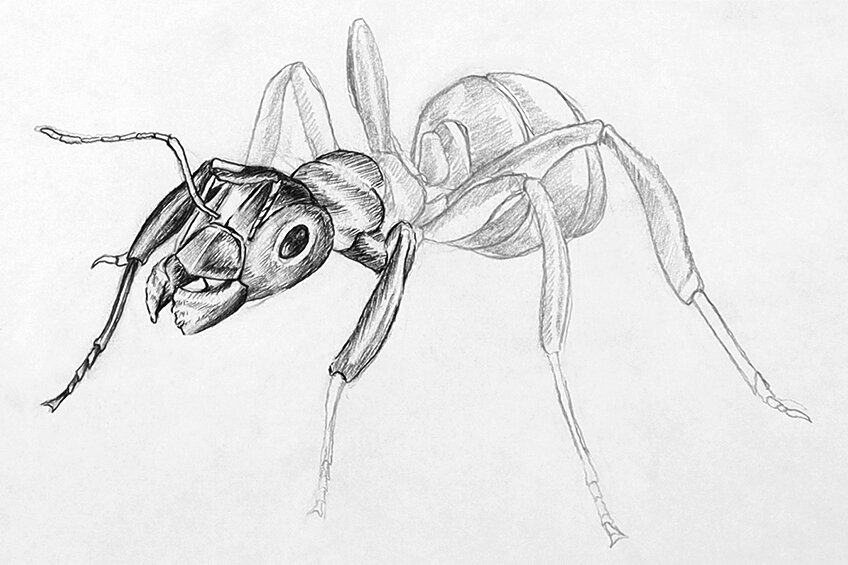
Try to keep your hand light as shade with your ballpoint pen; you want to be delicate with the shading process. Make sure you consider how the pencil shading is formed on the ant’s different features and allow that to guide your pen shading process.
As you go through the ant and continue to shade, make sure you consider the segmentation within the thorax of the ant. We also want to be mindful of the different joint structures and how we can use pen shading to accentuate these details.
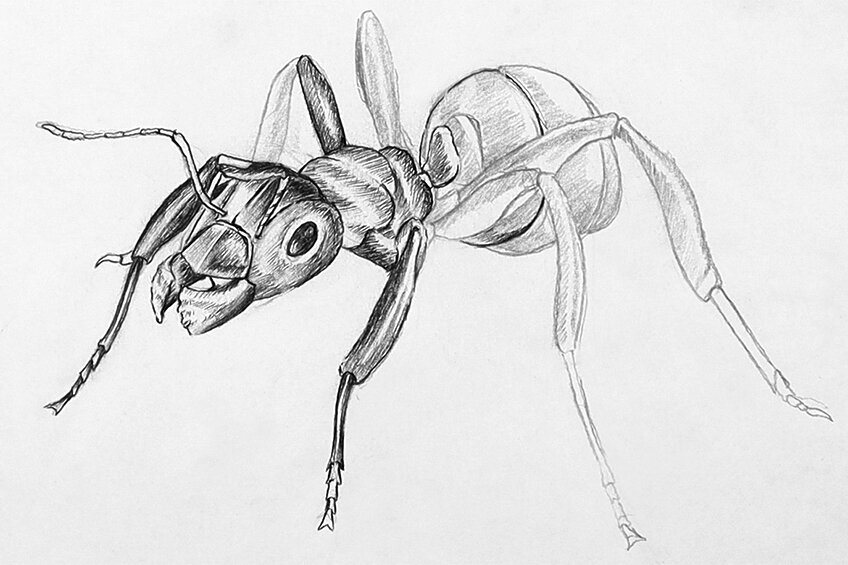
When shading with a pen, we also want to play around with gradients. This means that some aspects of the ant can have a dark to light gradient shaded into the feature. This is particularly helpful with the various segmentations within the ant.
As we come to the abdomen, we want to make the shading slightly darker. We want the shading in the abdomen to be quite dark, which will create a nice vivid contrast between the abdomen and the rest of the ant.
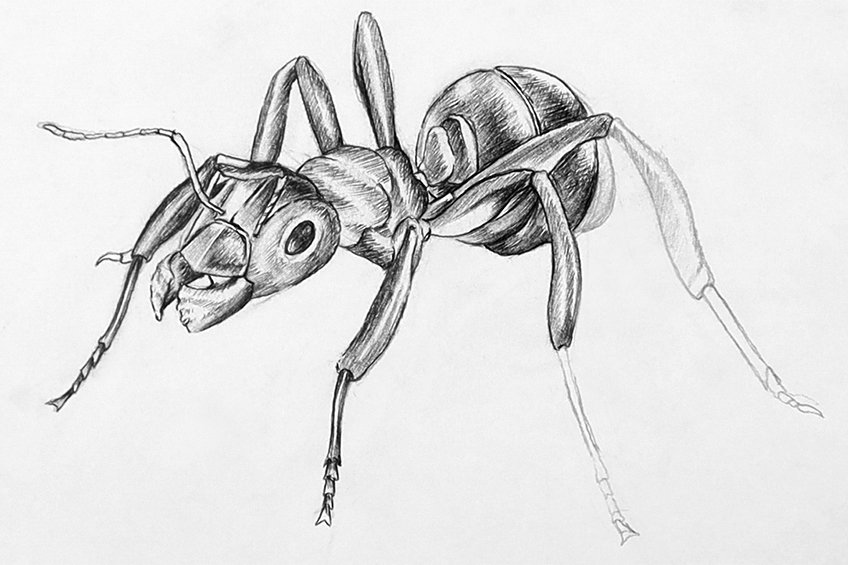
Make sure you keep the hind legs of the ant slightly lighter than the abdomen- this way we create a distinction between the features. We want to make sure we think about how some features sit in the foreground and background.
Take your time with the pen shading process, especially when it comes to creating distinctions between foreground features and background features. Also, be mindful of how the different segmentations can be represented within the abdomen.
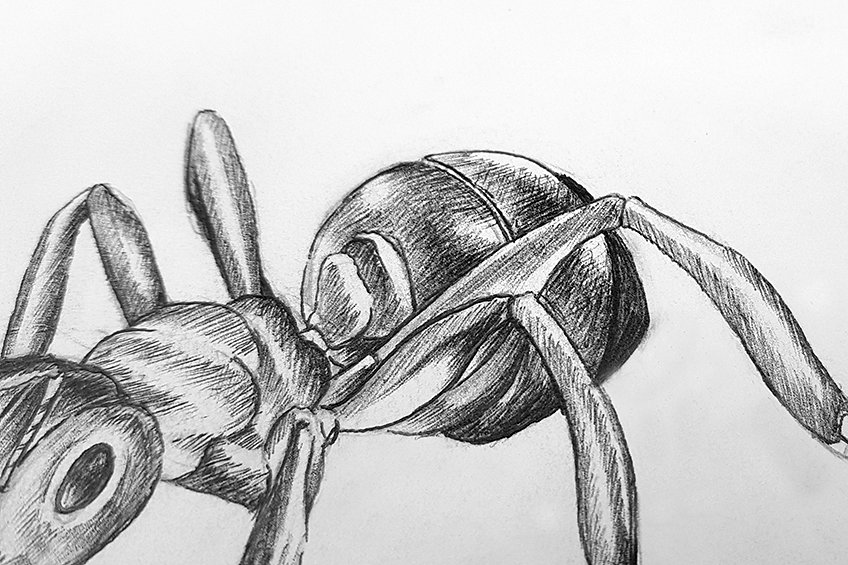
A great suggestion for the legs is to shade along the edges of the leg and leave white space running down the middle. By doing this, we create a beautiful highlight within the legs, making them more three-dimensional.
Step 5: Giving the Ant a Shadow
Once you have shaded your ant to your satisfaction, we want to contextualize the ant a little more by drawing a shadow underneath it. We can start with our HB pencils, whereby we create a flat horizontal shape directly underneath the ant.
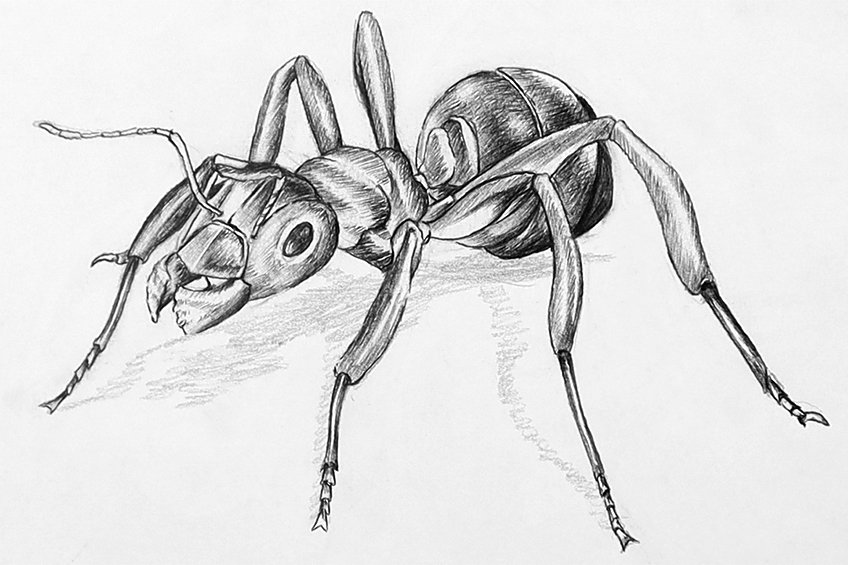
The shadow will have a distortion because of how it sits on a horizontal plane. This means we want to make sure it looks thinly spread. We also want to make sure that we connect the shadow to any limb that makes contact with the ground beneath the ant.

From there, we can simply go over the shadow with our ballpoint pens to give it a little more contrast. And there you have it- how to draw an ant in a few simple steps!
Tips to Remember
- Make sure that you work out the ant sketch first. You want to make sure that the pencil sketch is developed before moving on to using a pen.
- Take your time with the sketch. Make sure not to rush through the pencil sketch as well.
- Take a break. Drawing can get a little laborious, and sometimes we need to refresh our minds so that we can engage properly.
- Use a reference. This tutorial does not use a reference image, however, looking at images of ants can give you more insight into the aesthetics of their structure.
- Enjoy the unique experience. Learning how to draw a realistic ant illustration is a rare skill, so try to enjoy the learning experience.
- Look for references on the internet. Sometimes, just having an image of the subject matter on hand can be of great assistance to the drawing process.
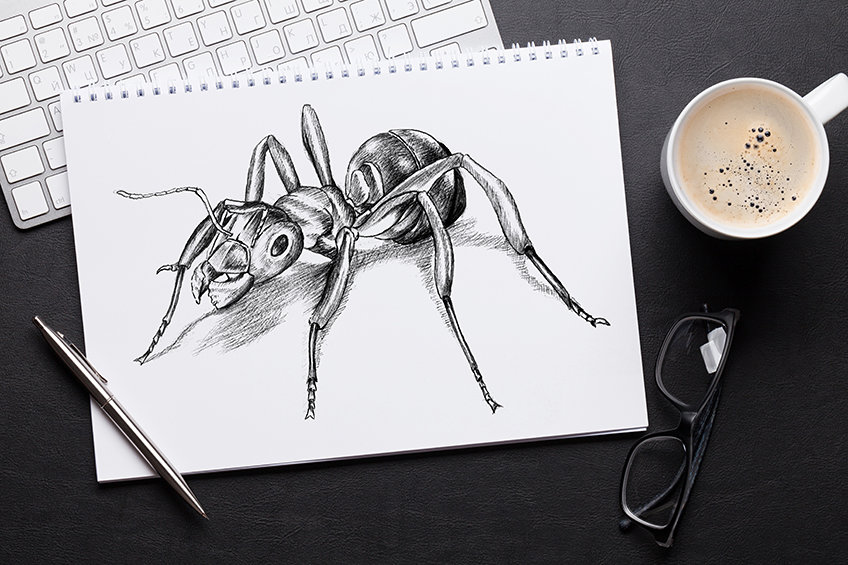
Learning how to draw an ant is a great exercise because it provides you with various technical challenges. There are a lot of fine little lines and details that go into making an ant drawing look good. Working out how to use black ink to appear as the dominant color within an ant drawing is also a tricky process, but very helpful in learning how to create highlights using a ballpoint pen. This is a good resource to come back to for various reasons and many learned skills can be applied to different artworks.
Frequently Asked Questions
How Do You Draw the Legs of an Ant?
Ants have six legs with a set of three on either side of the creature. The two front legs connect to the thorax of the insect, with the front two moving in a forward direction and the middle two moving outwardly in a lateral direction. The back legs of the ant or the hind legs move in a backward direction. Each leg has about six segments, with two larger ones called the femur and the tibia. The last four segments are small and look like little shards or spikes, which are used for traction and grip onto surfaces. The directional flow of the legs is most important in order to capture a realistic quality in an ant drawing. This means the front legs move forward, the middle legs move laterally and the hind legs move backward. All legs do have mobility in the joints, which means they can move in all directions, but this is the general form of the legs in a static position.
How Do You Draw the Antennae of an Ant?
The antennae of the ant are like two long double-jointed wires that poke out from the head of the ant. These two wires generally sit just above the jaws or mandibles and below the eyes of the ant. The antennae have little segments in them called the funiculus which have the appearance of stacked cups. These wire-like structures extend quite far out from the face, as they are used for sensing vibration within the environment and orienting the ant through space. These should usually be drawn first as they will sit in the foreground of the ant and will have an upside-down L-like shape that extends beyond the front of the ant’s face.
Matthew Matthysen is an educated multidisciplinary artist and illustrator. He successfully completed his art degree at the University of Witwatersrand in South Africa, majoring in art history and contemporary drawing. The focus of his thesis was to explore the philosophical implications of the macro and micro-universe on the human experience. Matthew uses diverse media, such as written and hands-on components, to explore various approaches that are on the border between philosophy and science.
Matthew organized various exhibitions before and during his years as a student and is still passionate about doing so today. He currently works as a freelance artist and writer in various fields. He also has a permanent position at a renowned online gallery (ArtGazette) where he produces various works on commission. As a freelance artist, he creates several series and successfully sells them to galleries and collectors. He loves to use his work and skills in various fields of interest.
Matthew has been creating drawing and painting tutorials since the relaunch in 2020. Through his involvement with artincontext.org, he has been able to deepen his knowledge of various painting mediums. For example, watercolor techniques, calligraphy and lately digital drawing, which is becoming more and more popular.
Learn more about Matthew Matthysen and the Art in Context Team.
Cite this Article
Matthew, Matthysen, “How to Draw an Ant – Ant Drawing Step-by-Step Tutorial.” Art in Context. March 15, 2023. URL: https://artincontext.org/how-to-draw-an-ant/
Matthysen, M. (2023, 15 March). How to Draw an Ant – Ant Drawing Step-by-Step Tutorial. Art in Context. https://artincontext.org/how-to-draw-an-ant/
Matthysen, Matthew. “How to Draw an Ant – Ant Drawing Step-by-Step Tutorial.” Art in Context, March 15, 2023. https://artincontext.org/how-to-draw-an-ant/.


