How to Draw a Demon Slayer – An Easy Step-by-Step Guide
In a world overrun by bloodthirsty demons, one warrior stands above the rest as the ultimate slayer. Armed with a keen sword and unyielding determination, this hero has spent countless battles vanquishing the darkest creatures of the underworld. His name strikes fear in the hearts of demons and brings hope to humanity. With every swing of his blade, he becomes more legendary, more feared, and more unstoppable. He is the demon slayer, and his legend will never die. So, grab your pens, pencils, and brushes, and begin our exciting tutorial on how to draw a demon slayer step-by-step!
Table of Contents
- 1 Create a Fearless Demon Slayer Sketch
- 1.1 Step 1: Draw the Head
- 1.2 Step 2: Draw the Main Body
- 1.3 Step 3: Add the Lower Body to Your Demon Slayer Sketch
- 1.4 Step 4: Draw the Legs
- 1.5 Step 5: Add Shoes to Your Demon Slayer Drawing
- 1.6 Step 6: Draw the Arms
- 1.7 Step 7: Add the Facial Guidelines to Your Demon Slayer Drawing
- 1.8 Step 8: Draw the Facial Features
- 1.9 Step 9: Shade the Face of Your Demon Slayer Sketch
- 1.10 Step 10: Draw the Hair
- 1.11 Step 11: Add the Collar to Your Tanjiro Kamado Drawing
- 1.12 Step 12: Outline the Sleeves
- 1.13 Step 13: Outline the Arms
- 1.14 Step 14: Begin to Outline the Skirt
- 1.15 Step 15: Outline the Legs and Shoes
- 1.16 Step 16: Draw the Armor Plates
- 1.17 Step 17: Draw the Headhand on Your Demon Slayer Sketch
- 1.18 Step 18: Detail the Facial Features
- 1.19 Step 19: Apply the First Color Coat
- 1.20 Step 20: Add Color to the Outfit
- 1.21 Step 21: Color the Armor of Your Demon Slayer Sketch
- 1.22 Step 22: Apply the Second Coat on the Armor
- 1.23 Step 23: Color the Hair
- 1.24 Step 24: Add Color to the Shoes
- 1.25 Step 25: Color the Eyes of Your Demon Slayer Drawing
- 1.26 Step 26: Shade the Skin
- 1.27 Step 27: Add Shading to the Outfit of Your Tanjiro Kamado Drawing
- 1.28 Step 28: Highlight the Armor
- 1.29 Step 29: Texture the Hair on Your Demon Slayer Drawing
- 1.30 Step 30: Shade the Shoes
- 1.31 Step 31: Detail the Eyes
- 1.32 Step 32: Add a Ground Shadow
- 1.33 Step 33: Finalize Your Demon Slayer Drawing
- 2 Frequently Asked Questions
Create a Fearless Demon Slayer Sketch
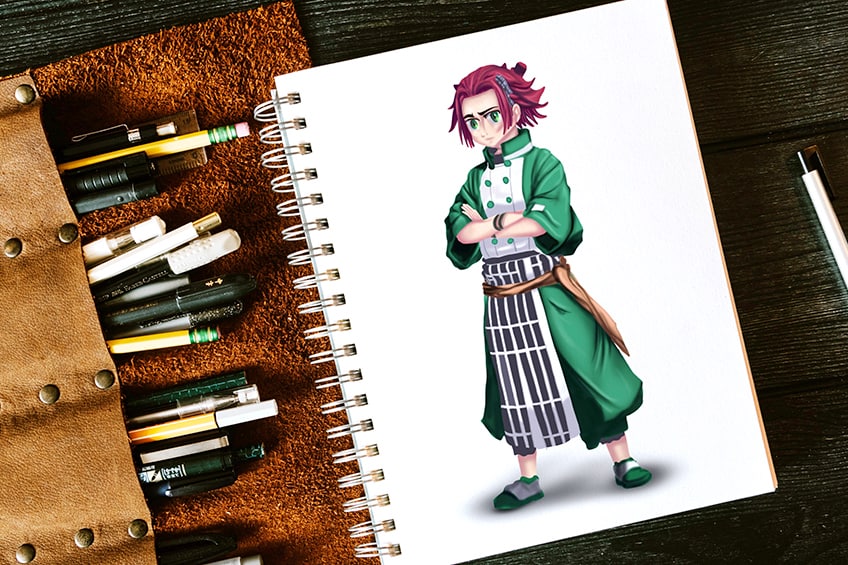
If you’re about to draw a demon slayer, there are a few things to keep in mind. First, pay attention to the character’s unique design, including his outfit, hairstyle, and facial features. Tanjiro Kamado, for example, wears a distinctive green and black outfit with a white pattern on his coat. His hair is styled in a traditional Japanese fashion, and his scarred face adds to his tough, battle-hardened appearance. Additionally, consider the character’s personality and demeanor. Tanjiro is a brave and determined warrior who fights to protect his loved ones and avenge his family. Try to capture his spirit and energy in your drawing by incorporating dynamic poses or action scenes. Finally, don’t be afraid to add your personal touch to the character. Whether you’re creating a traditional sketch or a digital illustration, let your creativity shine through, and have fun with the process!
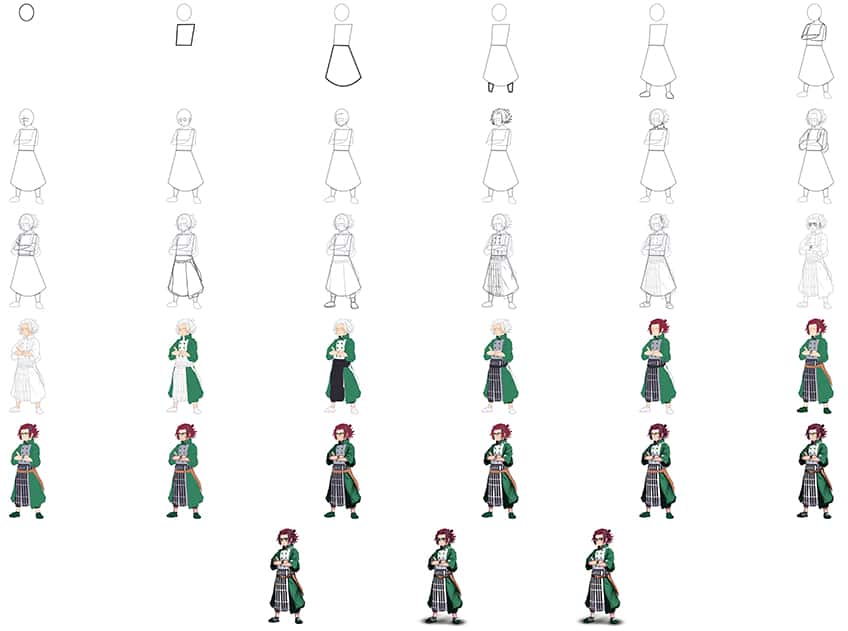
Check out the below collage which demonstrates each step you will take to draw a realistic demon slayer!
Step 1: Draw the Head
Begin your easy Tanjiro Kamado drawing, draw the oval shape to represent the head.

Step 2: Draw the Main Body
Below the head, draw the main body represented by a slightly slanted rectangle shape.

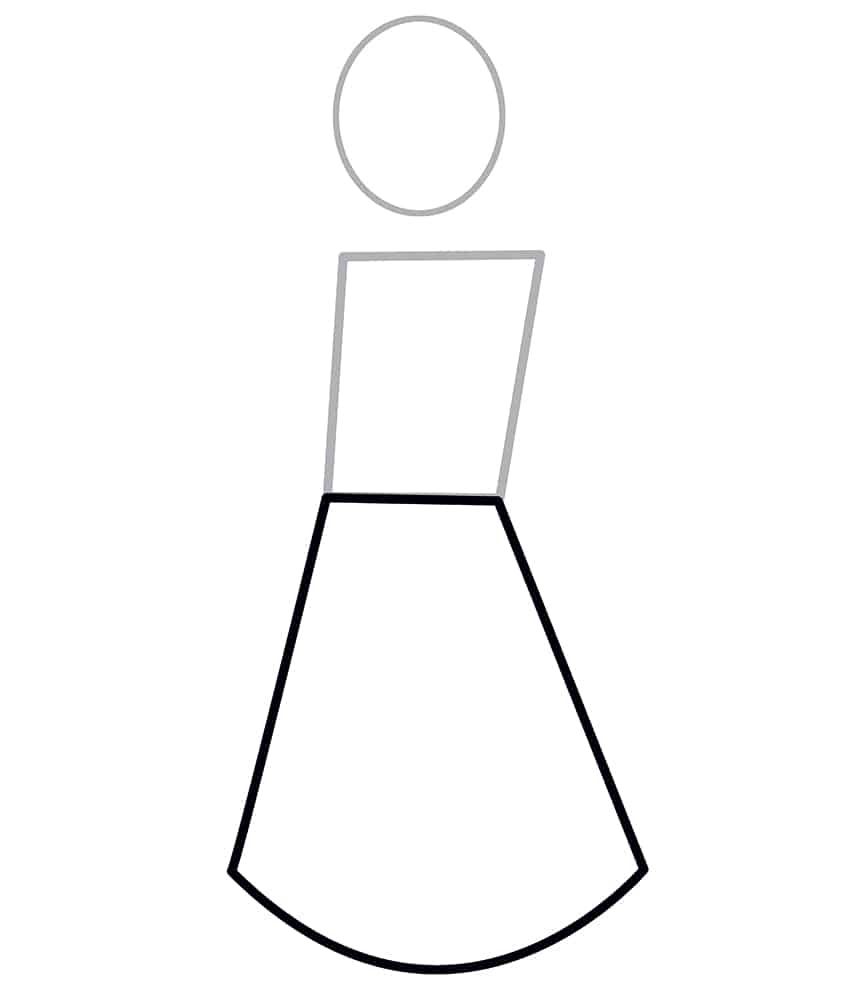
Step 3: Add the Lower Body to Your Demon Slayer Sketch
Attached to the previously drawn main body, draw the lower body. This should look somewhat like a dress shape.
Step 4: Draw the Legs
Beneath the previously drawn shape, draw the two short ends representing each visible leg.
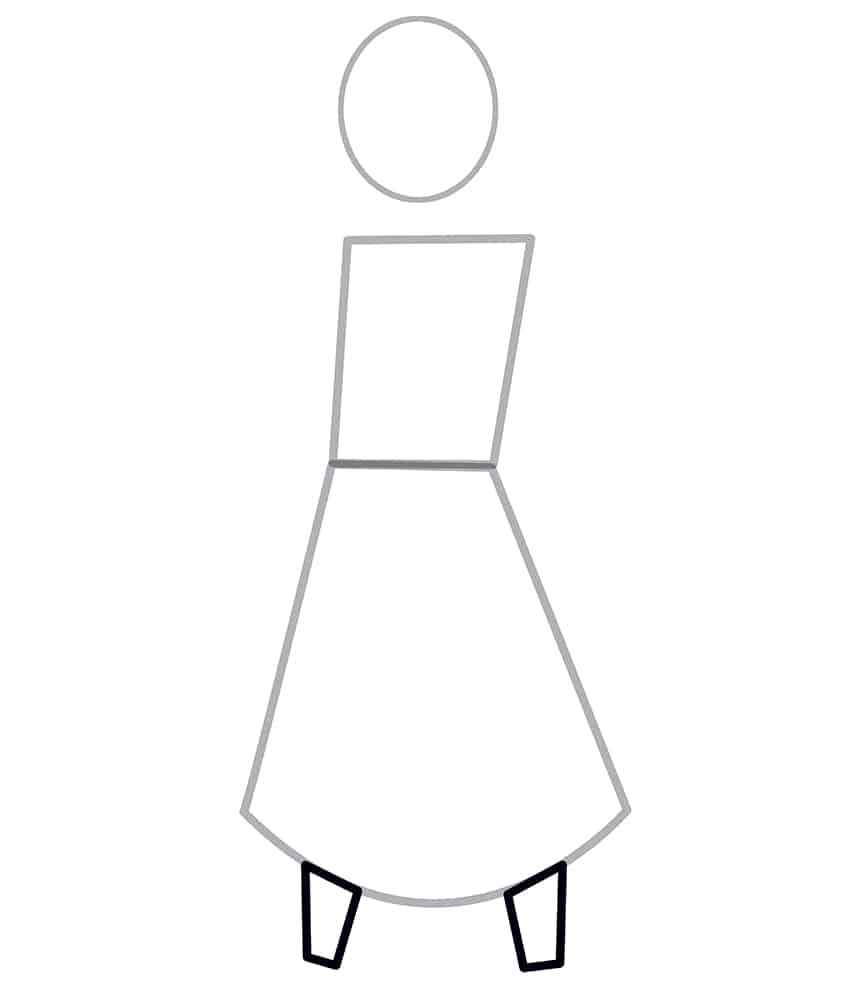
Step 5: Add Shoes to Your Demon Slayer Drawing
Attached to the bottom of each leg, draw the shoes. The left leg should have more of a side view of the shoe and the right leg should have more of a front view.
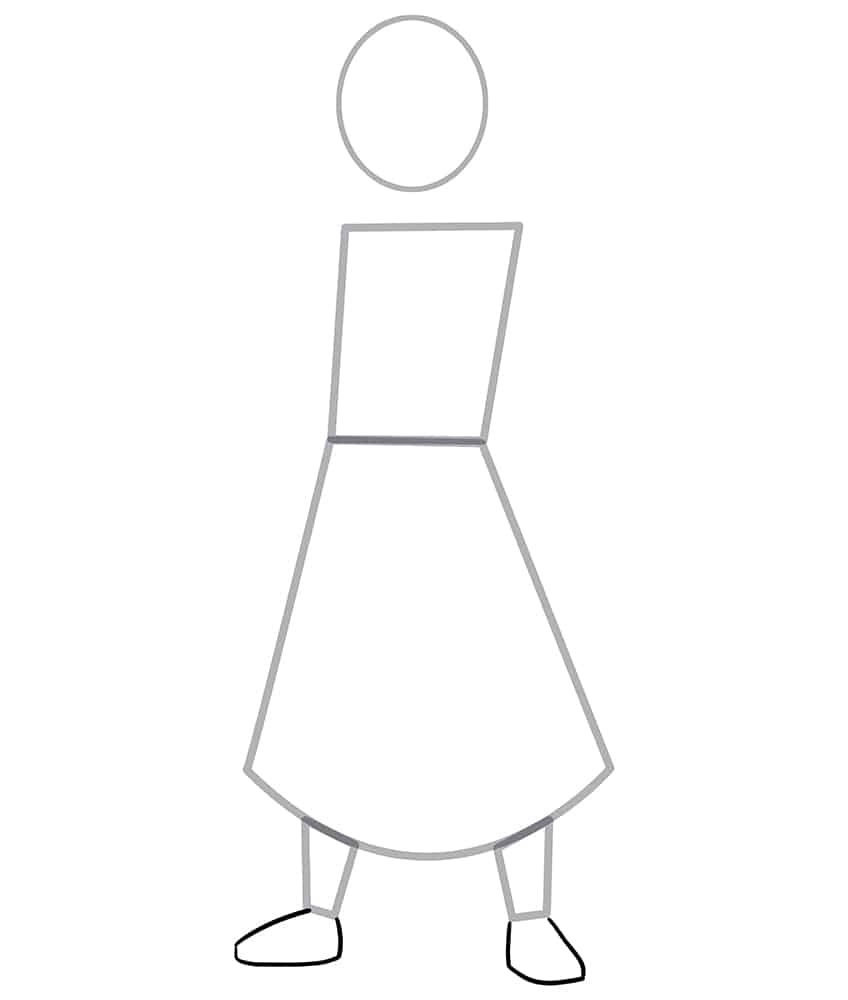
Step 6: Draw the Arms
Attach the head to the main body, by drawing the necklines leading onto the shoulders and crossed arms.
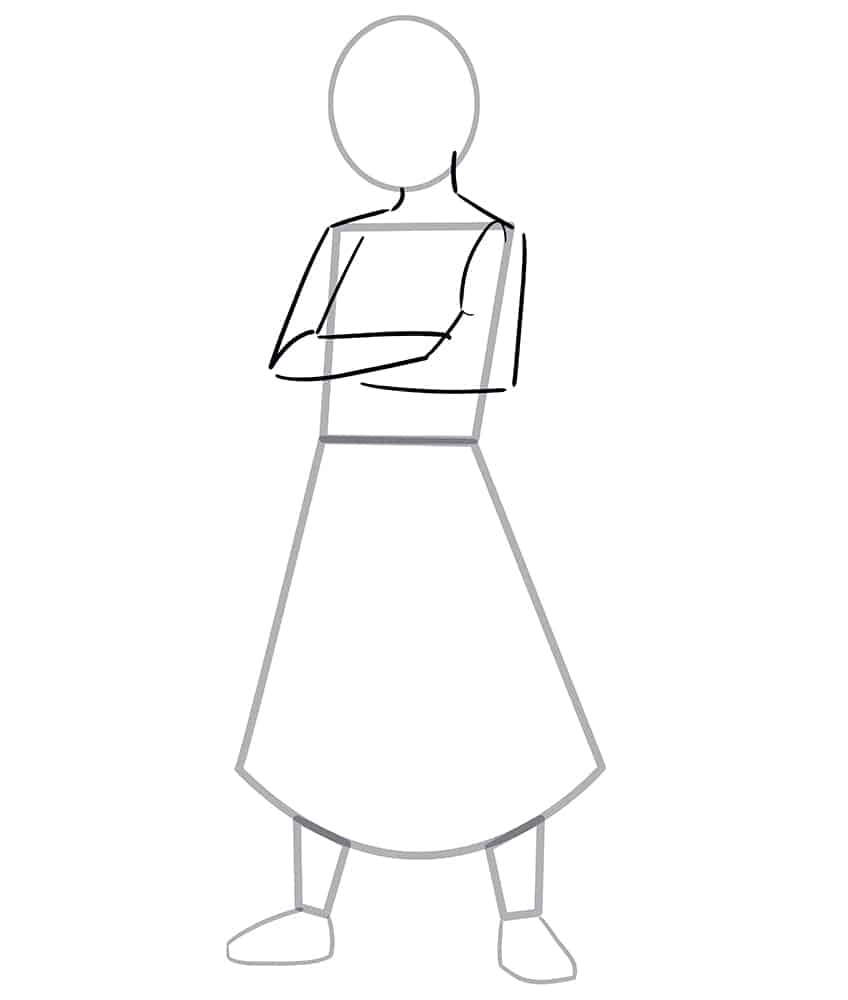
Step 7: Add the Facial Guidelines to Your Demon Slayer Drawing
Within the face, draw a center vertical line and three horizontal crossing guidelines to aid in the placement of the facial features.
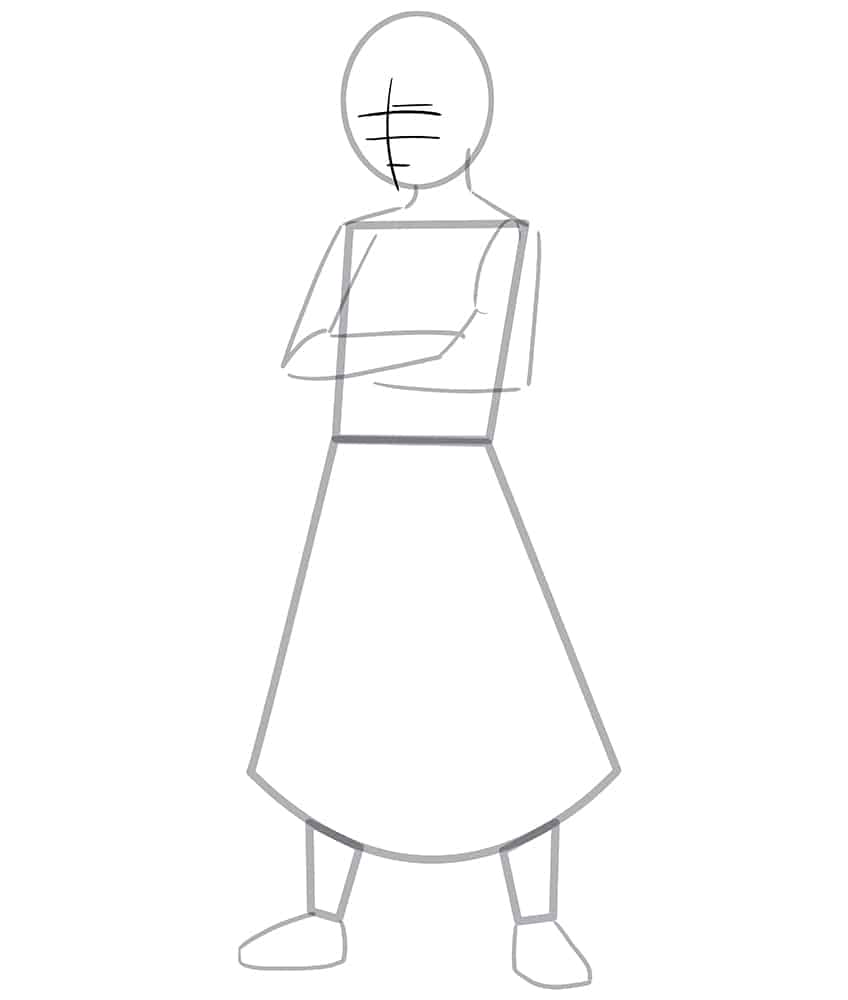
Step 8: Draw the Facial Features
Use the guidelines previously drawn to aid you in drawing two eyes and a nose at a realistic angle. Complete the step by drawing the ear represented by an oval shape.
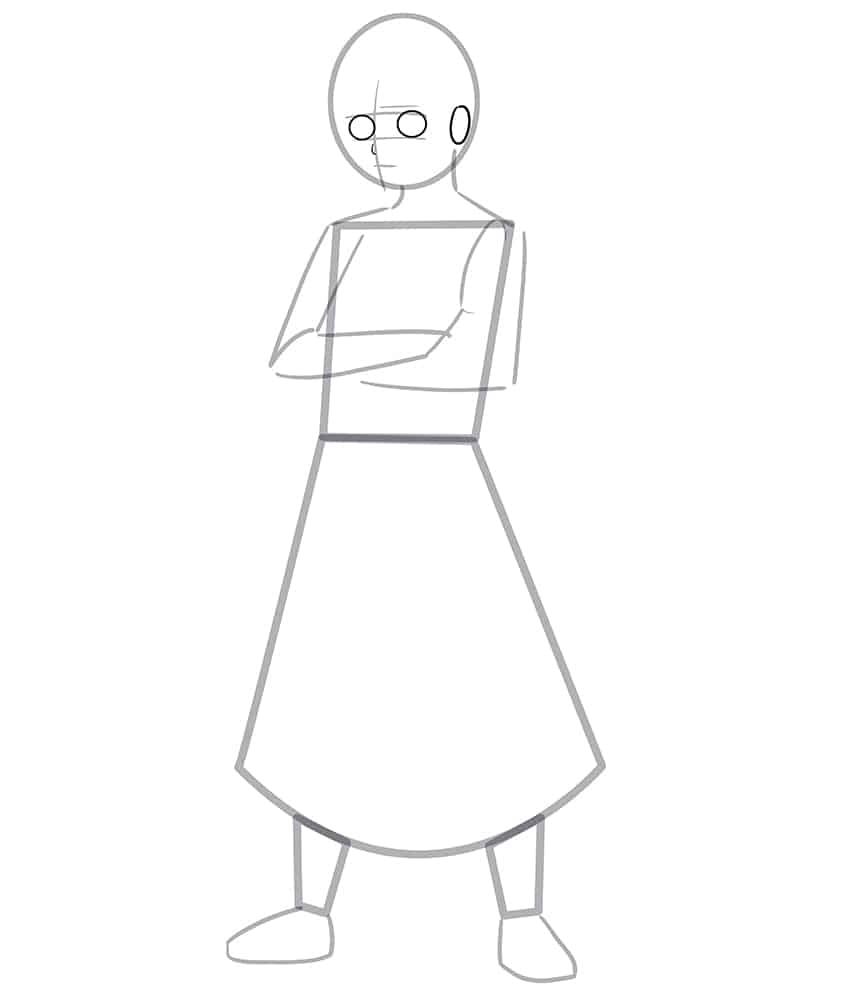
Step 9: Shade the Face of Your Demon Slayer Sketch
Using the construction and guidelines to aid you, draw the face outline within the head but around the facial guidelines.
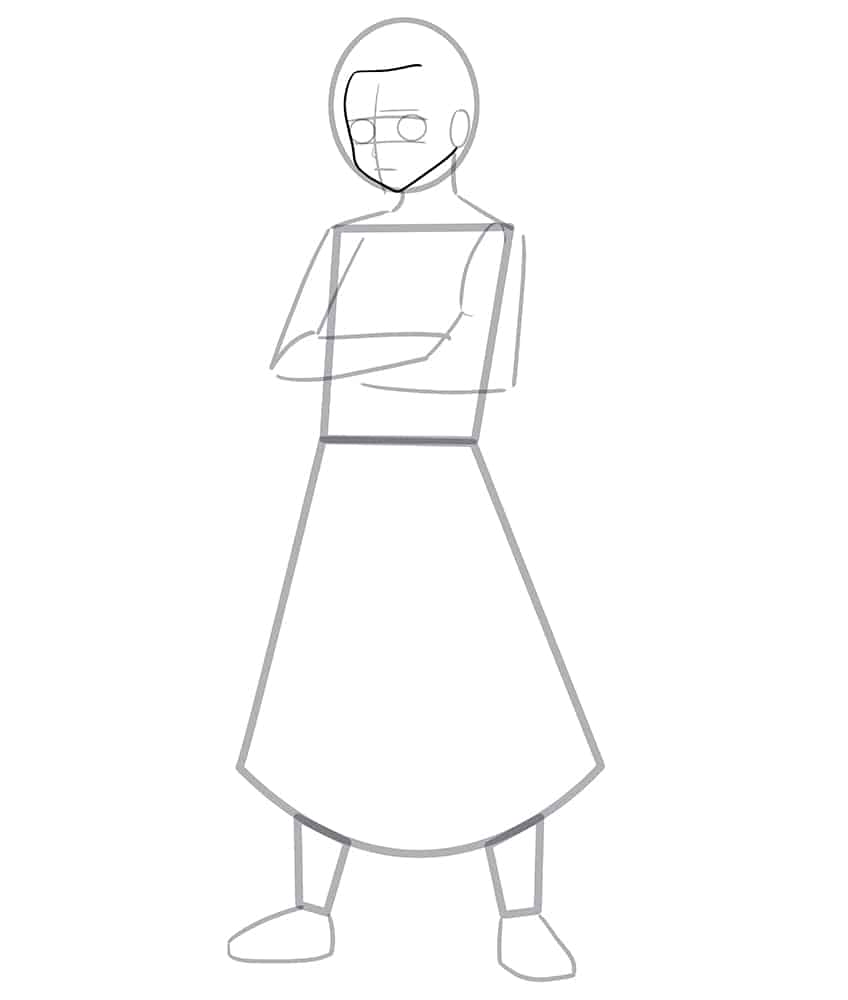
Step 10: Draw the Hair
In this step, draw the hair shape by drawing two hairline splits, leading down the face from the top of the head. Follow this, by drawing the rest of the hair spikes.
You are starting to create a realistic Tanjiro Kamado Drawing!
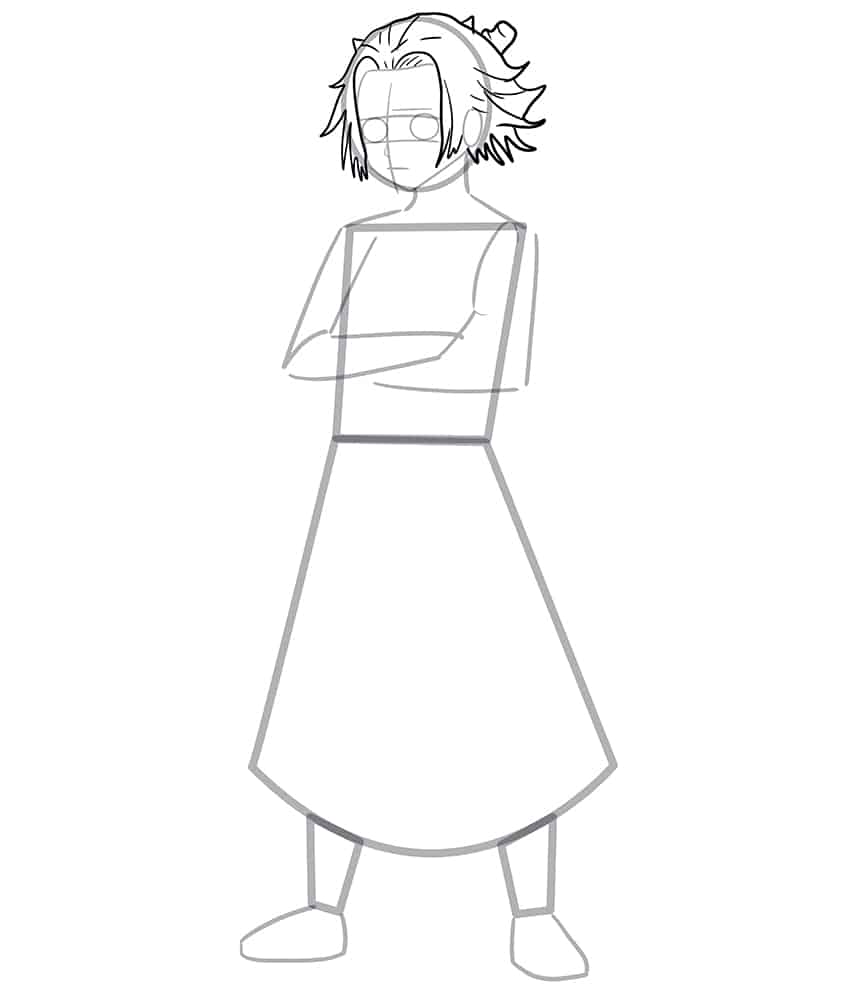
Step 11: Add the Collar to Your Tanjiro Kamado Drawing
Surrounding the neckline, draw the shirt collar, enhancing the shoulder line.
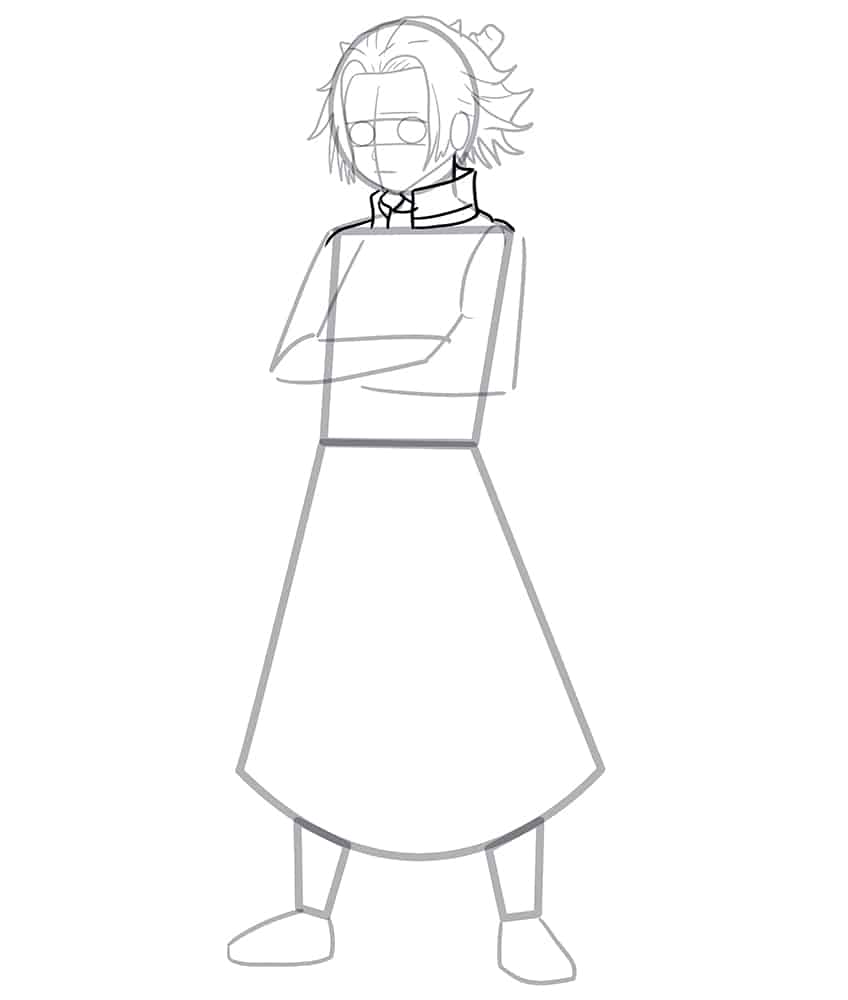
Step 12: Outline the Sleeves
Use the arms construction lines drawn in step six to aid you in outlining the baggy-looking sleeves on your demon slayer sketch.
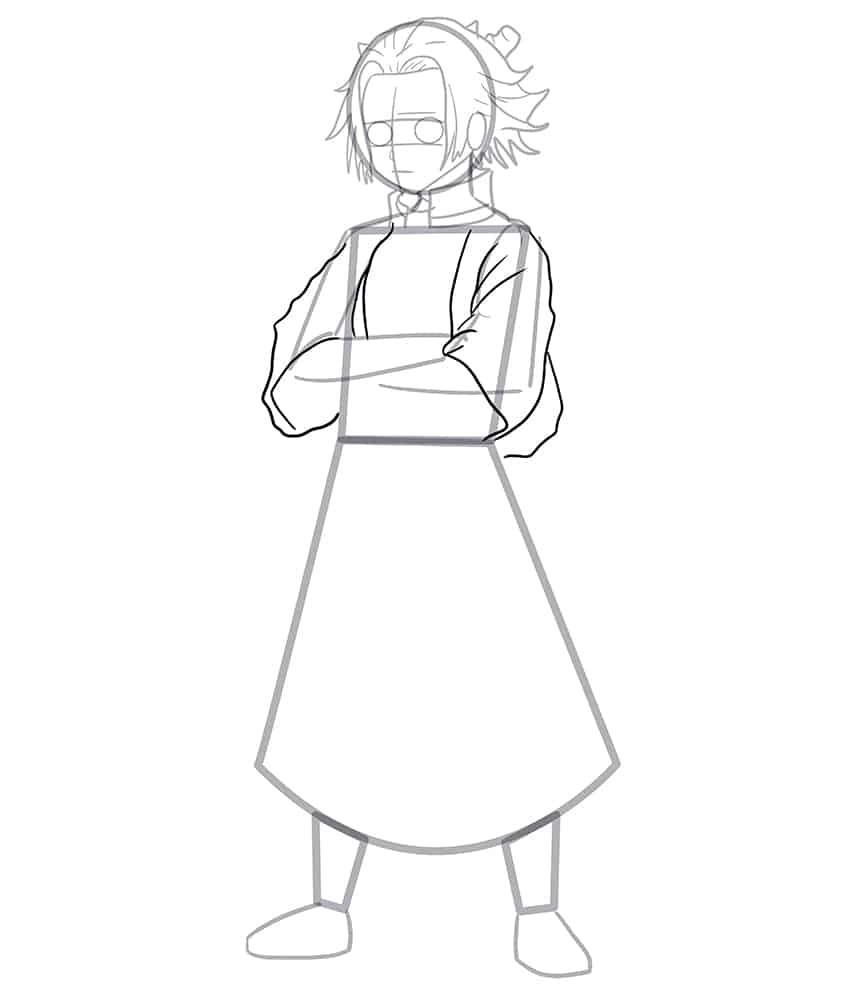
Step 13: Outline the Arms
In this step, outline the visible portions of the arms and hands, using the previously drawn construction lines.

Step 14: Begin to Outline the Skirt
Surrounding the lower body’s construction lines, outline the demon slayer skirt. Draw the tied belt to wrap around the body using fine hairlines curving around the lower body.
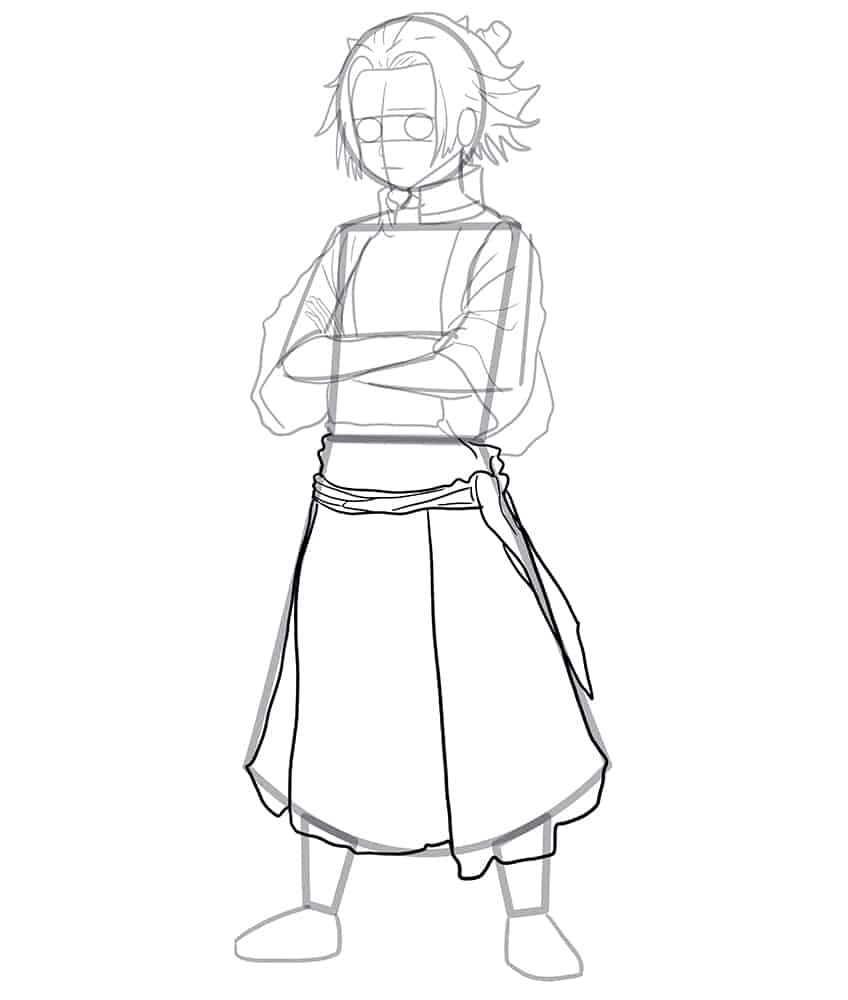
Step 15: Outline the Legs and Shoes
Outline the legs and shoes using the previously drawn construction lines to aid you.
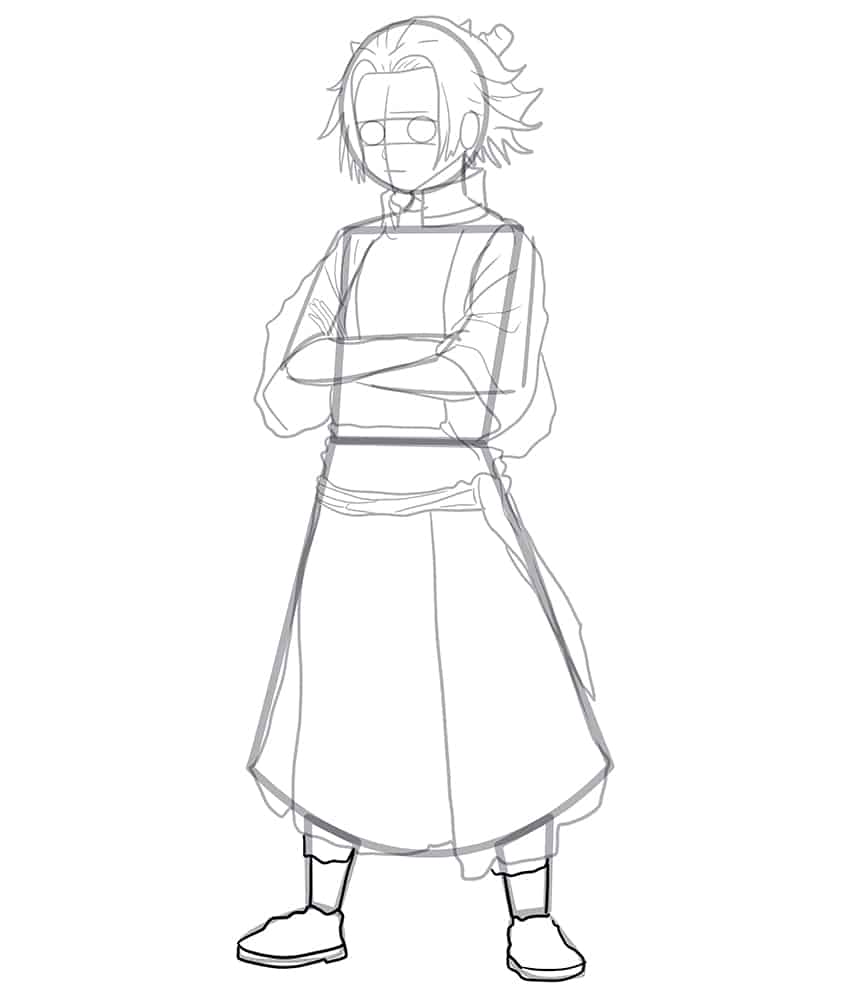
Step 16: Draw the Armor Plates
Down the center area of the demon slayer skirt, draw the rectangle armor plate layers. On the top half of the body, draw two lines separating the shirt and draw oval shapes to represent the buttons.
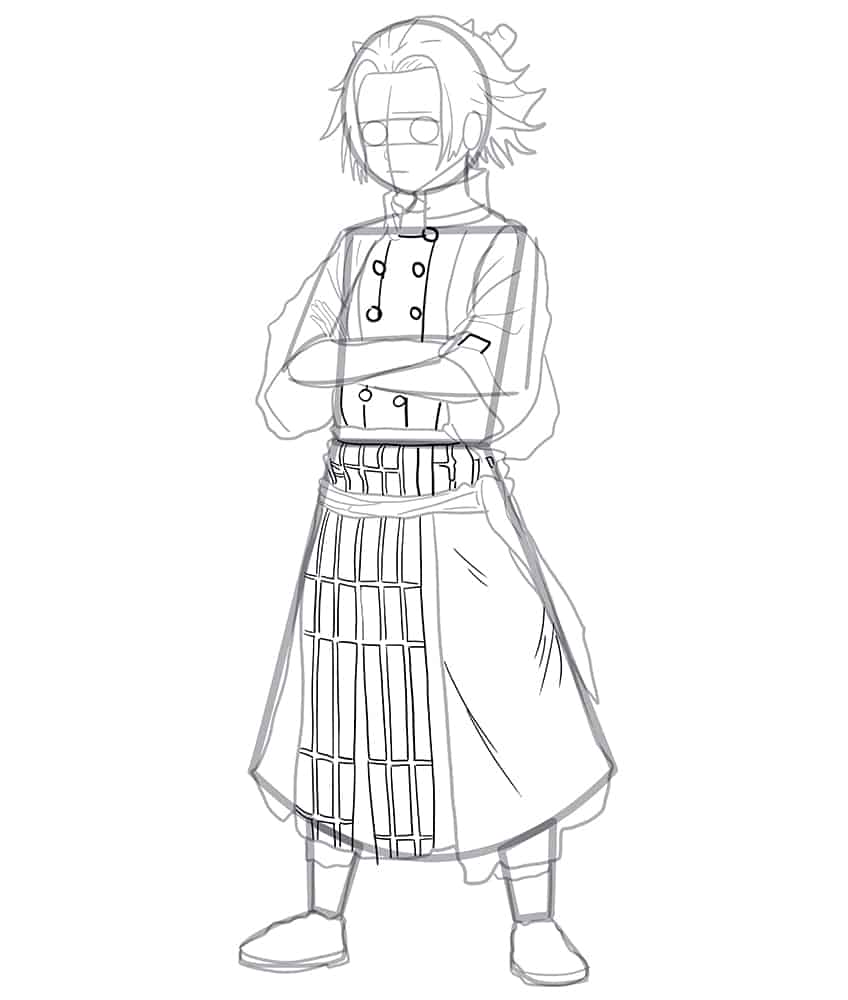
Step 17: Draw the Headhand on Your Demon Slayer Sketch
On the side of the head, draw the visible headband. Complete the step by adding seam lines to each shoe.
Once you have completed this step, you may now erase any construction lines and guidelines that are still visible.

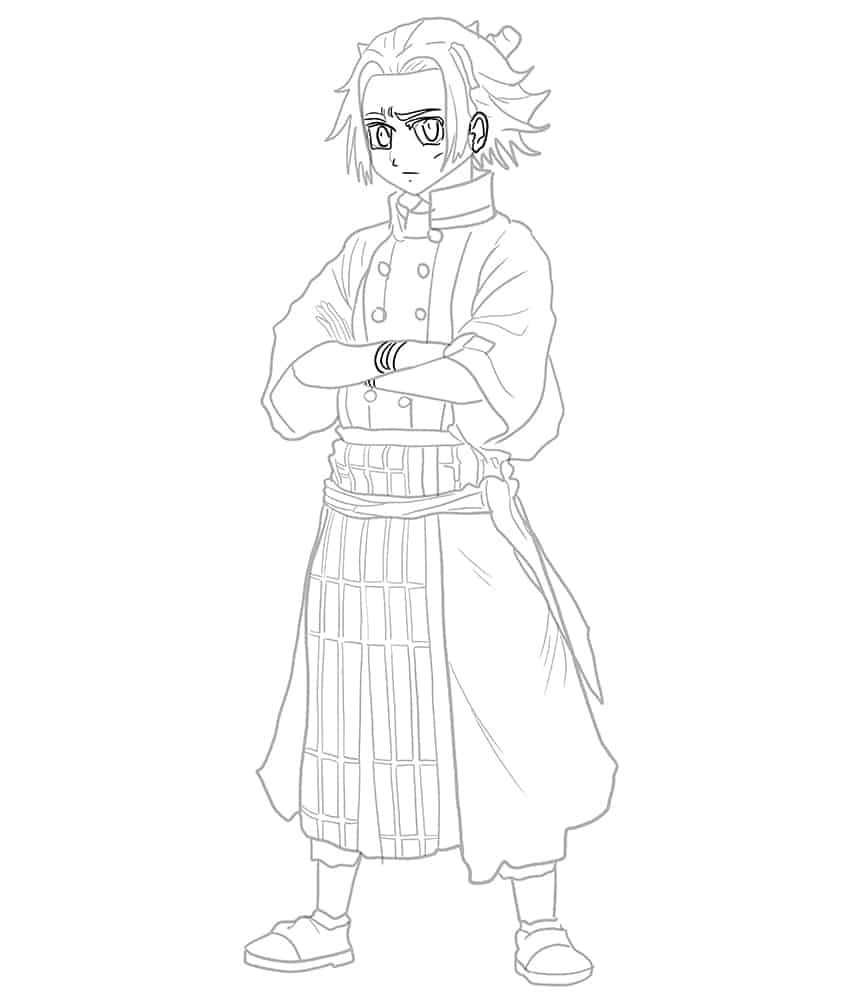
Step 18: Detail the Facial Features
Use the facial feature construction lines to aid you in outlining the eyes, nostrils, mouth, and ear. Begin by outlining the outer eye outlines and draw an inner oval shape within each eye. Above each eye, draw an eyebrow. Continue by outlining the nose and mouth lines. Draw the inner earlobe and outline the ear. Complete the step by drawing the wrist bracelets.
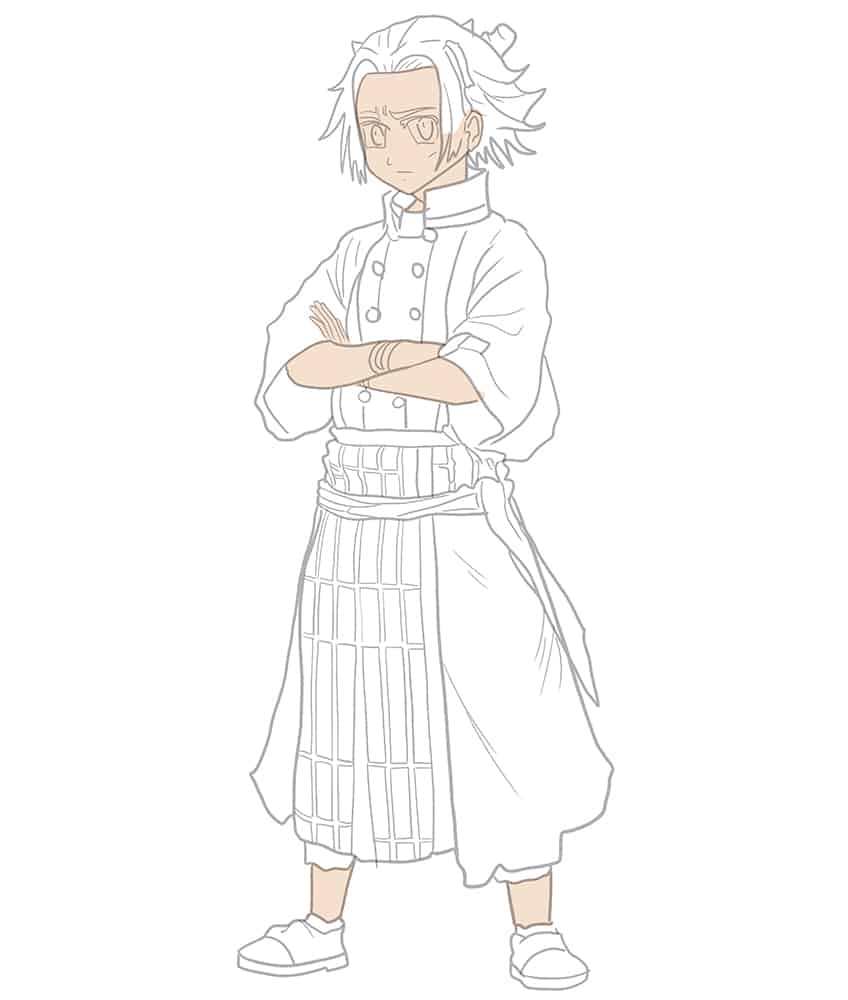
Step 19: Apply the First Color Coat
Select a fine, sharp brush and a shade of light peach paint, and evenly coat the face, arms, hand, and visible leg areas.
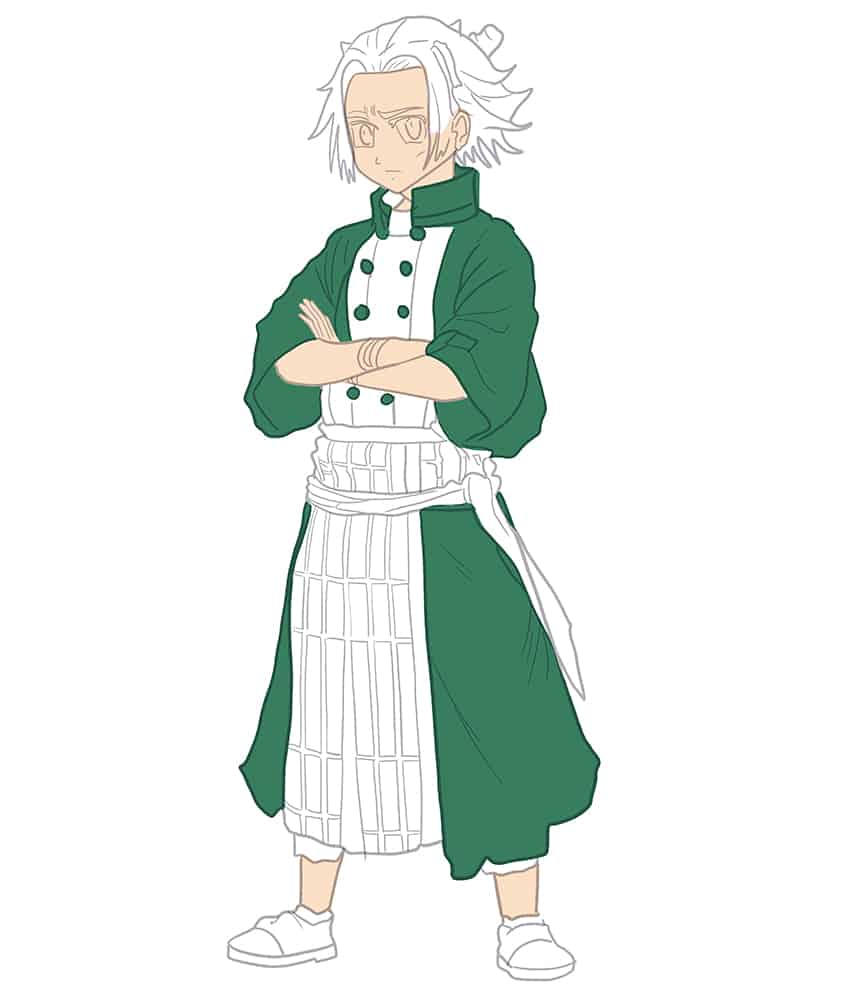
Step 20: Add Color to the Outfit
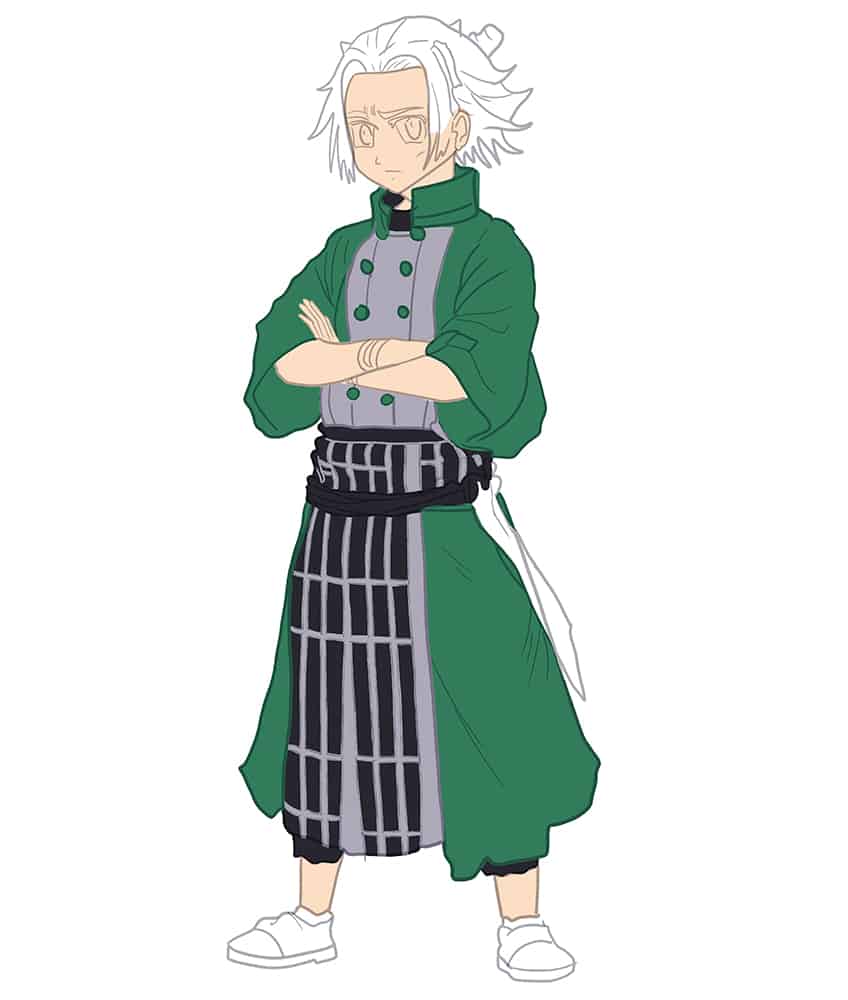
Use the same brush as previously and switch to green paint, and evenly coat the sleeves, and skirt including the buttons and collar.
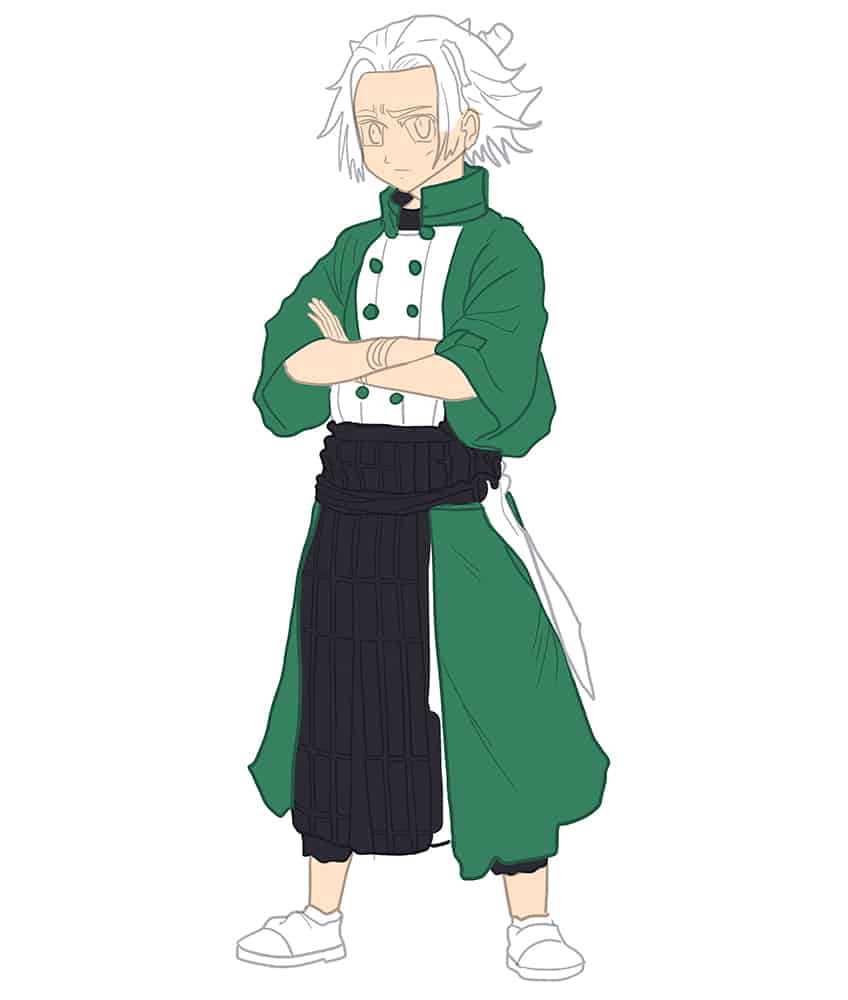
Step 21: Color the Armor of Your Demon Slayer Sketch
In this step, evenly coat the armor and the inner collar area, using a thin brush and dark gray paint.
Step 22: Apply the Second Coat on the Armor
Continue using the same brush and switch to a lighter gray paint, and begin to coat the top half of the outfit and separate the armor plates.
Step 23: Color the Hair
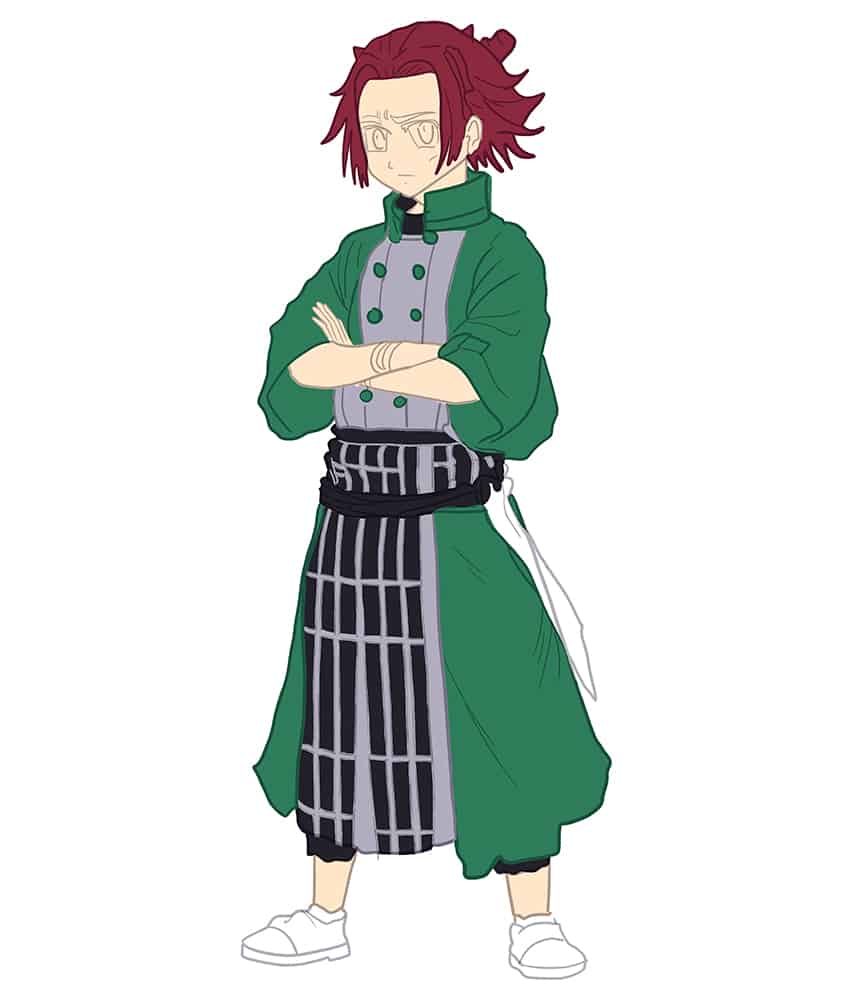
With a thin brush and maroon paint, evenly coat the hair on your demon slayer drawing.
Step 24: Add Color to the Shoes
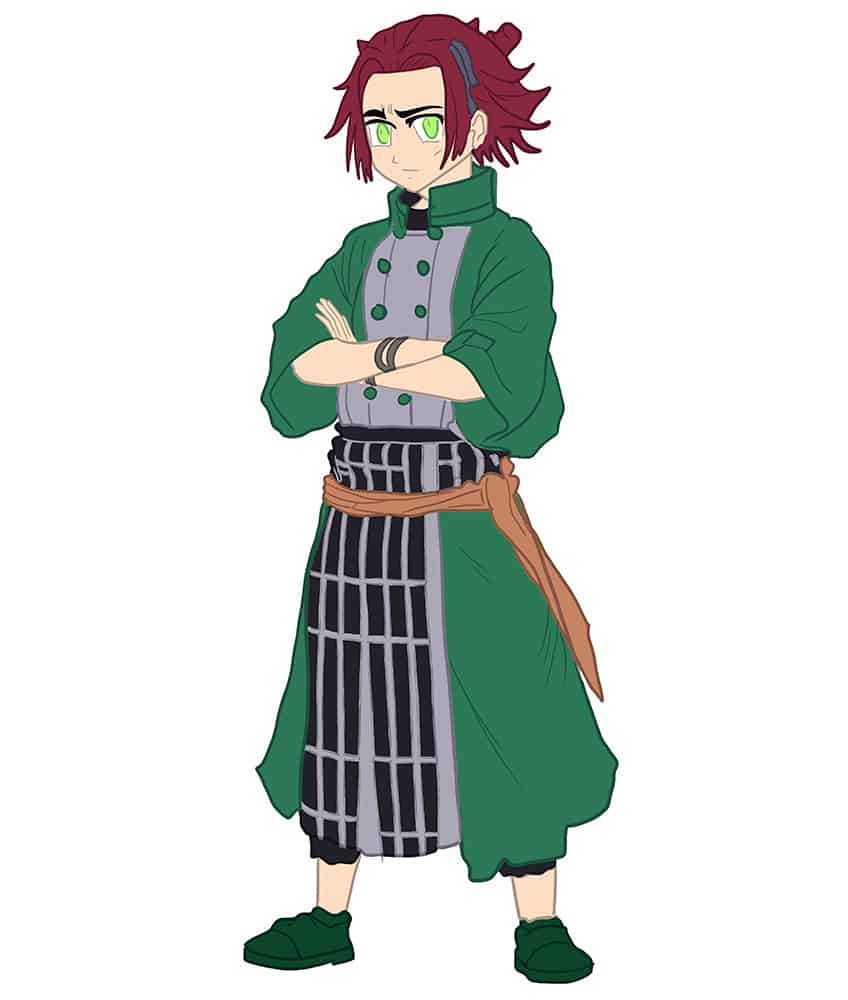
Begin this step by evenly coating the shoes on your drawing, with a thin brush and a dark shade of green paint. Continue using light brown paint to evenly coat the belt. Paint the bracelets and hair band with a shade of gray paint.

Step 25: Color the Eyes of Your Demon Slayer Drawing
With a fine, sharp brush and white paint, color around the iris. Continue using bright green paint to color the iris. Finish off using black paint to color the eyebrows and top eyelids.
Step 26: Shade the Skin
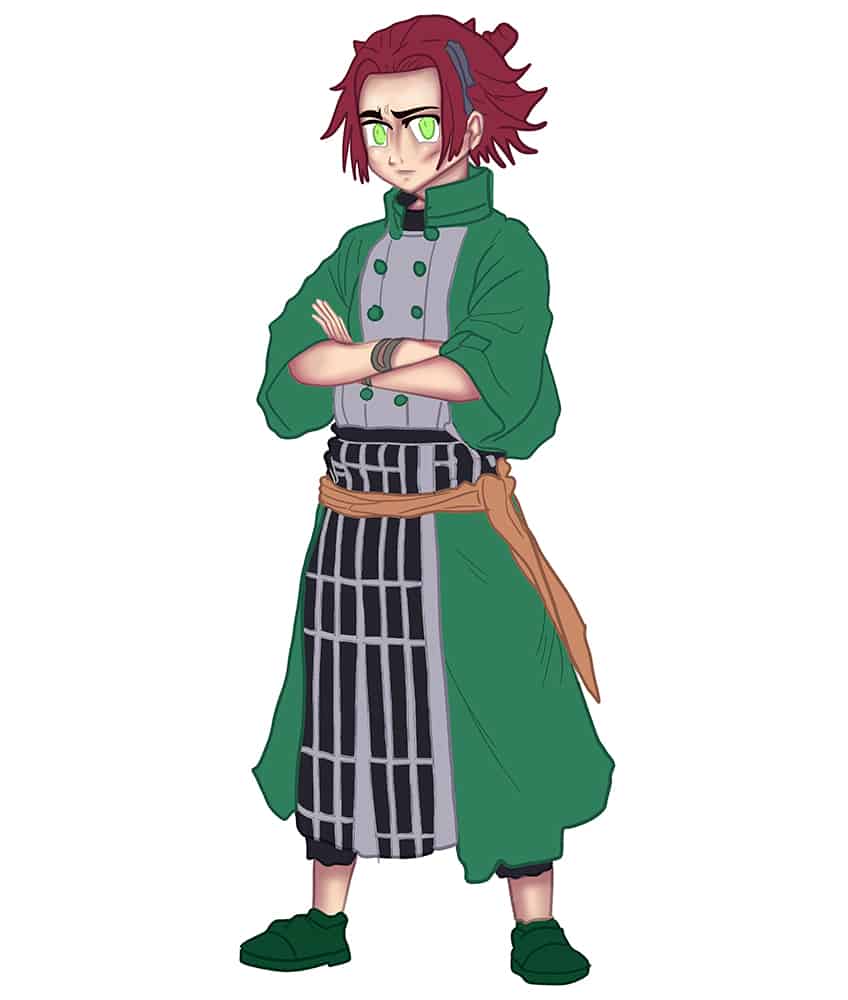
Begin to apply contouring along the edges of the visible skin areas such as the face, arms, hand, and legs, using a small, soft brush and maroon paint. Switch to a blending brush to soften and spread the shading. Complete this step, using a fine, sharp brush and white paint to add several highlight spots along the facial features.
Step 27: Add Shading to the Outfit of Your Tanjiro Kamado Drawing
Add fine brushstrokes to enhance the structure and texture lines of your demon slayer’s outfit, using a fine, sharp brush and black paint. Mainly focus on enhancing the crease lines between the shoulders and arms.
Continue by using a small, soft brush and black paint, and apply soft shading within the outfit and on the outer areas.
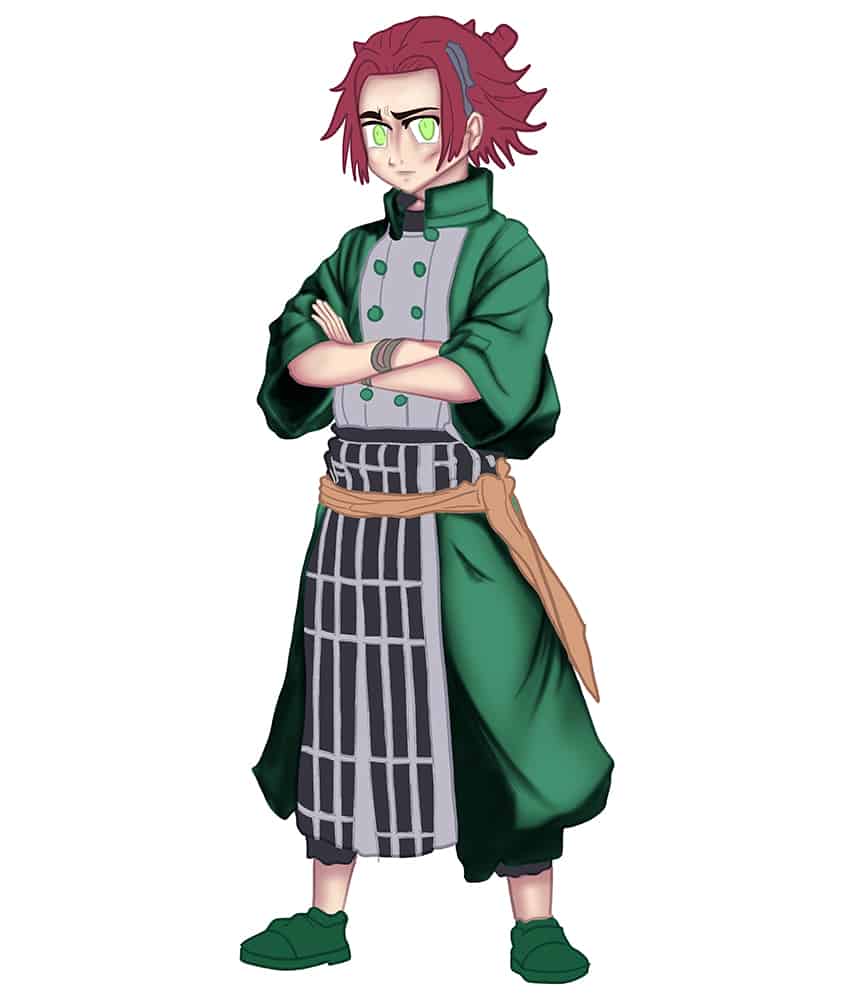
Step 28: Highlight the Armor
In this step, select a fine, sharp brush and white paint, and apply soft brushstrokes along the collar and lower armor. The first gray color coat should still be visible as a casted shadow.

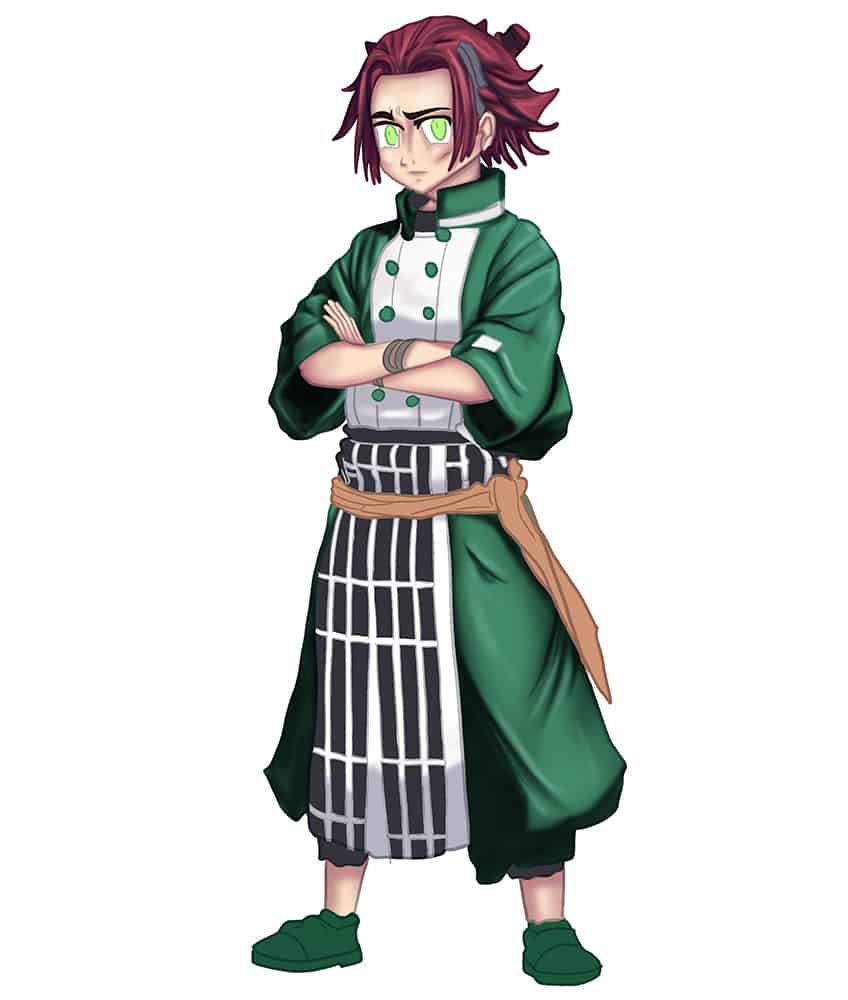
Step 29: Texture the Hair on Your Demon Slayer Drawing
Use the same brush as previously and switch to black paint, and add fine brushstrokes leading with the curvature of the hairlines. Repeat using a small, soft brush and add shading to enhance the structure of the hair. With white paint, add subtle highlights to the demon slayer’s hair.
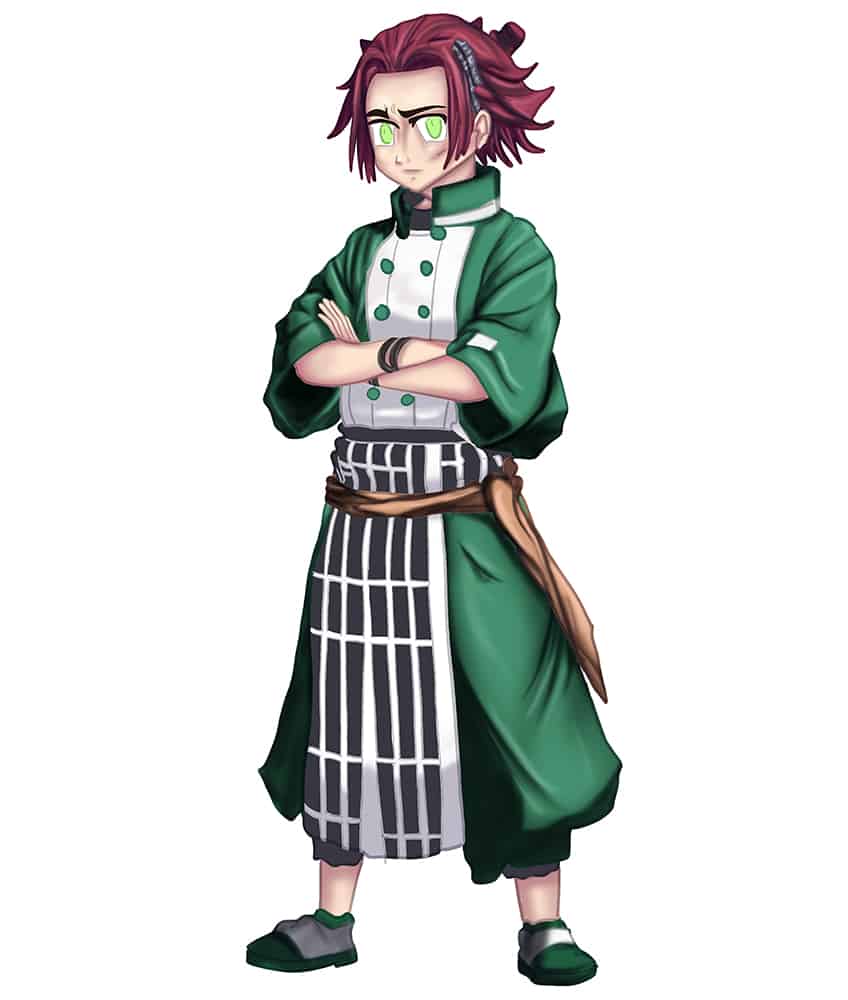
Step 30: Shade the Shoes
Begin to evenly add a second color coat to the shoes, using a thin brush and white paint. Repeat once more using a small, soft brush and black paint to softly apply shading to each shoe.
Continue using black paint to apply shading to the belt, and add fine streak lines within the belt. Switch to a small, soft brush, and softly shade each of the wrist bracelets.
With a soft brush and black paint, and shading to the hair band. Repeat using a fine, sharp brush and white paint to apply dots as the highlights.
Step 31: Detail the Eyes
Select a thin brush and black paint, and begin to color the pupil and around the iris. Using a small soft brush, apply soft shading to the left side of each eye. Finish this step using white paint to add a shimmer near the pupil.
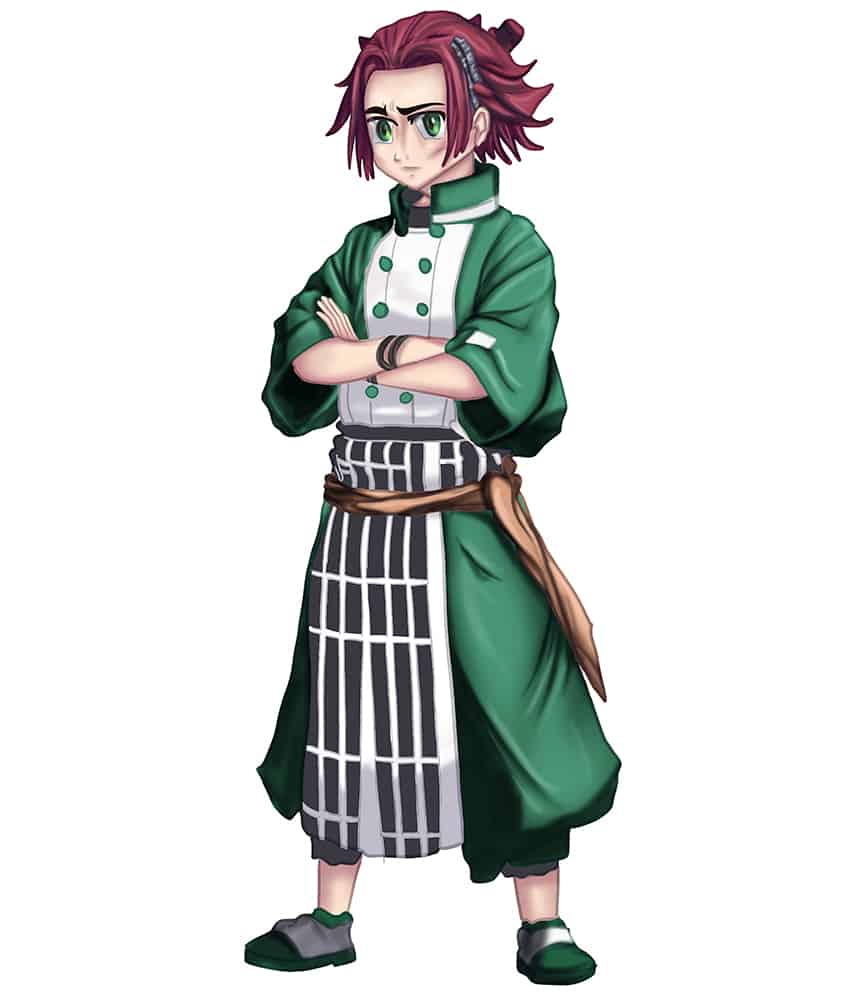
Step 32: Add a Ground Shadow
Apply shading beneath each shoe, using a soft brush and black paint. Continue using a blending brush to spread and soften the edges of the shading.
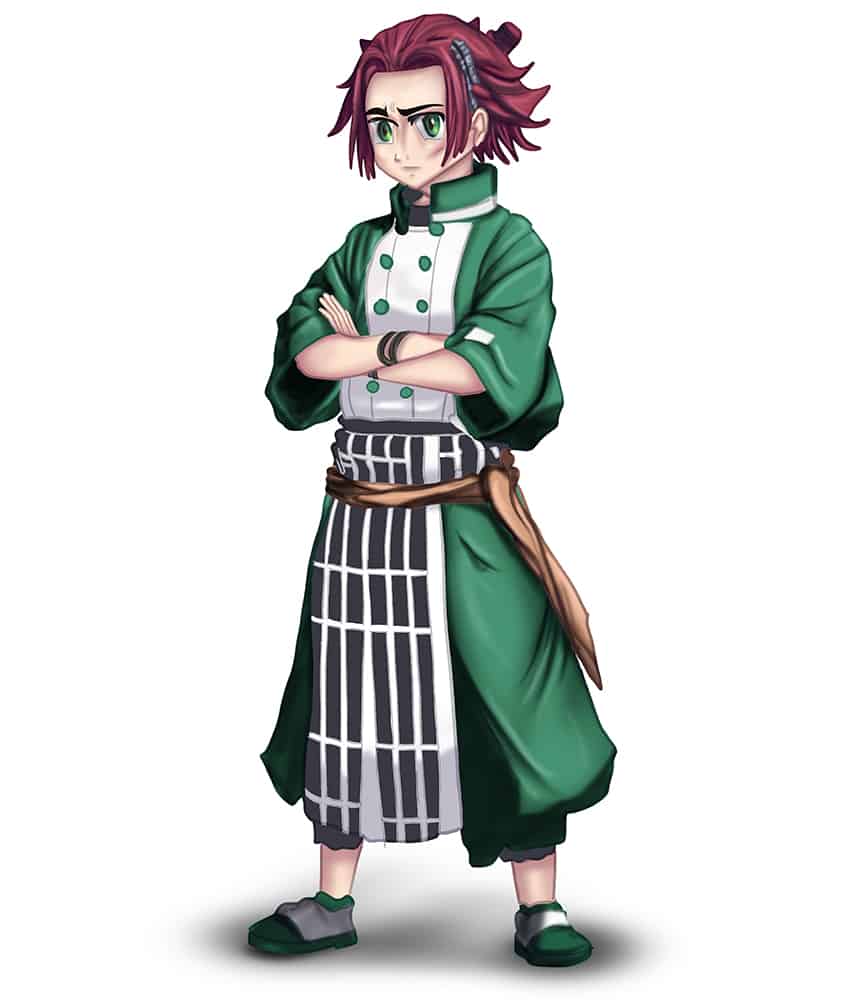
Step 33: Finalize Your Demon Slayer Drawing
You have reached the last step of our tutorial. To finalize your drawing, erase any harsh outlines that are still visible. Where this is not possible, simply select a fine, sharp brush and the corresponding colors to trace those areas to achieve a final seamless result!
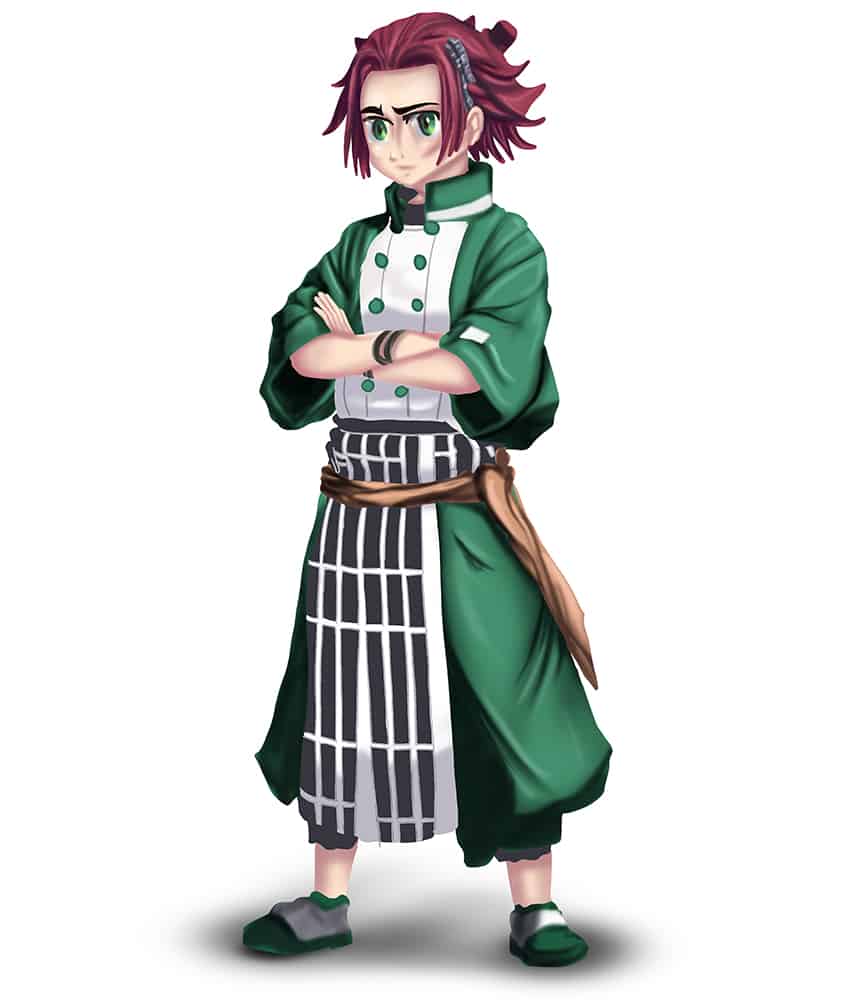
Congratulations on finishing your demon slayer drawing! Your hard work has paid off, and you should be proud of the results. Take a moment to admire the details you’ve included, such as the character’s outfit, weapon, and expression. You’ve captured the essence of a brave and determined warrior, ready to face any challenge that comes his way. As you look at your drawing, consider adding some finishing touches to make it even more impressive. Perhaps you could add shading or highlights to create a sense of depth and dimension, or add some additional details to the background to give your artwork more context. Remember, this is your creation, and you have the freedom to make it your own. Keep practicing, and you’ll continue to improve your skills and create even more impressive artwork in the future!
Frequently Asked Questions
What Are Some Tips for Shading My Demon Slayer Drawing?
Shading is a crucial element in any drawing, and it can make your demon slayer artwork look more dynamic and realistic. To shade your demon slayer drawing effectively, there are several tips that you should keep in mind. Start by choosing a light source and consider where the shadows and highlights should be in your drawing. Begin with light shading and gradually build up your shading by adding more layers to create contrast and depth. Pay attention to the texture of the materials in your drawing and use shading to create the illusion of texture. Blend your shading with a blending tool to create a smoother transition between light and dark areas. Lastly, remember that shading takes time and practice to master, so keep practicing and experimenting with different techniques and materials!
How Do You Capture the Character’s Unique Design in a Demon Slayer Drawing?
Capturing the character’s unique design in a demon slayer drawing requires a few key considerations. Firstly, take the time to study the character’s appearance carefully, paying attention to their distinctive features such as their hairstyle, outfit, and weapon. Secondly, focus on the proportions of the character’s body, paying close attention to their height and build. The demon slayer character designs tend to be highly stylized, so it’s important to capture these unique features in your drawing. Thirdly, think about the character’s personality and try to convey this through their expression and posture. Finally, don’t be afraid to put your spin on the character’s design, adding your personal touches while staying true to the overall look and feel of the character.
Matthew Matthysen is an educated multidisciplinary artist and illustrator. He successfully completed his art degree at the University of Witwatersrand in South Africa, majoring in art history and contemporary drawing. The focus of his thesis was to explore the philosophical implications of the macro and micro-universe on the human experience. Matthew uses diverse media, such as written and hands-on components, to explore various approaches that are on the border between philosophy and science.
Matthew organized various exhibitions before and during his years as a student and is still passionate about doing so today. He currently works as a freelance artist and writer in various fields. He also has a permanent position at a renowned online gallery (ArtGazette) where he produces various works on commission. As a freelance artist, he creates several series and successfully sells them to galleries and collectors. He loves to use his work and skills in various fields of interest.
Matthew has been creating drawing and painting tutorials since the relaunch in 2020. Through his involvement with artincontext.org, he has been able to deepen his knowledge of various painting mediums. For example, watercolor techniques, calligraphy and lately digital drawing, which is becoming more and more popular.
Learn more about Matthew Matthysen and the Art in Context Team.
Cite this Article
Matthew, Matthysen, “How to Draw a Demon Slayer – An Easy Step-by-Step Guide.” Art in Context. April 25, 2023. URL: https://artincontext.org/how-to-draw-a-demon-slayer/
Matthysen, M. (2023, 25 April). How to Draw a Demon Slayer – An Easy Step-by-Step Guide. Art in Context. https://artincontext.org/how-to-draw-a-demon-slayer/
Matthysen, Matthew. “How to Draw a Demon Slayer – An Easy Step-by-Step Guide.” Art in Context, April 25, 2023. https://artincontext.org/how-to-draw-a-demon-slayer/.


