How to Draw Anime Eyes – Master 3 Eye Expressions
Anime eye drawings are just epic and often can seem strangely complicated, even though they look minimal aesthetically. Anime eyes are a character drawing essential, as they can be utilized in so many different drawing ideas to represent different emotions. Different anime eye drawings also have different aesthetic qualities to them and convey different narratives within a character. Eyes are a powerful visual tool for character drawing, so knowing how to draw anime eyes is a great skill to have as an artist.
Table of Contents
- 1 How to Draw Anime Eyes for Beginners
- 2 A Guide on How to Draw Anime Eyes Step by Step
- 3 Applying the Fundamental Concepts to a Drawing
- 4 Tips to Remember
- 5 Frequently Asked Questions
How to Draw Anime Eyes for Beginners
This tutorial on how to draw anime eyes for beginners will help to break up the drawing process into easy-to-follow steps. We will learn the fundamental concepts that are necessary for drawing anime eyes effectively, which we will then apply to our own anime eyes drawing.
By the end, we will have a working knowledge of how to draw anime eyes, which will give us greater confidence for our anime drawings from here on out.
A Guide on How to Draw Anime Eyes Step by Step
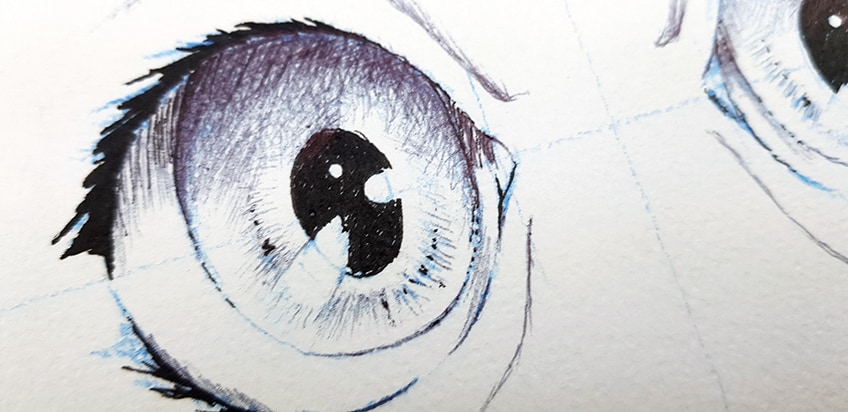
In this tutorial on how to draw anime eyes, we will first go through the fundamentals of drawing anime eyes. We will break down the essential concepts into stages that help us understand how to form an anime eye. From there, we will explore how to utilize these concepts and apply them to a few drawings of different anime eyes.
Now that we understand what to expect, let us get into this tutorial on how to draw anime eyes.
Understanding the Fundamentals of an Anime Eyes Drawing
We first want to understand how to construct anime eyes through the fundamental building blocks that go into drawing anime eyes. Once we understand the fundamental stages of constructing anime eyes, we then can apply this to our own anime eyes drawing.
Shape
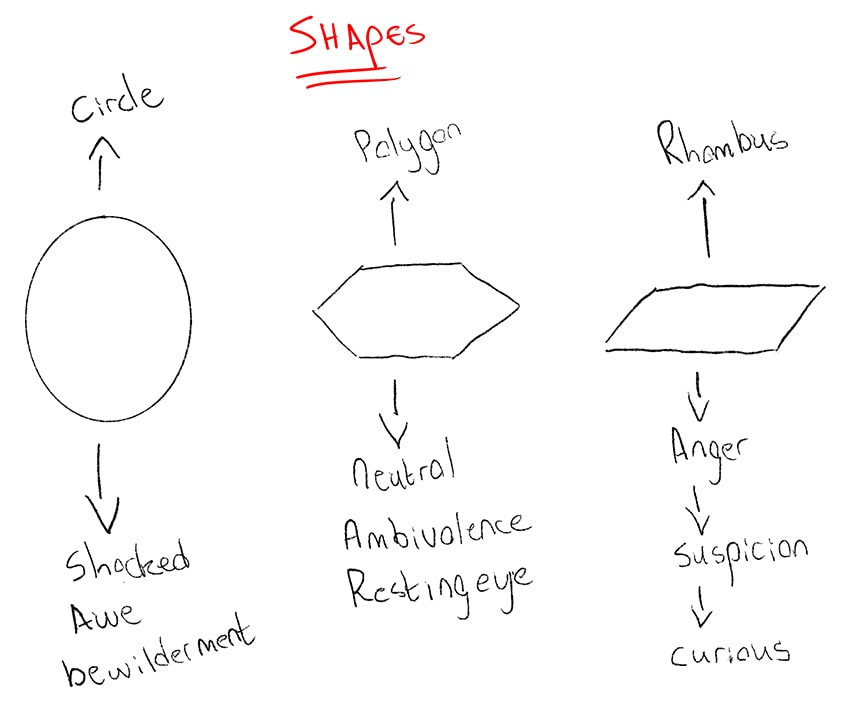
Differently-shaped eyes in anime often correlate with different emotions and interactions. To describe this process more clearly, let’s work with three simple shapes: a circle, a polygon, and a rhombus.
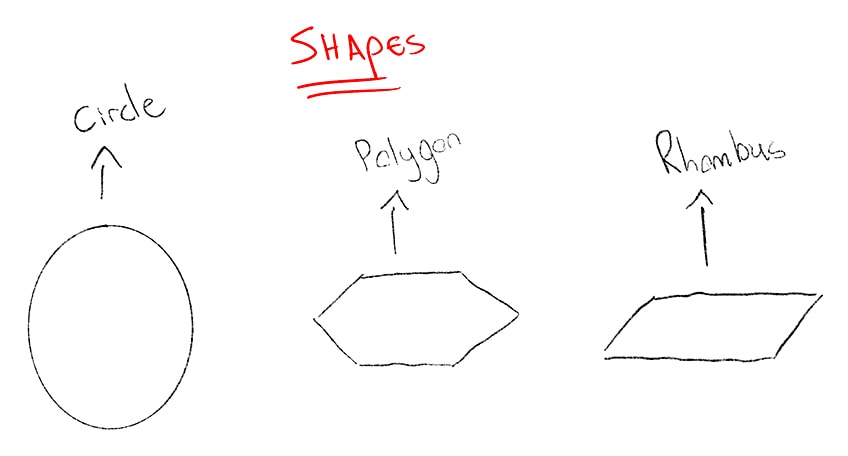
These three shapes often appear in anime and can be used to describe a broad range of emotions in the character.
So, shape is the first fundamental concept we want to think about.
Form
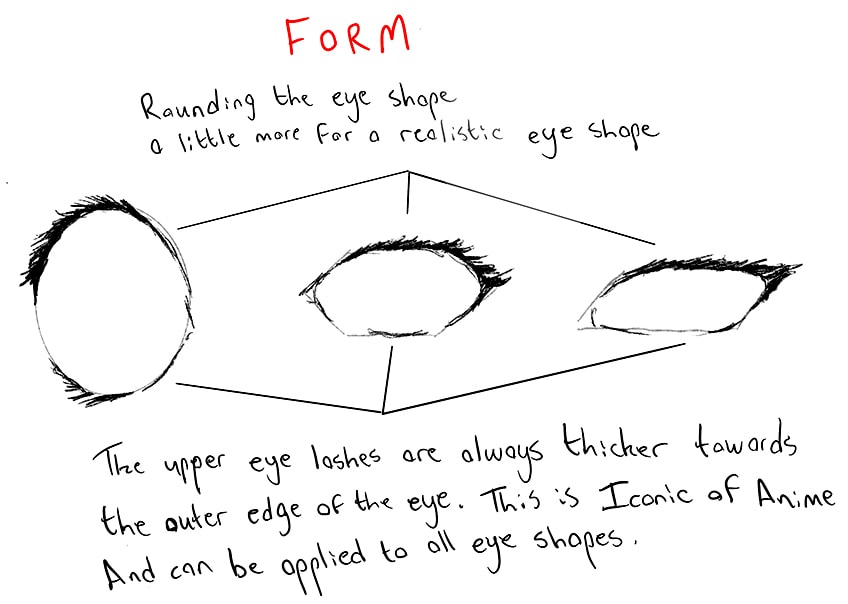
Once we have the basic shape, the intention will then be to slowly form the eye so that it takes on a more realistic and natural shape. We do this by refining the outline of the eye as well as working with the eyelashes as a way of contextualizing the form.
We will find that the eyelashes are always thickened near the outermost edges of the eye.
The Iris
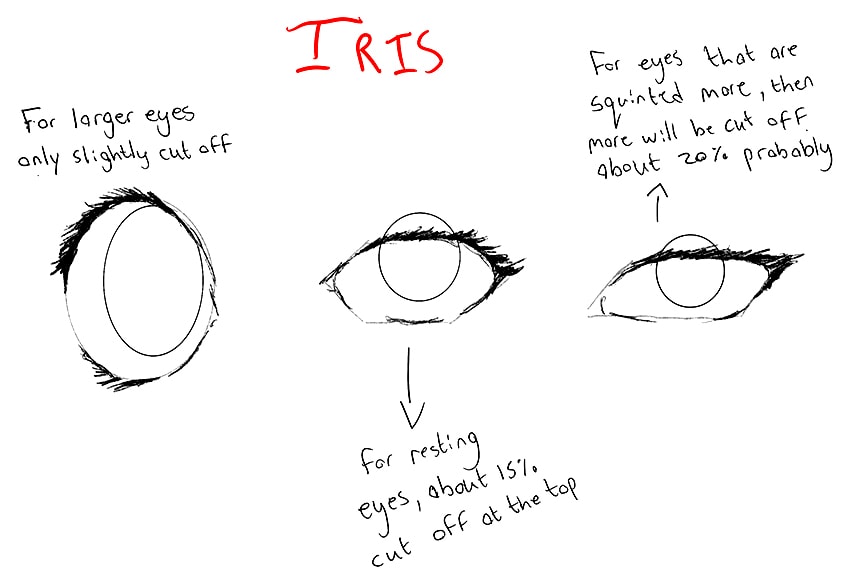
The iris is the next component of the eye that we want to get right. We can play around with different sizes, however, a good rule of thumb is to cut off a bit of the upper section for eyes that are slightly more narrow.
The Pupils
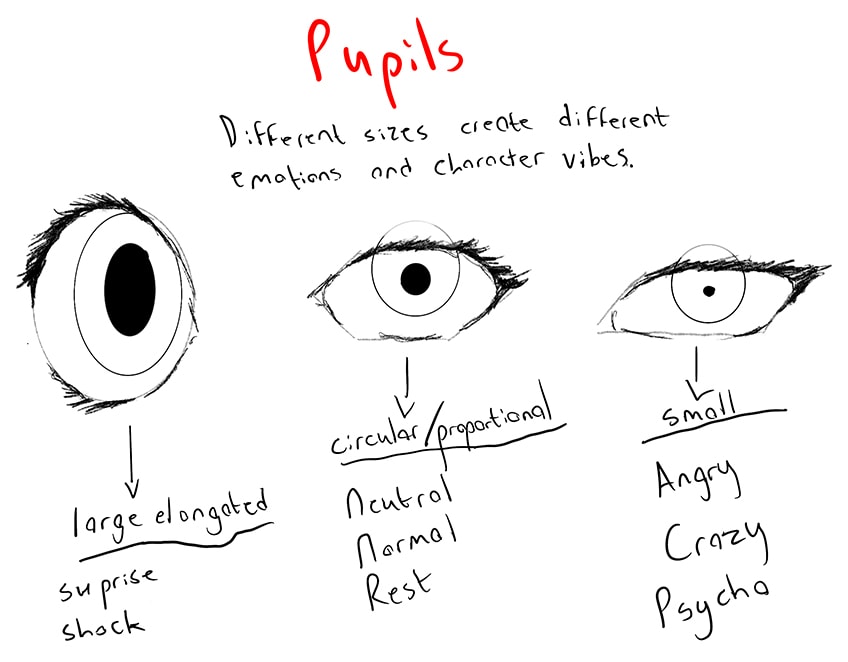
The next aspect of the eye also carries a lot of emotional weight within the genre of anime, as it describes the responsive nature of the character. Larger pupils can often represent awe, whereas smaller pupils could suggest crazy or fight mode.
Pupils are a great little part of the eye that can define a character’s vibe.
Highlights
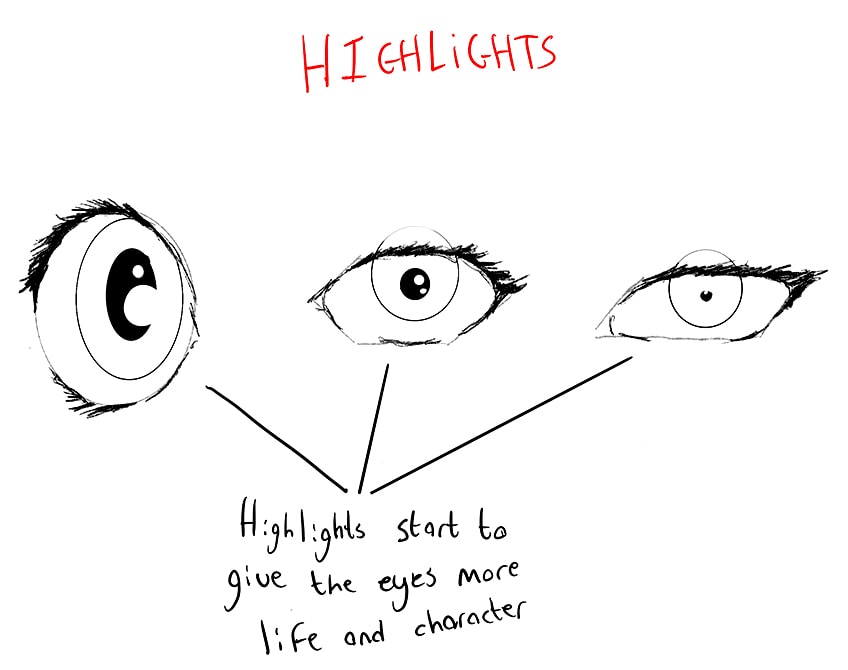
Once we have established the basic form and shapes of the essential aspects of the eye, we now can start to add details. Highlights are super essential, as they give more life to the eyes as well as a more realistic interaction with their environment.
Shading
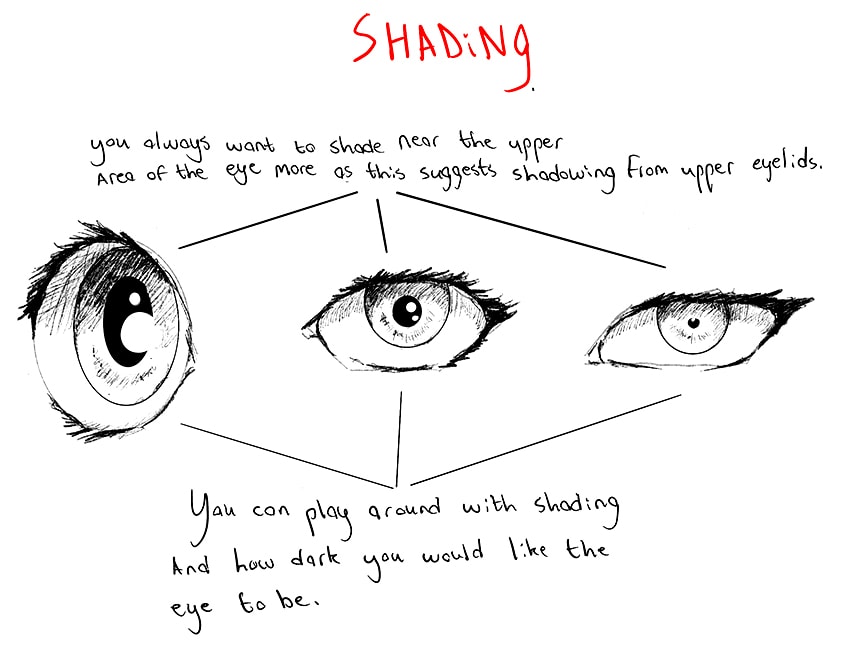
This is perhaps the aspect that starts to solidify the natural quality of the eye. We always want to keep shading along the upper area of the eye, as this will suggest that the upper eyelid is casting a shadow onto the eye.
We can also be playful by adding in some shading around the pupil inside the iris.
Surrounding Features
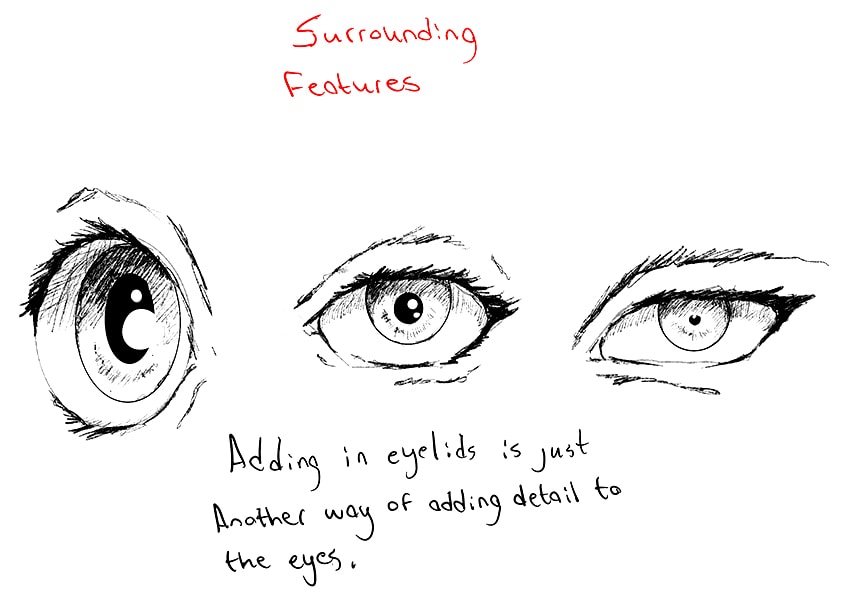
And lastly, we can add in some surrounding features to describe the form of the eyelids a little more. This is just another way of further contextualizing the form and shape of the eye in the skull.
Applying the Fundamental Concepts to a Drawing
Now that we have an understanding of what goes into drawing anime eyes and what fundamental concepts to apply, we now can use these to construct our own anime eyes.
Let’s go through a set of three differently styled eyes using the aforementioned stages of constructing anime eyes to assist us step by step.
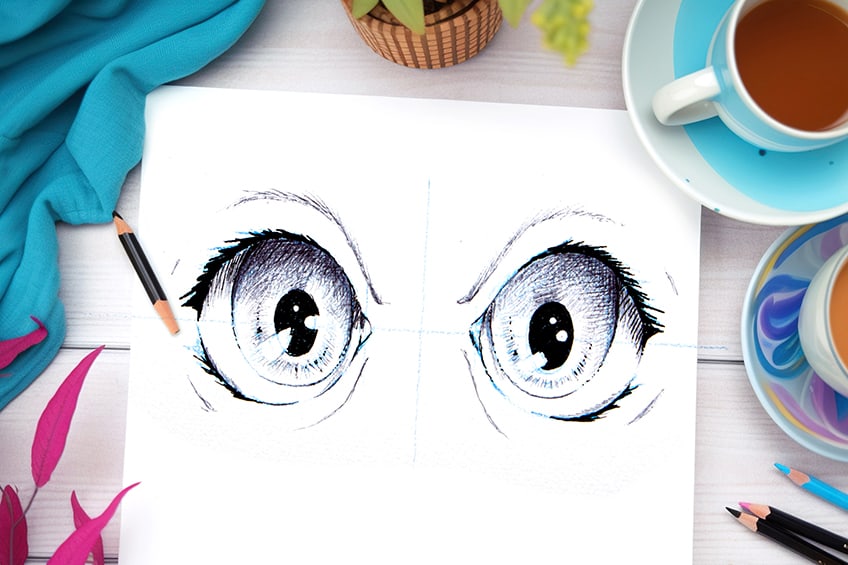
How to Draw Surprised Round Anime Eyes
Let us start with the classic rounded eye shape, this shape is a very popular eye style in the anime genre and is nice to have in your anime eye drawing. Let’s go through the basic construction steps of how to draw anime eyes in this style.
Step 1: Creating the Eye Shape
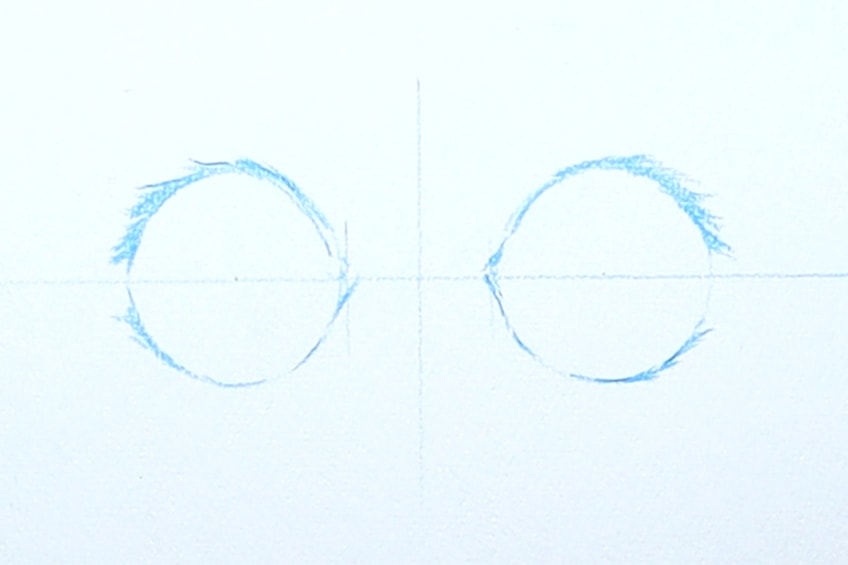
Using a compass or any tool to assist you in making two perfect circles, let’s begin by drawing two identical circles next to one another.

Using a ruler to set your eyes on the page correctly is just a great way to keep symmetry. The same goes for using a single rounded object or compass, as it makes the eyes more proportional.

Step 2: Forming the Eyes
We now want to use our pencils and start lightly sketching over the curve shape to create a slightly more natural eye shape. The best way we can do this is by creating thickened eyelashes that are bolder near the outer edge of the eye.
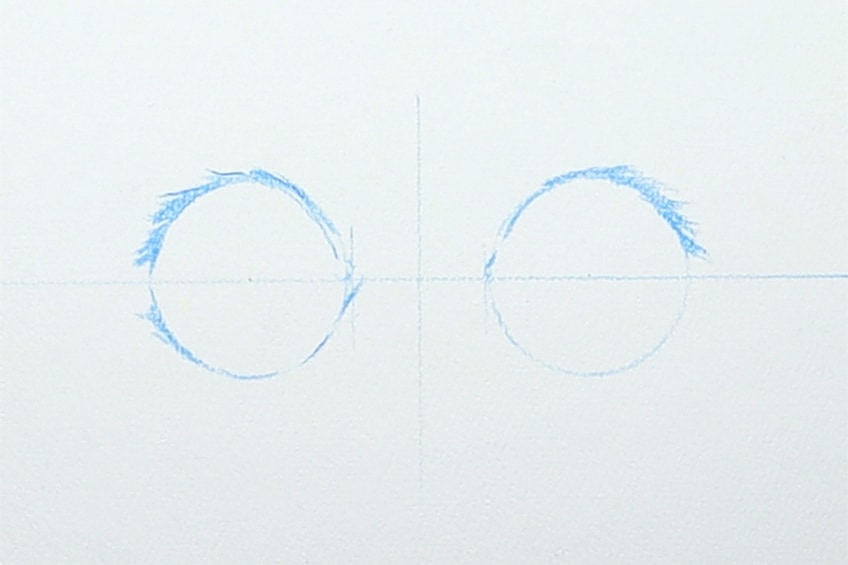
We will always want to make the outermost edges of the upper eyelashes bold. This is a great way to form the eyes into a more anime-like aesthetic and is iconic to the anime eye aesthetic.
We can do the same for the bottom lashes, but not as much as we do for the upper lashes.
Step 3: Drawing the Iris
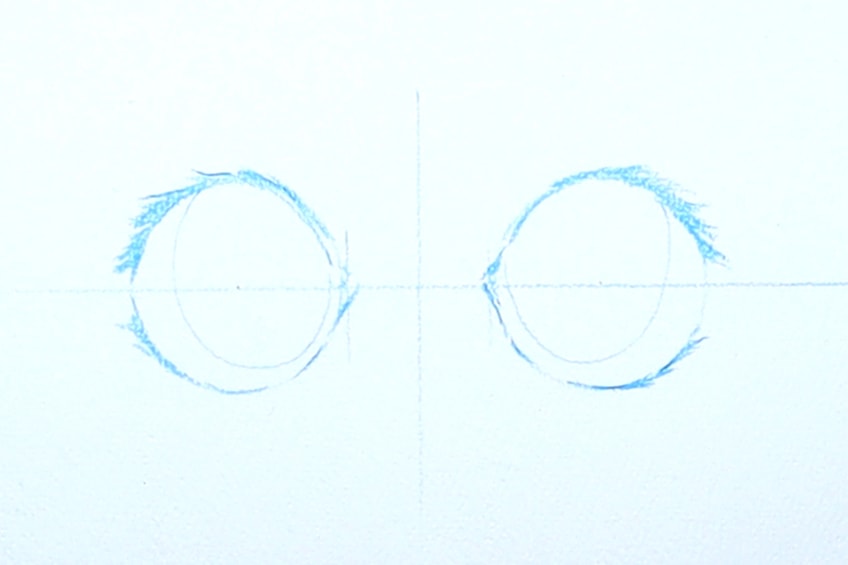
We now can draw the iris of the eye, but note that we want to draw the iris quite large. We also want to keep it slightly towards the inner side of the eyes.
We can also make the iris more oval-like for an interesting character quirk.
Step 4: Drawing the Pupils
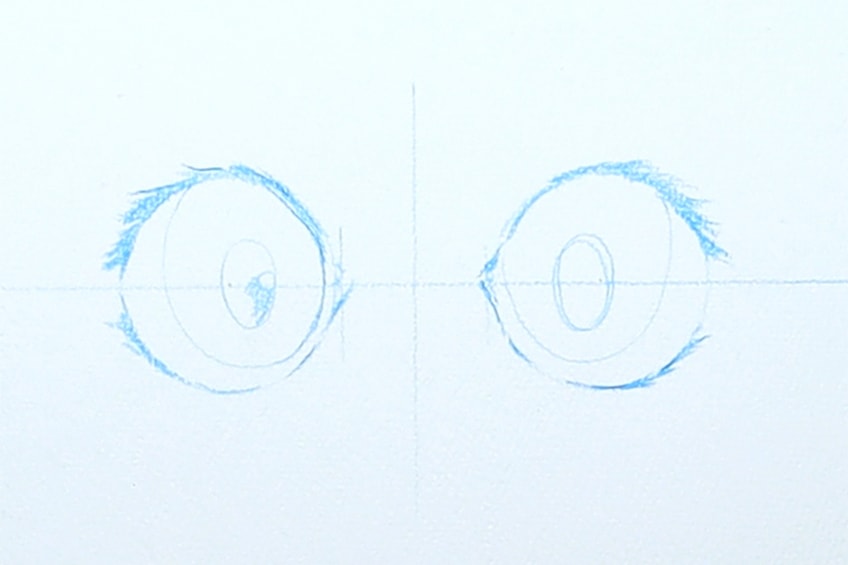
Once we have drawn the iris, we can move on to drawing the pupils. The pupils can be slightly large in this set of eyes, we want them to not be too large compared to the iris.
Step 5: Creating Highlights in the Eye
You want to include the highlights as you draw the pupils when sketching anime eyes. We do this by drawing negative spaces into the pupil, which we then can leave blank.
We will find that this is an easier way to make highlights, as we can just fill in the pupil around these shapes.
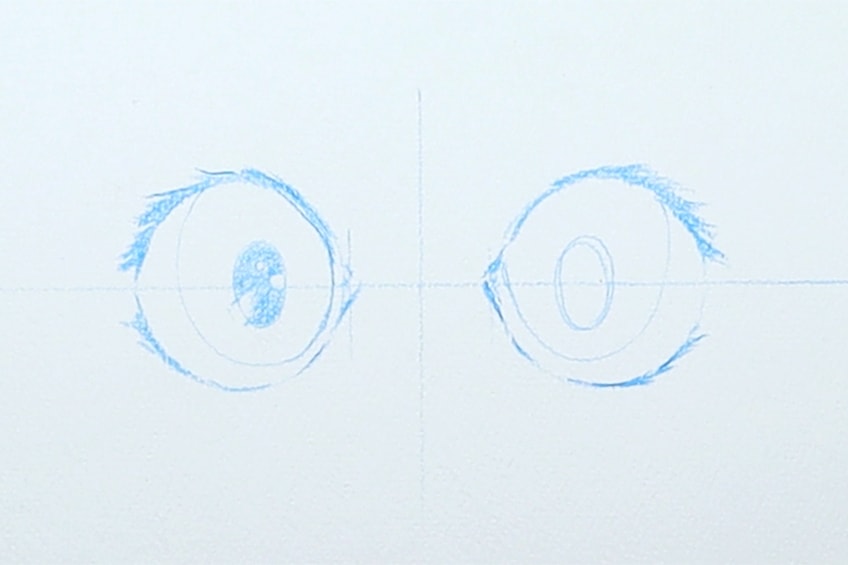
You also don’t want to overpower the pupil with highlights, especially when the pupils start to get smaller. Another good suggestion is to keep the highlight the same for both eyes, which will suggest a realistic reflection in the eye.
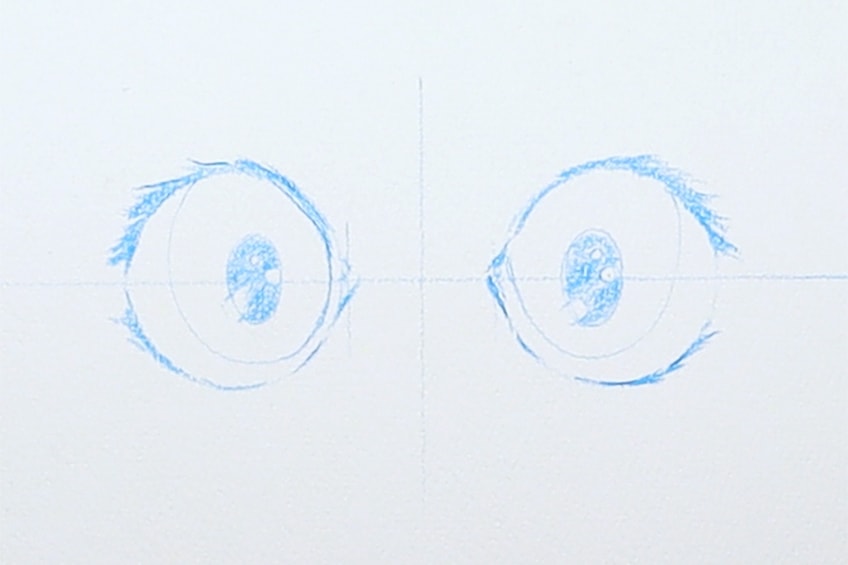
Step 6: Shading the Eyes
We want to make sure we add shading along the entire upper section of the eye. This means we will shade along the white areas in the eye, including the iris. However, we can slightly darken the iris a bit to create more contrast between the iris and the white areas of the eyes.
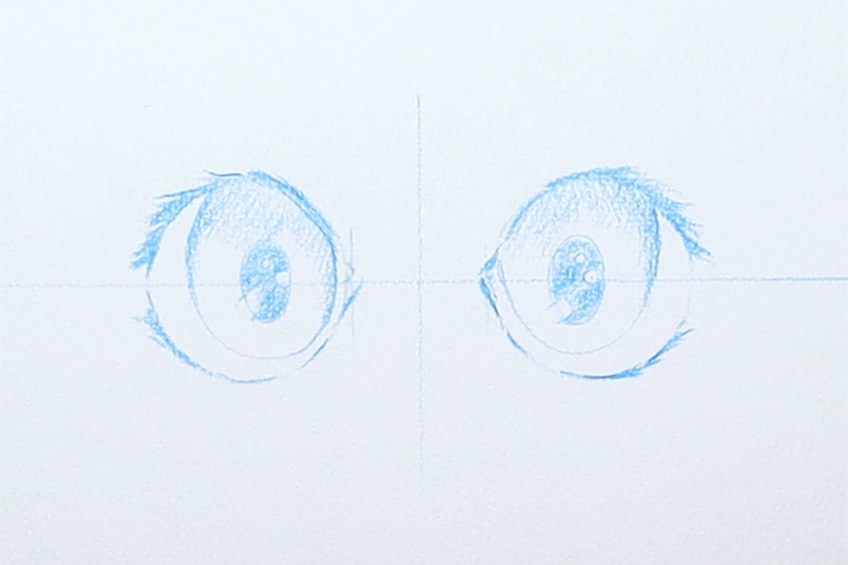
The reason we make the iris slightly darker is to create a subtle distinction between the white part of the eye and the iris.

Step 7: Shading the Eyes With Pen and Marker
Once we have established the sketch, we now can start going over these details with a marker and pen. Starting with the lashes, we can start making them darker and thicker, giving the eye more form.
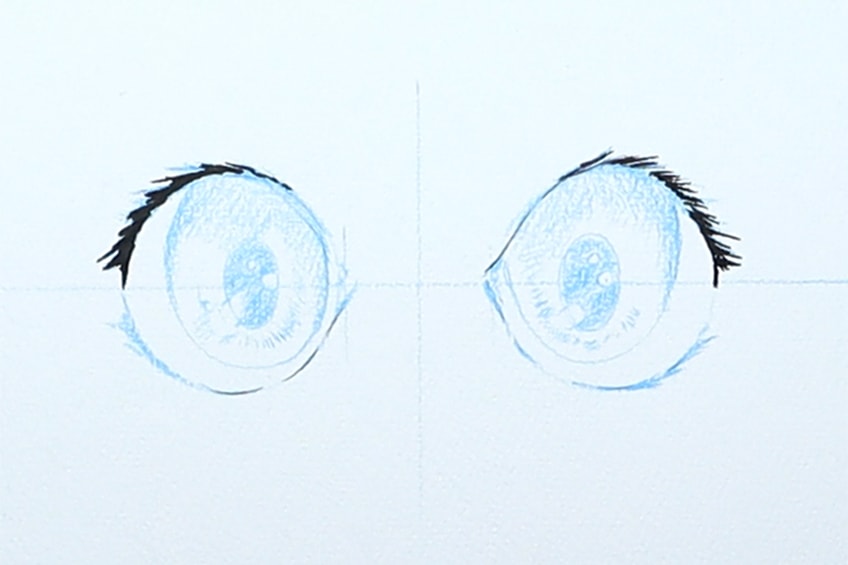
We can also start to form the eye a little better with a pen, slowly going over the pencil sketch. A good suggestion is to avoid making the bottom of the eye too dark, but we want the upper lashes to be thick and sharp near the edges.
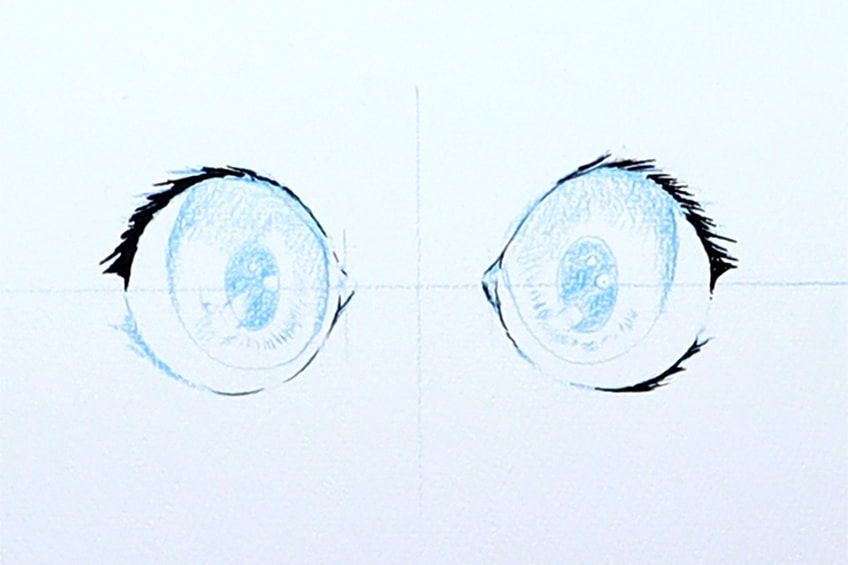
We can also start to fill in the pupils, making sure that we don’t fill in the highlights.
We want to be careful as we draw around the highlighted shape within the pupil. Be sure to take your time with the pupils – you want to make sure you don’t make the mistake of coloring over the highlighted areas.
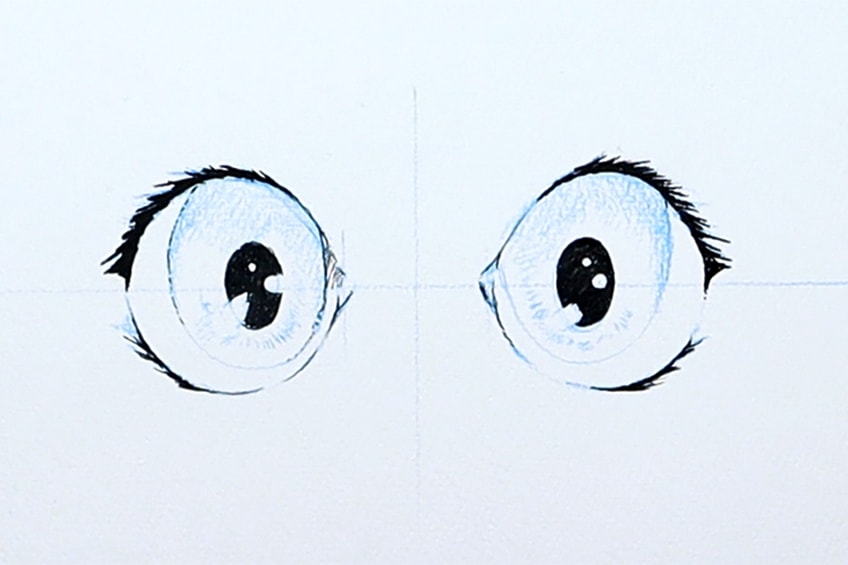
We can also start to add some shading along the upper section of the eye with a ballpoint pen. We want to use the pencil sketch as a way of guiding us as we add in pen shading. Try to keep it light, and slowly work layer over layer.
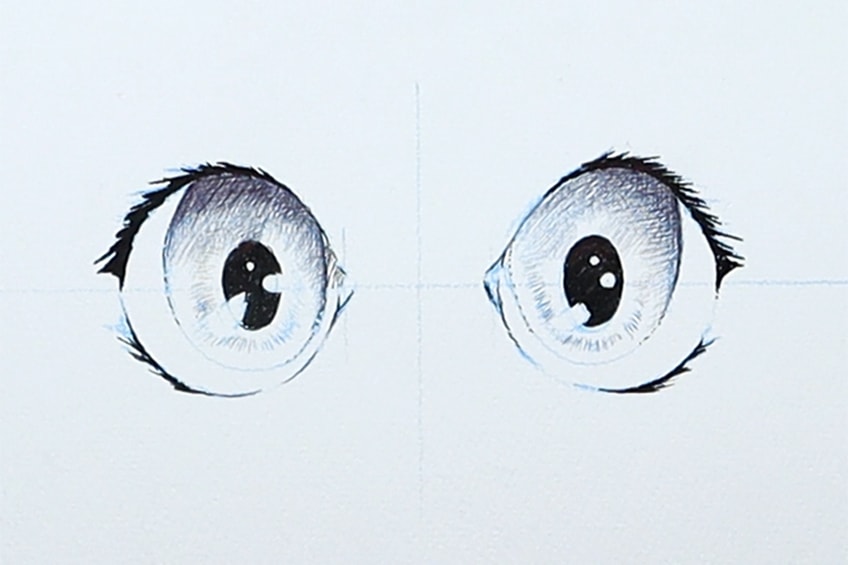
We want to make sure we shade along the entire upper section- under the top eyelid- as this will suggest that the upper eyelid casts a shadow along the entire upper section of the eye. You can make the iris slightly darker in shading to create a difference in the features of the eye.
Take your time working on these shading details and from there, you can add subtle lines around the eyes and you should be done.
How to Draw Neutral Polygon Anime Eyes
The next set of eyes we will draw is another very popular set of eyes within the anime genre. These polygon eyes are really common and are often associated with neutral and resting positions of eyes, which work great for keeping characters neutral in a situation, or perhaps to suggest that they are mentally preoccupied.
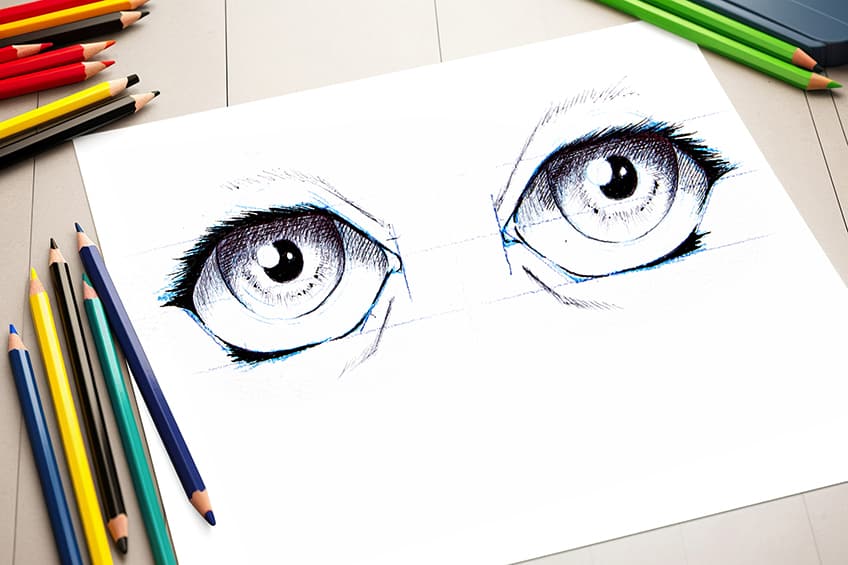
Step 1: Creating the Eye Shape
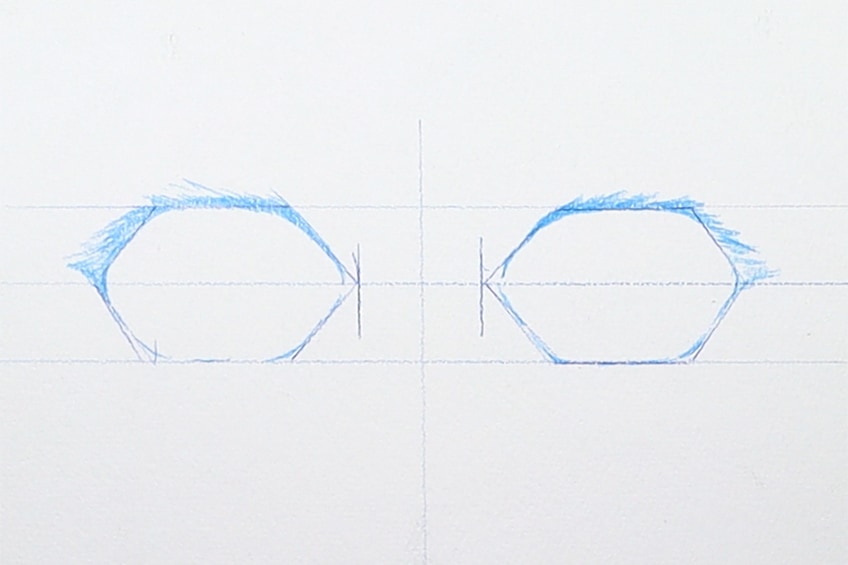
We want to draw a set of eyes, so let’s start by drawing demarcation lines to give us parameters to work within. Just try to make each polygon more elongated in a horizontal direction rather than a vertical one.
We also want to make sure that are about the same size, so try to use a ruler and measure them to have equal-sized polygon shapes.

Step 2: Forming the Eye
Again, we want to start forming the eye shape by using the lashes as an aesthetic tool that gives the eye its shape. We want to make sure that the upper lashes are sharp and bold near the outermost edges.
Step 3: Drawing the Irises
When drawing the iris in a neutral eye, we want to make sure that we cut off a little bit of the top part of the circle. This is so the eyelid seems to fall over the eyeball, resulting in a realistic effect.
Try not to cut off too much of the iris when sketching it in.

Step 4: Drawing the Pupils
When drawing the pupils, we also don’t want to draw them in the lower area of the iris. We want to make sure that we are drawing them in the center of the iris, which will make them see close to the upper eyelids.

Step 5: Creating Highlights
When sketching highlights, you want to do this before filling in the pupil. This is because we want to draw negative spaces in the form of little shapes in the eye, which we will color around.
We also want to make sure the highlights are identical in both eyes.
Step 6: Drawing the Pupils
Then, lastly, we will want to add shading to the eye, making sure it is mostly formed along the upper section beneath the top eyelid. This will give the effect of a shadow cast by the top eyelid. Remember, we can slightly darken the iris for contrast in the eye.
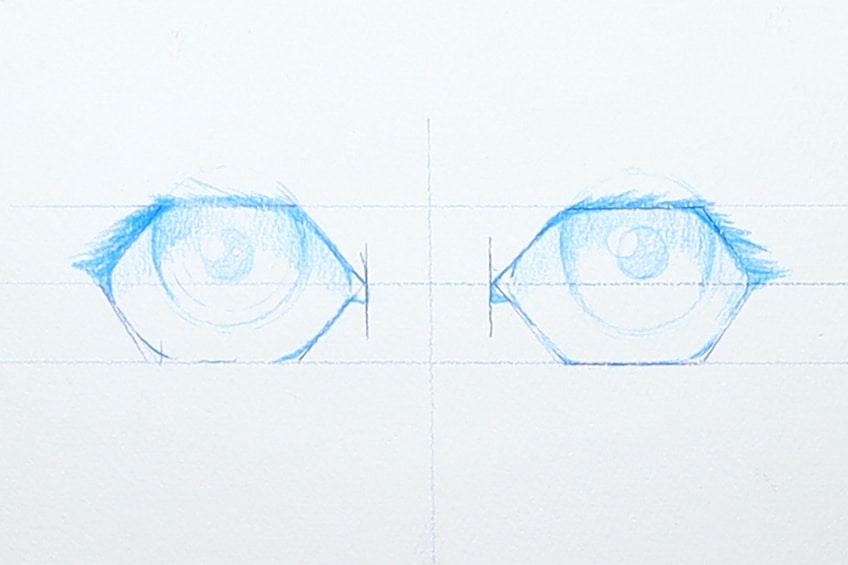
Step 7: Shading the Eyes With Pen and Marker
Once we have established our anime eyes sketch, we can now start to slowly work in more defined pen and marker details. Starting with the lashes, we want to make sure they are quite bold and dark.

At this point, you should have a basic understanding of how to integrate these features with a pen and marker. Working on one eye at a time is also a great way to effectively create these features in the eye.
An important note to remember is that regarding the pupils and highlights, we want to make sure we fill in the pupils slowly, making sure we leave the highlights blank.
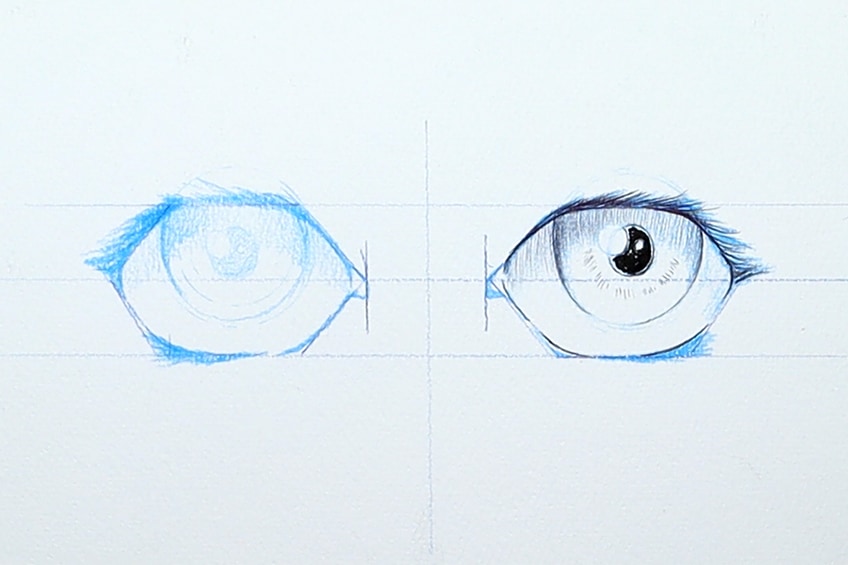
We also want to make sure that we are being strategic with our shading along the upper area of the eye. We want to shade along the entire upper area beneath the eyelid. However, we can make the iris slightly darker for a more interesting aesthetic.
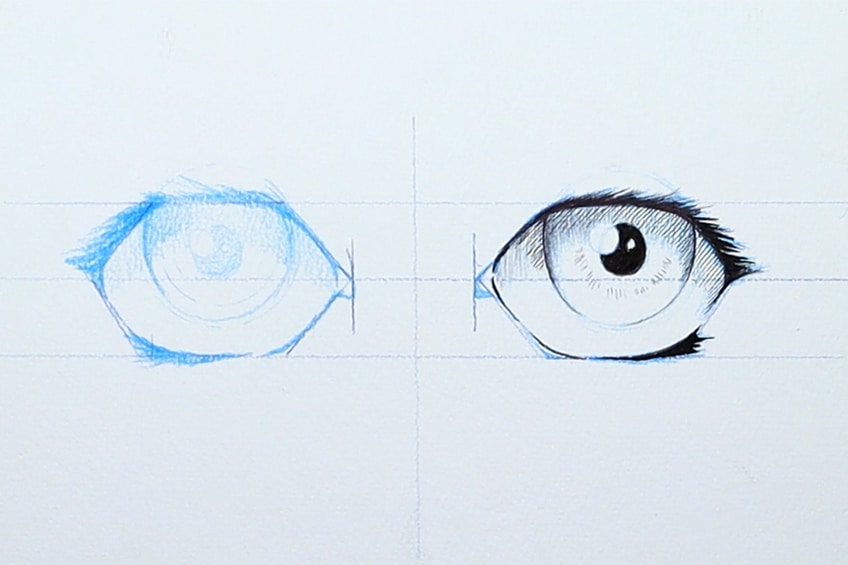
We also want to make sure we add features along the bottom section of the eye. We want to embolden the bottom lashes as well, making sure they are dark a refined. However, always keep the bottom lashes smaller than the upper lashes.
Take your time when working on these details – going through them slowly is going to be a much more effective way of achieving a beautiful anime eyes drawing.

Once you feel you have completed one eye and it looks good, you then can replicate this process in the other eye. By working on one eye at a time, you also direct your attention to a single eye, focusing more on the drawing process and details required. You could also add additional eyebrows for more realism.
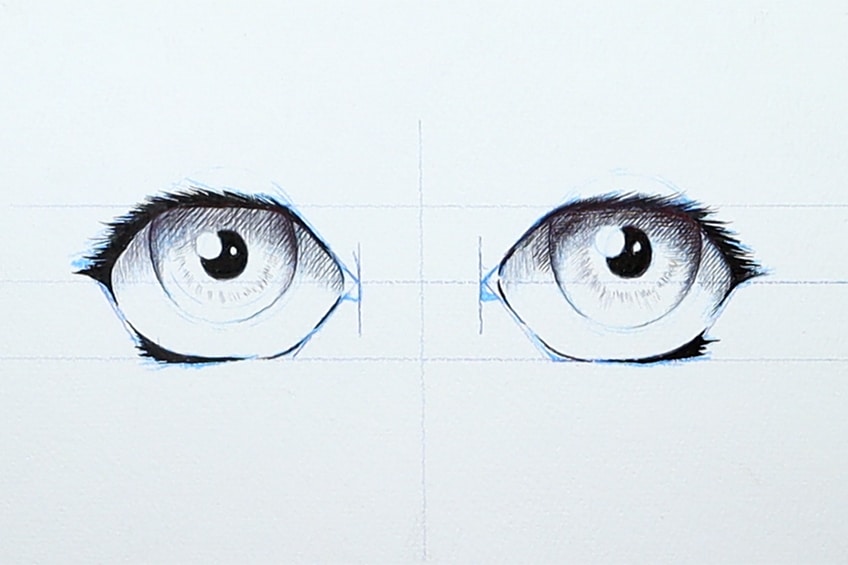
Slowly take your time with the following eye, allowing the first drawn eye to guide you in the drawing process of the next eye.

You can use the eye as a reference to maintain symmetry in all aspects of the eye.
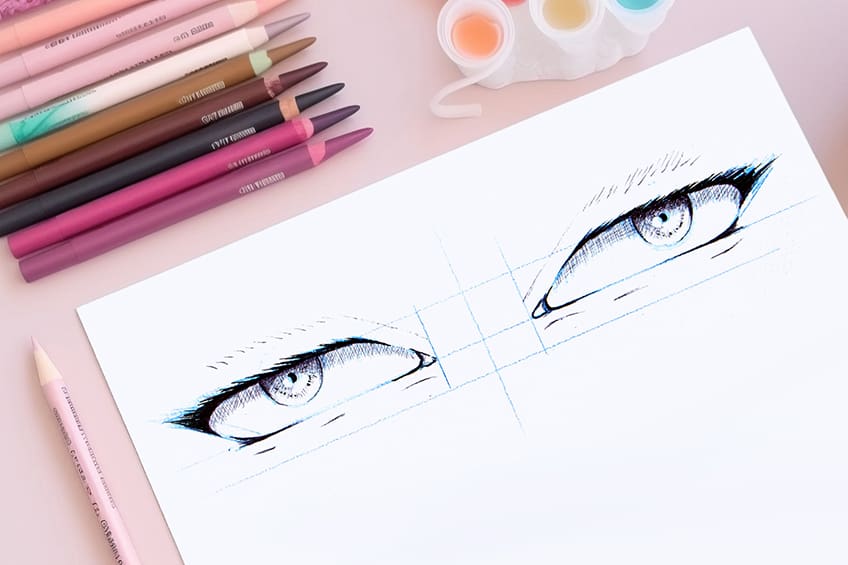
How to Draw Angry Narrow Anime Eyes
Anime eyes come in so many different shapes, and the narrow rhombus-styled eyes are another iconic shape that often conveys anger, disinterest, and many other interesting emotions. We will also find that the change in pupil size is another aspect that defines a character type as we go through the process of how to draw narrow eyes.
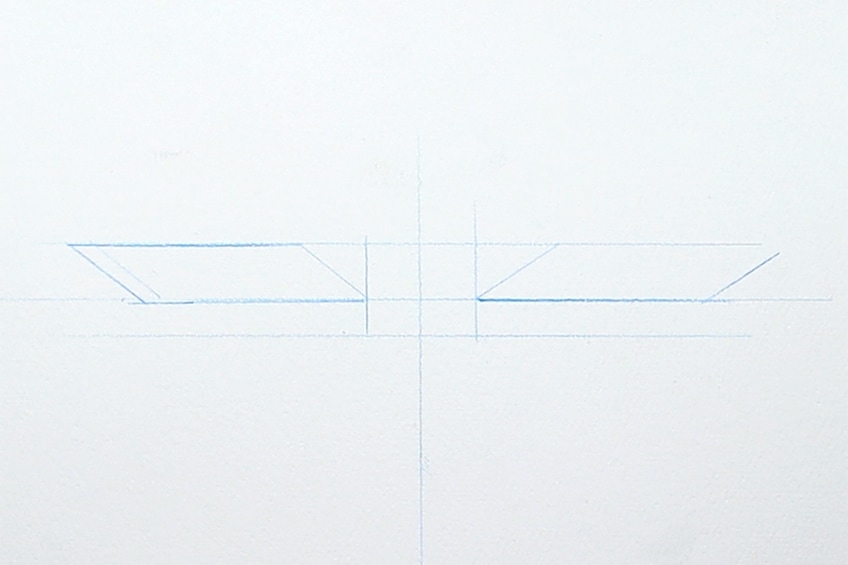
Step 1: Creating the Eye Shape
We want to start by drawing two rhombuses next to one another, we can also use our rulers to establish some guidelines.
This will give us a more symmetrical aesthetic in our anime eyes drawing.
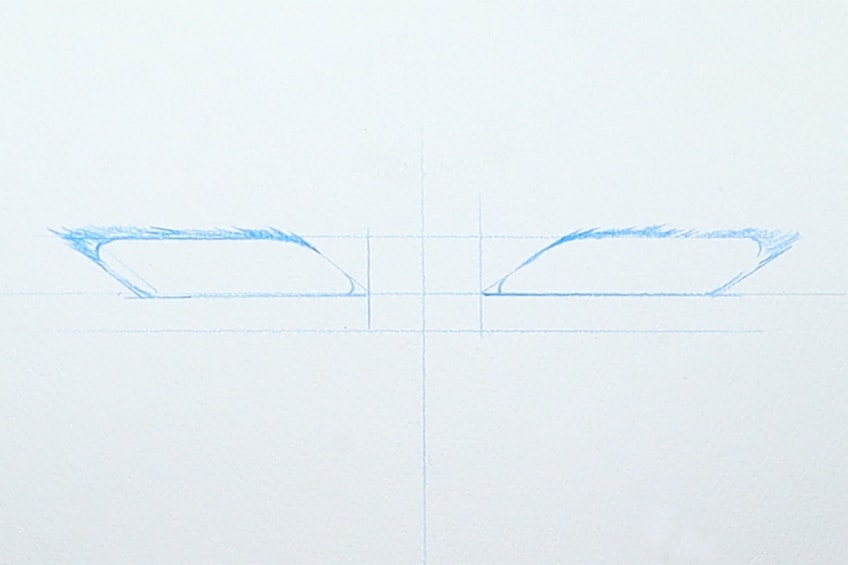
Step 2: Forming the Eye
You should, by now, have a basic knowledge of how to form the eye into a better realistic eye shape. We want to make sure that the top eyelashes are bold and thick towards the outer edge of the eye.
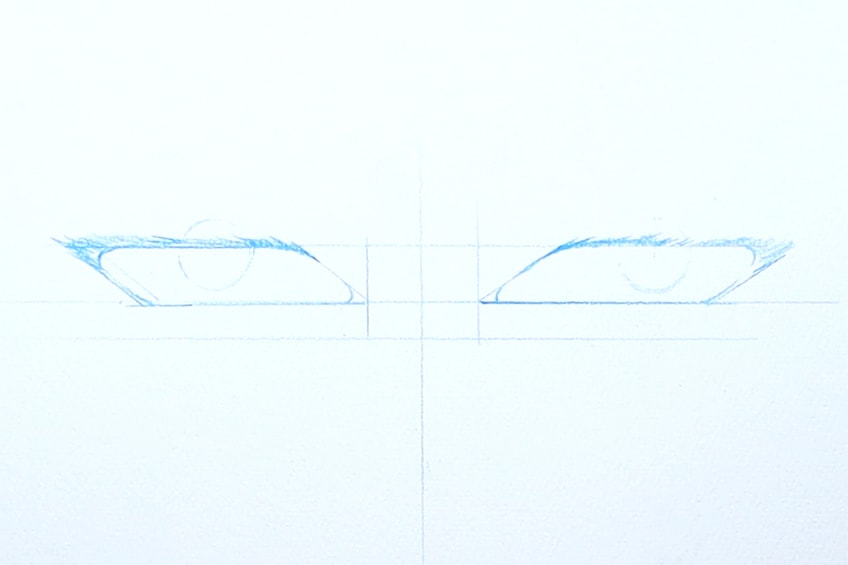
Step 3: Drawing the Irises
Remember, as we draw the irises, we want to make sure we cut off a bit of the upper section of the circle. We want the eyelid to fall over a bit of the iris for a more realistic effect of the eye’s mechanics.
Step 4: Drawing the Pupils
When we draw pupils this time, let us draw them small, as this will have a unique effect on the character. Contracted pupils are often associated with shock, anger, or fright. So, having smaller pupils can often be a great way to convey a particular emotion in the character.
Be sure to add a small highlight near the pupil.
Step 5: Shading the Eyes With Pen and Marker
Now that we have the eyes sketched out, we can proceed as we have before by using our pens and markers to further emphasize the details in the eye. Start by shaping the eye with the eyelashes.
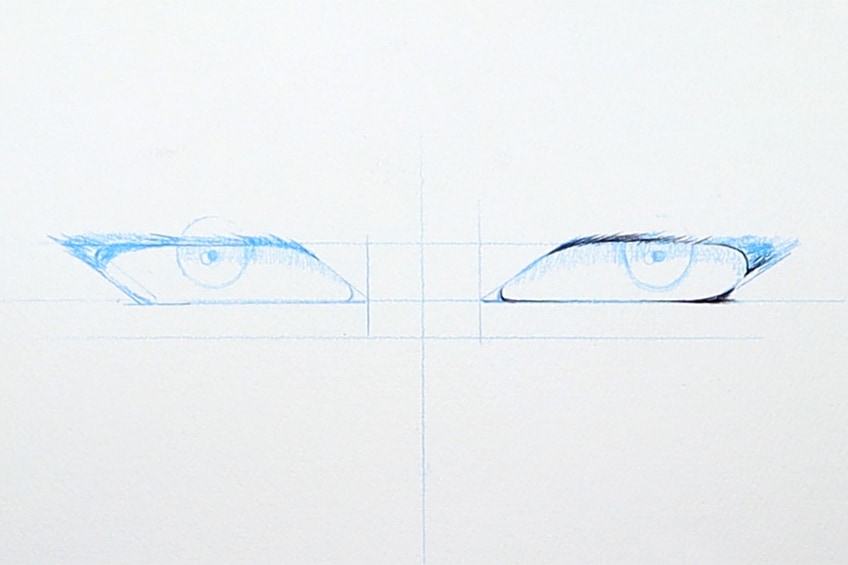
Remember, we can also work on one eye at a time for more focused attention to detail. As we add in the pupils and shading, we want to be conscious of the little highlights, making sure we keep them blank.
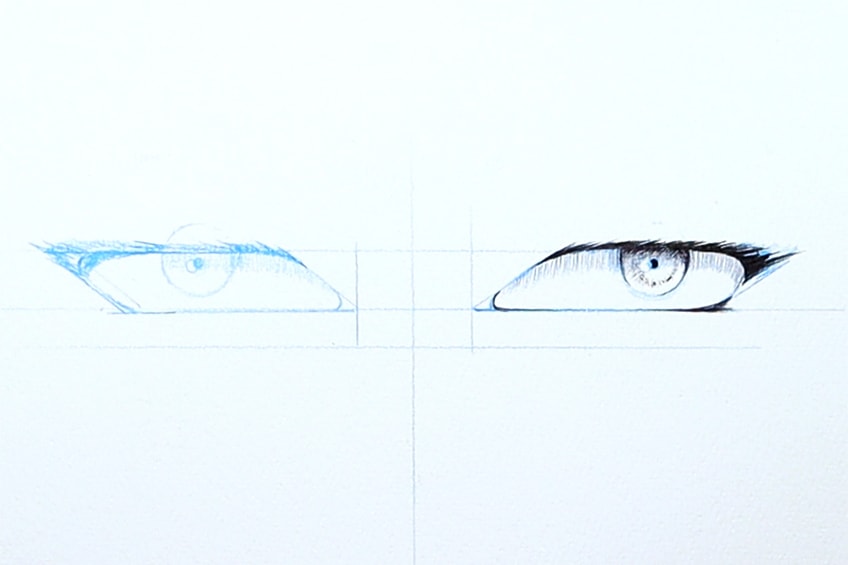
We also want to make sure that we keep the shading along the upper section of the eye, even when the eye is narrow. We will also start to see that as we color in the small pupil, the character starts to have a crazy look about them. Once we have completed one eye, we can then proceed to replicate the process in the other eye by using the previous eye as a reference.
Try to keep symmetry within the eyelashes, as it creates a cool aesthetic in character.
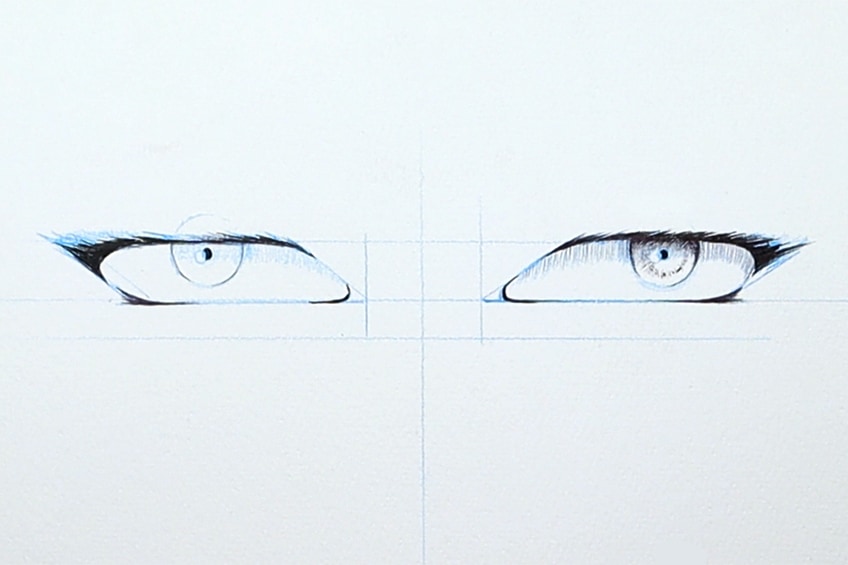
Make sure to also shade along the entire upper section of the eye, not just the iris. It is almost as if we are trying to create a strip of shading along the upper section of the eye that is cast by the upper eyelid.
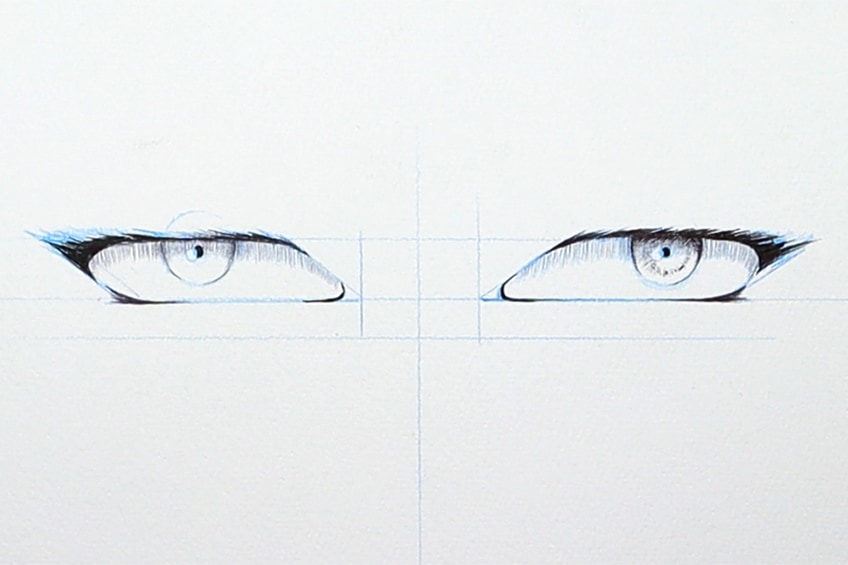
Allow yourself to take time and work on these details with patience, and you should be done. And there you have it, a comprehensive guide on how to draw anime eyes!
Tips to Remember
- Consider the details that enhance the eye. Highlights, shading, or even pupil size- all the little details matter when you want to make unique attributes to the eyes, so really consider all of them.
- Break up the process into its fundamental stages. You want to make sure that you slowly construct the eyes through each stage without rushing.
- Experiment with your own anime eyes drawings. Once you have the knowledge of the fundamental concepts, you can refine and tweak them to create your own unique anime characters.
- Have Fun! Everything about anime is fun, so enjoy the process of learning this epic skill.

Anime eyes are really great to have in your drawing repertoire because they are so applicable to so many different character designs. The fundamental knowledge of anime eyes drawings can also be adapted for other character design ideas. This tutorial on how to draw anime eyes step by step provides a really useful toolkit for considering an essential aspect of faces for character design. We also have an article about drawing manga which you can have a look at.
Take a look at our anime eye drawing webstory here!
Frequently Asked Questions
How Do You Shade Anime Eyes?
When shading anime eyes, it’s important to consider the actual real biological features of the eye. This means that we want to consider how the eyeball sits under the eyelids. This will inevitably create a shadowing that falls along the upper section of the eye, just under the upper eyelids. We want to keep the shading predominantly in that area, as it creates a nice contrast between the lower and upper sections of the eye. We can also add darker shading to the iris to create a distinction between the white areas of the eyes and the iris. Generally, an iris has coloration, so we want to represent the coloration in the iris by shading it slightly darker than that of the white areas in the eye.
How Do You Create a Distinction Between Female and Male Anime Eyes?
What’s really great about anime eyes is that they are very androgynous and often are not masculine or feminine in isolation. In order to capture the feminine and masculine qualities of anime characters, we must contextualize them through the rest of their features. In many instances, anime characters can be difficult to distinguish between male and female, unless clothing, body shape, and other visual factors are included to create a particular type of character. This is really great because it frees us to be more playful with eye choices and how to utilize them for different character types.
Matthew Matthysen is an educated multidisciplinary artist and illustrator. He successfully completed his art degree at the University of Witwatersrand in South Africa, majoring in art history and contemporary drawing. The focus of his thesis was to explore the philosophical implications of the macro and micro-universe on the human experience. Matthew uses diverse media, such as written and hands-on components, to explore various approaches that are on the border between philosophy and science.
Matthew organized various exhibitions before and during his years as a student and is still passionate about doing so today. He currently works as a freelance artist and writer in various fields. He also has a permanent position at a renowned online gallery (ArtGazette) where he produces various works on commission. As a freelance artist, he creates several series and successfully sells them to galleries and collectors. He loves to use his work and skills in various fields of interest.
Matthew has been creating drawing and painting tutorials since the relaunch in 2020. Through his involvement with artincontext.org, he has been able to deepen his knowledge of various painting mediums. For example, watercolor techniques, calligraphy and lately digital drawing, which is becoming more and more popular.
Learn more about Matthew Matthysen and the Art in Context Team.
Cite this Article
Matthew, Matthysen, “How to Draw Anime Eyes – Master 3 Eye Expressions.” Art in Context. December 6, 2022. URL: https://artincontext.org/how-to-draw-anime-eyes/
Matthysen, M. (2022, 6 December). How to Draw Anime Eyes – Master 3 Eye Expressions. Art in Context. https://artincontext.org/how-to-draw-anime-eyes/
Matthysen, Matthew. “How to Draw Anime Eyes – Master 3 Eye Expressions.” Art in Context, December 6, 2022. https://artincontext.org/how-to-draw-anime-eyes/.


