Cross Hatching – Learning the Cross Hatching Technique
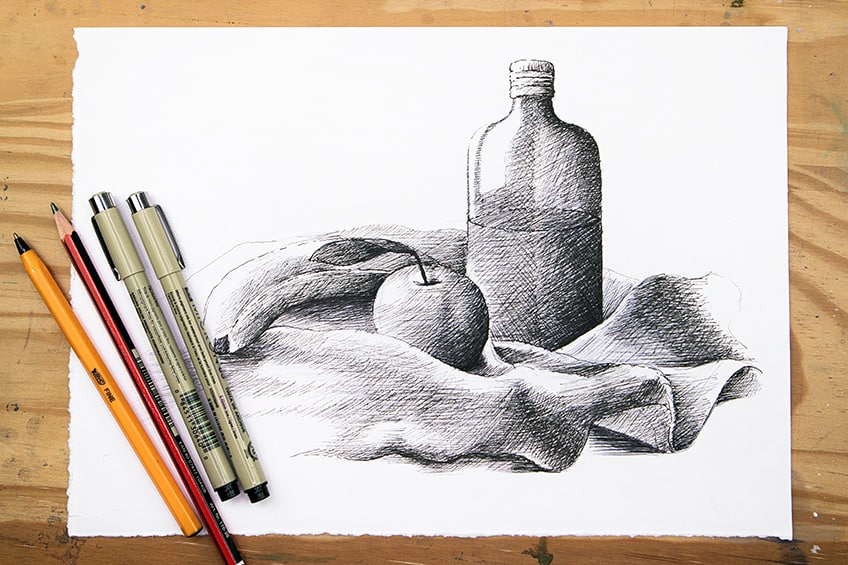
Cross-hatch shading is an amazing method of shading objects as it provides a really unique way of creating both light and shadowy moments within a drawing. Cross-hatching art also has a unique sketch-like quality that can be a great visual quality within various genres of art. It’s also a great skill to be used in tandem with various other shading styles. In this tutorial on how to cross-hatch we will be learning how to incorporate this simple technique into a drawing. The cross-hatching technique is an essential drawing method for an artist that is interested in drawing. This versatile skill can easily be used for various artistic ideas and provides the artist with more options in their drawing arsenal.
Table of Contents
An Easy Guide to Cross-Hatching
Cross-hatch shading is an easy task that can be used for various drawing ideas. In many ways, learning how to cross-hatch is more interchangeable between mediums than other shading styles because we work with lines. In this tutorial, we will get to explore both the fundamentals of cross-hatching with a pencil and then apply it to a more complex subject matter with the use of the pen. We will slowly break down the process into digestible bites so that we have a comprehensive understanding of the cross-hatching shading style. Learning how to cross-hatch is a great skill to have because you can explore this shading process with various mediums, making it a versatile skill that can be used in a variety of ways.
Necessary Materials
In this tutorial on cross-hatching, we will work with a simple set of tools as we explore the fundamentals of the cross-hatching technique. We will need some pencils, some ballpoint pens, and some micron pens. We will want to make sure that we have a sharpener for the early stages so that we can work with fine lines. Once we have all the necessary materials, we can start preparing ourselves by finding ourselves an environment that is conducive to focusing. All the necessary materials can be found through the links below:
- Ballpoint Pen
- Micron Pens
- Pencil
- Paper
- Reference Image (downloadable)
A Easy Guide to Cross-Hatching
In this tutorial, we will look at how this shading style can be implemented into basic three-dimensional structures, allowing us to really grasp the cross-hatching technique. This will also provide us with the opportunity to understand both light and shadow in a fundamental way. We then will see how this process can be applied to more realistic objects and how to achieve variety in shadow, tonal values, and light for a more realistic cross-hatching art. There is a downloadable reference image that will assist us in the latter part of the tutorial that breaks down the cross-hatching process of a still life with a few simple steps.
The Fundamentals of Cross-Hatching
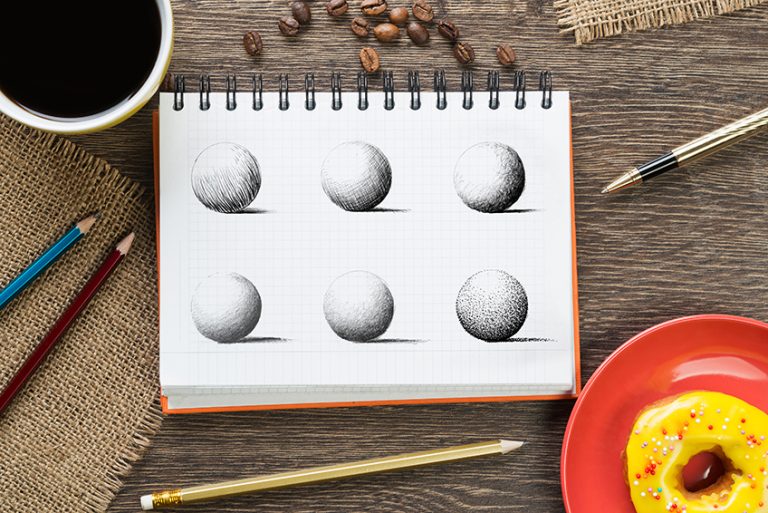
Let us start with some basic three-dimensional shapes to grasp the drawing process of creating a cross-hatching drawing. Working with three-dimensional shapes is a great way to break down the fundamental cross-hatching technique and how it is utilized to create light and shadow within three-dimensional structures.
Shape
Let’s start with drawing a basic sphere and rectangle, as it is important to grasp the shading process with basic shapes. This is because all three-dimensional structures can be simplified into basic three-dimensional shapes.
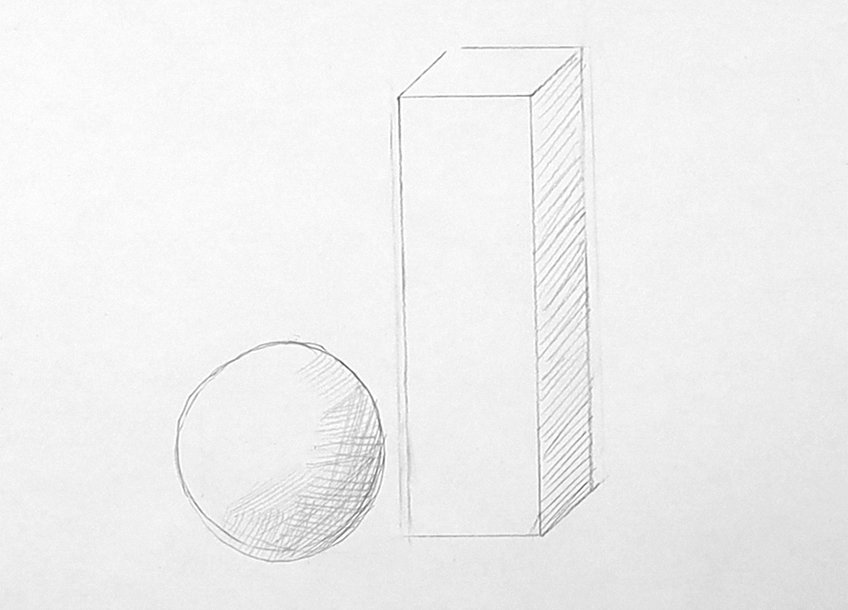
Using your pencils, you want to start with a general light layer cross-hatch pencil drawing, where you establish the darkest shadows on a single side of each shape. All the shadows will remain on a single side for each shape to create a realistic interaction with light.
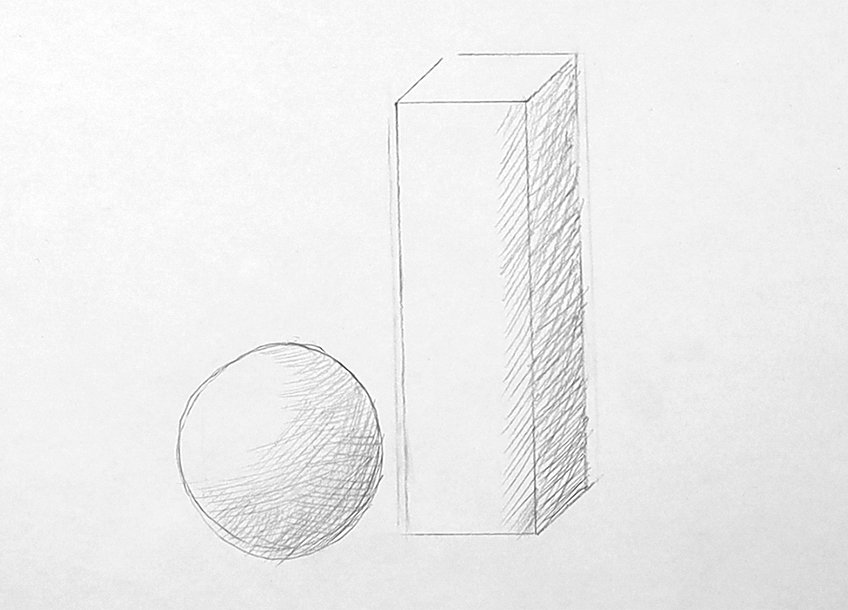
Considering the form and perspective of each shape and how they are placed on a single plane will help you to establish consistency within your cross-hatching technique. These principles can be easily applied to real objects.
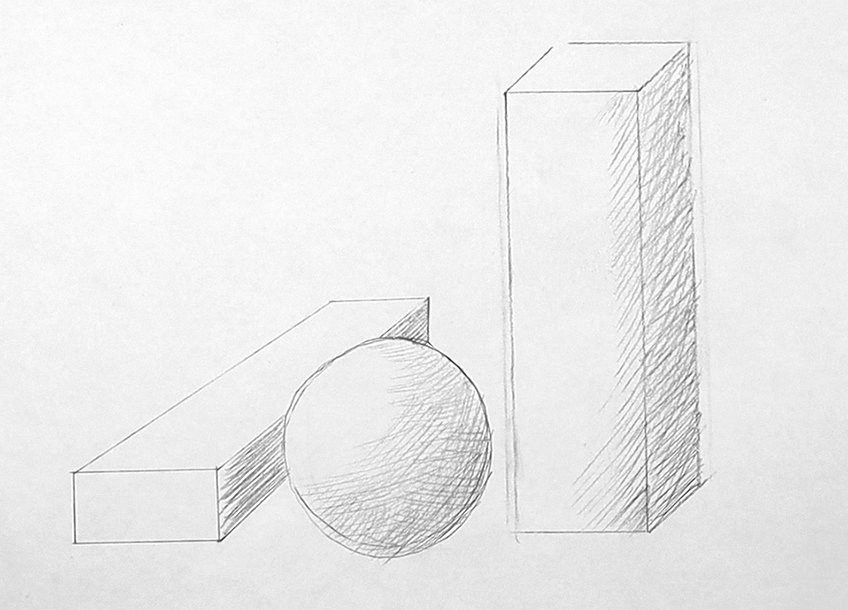
You want to keep the sketch light where you are more focused on the formation of the shapes and how they interact with one another. This is important because shading is meant to be a tool that enhances the realism of how objects exist in space.
Light and Shadow
Light and shadow are essential concepts to grasp, as these will help to establish consistency in the way we shade. You want to choose a single side from which the light source will be present.
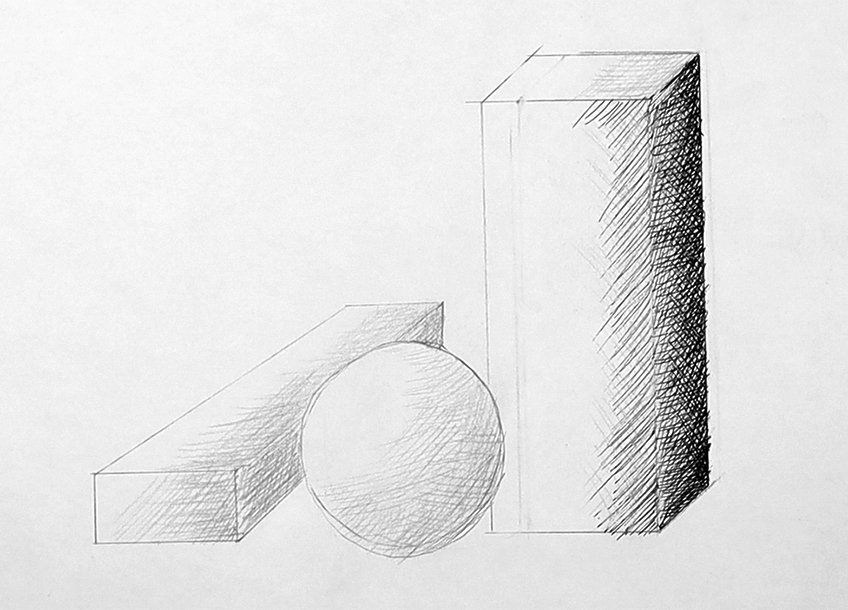
This is going to establish shadows on the same side of each shape, which will create a coherent light and shadow effect which is more effective when learning how to cross-hatch.
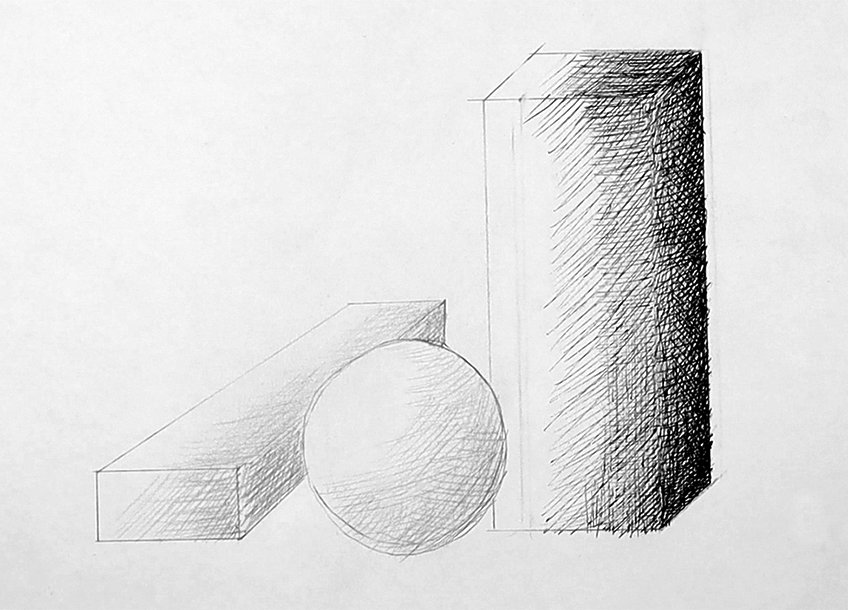
Cross-Hatching Linework
When we learn how to cross-hatch shade, we don’t need to worry too much about creating perfect vertical and horizontal lines. Cross-hatch drawing is not just about simplistic lines perpendicularly intersecting at right angles to create a shadowy effect.
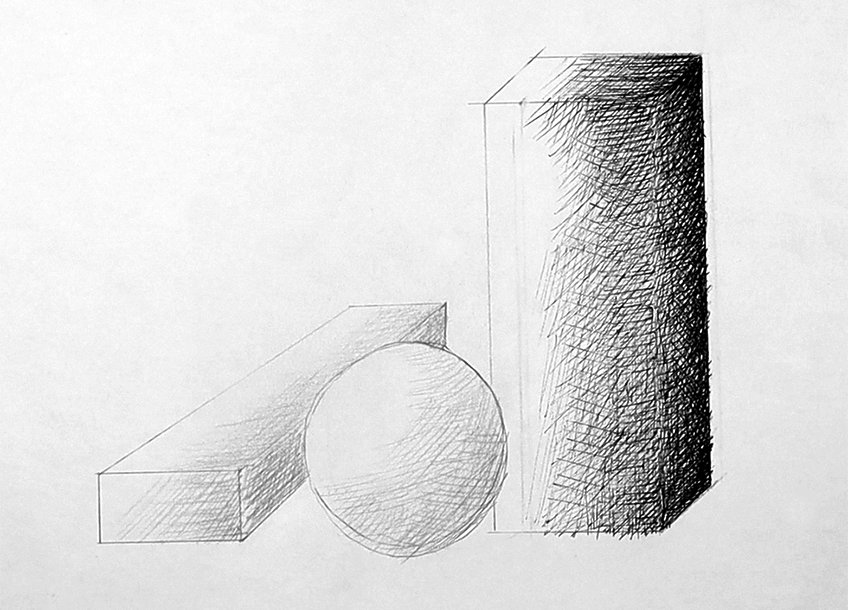
We can be messier and looser as we add more lines along the sides that will be mostly shadowed. The intent should be to build layers of lines, where you work with lighter lines along the shape first, after which you can slowly layer over darker lines.
By layering lines, we start to see how gradients will naturally form. This is with the intention of a light source being present on one side of the page. You want to work lines over one another, again and again, slowly transitioning from a lot to a few.
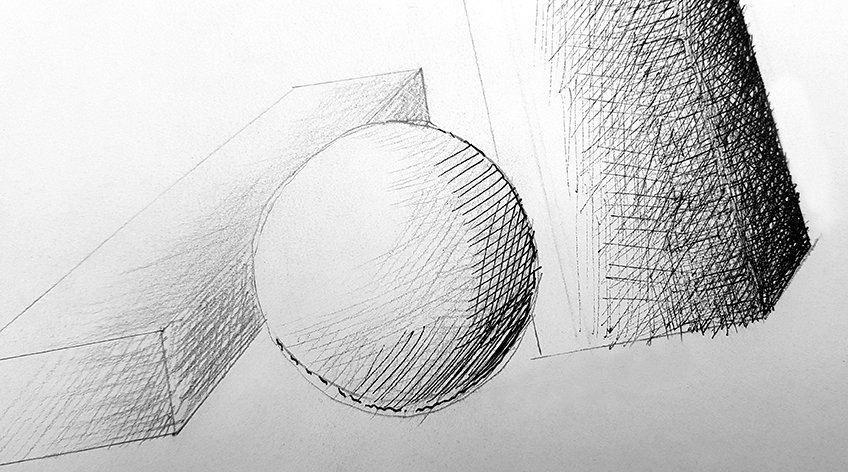
Naturally, the more lines we place on a single side of each shape, the darker that side of the shape will be. By doing this, we can slowly work in fewer and even thinner lines as move toward the lighter side of each shape.
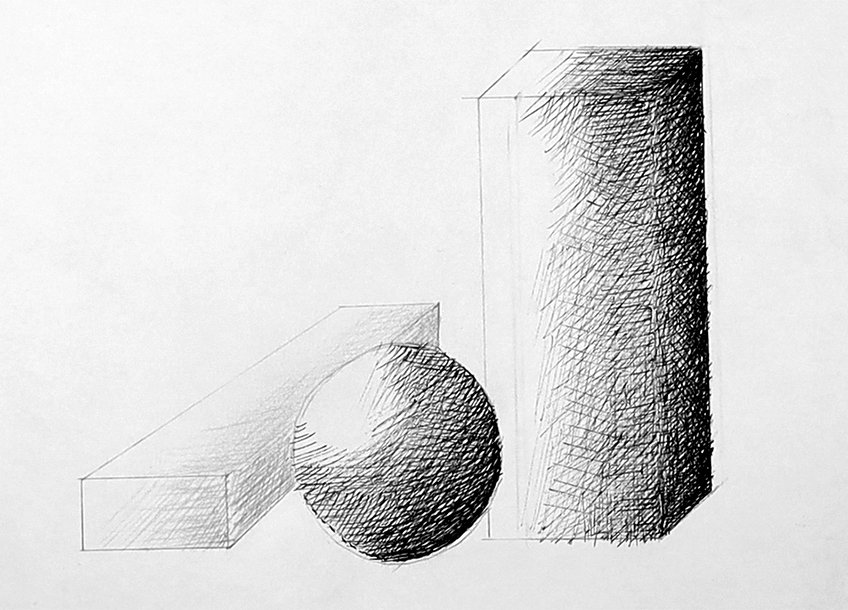
This is where the use of various tools can be a great way of creating different gradients within the shapes. We can use lighter and thinner tools for lighter qualities in the shape, whereas we can use darker and thicker pens for darker areas in the shape.
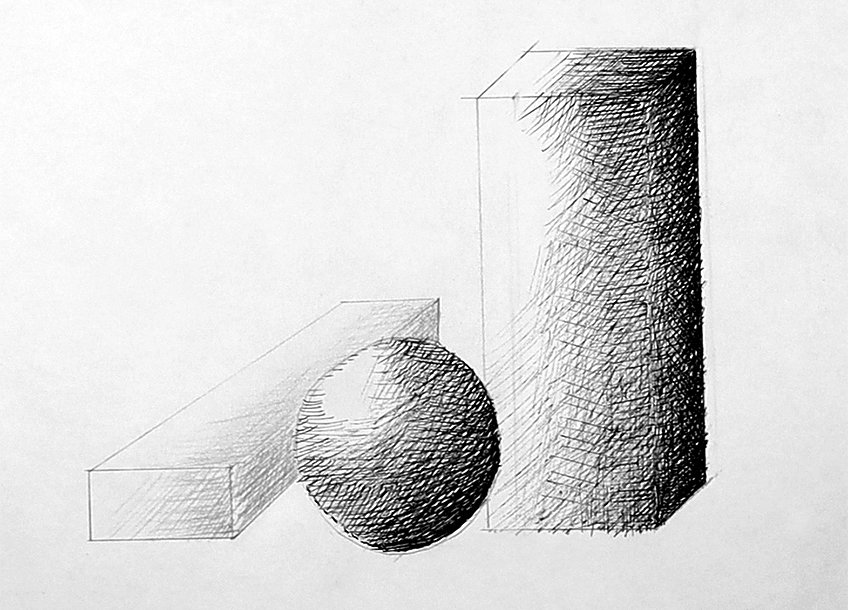
The intention should also be to create lines in all sorts of directions, slowly working in fewer and softer lines as you move along the shape to the area that is most lit.
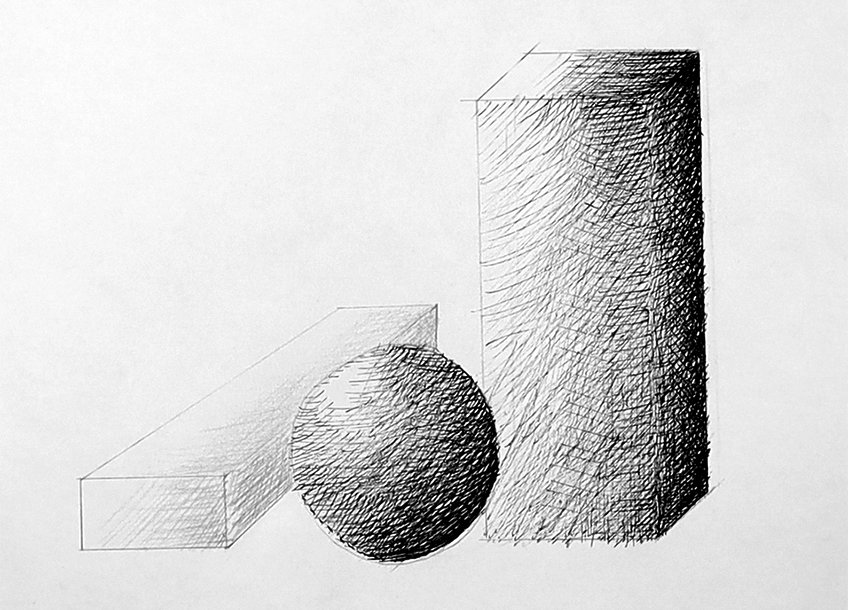
Think of it as adding softer light lines along the entire shape from dark to light. You then want to stick with this process by slowly layering lines over each other again and again, each time moving from dark to light.
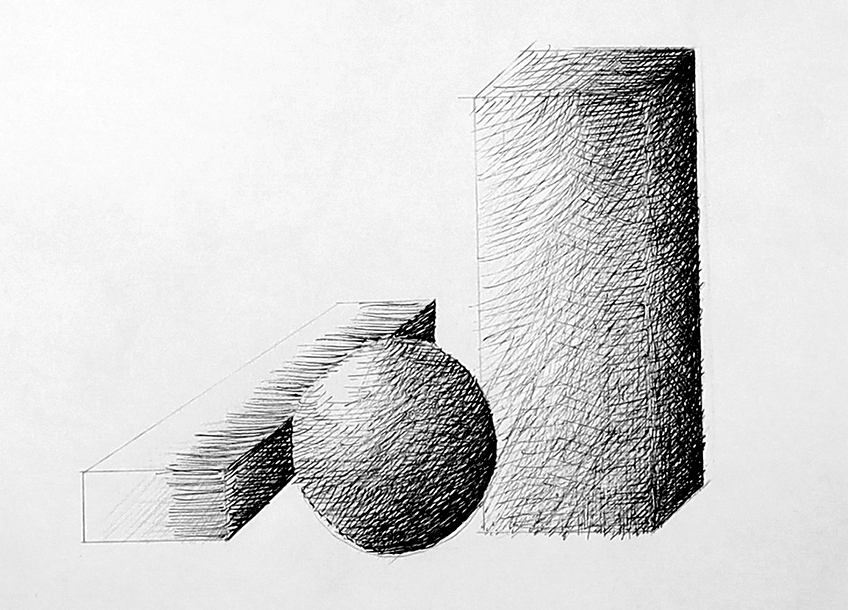
We always want to work from dark to light. This way, we are less likely to add in darker lines in the lighter areas of the shape by accident. This should always be a process of patience and caution as you draw cross-hatching lines.
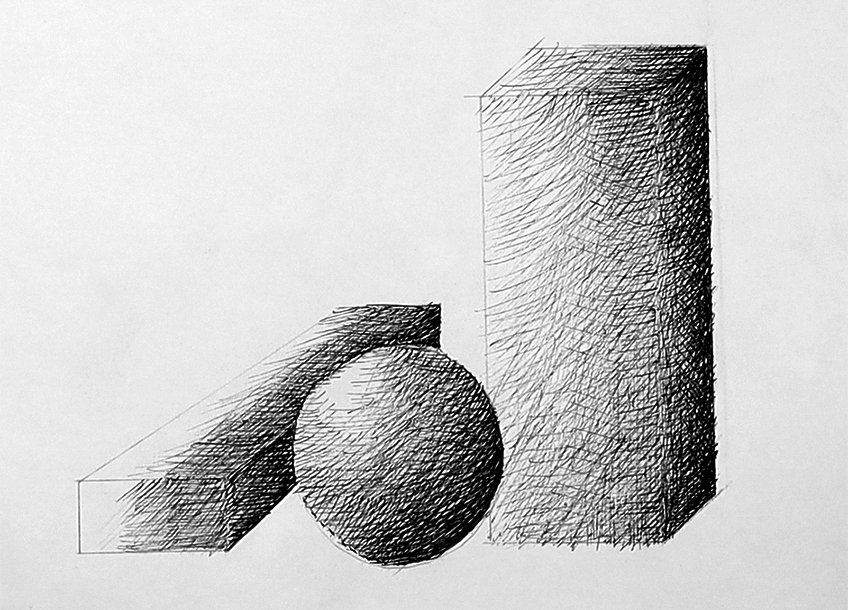
As you start to work through different objects one at a time, you will start to see that the cross-hatching technique provides a unique overall aesthetic to the drawing.
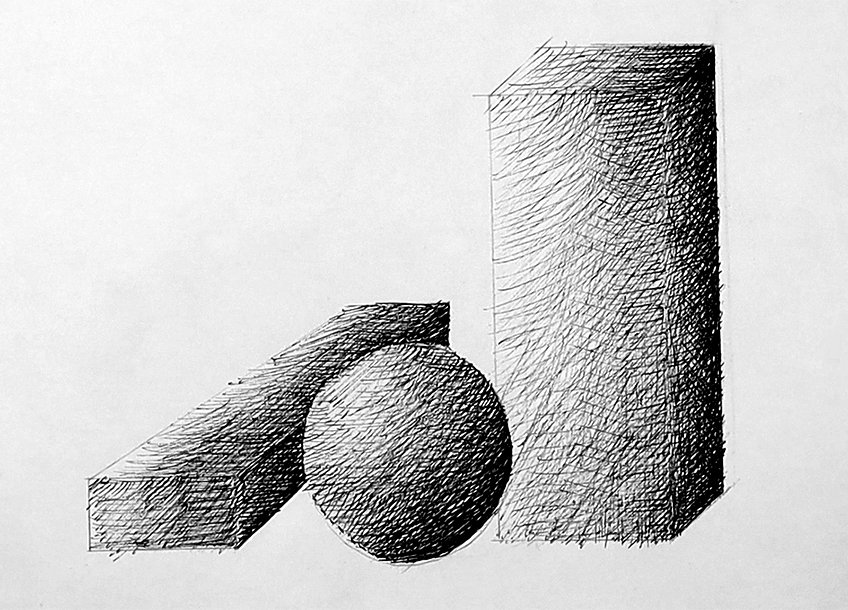
You can be really intentional as well with how you draw your cross-hatching artworks, as you can be really precise with your lines or more sporadic. You can also add in only thin lines or have a combination of thick and thin lines.
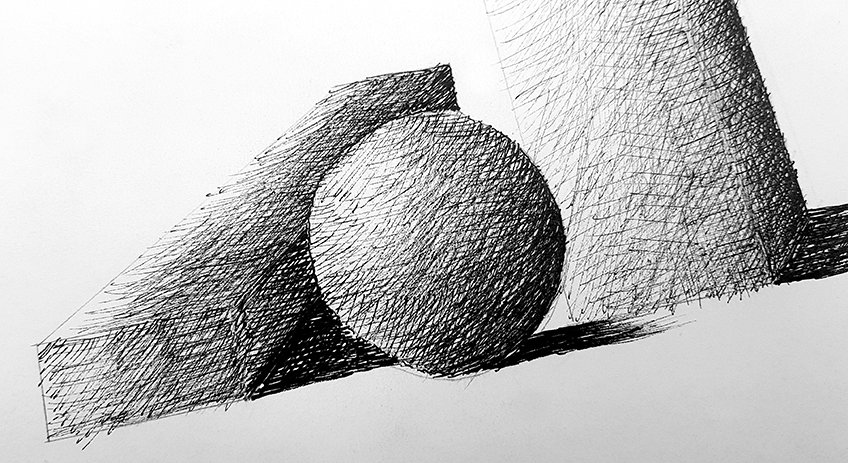
However, slowly layering lines over one another should always be the intention of the shading process. By doing this, we slowly darken various areas of a drawing and start to create a specific textural quality in the drawing that is unique to cross-hatching shading.
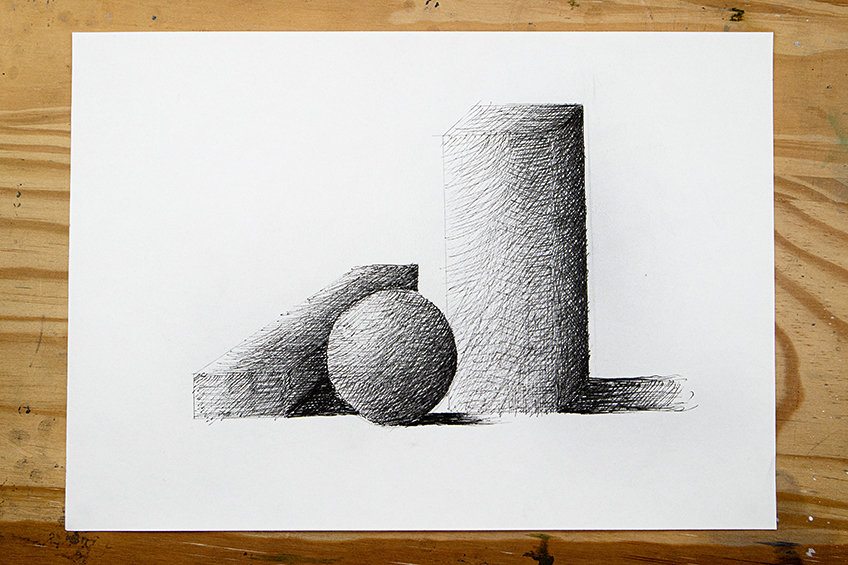
These are the basic fundamentals of the cross-hatching drawing process. This is a really beautiful sketch-like quality that can create a beautiful aesthetic in a drawing.
Applying Cross-Hatching to Real Objects
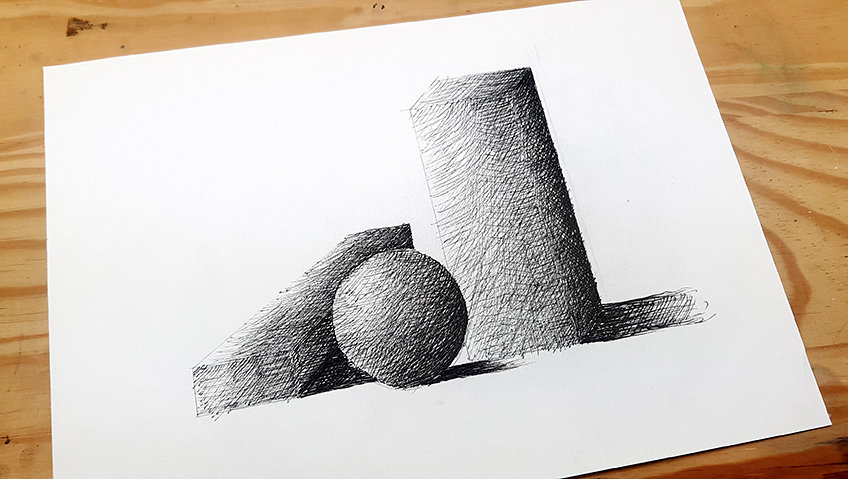
Now that we understand the fundamentals, let us go through a scenario where we can utilize this method of shading in a still life. A still life is a great way to exercise the cross-hatching technique because you can work with simple objects that can still provide you with the challenge of replicating three-dimensionality with light and shadow.
Step 1: Sketching the Scene
Let’s start with a light sketch of the scene as we observe the reference image for guidance. It’s important to set the scene as realistically as possible before shading.
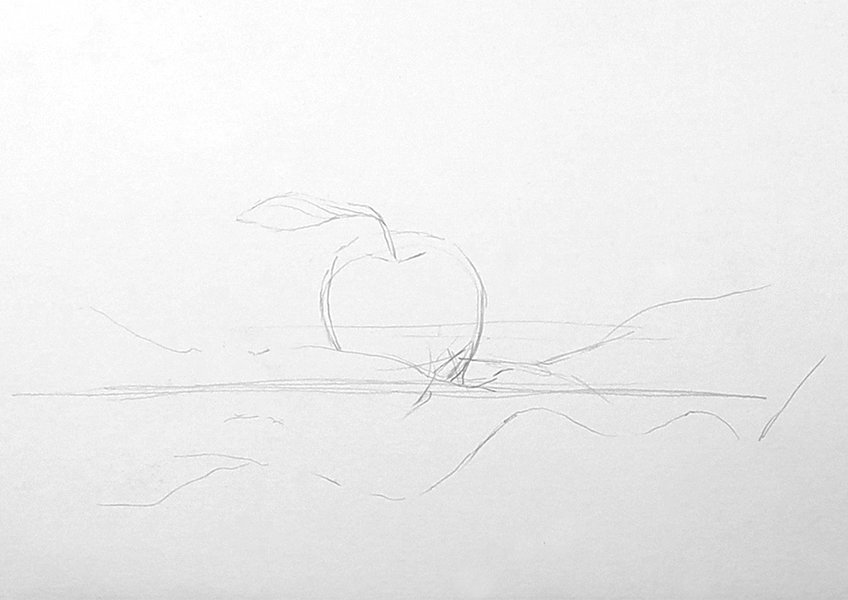
We slowly want to work through the scene, basically drawing in the different items as we did for the three-dimensional shapes.
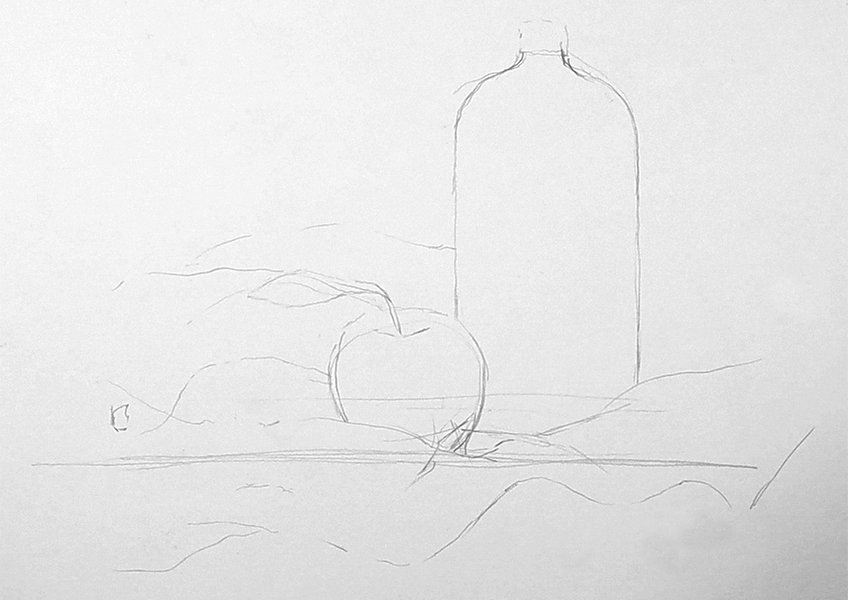
Take your time setting the scene with a light pencil sketch and try to work out the fabric and how it interacts with the different items present.
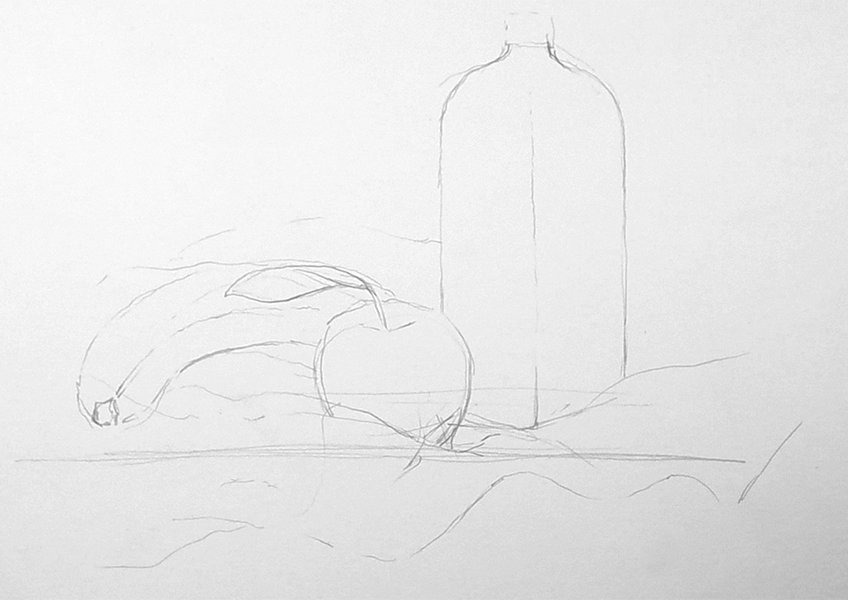
Step 2: Light Cross-Hatching to Establish Shadows
Once you feel that you have adequately sketched out the scene, we want to continue with our pencils to add in some light cross-hatching. We also want to establish which side of the scene the light source will be present.
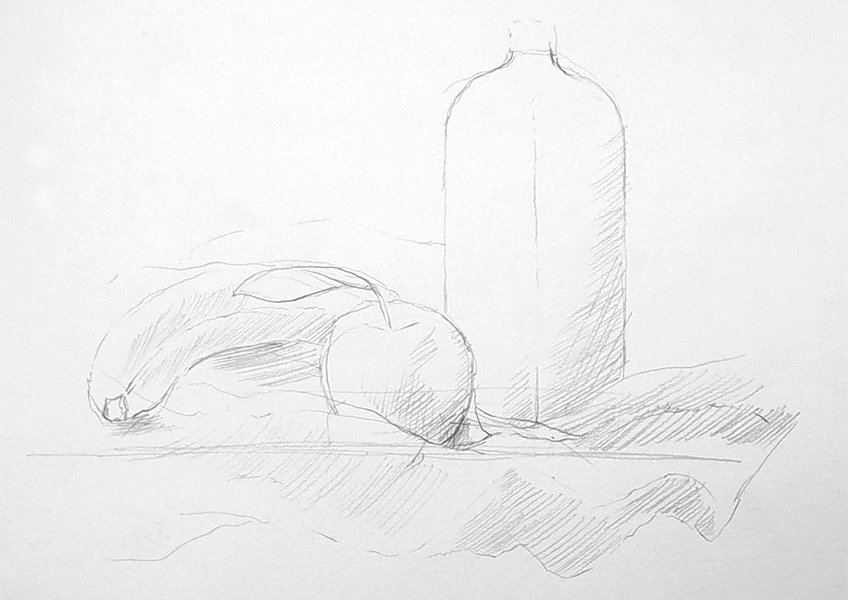
Try to be gentle with placing these light cross-hatching marks. The intention is to give subtle form to the different items, slowly creating more three-dimensionality in the scene.
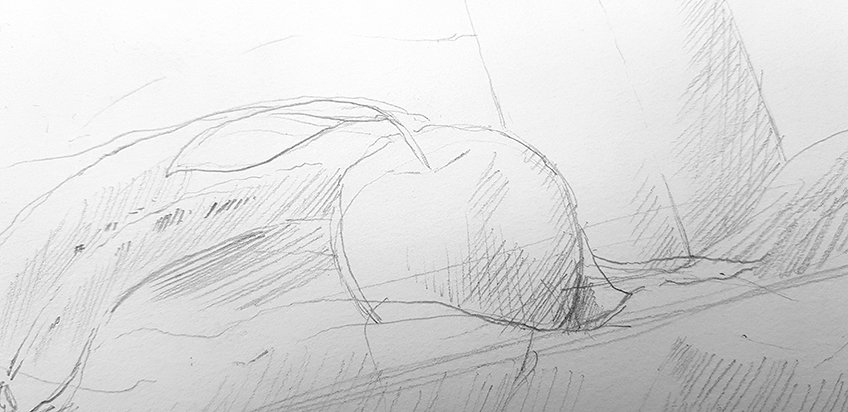
We really want to consider each form of each shape, meaning that we want to consider curvatures within the shapes. Ask yourself: Are there gentle curves or harsh curves? You want to think through this as you draw the different items.
This is the time where we focus on really capturing the shape and form of each item, just as we learned how to do so with the three-dimensional shapes.
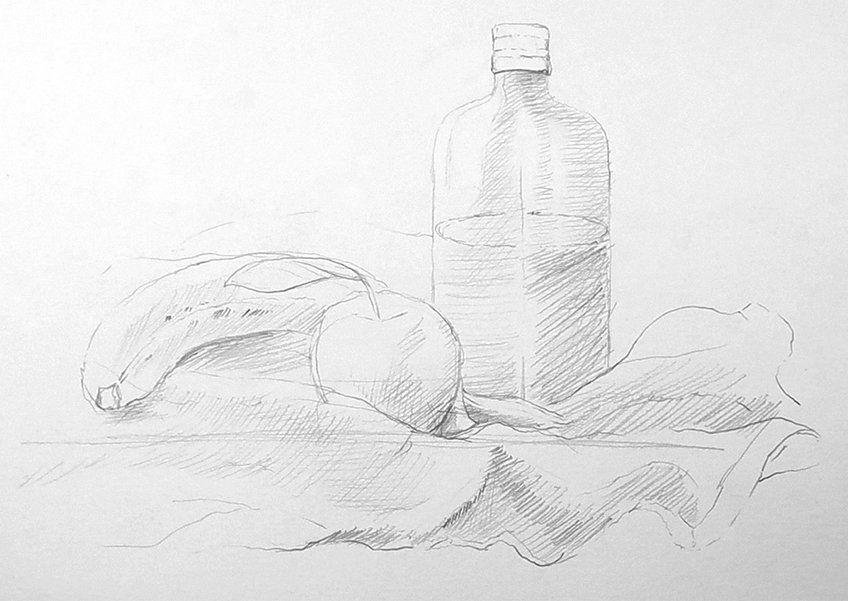
Slowly, we should start to see how the still life scene becomes more alive and realistic through a subtle cross-hatch pencil drawing.
Step 3: Adding in Light Cross-Hatching Shading
This is where we can start to utilize darker tools to slowly enhance the drawing. A good suggestion is to start with a ballpoint pen, as it has lighter ink than that of a micron pen.
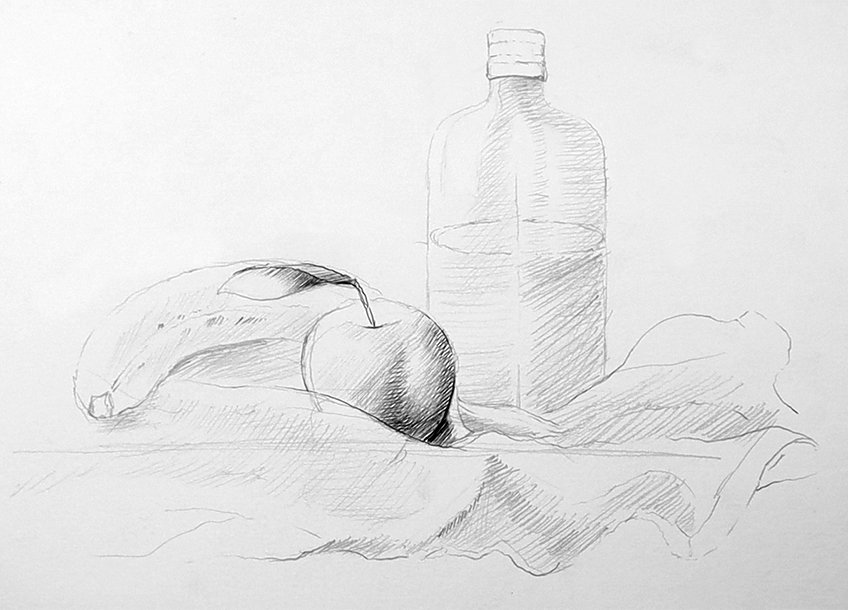
The intention is to follow the same fundamental process of building layers. Use the concepts you have learned for the three-dimensional shapes and apply that process to these real objects.
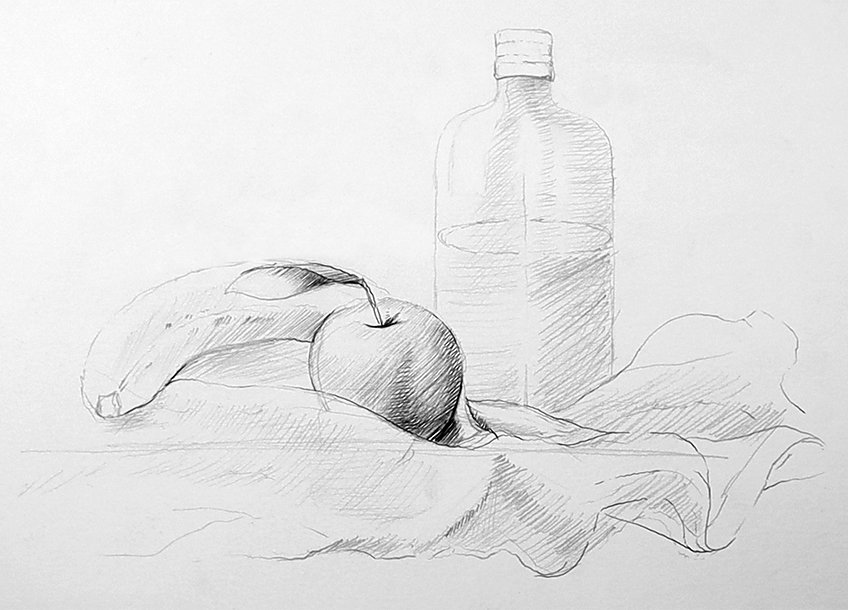
You want to make sure you use the reference image as a guiding force for the placement of darker and lighter lines. Again, we don’t need to worry about perfect lines; rather, we want to be more conscious of dark lines.
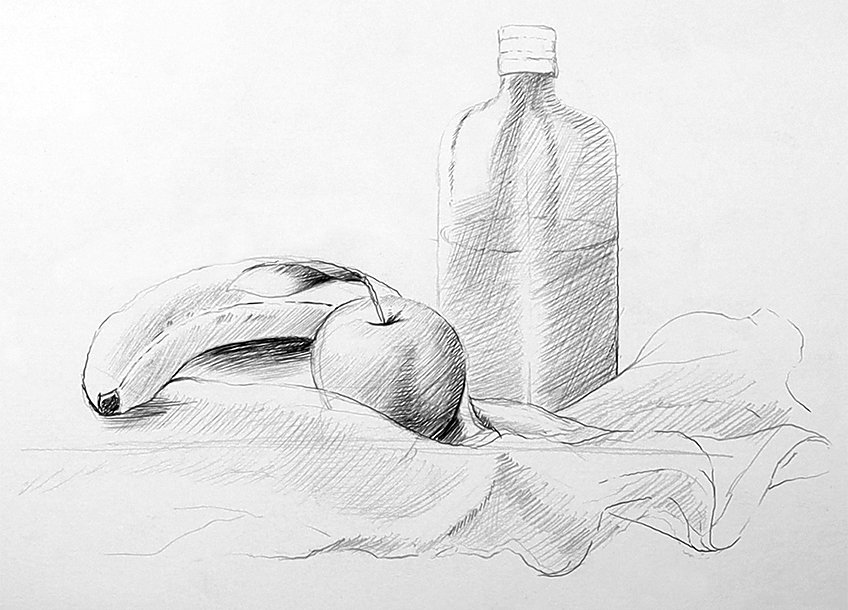
We want to work with layers, starting with lighter tools as we shade the scene with cross-hatching lines. We will slowly increase the contrast as we layer darker lines later on.
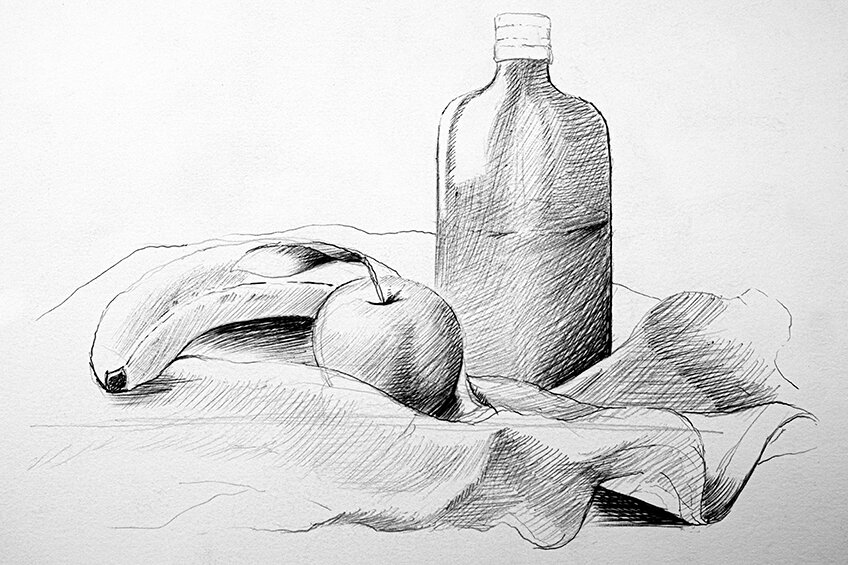
We also want to make sure that we work from the darker areas to the lighter areas within each item. Remember, this will reduce our chances of accidentally making the lightest areas in the drawing dark.
Step 4: Layering Darker Cross-Hatching Lines for Contrast
Once we have established lighter layers of cross-hatch shading throughout the drawing, we can start to move on to darker tools for more contrast. This is where the use of micron pens becomes very helpful.
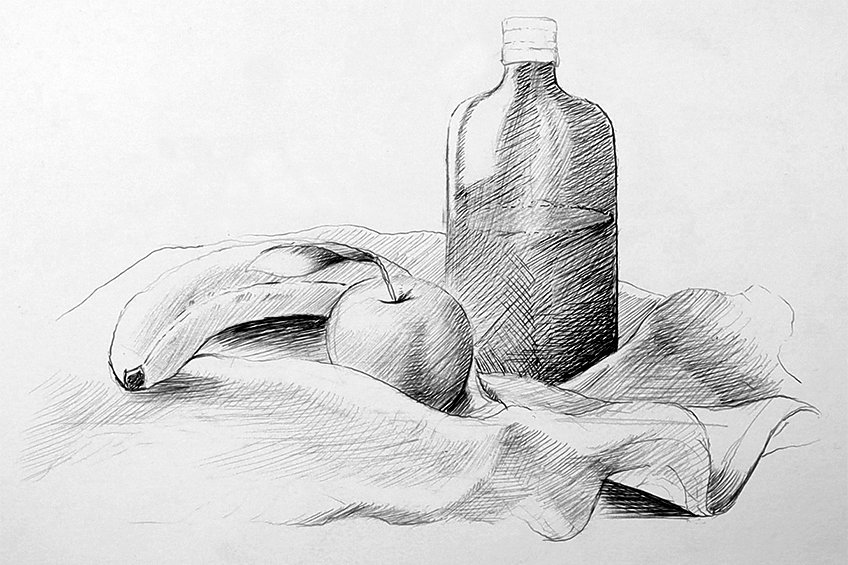
Again, we simply follow the same process of working layer over layer of cross-hatching lines. We also want to make sure that we are always working from the darkest sides of the drawing to the lightest sides of the drawing.
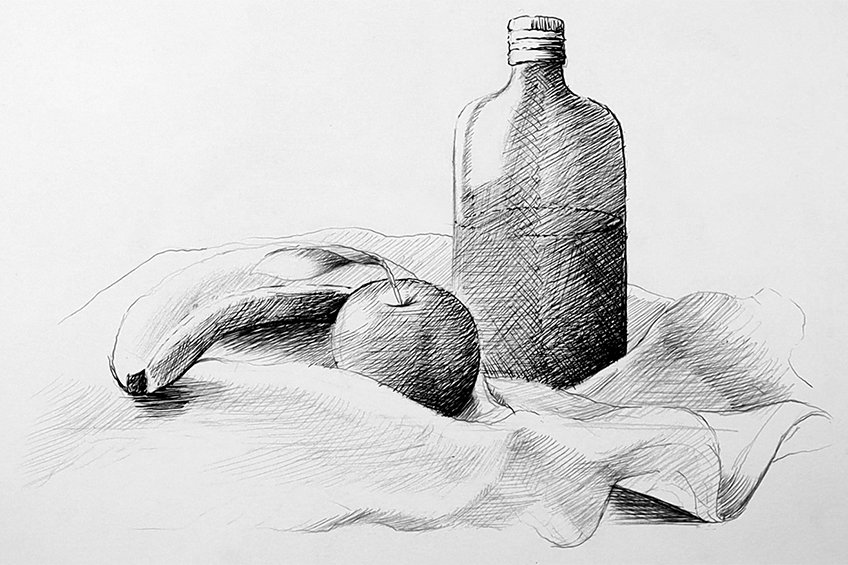
This means that as we focus on each area and item within the drawing that has shadows, we want to work from dark to light, slowly layering lines over one another to create seamless gradients in the drawing.
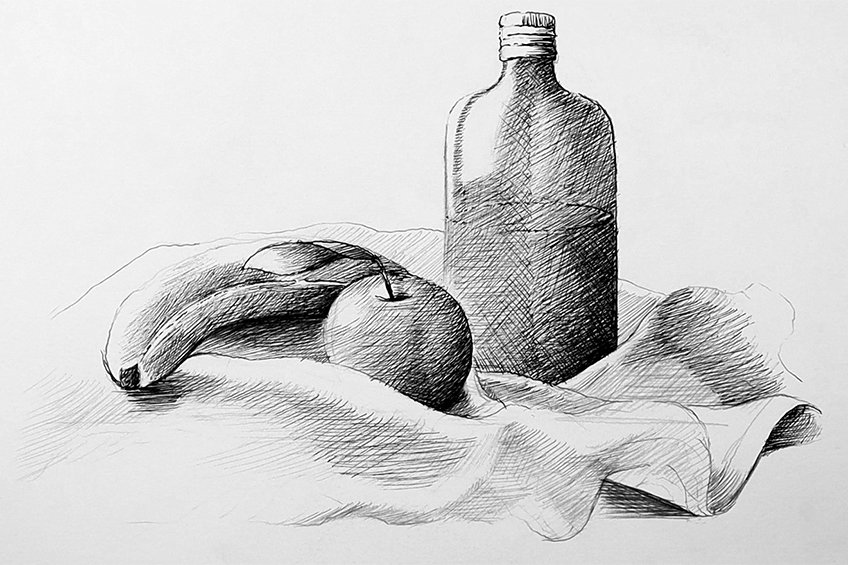
You can be really strategic with how you do this through the use of thicker and thinner lines. This means you can work with thin lines to establish lighter layers, and then work with thicker lines in the darkest shadowed areas.
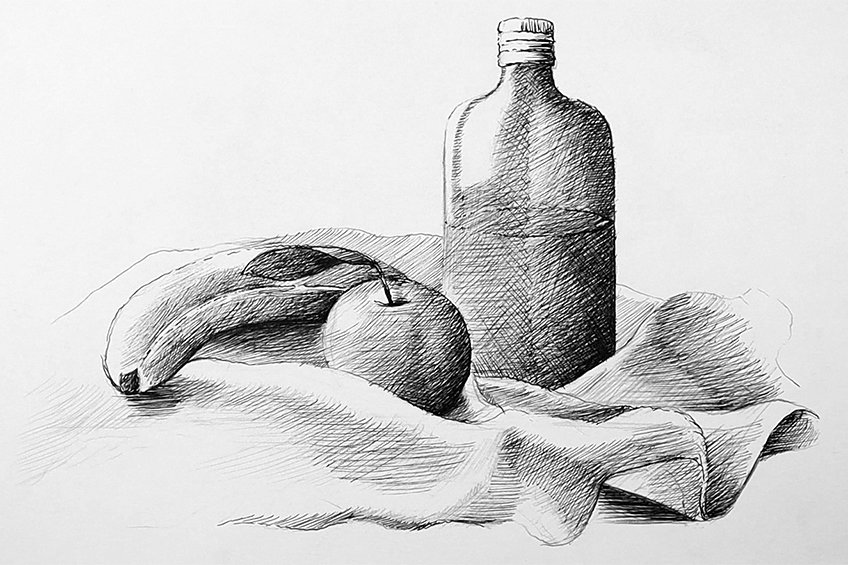
The more you add lines over one another, the more seamless and cohesive the drawing will start to look. That being said, you can also add in very few lines in very lit areas of the drawing to create textural differences.
At this point, it is simply a matter of patience and observation of the thing that you are drawing. Be sure to always keep checking and analyzing your reference image for guidance.
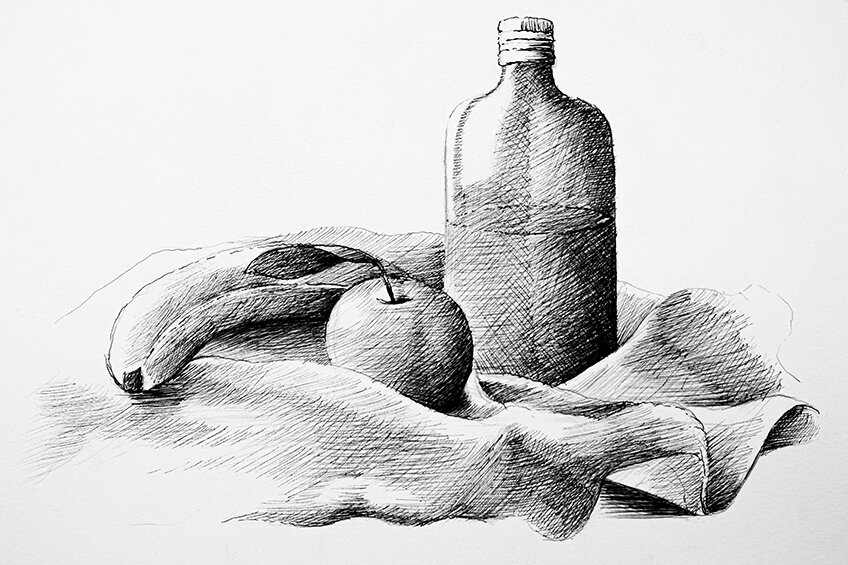
Take your time, slowly building up layer over layer, darkening the shadowed areas and creating transitions into the lighter areas. The more time you take to add in lines, the more effective you will be at creating gradients between lighter and darker moments.
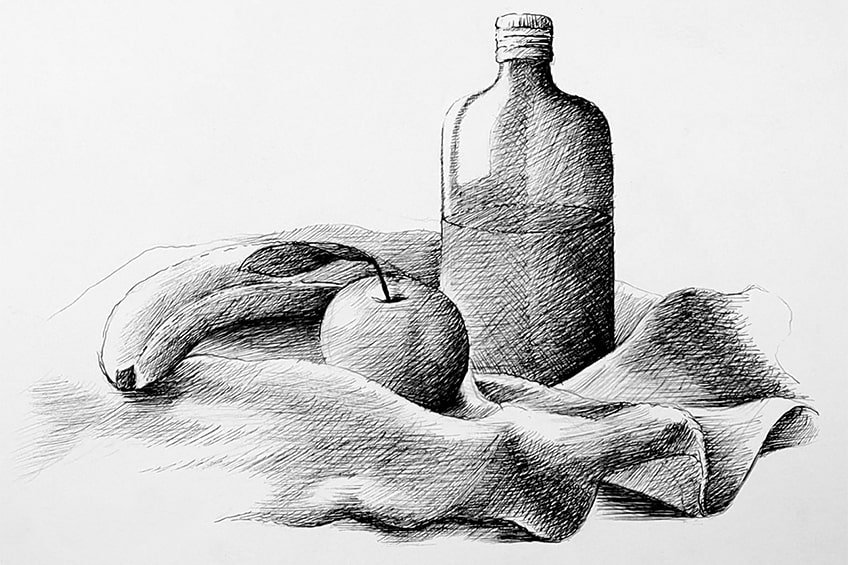
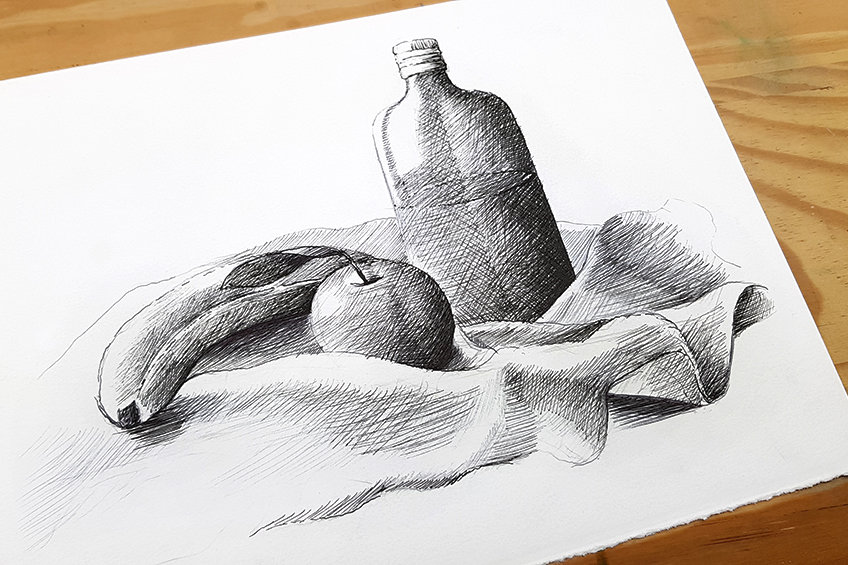
That is the basic process of a cross-hatching technique drawing process! Just remember to be patient and really observant of the subject matter that you are drawing.
Tips to Remember
- Do some practice sketches. Use these skills to draw different items to better your cross-hatching technique.
- Get comfortable with three-dimensional shapes. Consider drawing simple three-dimensional shapes such as apples and then slowly build up to more complicated subjects like people.
- Consider light and shadow more closely. Make sure you consider the light source of whatever you are drawing.
- You can draw lines in various directions. Don’t worry about perfect lines; allow yourself to be loose with your cross-hatching shading.
- Consider using different tools for different gradients. Create light to dark layers through the use of different tools to create more enriched textural qualities in your drawings.
Learning how to create cross-hatch shading is not difficult if you build up from basic to more complex shapes. This tutorial provides a variety of different concepts and ideas to consider within your cross-hatching art. Remember, art takes practice, so be patient with the drawing process and keep at it!
Frequently Asked Questions
What Can You Use Cross-Hatching For?
Cross-hatching can be used for various drawing ideas. Cross-hatching is simply a shading method and is therefore easily applicable to different drawings. Cross-hatching also works really well within the realm of drawing from life, which includes still lifes, nature, portraits, and other things drawn from sight. The shading style lends itself well to real-life objects being represented in a drawing format as it simultaneously achieves both a sketch-like quality whilst being able to achieve realistic moments of shadow and light. The best way to exercise this drawing method is to explore its potential in a still life. This allows you to draw realistic objects that have different compositions, making it a great way to grasp the cross-hatching technique within a drawing.
Can You Use Different Mediums Together With Cross-Hatching?
What is nice about cross-hatching is that it is a layered method of drawing, as the process requires overlapping lines to create different gradients. This means that we can work with different mediums that work well interchangeably with one another such as pencil and pen. Drawing undertones with a lighter medium such as a pencil is a great way to set up transitions between gradients in a more seamless way. This means that as you overlap darker lines with another medium, perhaps a pen, you then can use the pencil lines as a guideline. Utilizing different mediums for different shadows in a drawing is a great way to explore gradient shifts in a cross-hatching drawing.
Matthew Matthysen is an educated multidisciplinary artist and illustrator. He successfully completed his art degree at the University of Witwatersrand in South Africa, majoring in art history and contemporary drawing. The focus of his thesis was to explore the philosophical implications of the macro and micro-universe on the human experience. Matthew uses diverse media, such as written and hands-on components, to explore various approaches that are on the border between philosophy and science.
Matthew organized various exhibitions before and during his years as a student and is still passionate about doing so today. He currently works as a freelance artist and writer in various fields. He also has a permanent position at a renowned online gallery (ArtGazette) where he produces various works on commission. As a freelance artist, he creates several series and successfully sells them to galleries and collectors. He loves to use his work and skills in various fields of interest.
Matthew has been creating drawing and painting tutorials since the relaunch in 2020. Through his involvement with artincontext.org, he has been able to deepen his knowledge of various painting mediums. For example, watercolor techniques, calligraphy and lately digital drawing, which is becoming more and more popular.
Learn more about Matthew Matthysen and the Art in Context Team.
Cite this Article
Matthew, Matthysen, “Cross Hatching – Learning the Cross Hatching Technique.” Art in Context. February 24, 2023. URL: https://artincontext.org/cross-hatching/
Matthysen, M. (2023, 24 February). Cross Hatching – Learning the Cross Hatching Technique. Art in Context. https://artincontext.org/cross-hatching/
Matthysen, Matthew. “Cross Hatching – Learning the Cross Hatching Technique.” Art in Context, February 24, 2023. https://artincontext.org/cross-hatching/.


