Drawing With a Grid – How to Use a Grid for Drawing Various Things
Drawing with a grid is a great way to learn how to capture objects, scenes, and all sorts of subject matter in an accurate way. Sometimes our observational skills can play tricks on us and we can easily distort what we see by what we think we see. Grid-method art teaches you how to refine your observational skills, giving you insight into having an accurate perspective on describing the subject matter within your artwork. Using a grid for drawing also provides you with a lot of possibilities, as you have to worry less about drawing a whole object perfectly and can focus easily on smaller details incrementally. Drawing with a grid is a great way to accurately depict subject matter and can be applied to all sorts of subject matter.
Table of Contents
An Easy Guide to Drawing With a Grid
In this tutorial on drawing with a grid, we will be drawing a hand, as it is quite an intricate and complex structure. This tutorial will demonstrate how drawing with a grid can nullify the anxiety associated with drawing something complex when it is broken into little blocks.
Using a grid for drawing makes the process much easier as it demonstrates how focusing on little moments of details in a single block is much easier than attempting to create an accurate drawing with a holistic approach.
Our brains often register objects as a whole, which makes it overwhelming sometimes to represent within a drawing. However, using a grid for drawing allows you to draw complex objects in simple and digestible sections.
Instructions on Creating a Drawing With a Grid
The process of drawing with a grid is quite simple- it only requires some measurements and line placement in the beginning. The aim will be to establish the same grid measurements on both the reference image as well as the drawing paper, which will give us a corresponding grid between the drawing paper and the reference image.
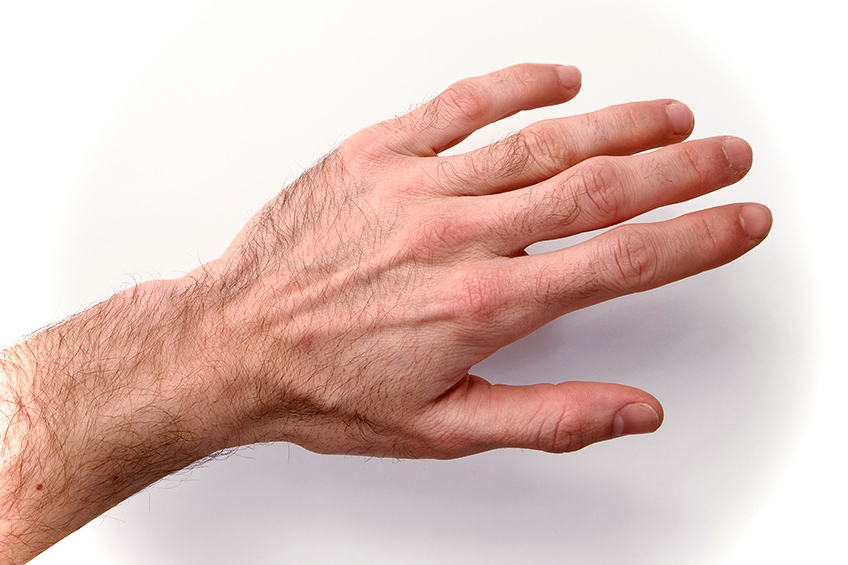
From there, we will establish the numbers of the blocks and proceed to draw our hands.
We will find that the process of using a grid to draw a hand is much simpler. As we use the corresponding blocks in both the reference image and drawing paper, this will make the drawing process easy. Now that we know what to expect, let us get into this tutorial about grid-method art.
Step 1: Creating a Grid
We want to start by drawing a grid on both the reference image as well as the drawing paper. Using a ruler and an HB pencil, we will proceed to create a set of 10 x 7 blocks in our grid. We are working on an A4 page, which means we want to make a set of 10 rows vertically.
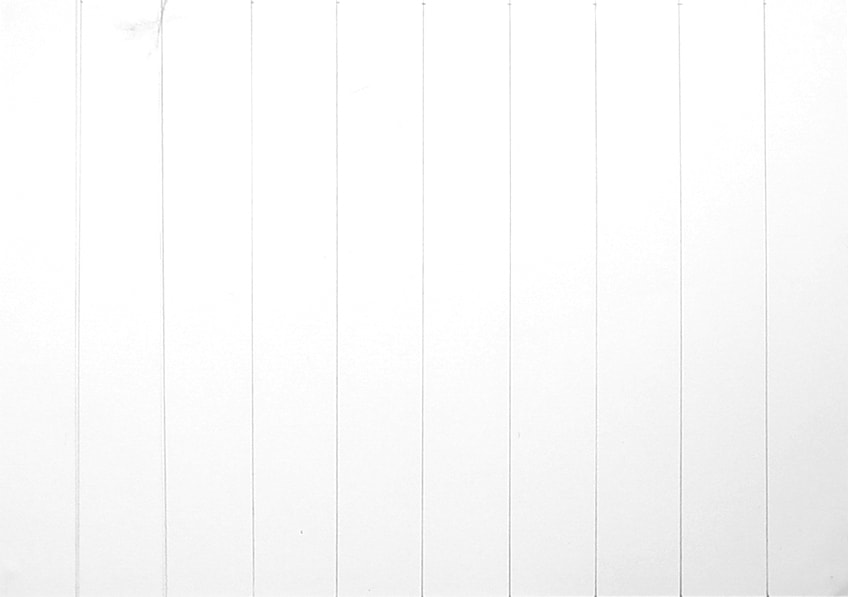
This way, we will follow the drawing process much more smoothly.
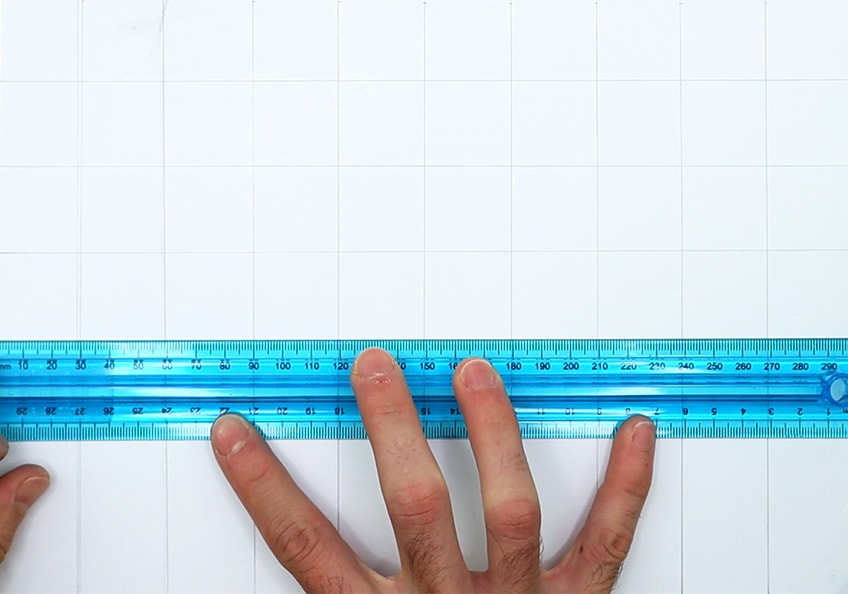
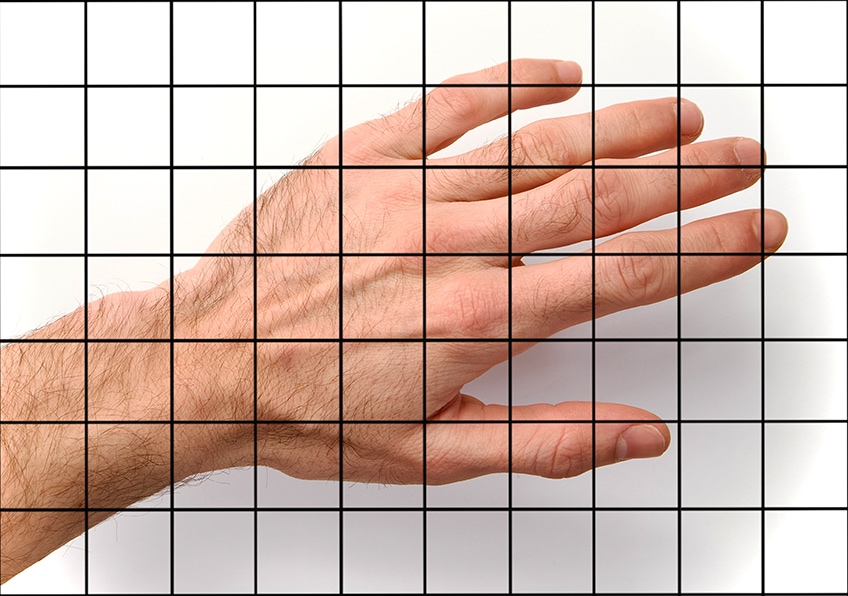
As long as the grid is the same on both a reference image and the drawing paper, it will be successful.
Step 2: Making a Key for the Grid
Along the vertical row of blocks from the top left, write the letters “A” to “G” down the page in the row of blocks. Along the top row of blocks starting in the top left block again, write the numbers “1” to “10” in each block.
We can do the exact same on the reference image as well; this way, we have a key to guide our drawing process.
Step 3: Drawing the Hand
Starting in block 1G, which would be the bottom left block of the page, we want to start our drawing. We should have a corresponding grid replicated on the reference image at this point.
This means we want to draw exactly what we see in the corresponding block on the reference image.
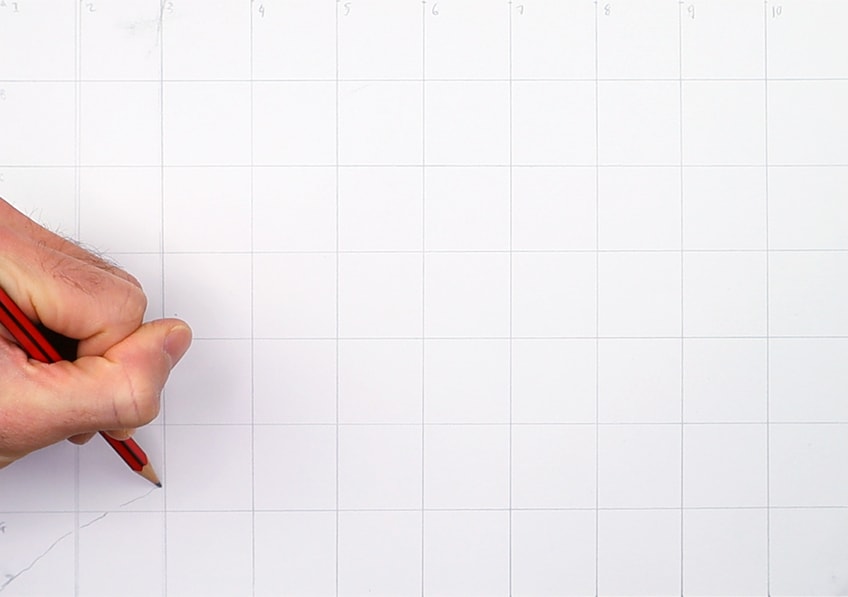

You only need to focus on one single block at a time and link the drawing marks as you go through the drawing process.

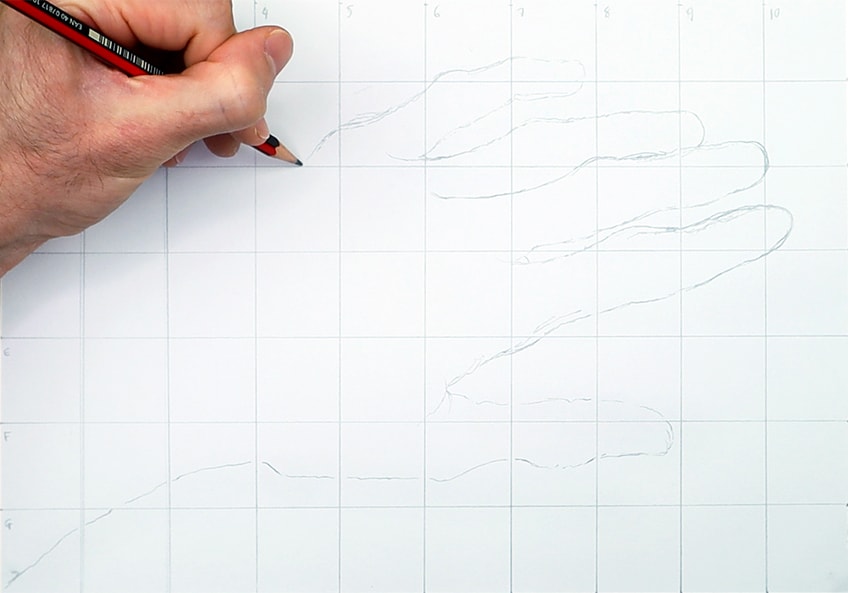

Take your time and go through each block, slowly shaping the hand.
Step 4: Adding Details and Light Shading to the Hand
We will now proceed to add shading to our drawing, using the same approach as we did for outlining the hand. Again, we want to work through the hand one block at a time, making sure that you consider the details within each block and how they seamlessly connect to the next block.
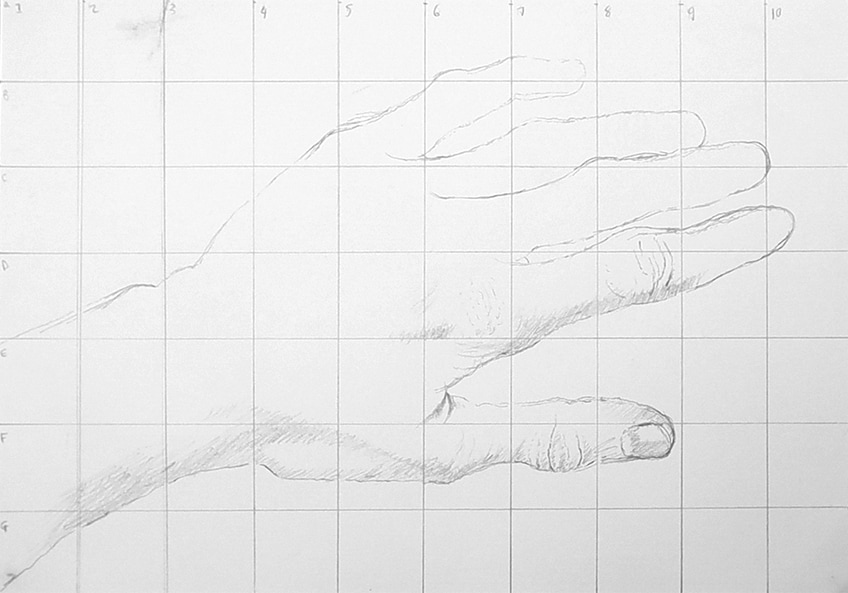
Again, you don’t want to focus too much trying to shade in the hand holistically you want to focus on one block at a time.
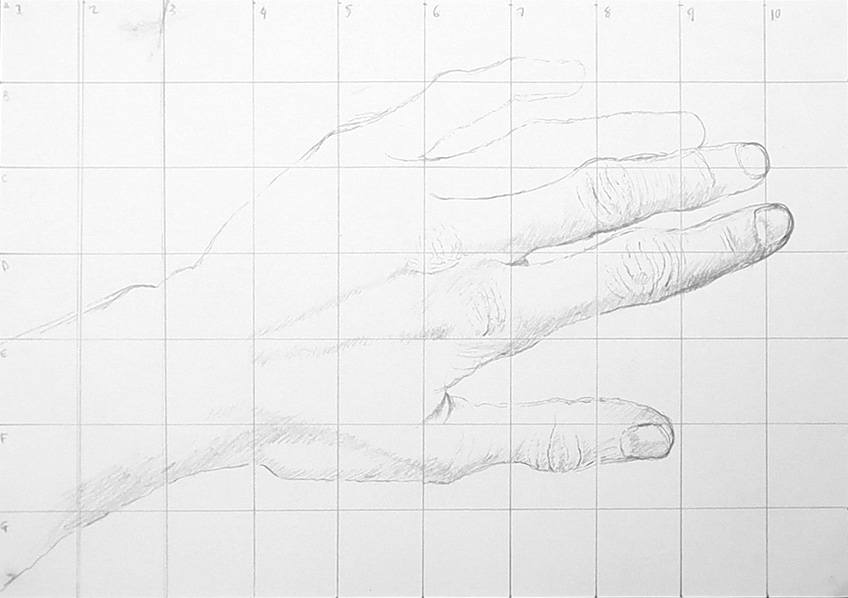
A good suggestion is to add in the lighter moments of shading first, which you then can darken later on by layering over those areas of shading.

So, we want to make sure that we take our time capturing these features within the hand.
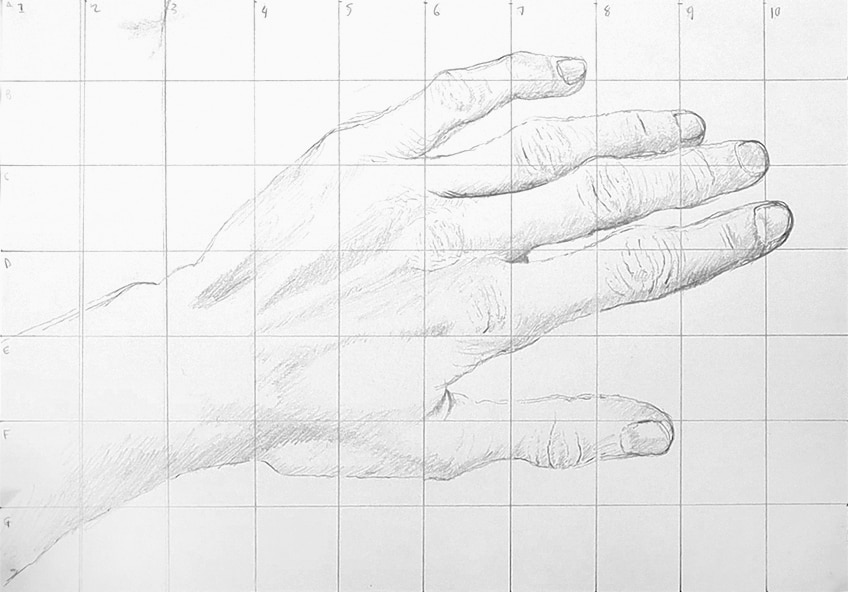
Take a break if you need to; by doing this, you will regain a fresh mind and approach to the drawing process.
Step 5: Adding Darker Shading
Now that we have used our grid to create a realistic hand drawing, we can now add in darker shading. At this point, the grid for drawing becomes a little more relaxed, as we have mostly completed the hand drawing.
We now can simply use the entire reference image to guide us in placing darker moments of shading.
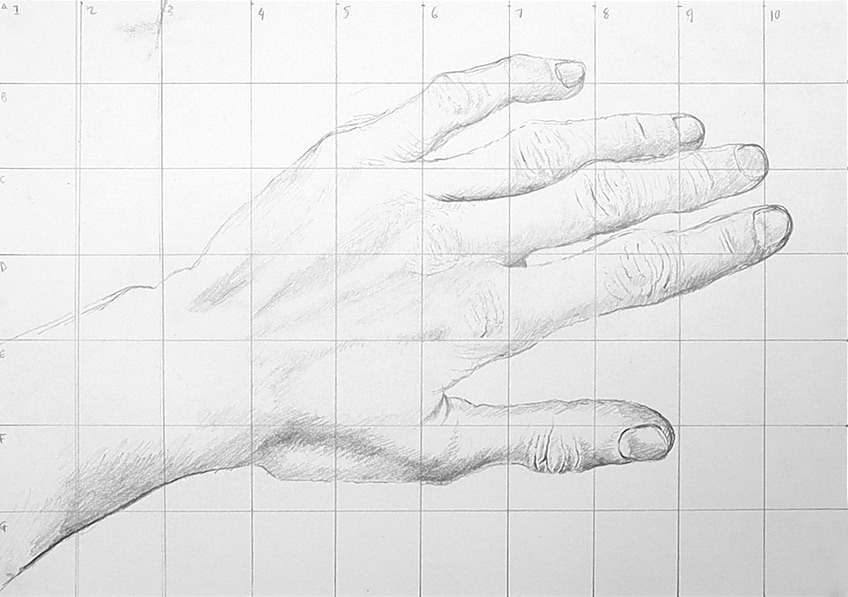
As the drawing becomes more refined by using the blocks, we start to need it less.
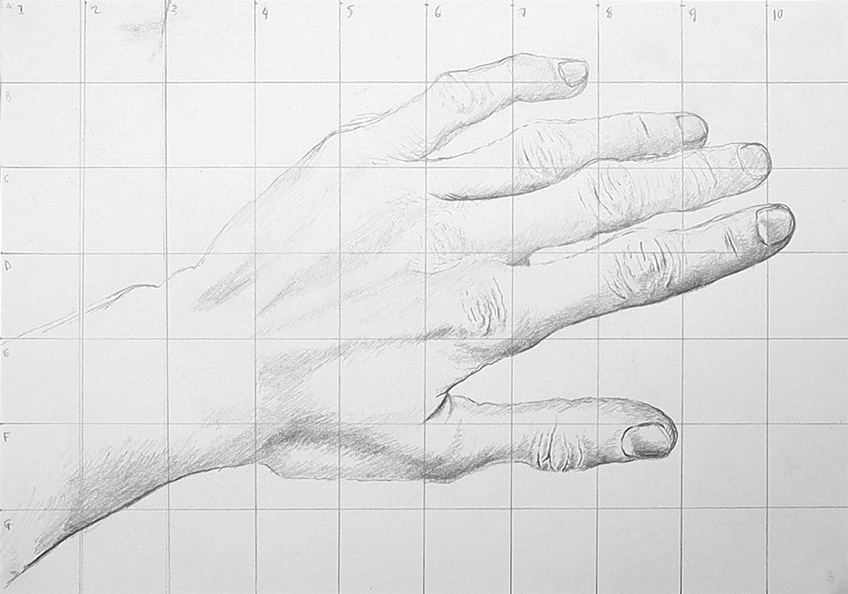
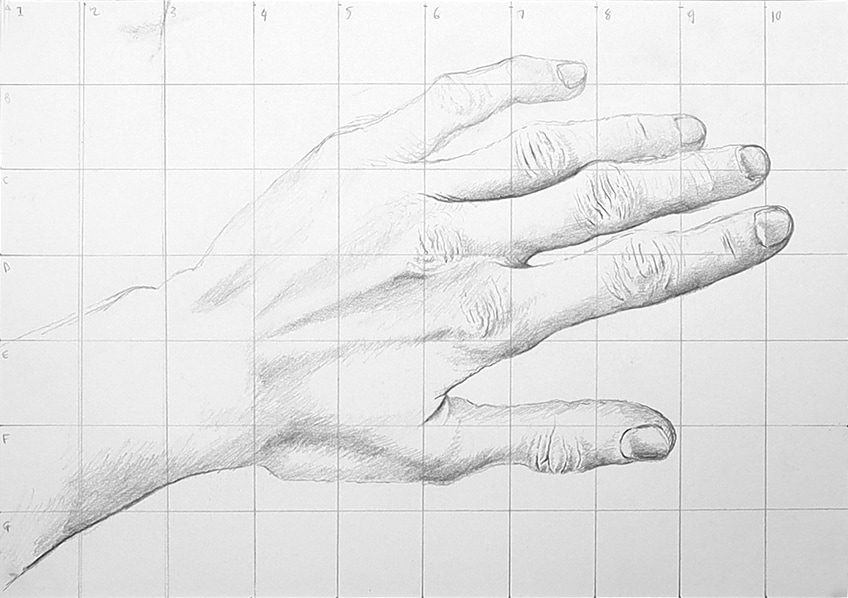
Creating a drawing with a grid is quite a simple process and the grid-method drawing process can be applied to any subject matter.

But now you know the process of drawing with a grid!
Tips to Remember
- Focus on individual blocks at a time. This makes the drawing process much simpler.
- Work out the structure of the object first. In this case, it is outlining the hand but it can also be outlining whatever object you are drawing with a grid.
- Take your time. Grid-method art intends to capture the image as accurately as possible, so take your time.
- Make sure the measurements are correct. You want the drawing paper and the reference image grid to correspond with one another.
- Use it for other drawing ideas. Now that you know the grid-method drawing process, you can apply it to other drawing ideas.
The main takeaway from drawing with a grid is that you learn how to refine your observational skills. Drawing with a grid heightens your attention to detail and gives you a clear understanding of how to form drawings in a way that accurately represents the subject matter you are drawing. Grid-method art is a great way to capture images within a drawing as accurately as possible and can be used for any observational drawing idea.
Frequently Asked Questions
How Many Blocks Do You Need for a Grid Drawing?
When using a grid for drawing subject matter, it is really dependent on how complicated the image is that you are trying to draw. For instance, if you use more blocks, it is going to help you focus on smaller details much more, however, it will also require more time to complete your drawing. On the other hand, if you use fewer blocks, this will make the blocks larger, which means you will have to focus on capturing more of the image within that single block. Consider how complicated your drawing is and your intention. If you would like to capture an image as closely comparable as possible, then using more blocks will allow you to capture smaller details more accurately.
Should the Drawing Page and Reference Image Be the Same Size?
Yes. The approach to using a grid for drawing is intended to achieve an image as accurately as possible within your drawing. This means that the measurements matter, so the page should be the same size. This will make the process of creating a grid on both the reference image and drawing paper easier. If the pages are the same size, then the measurements used to create a grid on one of the pages can be easily transferred onto the other. This will result in an accurate number of blocks that will correspond with one another between the drawing paper and the reference image. This can also be created using a digital device as well, which means that you can create the same size image on your device as your drawing paper.
Matthew Matthysen is an educated multidisciplinary artist and illustrator. He successfully completed his art degree at the University of Witwatersrand in South Africa, majoring in art history and contemporary drawing. The focus of his thesis was to explore the philosophical implications of the macro and micro-universe on the human experience. Matthew uses diverse media, such as written and hands-on components, to explore various approaches that are on the border between philosophy and science.
Matthew organized various exhibitions before and during his years as a student and is still passionate about doing so today. He currently works as a freelance artist and writer in various fields. He also has a permanent position at a renowned online gallery (ArtGazette) where he produces various works on commission. As a freelance artist, he creates several series and successfully sells them to galleries and collectors. He loves to use his work and skills in various fields of interest.
Matthew has been creating drawing and painting tutorials since the relaunch in 2020. Through his involvement with artincontext.org, he has been able to deepen his knowledge of various painting mediums. For example, watercolor techniques, calligraphy and lately digital drawing, which is becoming more and more popular.
Learn more about Matthew Matthysen and the Art in Context Team.
Cite this Article
Matthew, Matthysen, “Drawing With a Grid – How to Use a Grid for Drawing Various Things.” Art in Context. July 14, 2022. URL: https://artincontext.org/drawing-with-a-grid/
Matthysen, M. (2022, 14 July). Drawing With a Grid – How to Use a Grid for Drawing Various Things. Art in Context. https://artincontext.org/drawing-with-a-grid/
Matthysen, Matthew. “Drawing With a Grid – How to Use a Grid for Drawing Various Things.” Art in Context, July 14, 2022. https://artincontext.org/drawing-with-a-grid/.


