How to Draw a Strawberry – A Fun Strawberry Drawing Tutorial
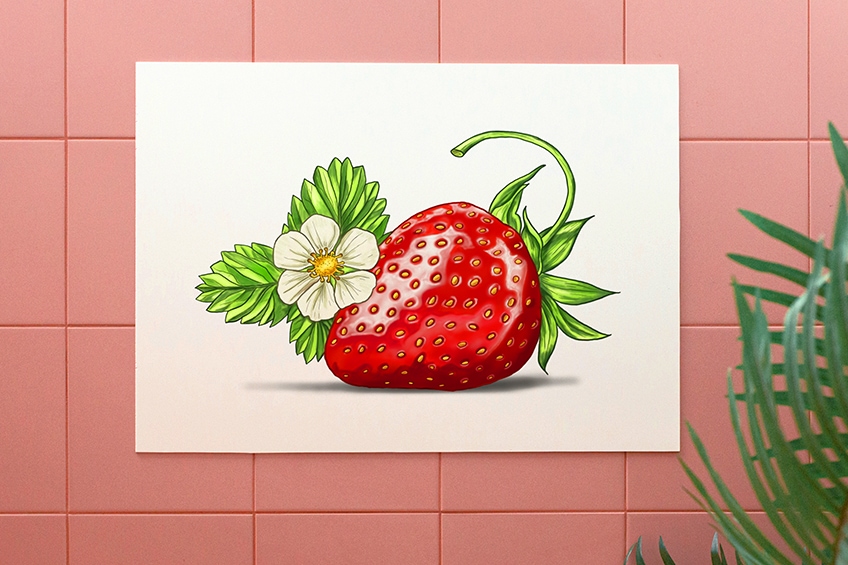
Strawberries are distinctly known for their sweet fragrance and heart-shaped bodies. Categorized as a “multiple fruit”, strawberries make the perfect addition to any picnic or hand-made card! In today’s drawing tutorial, we are going to show you how to create your own realistic strawberry drawing with our step-by-step instructions. Select the drawing supplies that you will be using today and let us get started!
Table of Contents
- 1 How to Create a Realistic Strawberry Drawing
- 1.1 Step 1: Draw the Main Body of the Strawberry
- 1.2 Step 2: Add the Stem to the Strawberry
- 1.3 Step 3: Outline the Crown Leaves
- 1.4 Step 4: Draw the Flower
- 1.5 Step 5: Add Some Additional Plants Around the Flower
- 1.6 Step 6: Outline the Body of the Strawberry
- 1.7 Step 7: Go Over the Lines for the Crown and Stem
- 1.8 Step 8: Trace Over the Flower
- 1.9 Step 9: Outline the Additional Plants
- 1.10 Step 10: Add In Some Details and Texture
- 1.11 Step 11: Apply the First Coat of Color
- 1.12 Step 12: Adding the Second Coat of Color
- 1.13 Step 13: Shading the Strawberry
- 1.14 Step 14: Enhance the Blending and Highlights
- 1.15 Step 15: Finishing Up Your Strawberry Drawing
- 2 Video Tutorial on How to Draw a realistic Strawberry
- 3 Frequently Asked Questions
How to Create a Realistic Strawberry Drawing
Follow along and learn how to make an easy strawberry drawing with our step-by-step tutorial! In addition to covering the basic elements of how to draw a strawberry, we have included the entire coloring process for you as well.
Our easy strawberry drawing guide is great for both beginners and more experienced artists alike, so grab your drawing tools and let us try it out! At the end of our guide, you will be left with a beautiful drawing of a strawberry.
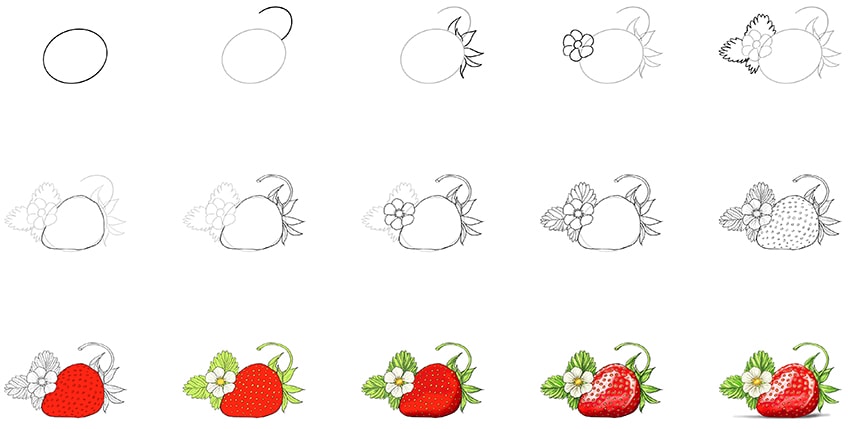
The above collage shows each of the 15 steps taken to achieve the final result and demonstrates what your strawberry drawing should look like at every stage. Our tutorial works well for you to follow on either a graphic tablet or a piece of paper!
Step 1: Draw the Main Body of the Strawberry
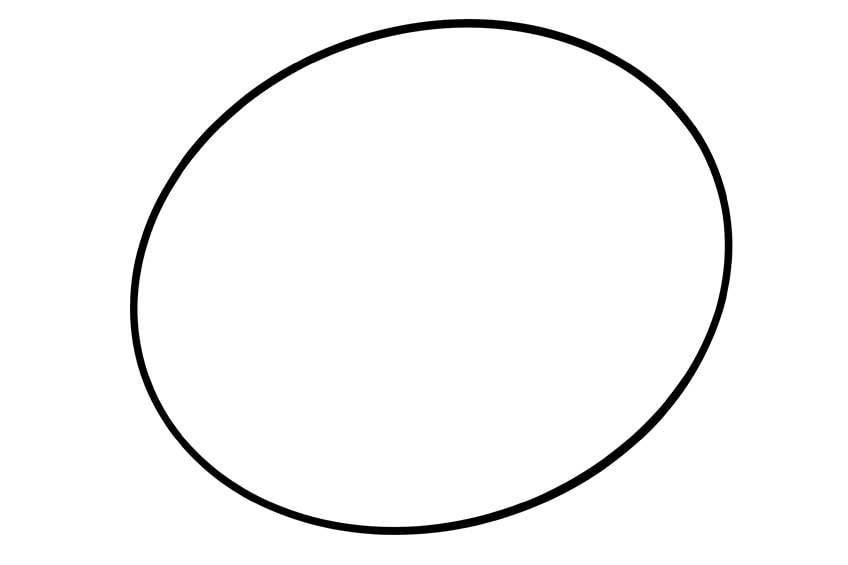
Before you start your realistic strawberry drawing, you will first need to locate the center of your drawing space. This is where the body of your strawberry will be placed, and will mark out where the other elements of the drawing will go.
Draw a tilted oval shape lying horizontally in the middle of your page.
Step 2: Add the Stem to the Strawberry
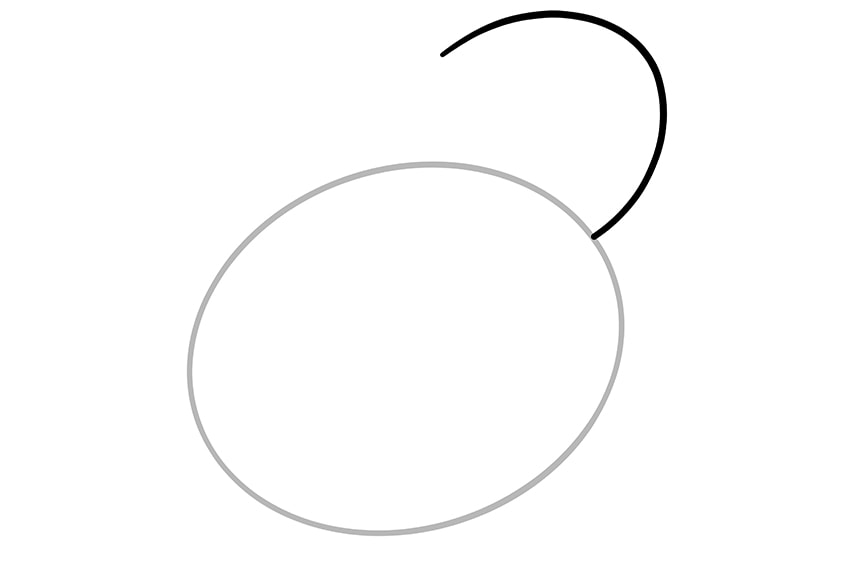
Still working with the oval from your previous step, you will now be adding the stem to your strawberry. On the right-hand side of the oval, sketch a curving and arched line towards the top of the shape. This will represent the stem.
Be careful not to make the stem too long!
Step 3: Outline the Crown Leaves
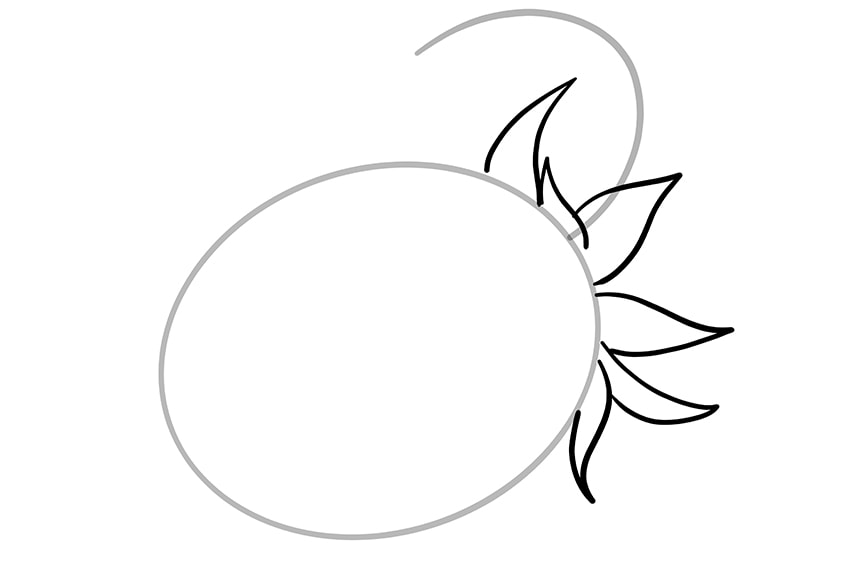
Now that the base of your strawberry has been drawn, you will need to add its distinctive leaves underneath the stem. Draw the crown leaves around the right curvature of the main oval shape, making sure that they flow outwards like in our drawing below.
As you are wanting to create a realistic strawberry drawing, do not add too many leaves.
Step 4: Draw the Flower
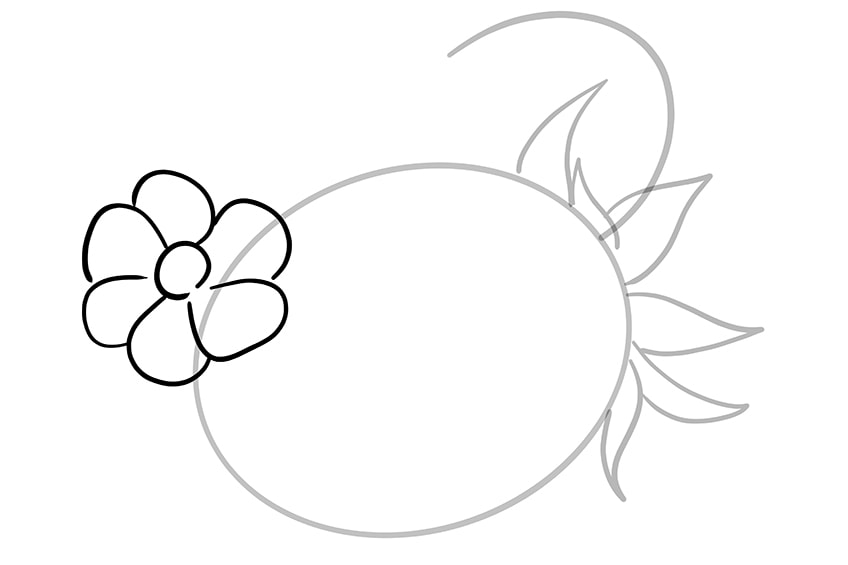
Moving on from the strawberry completely, you will now be adding a small flower to your strawberry sketch. On the left curvature of the oval, add your flower drawing towards the top of the body. Keep your flower simple.
The flower is added purely for aesthetic reasons, meaning that you can leave it out if you want to.
Step 5: Add Some Additional Plants Around the Flower
Still focusing on the flower that you drew in the previous step, you will now need to add some additional foliage around it. Surround your flower with some extra leaves, making sure to draw them differently from the crown leaves already added in step three.
These new leaves should be placed behind the flower and strawberry.
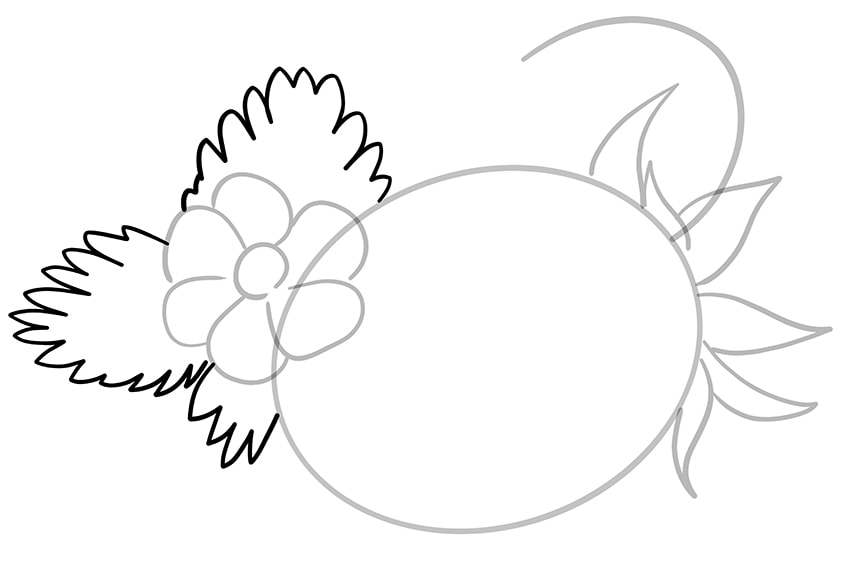
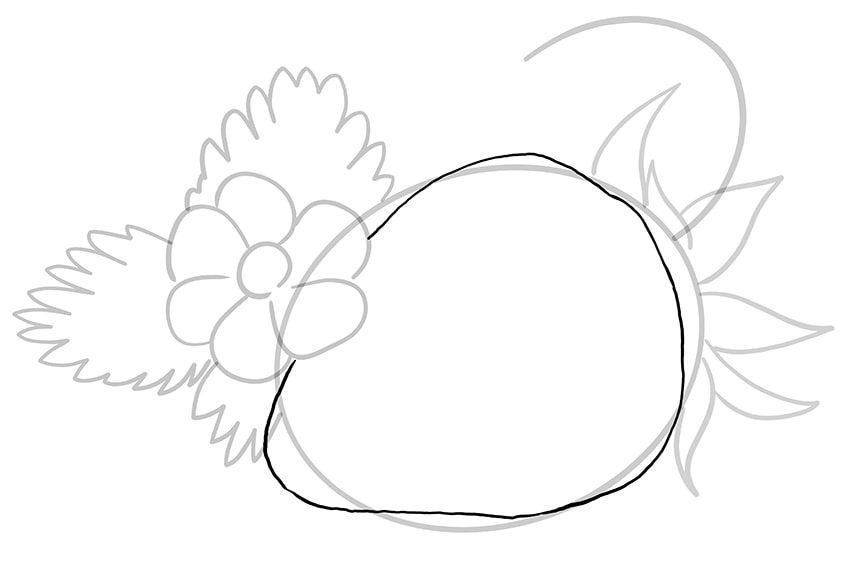
Step 6: Outline the Body of the Strawberry
Now that the initial drawing is finished, you can begin to outline the body of the strawberry. Making use of the construction lines from the oval that you drew in step one, outline your strawberry in a more realistic shape.
As strawberries are known for their heart-shaped bodies, keep this in mind when outlining the oval.
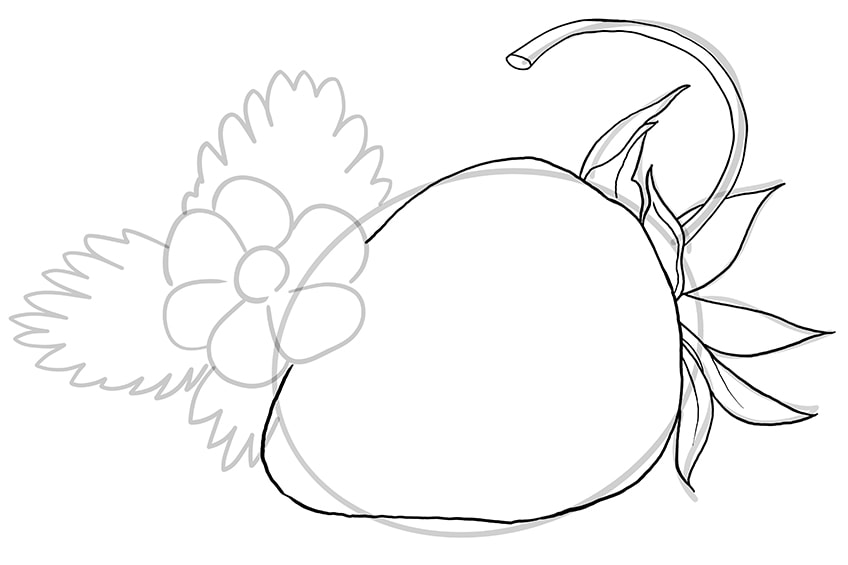
Step 7: Go Over the Lines for the Crown and Stem
Once your oval has been outlined to resemble a realistic strawberry drawing, you can start to outline the stem and crown. Using the construction lines drawn in steps two and three to guide you, outline these two components as well.
As you outline, create a thicker stem and more 3D crown leaves.
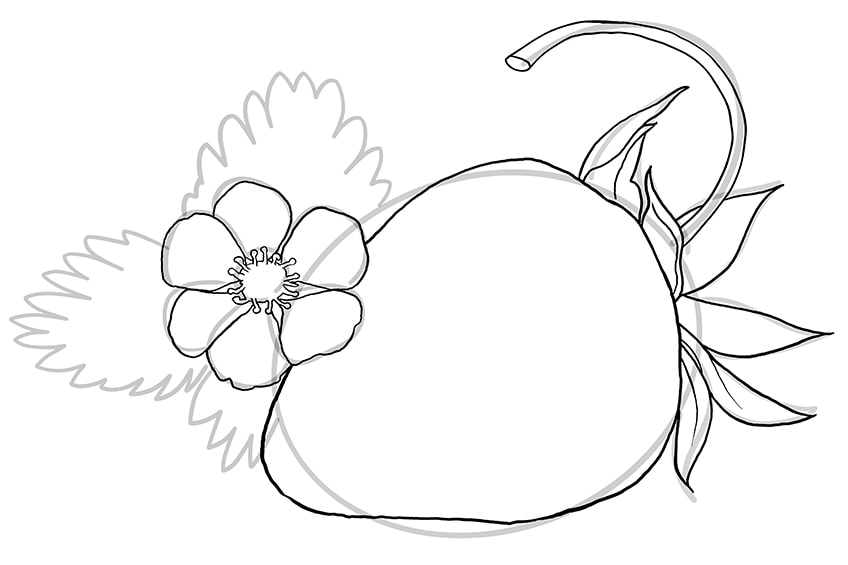
Step 8: Trace Over the Flower
You will now need to outline the simple flower that you drew in step four. Using the construction lines to help you, lightly trace over the petals of your flower, making sure to include its stamen lines as well. This should make it look more realistic than before.
Try to curve the flower petals that are lying flat against the strawberry to create a wrapped look.
Step 9: Outline the Additional Plants
The last element that you will need to outline is the additional leaves behind your flower that you drew in step five. As you outline the leaves, be sure to add some fine lines and curved edges to them. Remember that these leaves should remain behind the flower and strawberry.
Once you have completed this step, you can erase any visible construction lines.
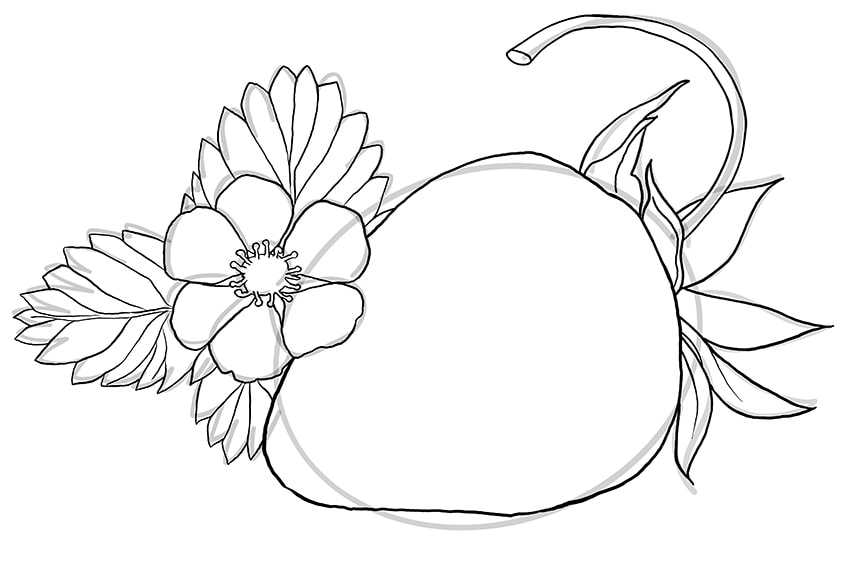
Step 10: Add In Some Details and Texture
You are now ready to start adding some details and texture to your drawing of a strawberry! Start by drawing the fine lines within your flower petals and the curved lines within the leaves, crown leaves, and stem. To complete this step, draw a mesh of small seeds across the entire body of the strawberry. Try to place each seed at an equal distance from each other.
All of your texture and detail lines should follow the curvature of your outlines. This means that if your leaf is curved, for example, the inner texture lines should follow the same curve.
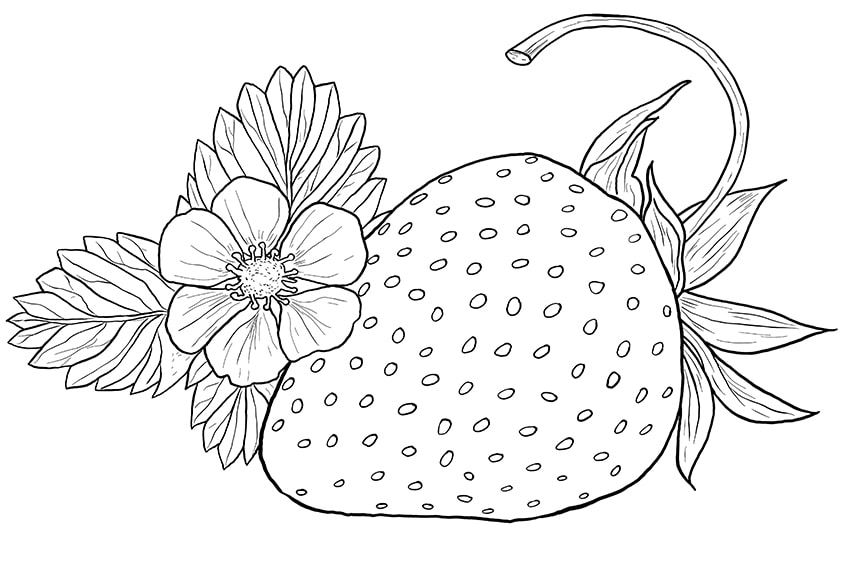
Step 11: Apply the First Coat of Color
You are now ready to start the coloring process! With a regular brush, select a shade of red paint. Use the brush to evenly paint over the entire body of the strawberry, including the little seeds that you drew in step 10.
If you are trying to create a realistic strawberry drawing, we suggest that you select a color similar to ours.
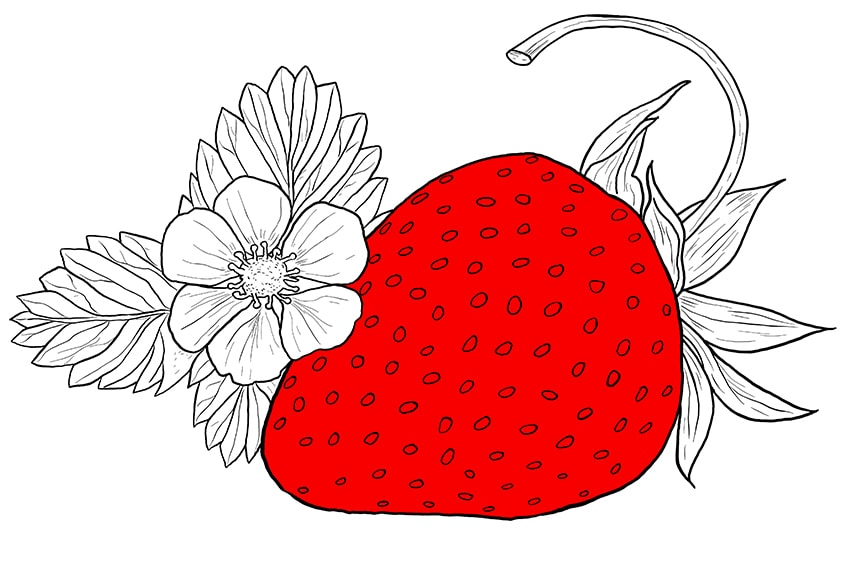
Step 12: Adding the Second Coat of Color
Now that your first coat of color has been added, you can begin your second coat! With a fine sharp brush and a shade of bright green or lime green, color in each seed within the strawberry. If you do not have these colors, yellow will work as well! Once this is done, use a fine brush and a shade of bright green to color in the crown leaves, the stem, and the additional plants behind the flower.
Finally, take a small soft brush and some yellow paint to color the center of your flower. Once this has dried, use some white paint and a regular brush to color the flower petals.
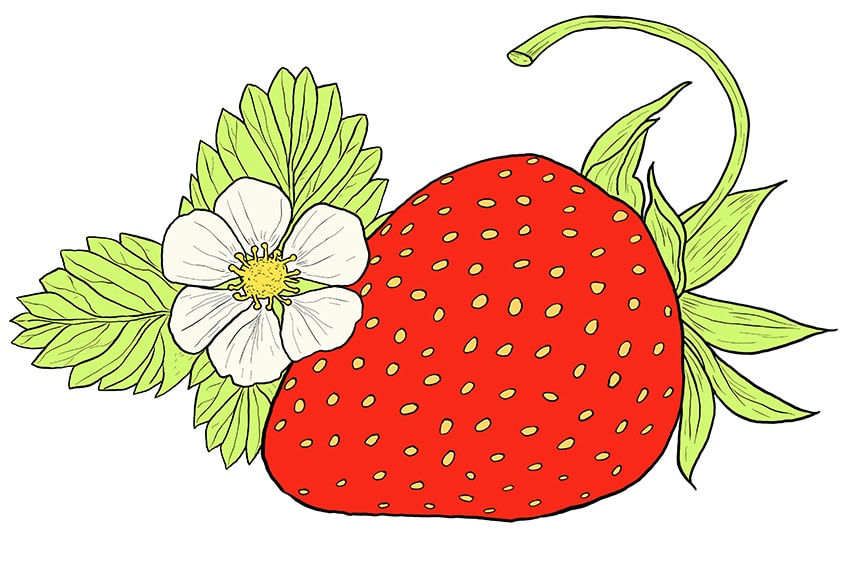
Step 13: Shading the Strawberry
As your strawberry has been painted, you can start to add some shading. With a small soft brush and black paint, lightly paint a shadow layer into each seed. Using the same color paint, apply some shading to the strawberry itself, including the crown leaves and stem. For the inside of the flower, use some light brown or golden yellow paint with a soft brush to lightly create some blending shading.
The shading should be done very lightly so that it appears gray as opposed to dark black. The shading done in this step should also leave some patches of the first and second color coats visible.
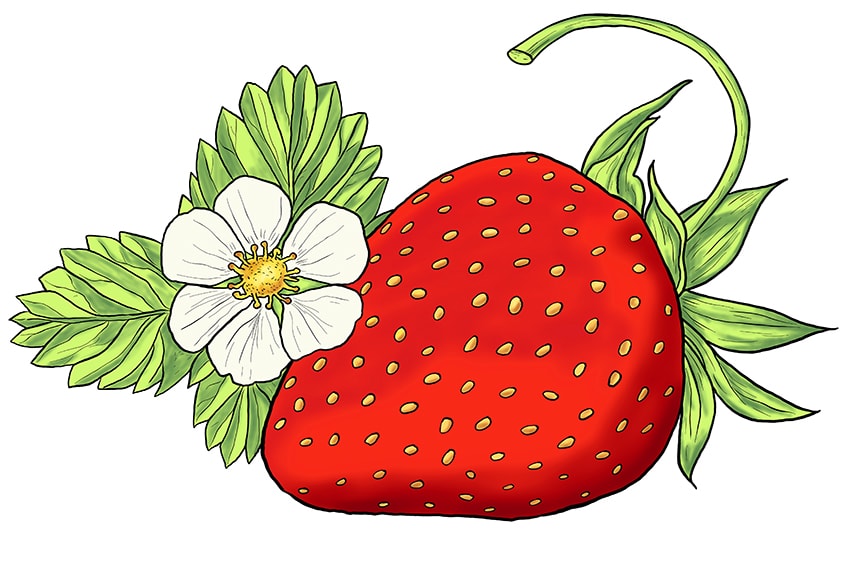
Step 14: Enhance the Blending and Highlights
In the second last step, you will enhance the overall look of the strawberry and its surrounding elements, to make it look as realistic as possible. In order to do this, you will need to blend and highlight the shaded areas. Select a soft brush and some dark red paint to gently apply a second and natural-looking layer of shading to the darkened areas of your strawberry.
Switch over to a soft brush and white paint to highlight the lighter areas of the strawberry (which should have been left unshaded from the previous step). After applying a soft to medium coat of white paint, take a soft brush to blend the highlight into the lighter areas, which will create a faded color effect. Continue this blending around the seeds of the strawberry with a fine sharp brush.
For the leaves and stem, take a soft brush with either dark green or gray paint (both will have the same effect) to enhance the shading there. Finally, use a small soft brush and some light olive paint to gently brush the texture lines of the flower petals.
As this is quite a lengthy and time-consuming step, it should be completed with patience. Remember, the more time spent on enhancing your blending and highlights, the more realistic your strawberry drawing will look!
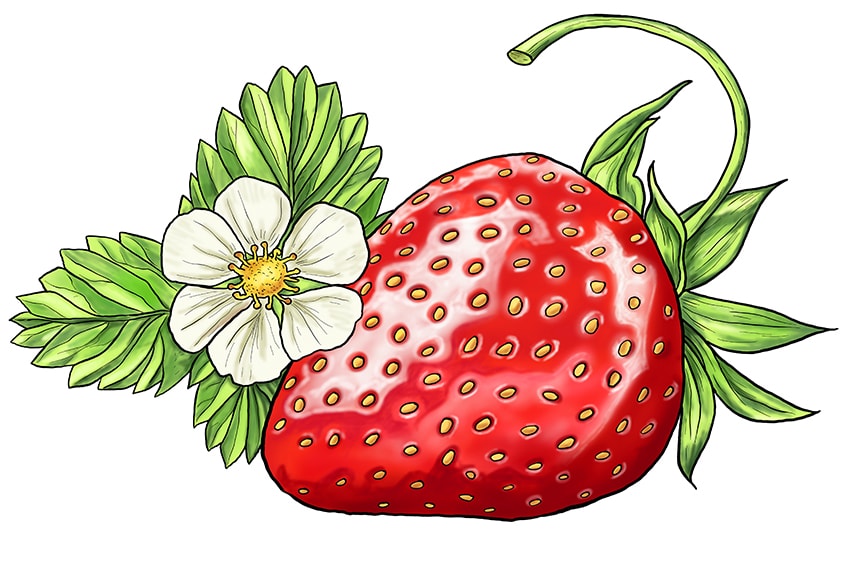
Step 15: Finishing Up Your Strawberry Drawing
In the final step, you will need to use a fine sharp brush to trace over the entire drawing. With the corresponding color for each area, trace your strawberry sketch to create a final seamless look without any visible outlines. You may repeat this step on the inner outlines and texture lines.
Once that has been completed, one final touch is needed. With a small soft brush and some black paint, apply a few light brushstrokes underneath your strawberry to create a casted shadow and voila, your strawberry sketch is finished!
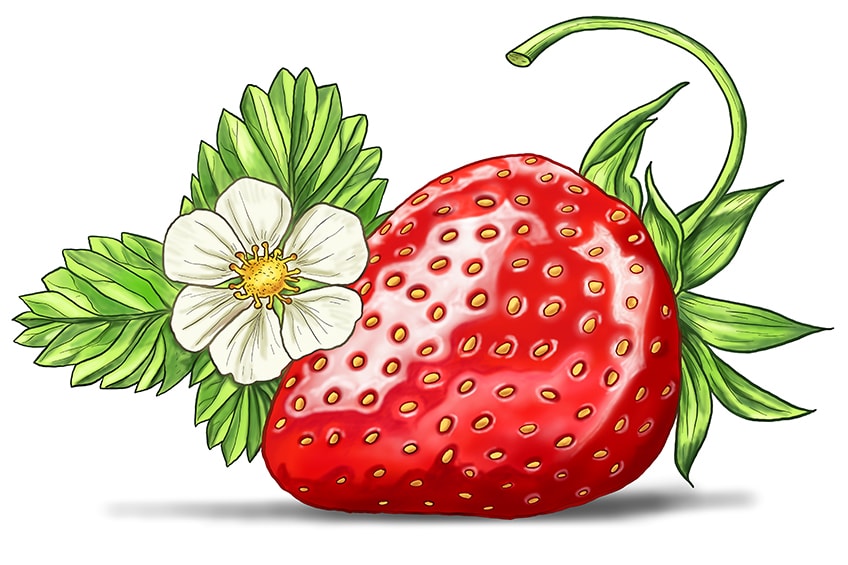
Well done on finishing your very own drawing of a strawberry! We have reached the end of our step-by-step guide on strawberry drawing, where you will have learned everything you need to know to recreate this drawing again. We hope that you have enjoyed our tutorial on creating an easy strawberry drawing, and that you will join us again for more easy and exciting drawing guides!
Video Tutorial on How to Draw a realistic Strawberry
Frequently Asked Questions
Is It Hard to Learn How to Draw a Strawberry?
Not at all! In the above tutorial, we have outlined 15 easy steps for you to follow to create your very own drawing of a strawberry. As our guide has been designed for both beginner artists and professional artists alike, the steps are very straightforward to follow.
Will I Be Able to Create a Realistic Strawberry Drawing?
With our easy strawberry drawing tutorial, we have explained how to accurately blend and highlight your strawberry sketch so that it looks as realistic as possible. Be sure to follow our steps above and your drawing of a strawberry will look good enough to eat!
Matthew Matthysen is an educated multidisciplinary artist and illustrator. He successfully completed his art degree at the University of Witwatersrand in South Africa, majoring in art history and contemporary drawing. The focus of his thesis was to explore the philosophical implications of the macro and micro-universe on the human experience. Matthew uses diverse media, such as written and hands-on components, to explore various approaches that are on the border between philosophy and science.
Matthew organized various exhibitions before and during his years as a student and is still passionate about doing so today. He currently works as a freelance artist and writer in various fields. He also has a permanent position at a renowned online gallery (ArtGazette) where he produces various works on commission. As a freelance artist, he creates several series and successfully sells them to galleries and collectors. He loves to use his work and skills in various fields of interest.
Matthew has been creating drawing and painting tutorials since the relaunch in 2020. Through his involvement with artincontext.org, he has been able to deepen his knowledge of various painting mediums. For example, watercolor techniques, calligraphy and lately digital drawing, which is becoming more and more popular.
Learn more about Matthew Matthysen and the Art in Context Team.
Cite this Article
Matthew, Matthysen, “How to Draw a Strawberry – A Fun Strawberry Drawing Tutorial.” Art in Context. February 11, 2022. URL: https://artincontext.org/how-to-draw-a-strawberry/
Matthysen, M. (2022, 11 February). How to Draw a Strawberry – A Fun Strawberry Drawing Tutorial. Art in Context. https://artincontext.org/how-to-draw-a-strawberry/
Matthysen, Matthew. “How to Draw a Strawberry – A Fun Strawberry Drawing Tutorial.” Art in Context, February 11, 2022. https://artincontext.org/how-to-draw-a-strawberry/.


