How to Draw Lungs – Steps to Create a Realistic Lungs Sketch
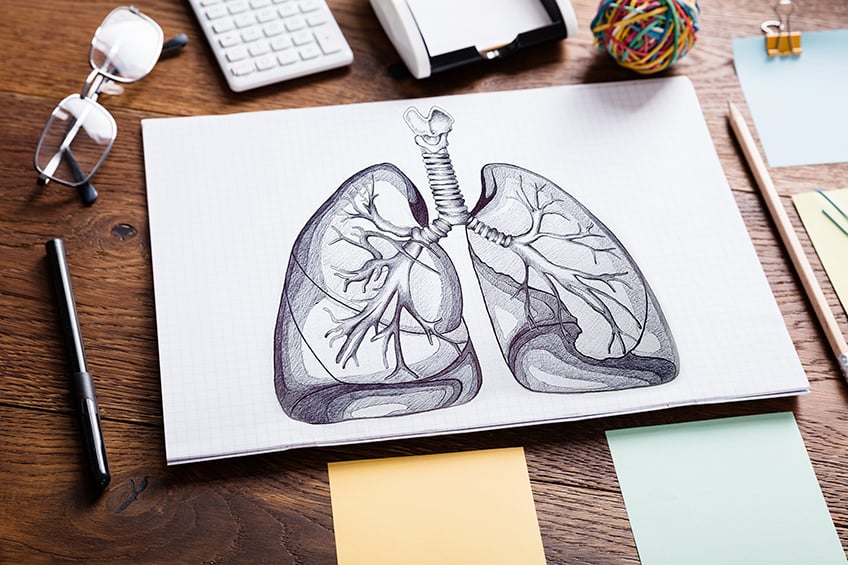
Human lungs drawing is a fun exercise due to the strange visual nature of the lungs. Lungs are a fascinating structure; the lung’s strange composition is a fun and interesting subject to draw as the lungs are seemingly alien and abstract. Drawing the lungs provides the artist with a variety of challenges due to the combination of different muscles, layers, and vessels within the lungs. A lungs drawing also provides us with great insight into how the lungs work and what the lungs are made up of. Human lungs drawing provides the artist with a knowledge of the human anatomy, specifically concerning the components of the body, responsible for breathing. Anatomical drawing always develops both our anatomical knowledge, as well as our drawing skills. The lungs are complicated and interesting, which makes for an interesting drawing exercise that will develop both our concentration and drawing skills.
Table of Contents
- 1 An Easy Guide to Drawing Lungs
- 2 Step-by-Step Instructions on How to Draw Lungs
- 2.1 Step 1: Drawing a Light Sketch of the Lungs
- 2.2 Step 2: Adding Light Shading to the Lungs
- 2.3 Step 3: Shading the Trachea in Pen
- 2.4 Step 4: Shading in the Left Lung’s Bronchioles with Pen
- 2.5 Step 5: Shading in the Rest of the Left Lung with Pen
- 2.6 Step 6: Shading in the Right Lung’s Bronchioles with Pen
- 2.7 Step 7: Shading in the Rest of the Right Lung with Pen
- 2.8 Step 8: Final Touches
- 3 Tips to Remember
- 4 Frequently Asked Questions
An Easy Guide to Drawing Lungs
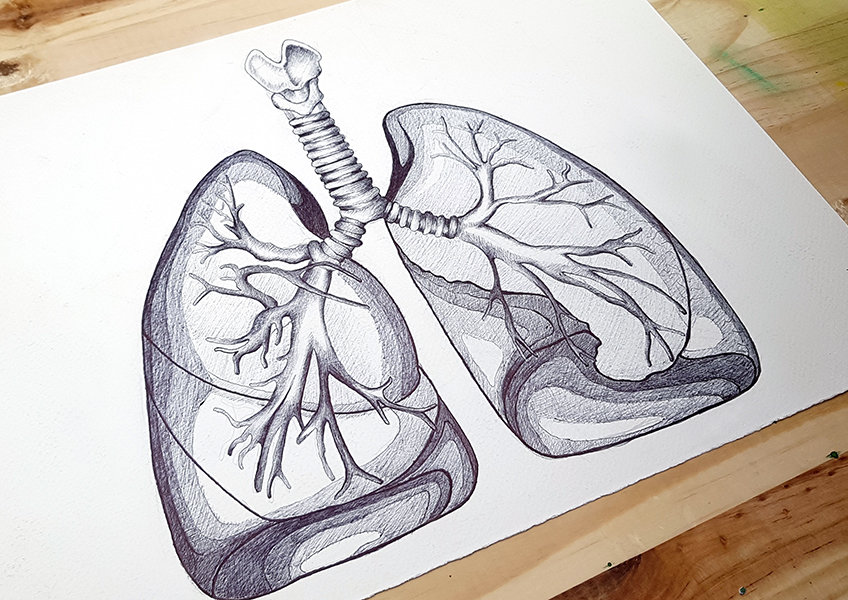
As we learn how to draw lungs in this tutorial, we will find that the process is quite simple, and broken up into a few simple steps. There are many ways to do a human lungs drawing, as their structure is very distinct, however, we will be using a reference image to guide us throughout the process. We will also be drawing the lungs in both pencil and pen, to give it a more contrasted and vivid quality.
In this easy lungs drawing tutorial, we will go through the process of developing the lungs sketch into a lungs drawing that is more realistic and identifiable.
Necessary Materials
Since we will be drawing the lungs in both pencil and pen, we want to make sure we have the right tools that are going to help us to achieve the best results. We will also have to fix a few mistakes in the earlier stages of the tutorial, so we want to make sure we have an eraser throughout the process of drawing in pencil.
We want to have a sharpener so that we can keep our pencils sharp for drawing the finer details earlier on in the tutorial.
We will also want to make sure we have some good paper for our tutorial on how to draw lungs. Lastly, we will be using a reference image to guide us throughout the drawing process. All items can be found through the links below:
- Pencils
- Ballpoint pen
- Eraser
- Sharpener
- Good paper (200 g/m – 250 g/m recommended)
- Source image
Preparation
Once we have all our materials ready, we can begin to prepare ourselves for this tutorial on how to draw lungs. This tutorial does come with its challenges and does require some focus. So, try to place yourself somewhere that is going to help you focus. Perhaps your room, a study, or a dining room table. The tutorial on how to draw lungs breaks down the steps into simple and understandable bites, so try to relax and take it easy as you go through each step.
If you get tired, take a break but most importantly, try to have fun with the process of learning how to draw lungs. Let us see what we are to expect within this tutorial on how to draw lungs.
Step-by-Step Instructions on How to Draw Lungs
The process of lung drawing is simple. We begin with a light sketch of the lungs, as we constantly refer to the reference image for guidance. We want to spend some time here, capturing the scale and proportions as best as we can. From there, we will begin to add more details with our pencils.
In our lungs drawing, we want to slowly develop the light lungs sketch into a more realistic rendition of the lungs represented in our reference image.
Once we have established the linework, added in some of the details, and are satisfied with the placement of the various components, we then can proceed to add some light pencil shading. From there, we will move on to drawing and shading in the lungs drawing with our pens. Taking our time and using the pencil marks for guidance we will take our time here until complete. Now that we are aware of the process let us begin.
Step 1: Drawing a Light Sketch of the Lungs
We want to begin by developing a very light lungs sketch. We do this by referring to our reference image, and with a pencil between a 2H and HB, we want to start drawing a general outline of the lungs. Again, we want to keep our drawing light as we work with our erasers during this part.
This is where we must tweak and fix up our drawing until we achieve an outline that resembles the lungs in the reference image.
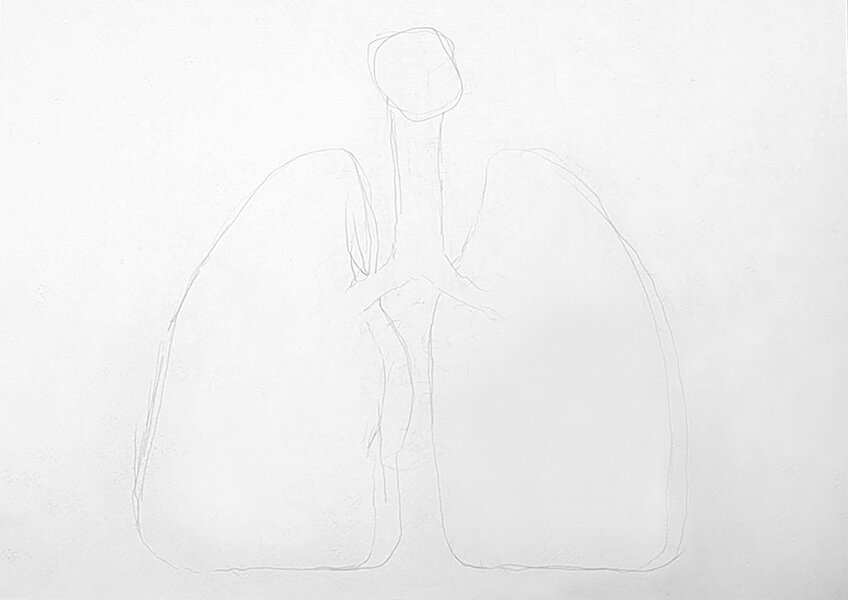

Perhaps start with the left lung, which would be on the right side, first drawing the bronchioles.
Staying with the left lung, once you have drawn the various bronchial branches, proceed to draw the various lines that are placed behind the bronchioles. The reference image depicts a series of lines that move parallel along the lining of the lung wall. As you see the different motions and partitions developed from the lines, attempt to mimic them with your pencil.
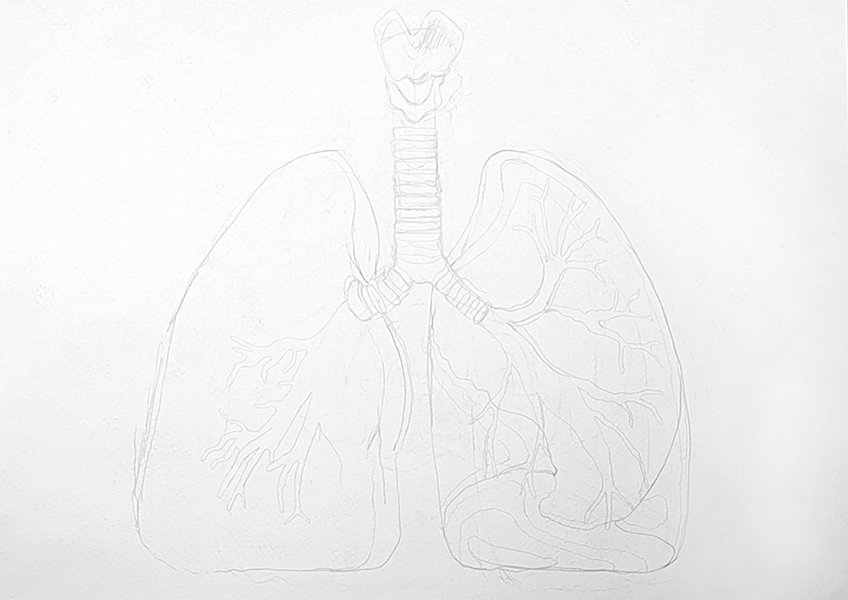
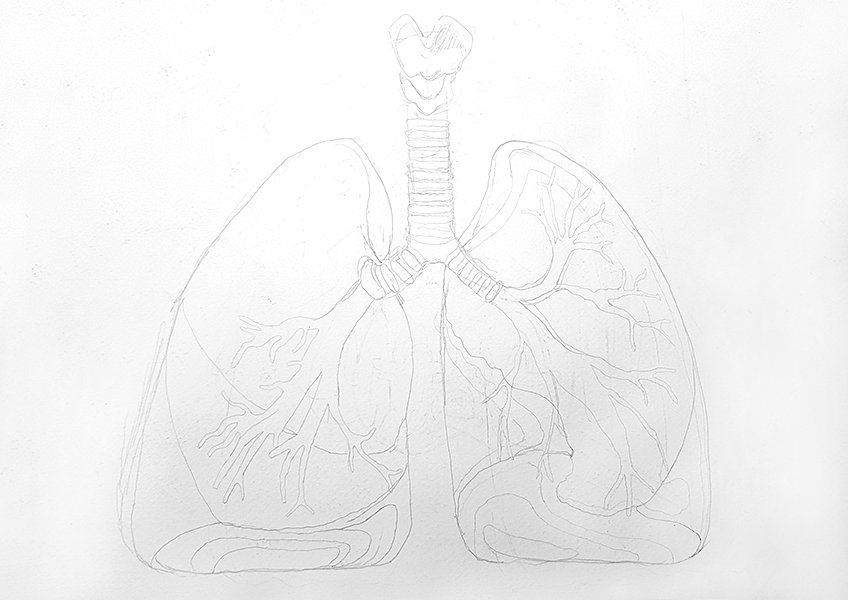
Remember this, once we move on to shading to differentiate between the different tonal variations.
Step 2: Adding Light Shading to the Lungs
Once we are satisfied with the light sketch of our lungs, we can then proceed to add some shading to our drawing. We still working with our pencils at this stage. The intention is to lightly shade the lungs to indicate the various tonal values.
This will help us once we move on to the parts of the tutorial where we draw with a pen.
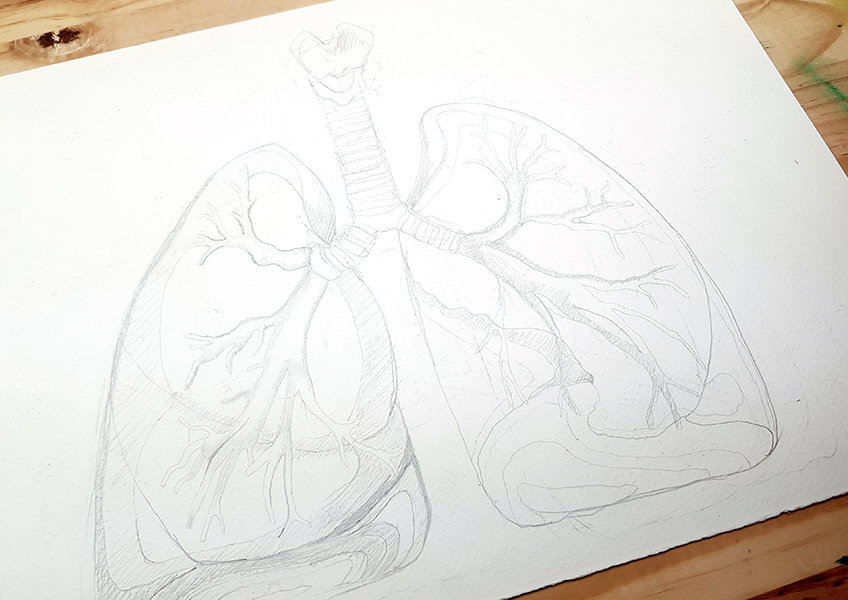
A good area to pay attention to is the lower parts of the lungs, where the reference image says right and left lobe.
Make sure you accurately distinguish the different tonal values by how light and dark you shade in the different layers. We can do this by constantly referring to the reference images as well as paying attention to how much pressure we apply to our pencils.
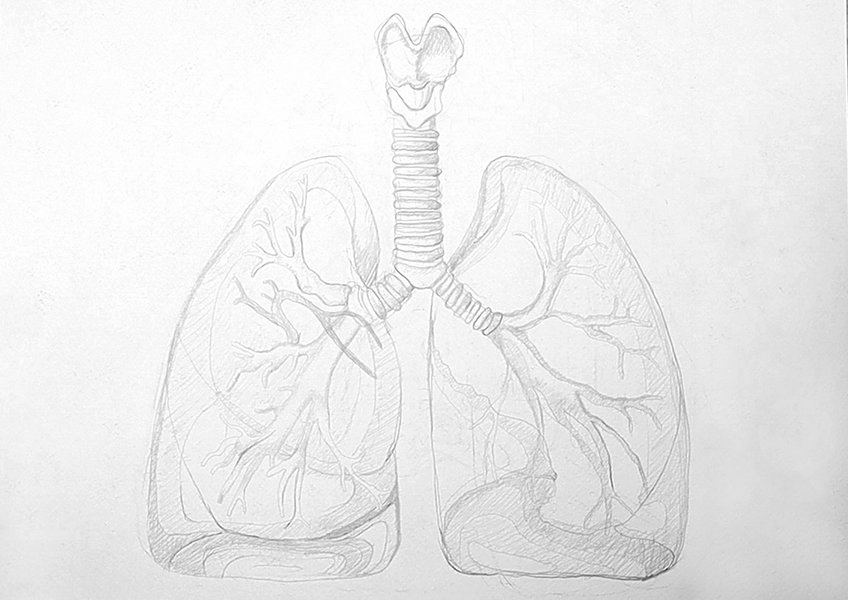
Make sure you attend to all features of the lungs before moving on to the next step.
Step 3: Shading the Trachea in Pen
We now will move on to the step of the tutorial where will begin to shade in the drawing with a pen. We want to begin with the trachea, moving our way down to the left and right lungs. Let us begin by shading the thyroid and cricoid cartilage.
Again, we want to keep referring to the reference image to guide us in the shading process.
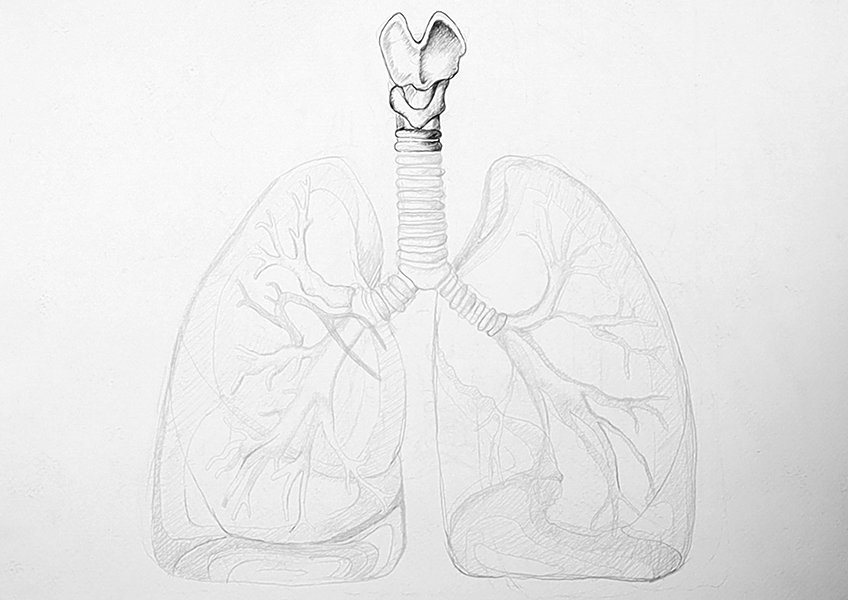
We can achieve this quality by making the outer edges of each little bone darker, and the center parts lighter.
We want to work slowly when shading in with a pen. A good suggestion is to pay close attention to the pressure you apply to your pen. The harder you press the darker the mark, the lighter you press the lighter the mark. The shading process is very similar to the way you would shade with a pencil.
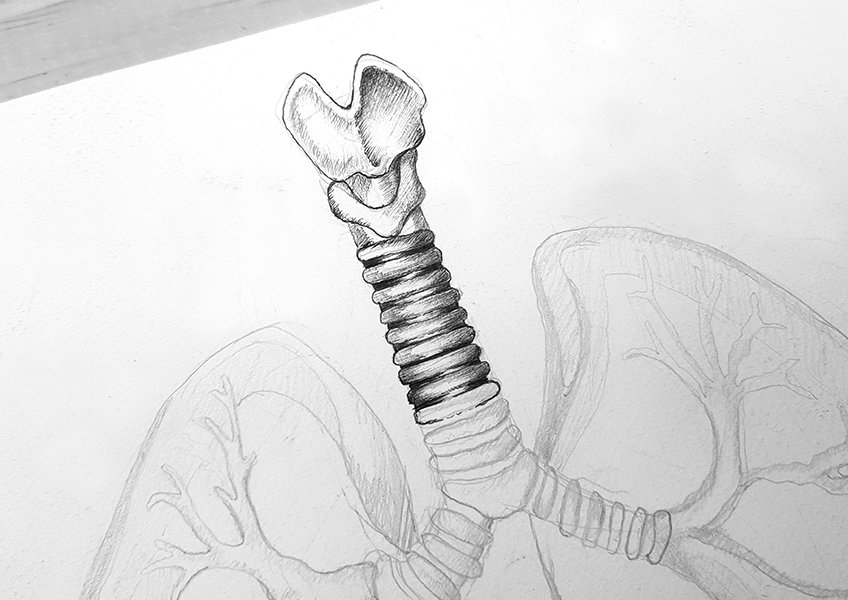
Proceed with this process, moving toward the left lung (on the right side of the diagram).
Step 4: Shading in the Left Lung’s Bronchioles with Pen
We can carry on shading the drawing with our pens. We want to carry on the same process of shading in the trachea, as it connects to the left primary bronchus, situated in the left lung. As we carry on the shading process, we want to start with the bronchioles.
As they are situated in the foreground and are the most prominent feature within the lungs.
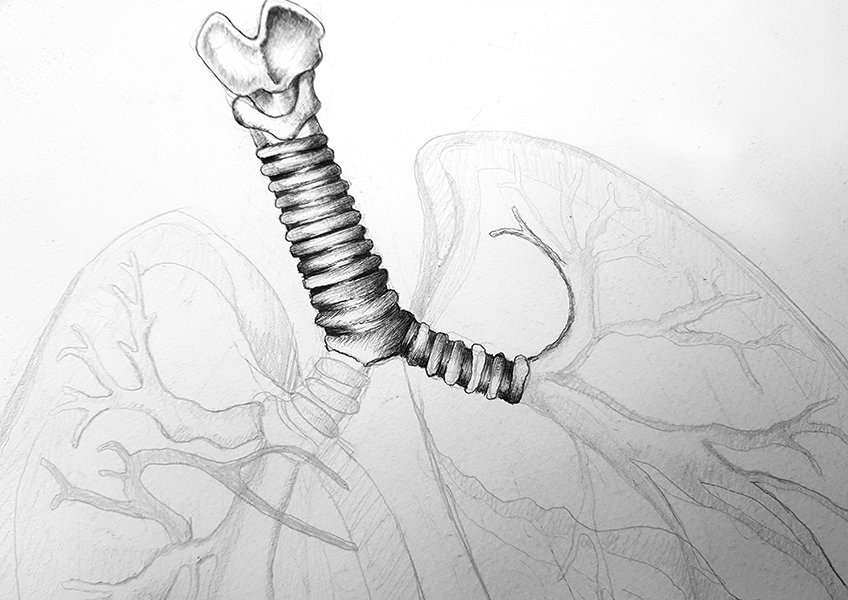
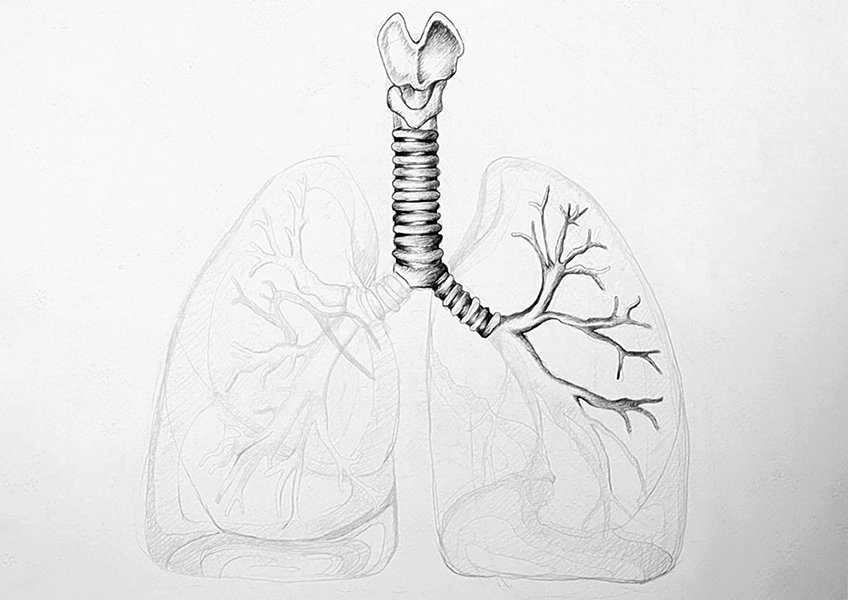
We can see that this is the case in the reference image, whereas the upper and lower lobe bronchi are darker around their linings.
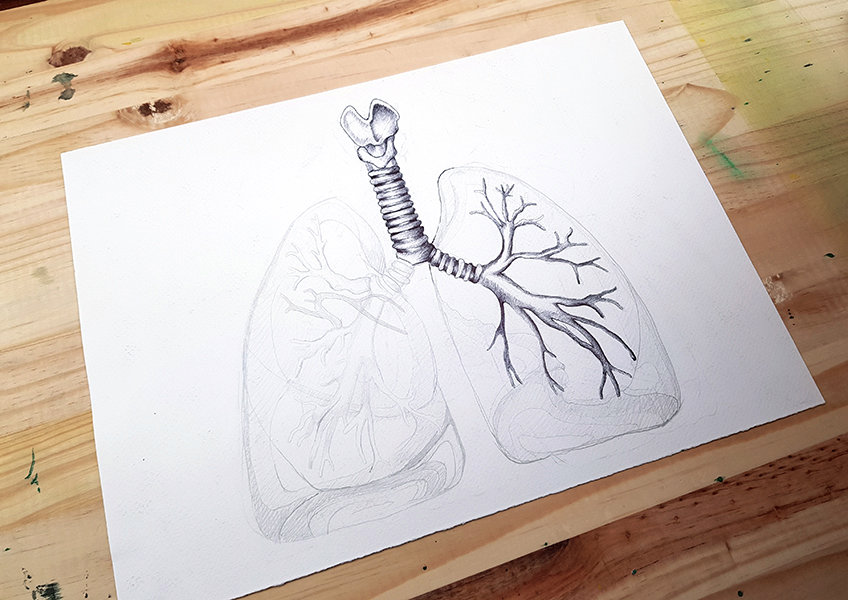
Step 5: Shading in the Rest of the Left Lung with Pen
Once we have drawn the bronchioles, we can then move on to adding more details to the lungs with our pens. We do this by, again, analyzing our reference image and using our pencil marks to guide us. Let us begin by working on the lines that partition the different lobes of the lung.
We want to use our pens, to slowly draw these lines throughout the lung, using our pencil marks to guide us.
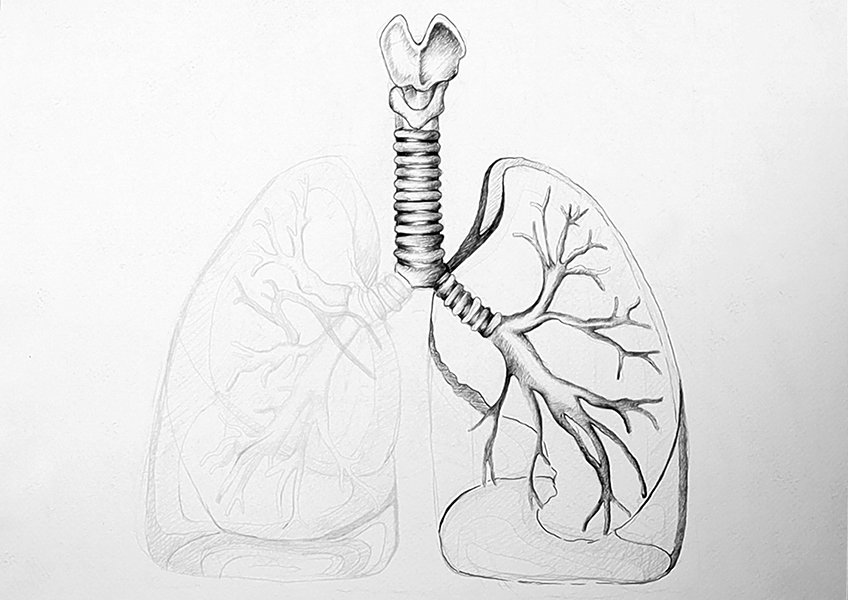
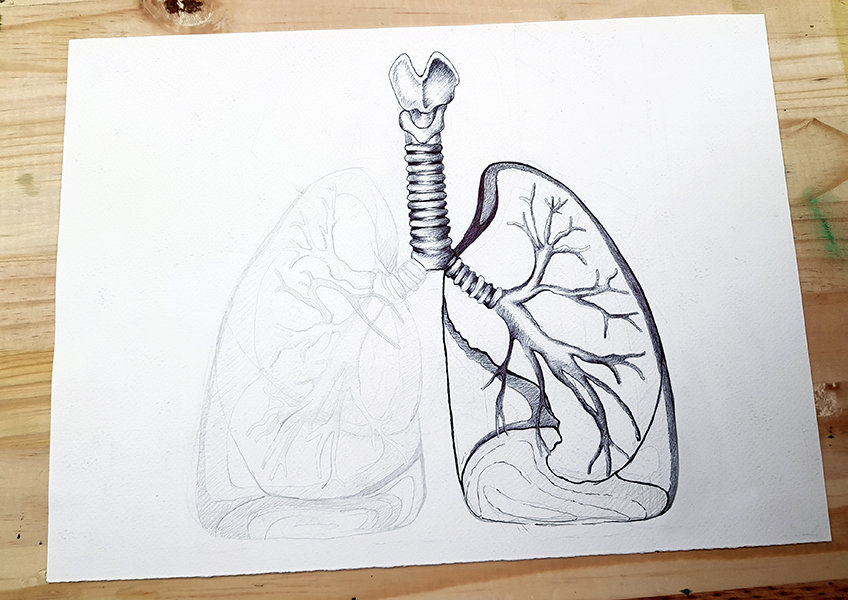
As the ink will come out sparingly, you want to build light layers of shading over one another, we do this until we have reached the desired tonal value.
As you continue to shade in the different layers, remember that as you translate them into your drawing, you want to make sure that the darkest to lightest layers are represented correctly. Perhaps go one layer at a time, this way you may compare them next to each other more adequately.
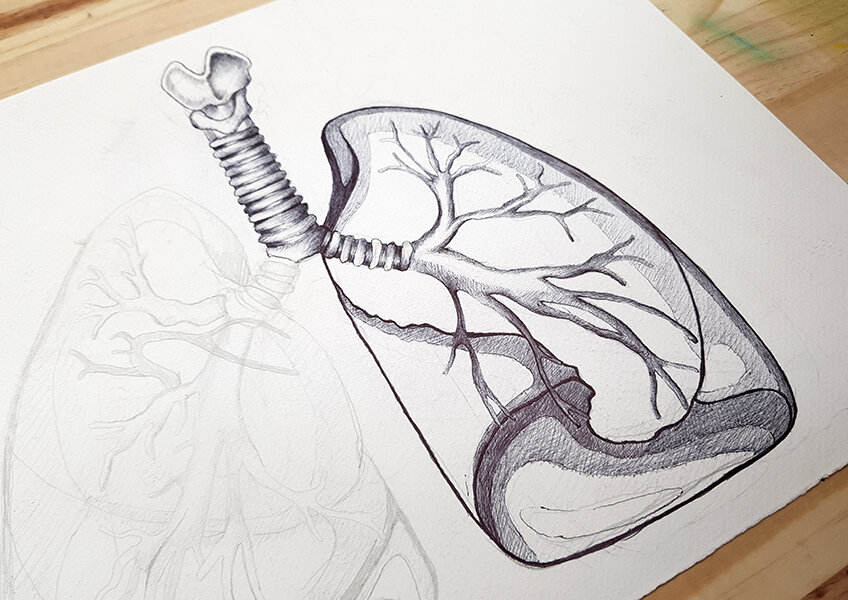
Make sure you shade in each section one at a time, that way you complete a whole layer before moving on to the next one. By doing this, you have a better chance of not making a mistake.
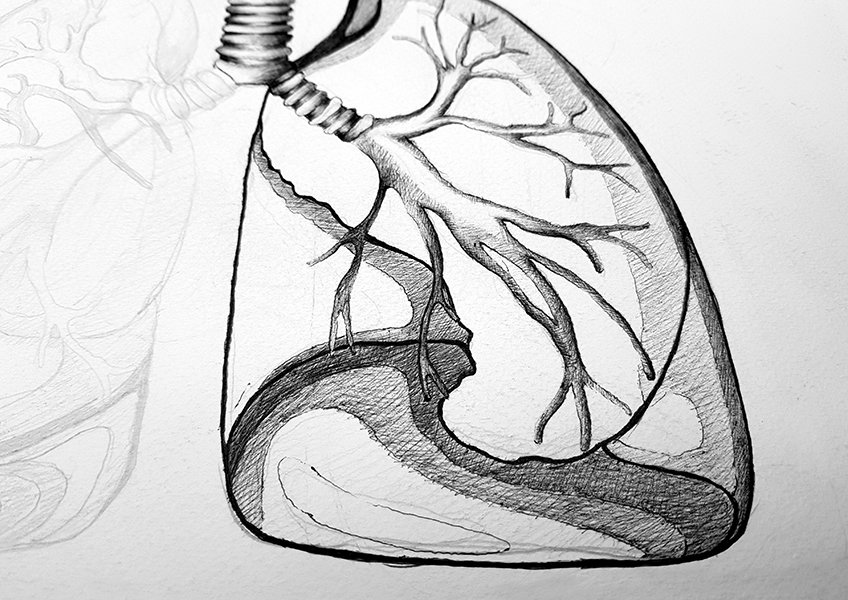
Step 6: Shading in the Right Lung’s Bronchioles with Pen
Once we have completed the left lung, we can now move on to shading the right lung. We want to start with the bronchioles again as they are the most contrasted feature within the lung. We can proceed by completing the right primary bronchus as we did for the left previously in the tutorial.
We will want to start with shading in the bronchioles.
As we shade in the bronchioles, remember to use your reference image to give you an idea of how the different bronchioles are contrasted to one another. For instance, one section of the bronchioles is vividly dark. We can represent this by making it slightly darker than the rest of the bronchioles by shading that group of bronchioles quite dark.
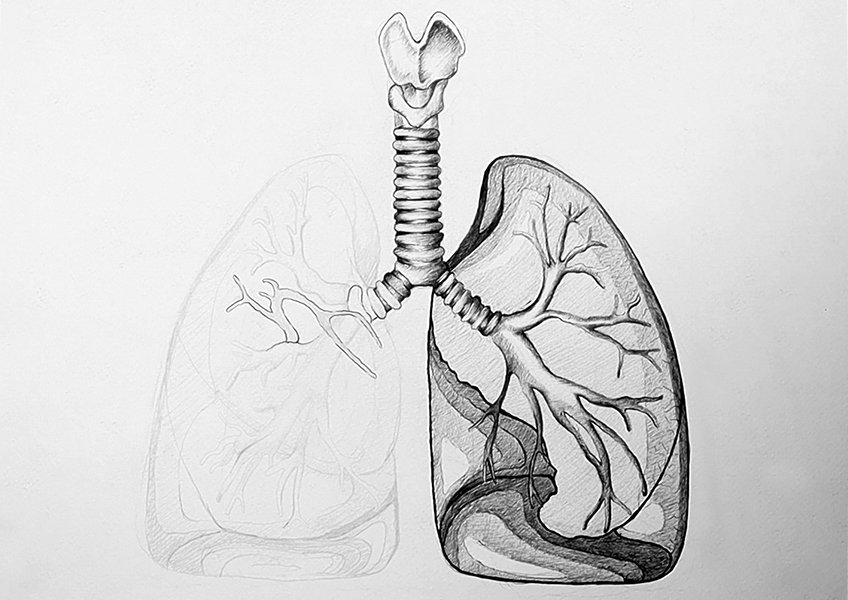
However, this time we can see the lining is slightly darker than the center of the upper lobe bronchus.
We want to proceed with this process, the same way we drew and shaded in the left lung’s bronchioles. Continue by outlining the rest of the bronchiole branches, thus defining the structure, and helping us to see more clearly where we will add shading.
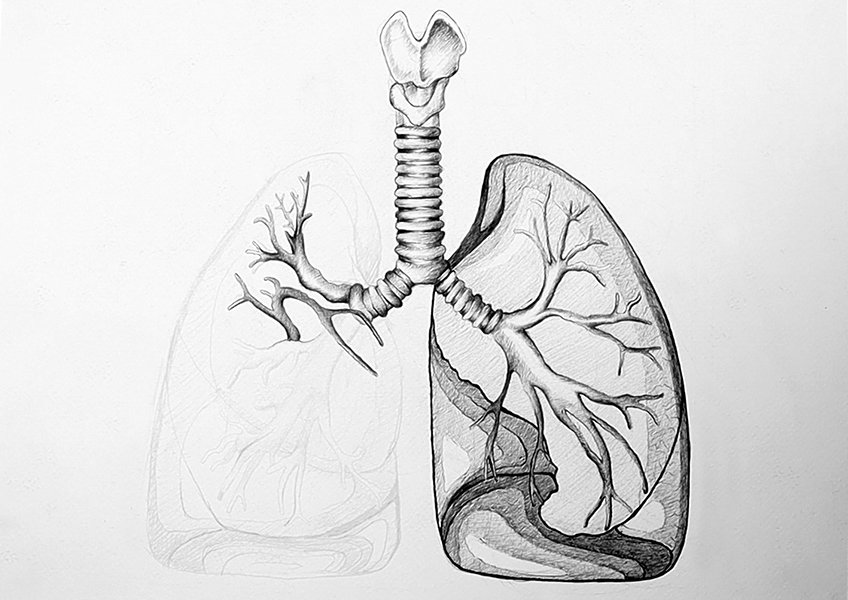
We want to continue with shading in the bronchioles.
As we shade in the smaller branches, we can add gradients to each of the bronchiole branches. We do this by shading each branch, creating dark to light gradients that give the branches a more realistic quality.
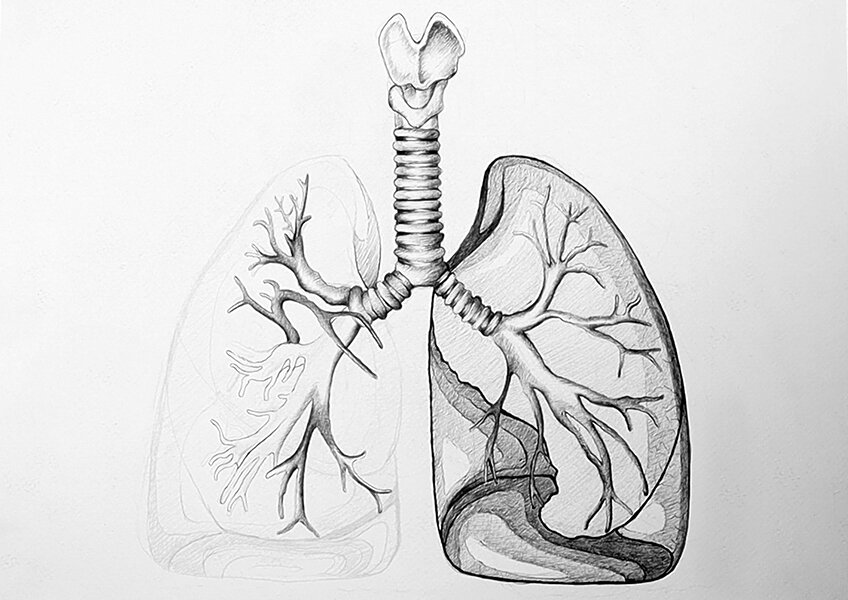
Take your time working through this section, being cautious with your pen as you shade.
Step 7: Shading in the Rest of the Right Lung with Pen
Similar to how we drew the partition lines of the different lobes within the left lung, we will proceed to do the same for the right lung. We want to use our pencil marks to guide our drawing process, as we continue to draw the different lines in the lungs that demarcate the different lobes of the right lung.
Again, as we did with the left lung, we now want to slowly and cautiously begin to shade in the different layers.
As the reference image depicts, we can see that there are various tonal variations, some darker than others. We want to go through each of these layers, shading one layer completely before moving on to the next.
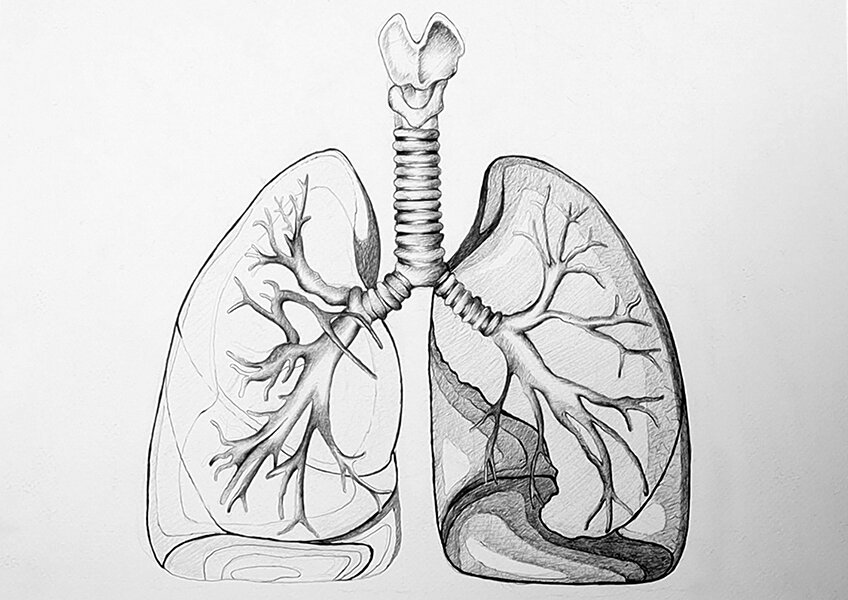
You want to do this again and again until you reach a total value that you are happy with.
We will carry on this process, going through each layer of the lung as seen within the reference image. An area to pay close attention to is the bottom of the lung. There are more layers to draw in this section and they are quite closely compacted. Take your time here, as you slowly build each tonal value by drawing layer over layer.
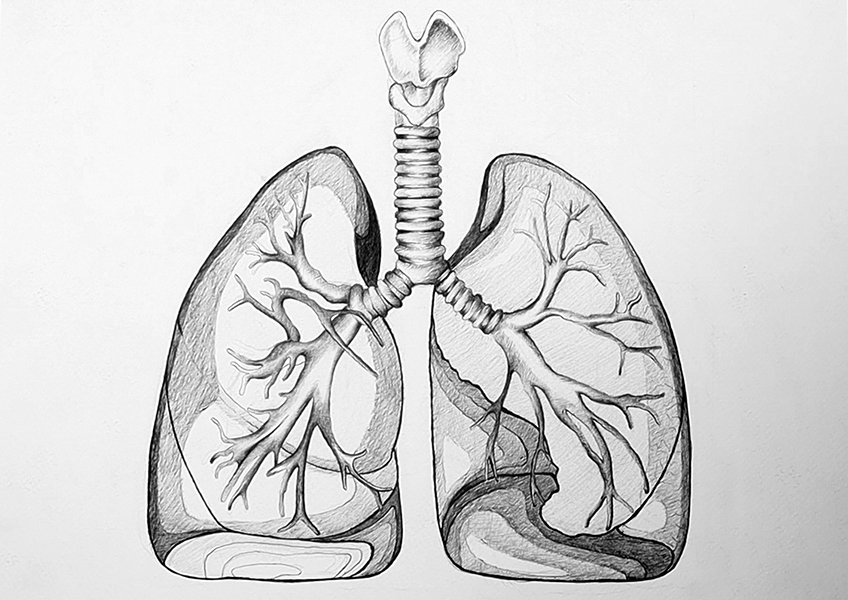
Continue with this process until you have completed the right lung.
Step 8: Final Touches
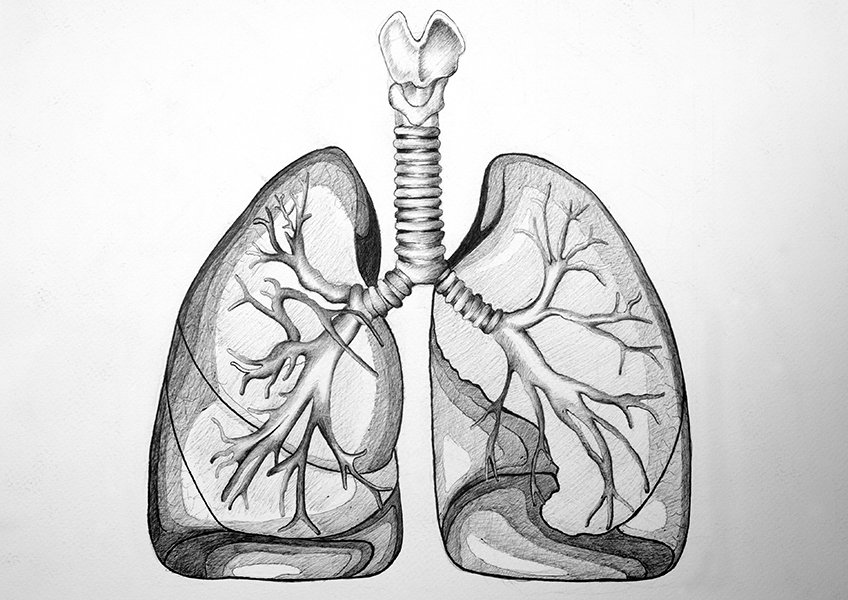
There you have it! That is the end of the tutorial. A few simple steps on how to draw lungs. The last thing you want to do is erase any lingering unwanted pencil marks. Perhaps go through your drawing to see if there are any sections you missed with your pen.
Give your drawing one last glance, comparing it to the reference image. There you have it, an easy-to-follow tutorial on how to draw lungs!
Tips to Remember
- Use the reference image. From start to finish, you want to be constantly referring to the reference image for guidance.
- An eraser is a tool. This means you want to draw and tweak as much as you can with your pencils and erasers before moving on to the stages where you will draw with a pen.
- Drawing takes practice. Don’t worry if it doesn’t turn out the way you want on the first try, see this tutorial as a resource to come back to.
- Have fun with the process. Perhaps listen to some music to create a more relaxing experience.
- Explore mark-making. In this tutorial, we discuss a few mark-making styles, but allow yourself to try other methods as you would like.
Learning how to draw lungs is quite easy, once it is broken down into a few steps. the general idea of how the process is by first creating the general sketch, which you then slowly refine by adding in details and shading. Lungs drawing is a great way to learn how to shade with a pen, as this tutorial requires you to distinguish the different layers of the lungs by shading each one in a different tonal value. This exercise enhances your pen drawing skills and builds your anatomical knowledge of the lungs.
Frequently Asked Questions
How Do You Draw Lungs Accurately?
You want to make sure that you have a good reference image. Using a labeled diagram from the internet can provide you with a more accurate representation of the lungs. From there you can develop a light pencil lung sketch, whereby you focus on the outlining of the lung to capture its form and shape. From there, you will slowly develop the drawing by adding more details to the drawing, using the outlines to demarcate the areas in which you will draw. Once you have satisfactorily drawn the lungs in pencil, you can move on to refining the drawing by adding shading. You can either do this with darker pencils or, in the case of this tutorial, you are shown how to do this with a pen. This provides maximum contrast within your drawing to give it more depth.
How Do You Draw the Different Features in a Lung?
There are many ways to draw the different features of a lung, however, a good suggestion is to use a reference image to guide your drawing process. Once you have an image to refer to, you can then proceed to lightly mimic the features of the reference image within your drawing. Remember to keep your pencil marks light, this way, as you add in moments of darker shading, you can use the light pencil marks to guide your shading process. From there we can then utilize the skill of shading to enhance each feature. By doing so we can darken features and lighten features with our medium, to either put them in the foreground or the background. This will also give the drawing more dimension, making the features more realistic. So remember, have a good reference image to define the features and place them correctly within the lungs, then work on shading each feature of the lung.
How Do You Draw the Trachea of the Lungs?
Drawing the trachea of the lung resembles the process of drawing a spine. When drawing any anatomy, it is essential to use a reference image to guide the process. Anatomy is very specific, thus, if we are looking to represent anatomical features correctly, we will want to have an image that represents these features. This will give us the best chance to draw these features more accurately and effectively. Within the trachea, we can utilize our shading skills to define the feature more significantly. You can do this by shading the bone structures of the trachea, as well as the cartilaginous areas in between the bone structures. It’s a matter of shading in different directions within different sections of the trachea. Doing so will give it dimension and more realistic quality. Most importantly, use a reference image to guide you in the forming of the trachea structure.
Matthew Matthysen is an educated multidisciplinary artist and illustrator. He successfully completed his art degree at the University of Witwatersrand in South Africa, majoring in art history and contemporary drawing. The focus of his thesis was to explore the philosophical implications of the macro and micro-universe on the human experience. Matthew uses diverse media, such as written and hands-on components, to explore various approaches that are on the border between philosophy and science.
Matthew organized various exhibitions before and during his years as a student and is still passionate about doing so today. He currently works as a freelance artist and writer in various fields. He also has a permanent position at a renowned online gallery (ArtGazette) where he produces various works on commission. As a freelance artist, he creates several series and successfully sells them to galleries and collectors. He loves to use his work and skills in various fields of interest.
Matthew has been creating drawing and painting tutorials since the relaunch in 2020. Through his involvement with artincontext.org, he has been able to deepen his knowledge of various painting mediums. For example, watercolor techniques, calligraphy and lately digital drawing, which is becoming more and more popular.
Learn more about Matthew Matthysen and the Art in Context Team.
Cite this Article
Matthew, Matthysen, “How to Draw Lungs – Steps to Create a Realistic Lungs Sketch.” Art in Context. June 28, 2022. URL: https://artincontext.org/how-to-draw-lungs/
Matthysen, M. (2022, 28 June). How to Draw Lungs – Steps to Create a Realistic Lungs Sketch. Art in Context. https://artincontext.org/how-to-draw-lungs/
Matthysen, Matthew. “How to Draw Lungs – Steps to Create a Realistic Lungs Sketch.” Art in Context, June 28, 2022. https://artincontext.org/how-to-draw-lungs/.


