How to Draw Braids – Create Your Own Braided Hair Drawing
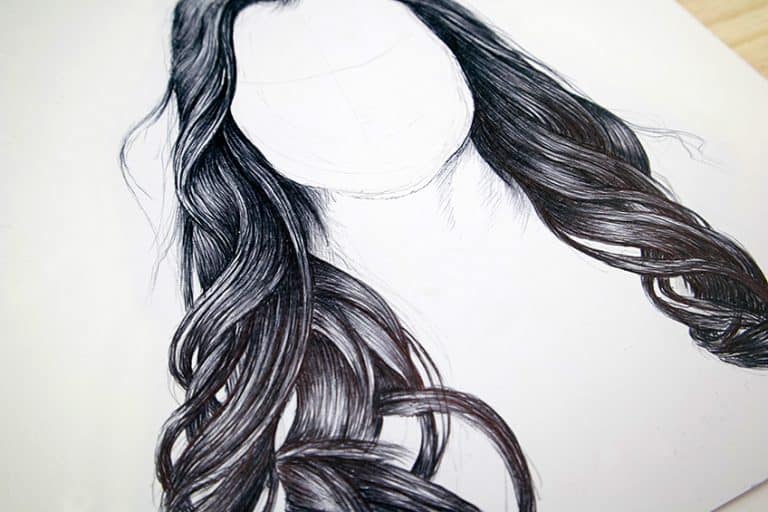
Learning how to draw braids is interesting because it is as if you are learning how to draw silky rope. Learning how to draw hair in various ways is always a helpful skill to have and braided hair is a fun and quirky addition to character design. In this easy braid drawing tutorial, we will also learn a few tips and tricks that we can utilize within our shading process for various other drawing ideas. A braided hair drawing teaches you a unique way to shade a structure and emphasize its shadow and light.
Table of Contents
An Easy Guide to Drawing Braids
Braided hair is a simple structure to draw, as the formation and shading process of a braided hair drawing can be done in a few digestible steps. In this easy braid drawing tutorial, we will find that the process of outlining and working in the shadows and highlights is really easy. Braided hair can be drawn in a variety of ways and in this easy braid drawing tutorial, we will work on forming the structure and applying details to the hair in a few simple steps.
Once you know the process of how to draw braids, you can then practice in your own time and the drawing process will eventually become second nature. We will only need simple materials for this easy braids tutorial.
Necessary Materials
A braid drawing may seem complicated, but it is a very easy structure to draw. We want to know how to assemble the structure from a simple sketch into a refined and realistic braid drawing. The process of drawing braided hair can be done within various mediums, however, in this tutorial, we will be using a simple set of tools.
We want to work with an HB and 2B pencil to work out a braid sketch first, focusing on the form of the braided hair structure at first.
We want to make sure that we have an eraser and a sharpener to assist us along the way in case we make any silly mistakes. We will also be using a ballpoint pen to enhance the contrast between highlights and shadows within the braided hair structure. All materials can be found through the links below:
- HB pencil
- 2B pencil
- Ballpoint pen
- Eraser
- Sharpener
- Good paper (200 g/m – 250 g/m recommended)
Preparation
Once we have all our materials ready, we want to start preparing ourselves within an appropriate environment to focus on. We want to also mentally prepare for the tutorial ahead, making sure we are ready to focus on each step for this easy braid drawing tutorial.
The task at hand is not difficult, but it does require some attention to the drawing process. A good suggestion is to listen to some music. We want to relax and enjoy the process. Now that we are prepared, let us see what we should expect.
Step-by-Step Instructions on How to Draw Braids
In this tutorial on how to draw braids, we will find that the process of drawing braids is quite simple. Firstly, we will work with our pencils to create a light braid sketch, making sure we have the form drawn correctly. From there we will work on some detail and light shading. We will then move on to using a ballpoint pen to enhance the shadows and highlights within the hair structure, making sure that we enhance the silky-smooth quality of the hair.
Now that we know what to expect, we can get started on this tutorial on how to draw braids.
Step 1: Shaping the Head and Hair
We want to start by drawing a basic circle on our page using our HB pencil. We want to establish the area in which the head will be drawn. It is completely up to us regarding what size we would like to draw the head shape.
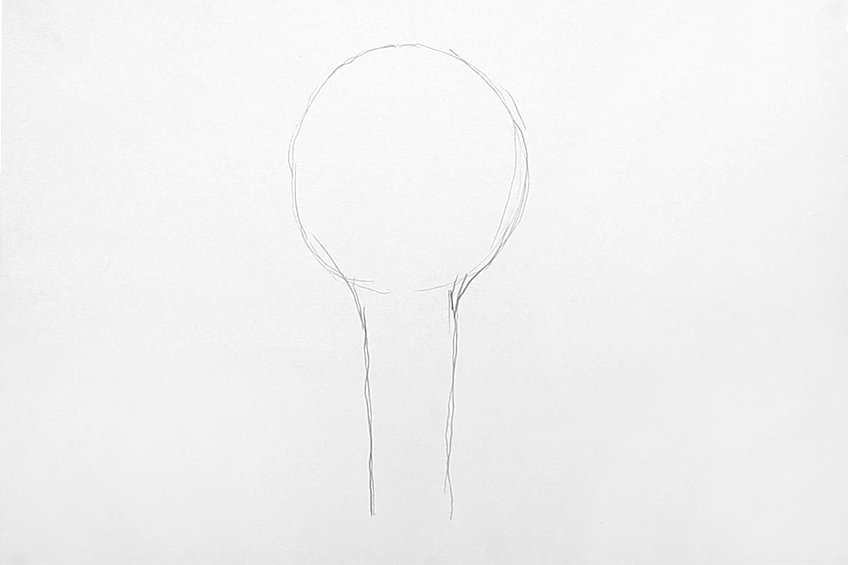
We want to make sure that the rectangle is long enough for a few knots within the braids.
Step 2: Adding Light Details
We now will proceed to add some details to the drawing that indicate the flow of the hair. We can do this by partitioning the hair into three main sections on the head.
From there, we want to draw a zig-zag line down the center of the vertical rectangular shape.

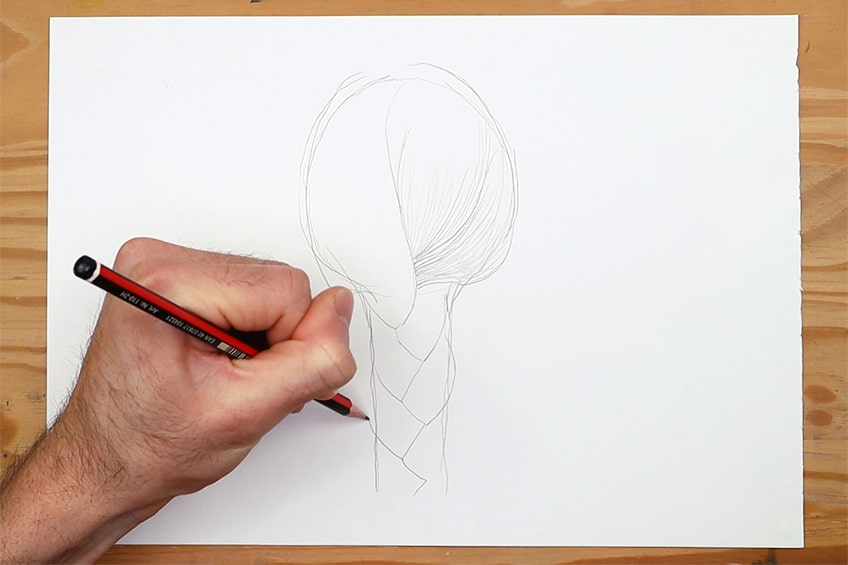
This will create a series of knots moving down the hair.
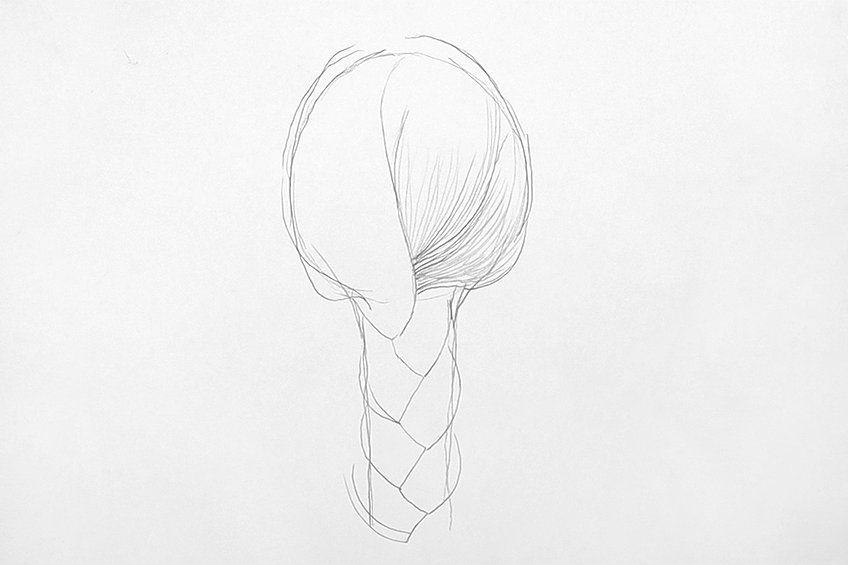
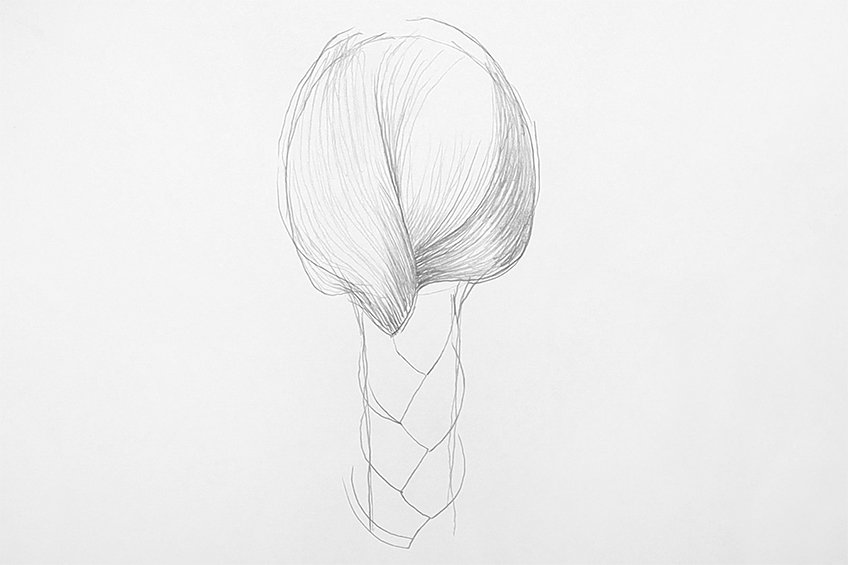
This will be easier once we move on to using a pen for finer and contrasted shading.
Step 3: Adding Details with Pencil
Once we have established the hair structure and worked out the pencil braid sketch, we can now use our HB pencils to slowly add details to the hair. We want to use a line-stroke action to create shadows within the hair structure.
We do this by drawing a series of strokes that start from each knot within the hair.
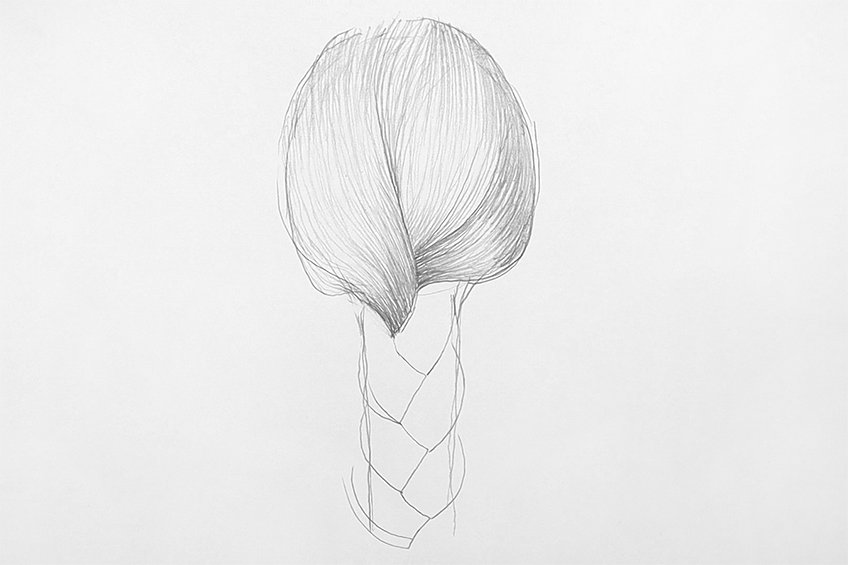
This will create a highlighted-shine effect.
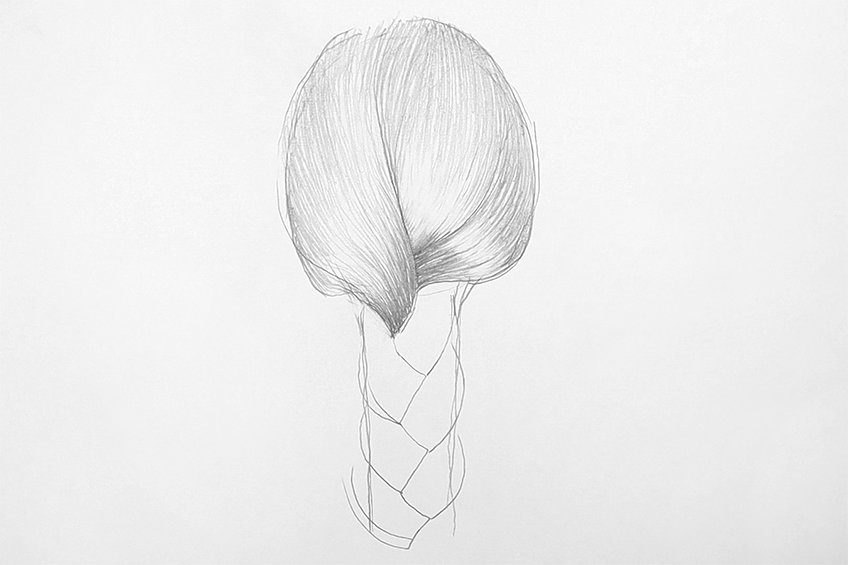
Step 4: Adding Pencil Shading
As we go through each knot within the braid, we want to lightly sketch lines into each braided knot. Really, what we want to do is create a hair effect within the drawing, which we can achieve by using lines.
We add these lines into each overlapping section within each knot in the hair.
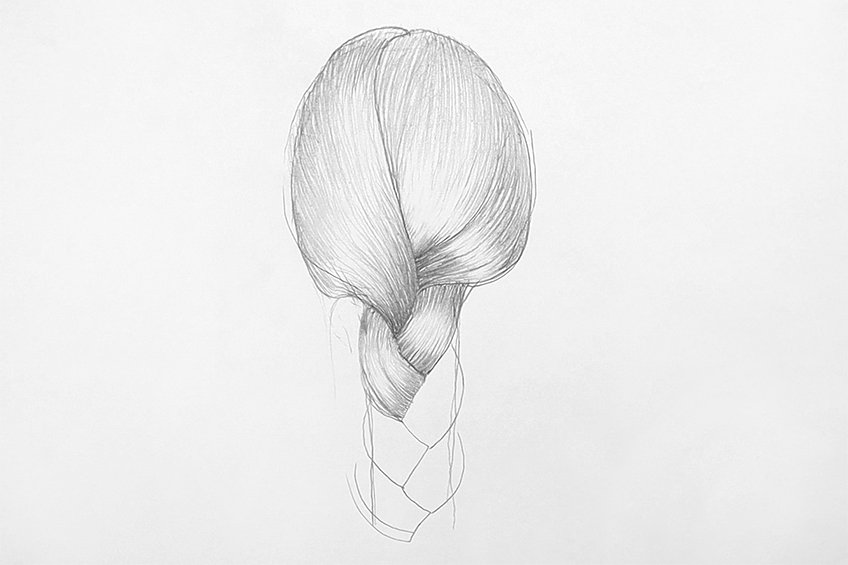
Shading hair is not like shading other objects, as hair is quite specific in its structure. We want to approach drawing hair quite literally within the braided hair drawing. We do this by adding in a series of lines over and over again.
By doing this, we will create the effect of many strands of hair tied together.
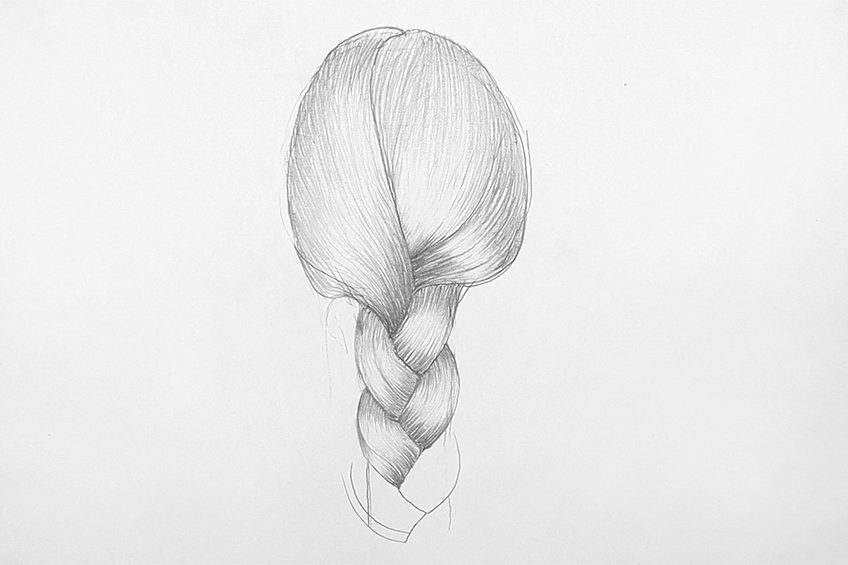
This means that as we add pencil marks to each knot within our braid drawing, we want to make sure that lines are darkest near every overlapping section. This will leave the middle section of hair within each knot lighter and less shaded.
By doing this, we will give the hair dimension and a more realistic effect.
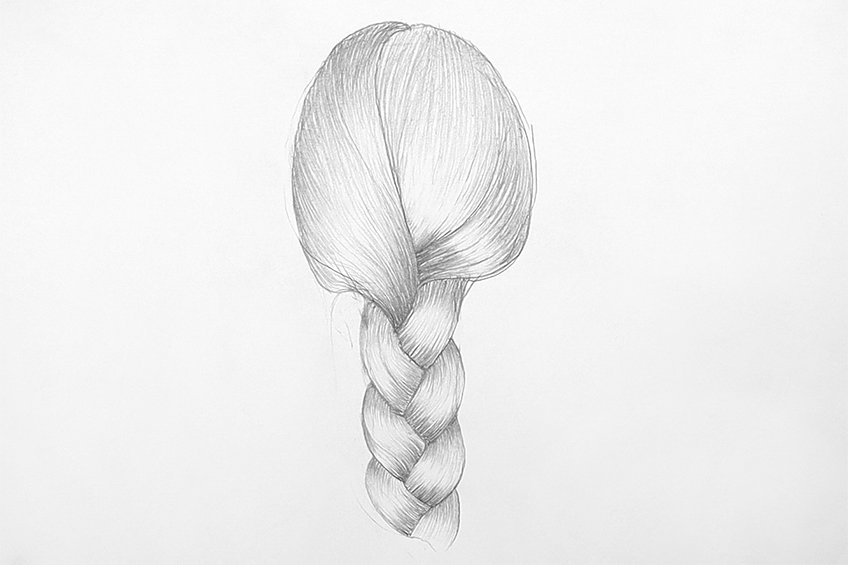
Step 5: Adding Pen Shading to the Head
We will now proceed to add shading to our braids drawing using a pen. We want to follow the same process, basically using the pencil marks to guide the pen shading process. We want to make sure we take our time with this.
At this step, slowly add lines into the hair.
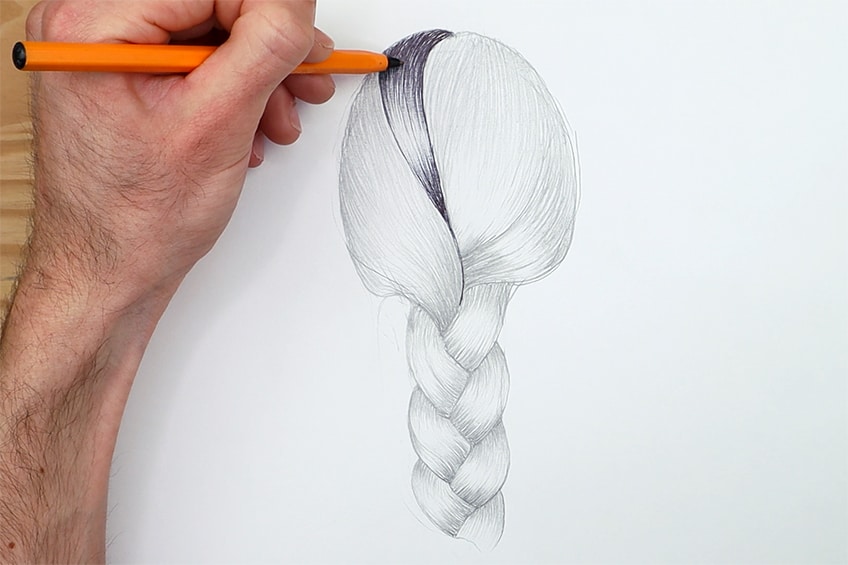
We also want to add dark lines near the areas of the knots where they overlap over one another.
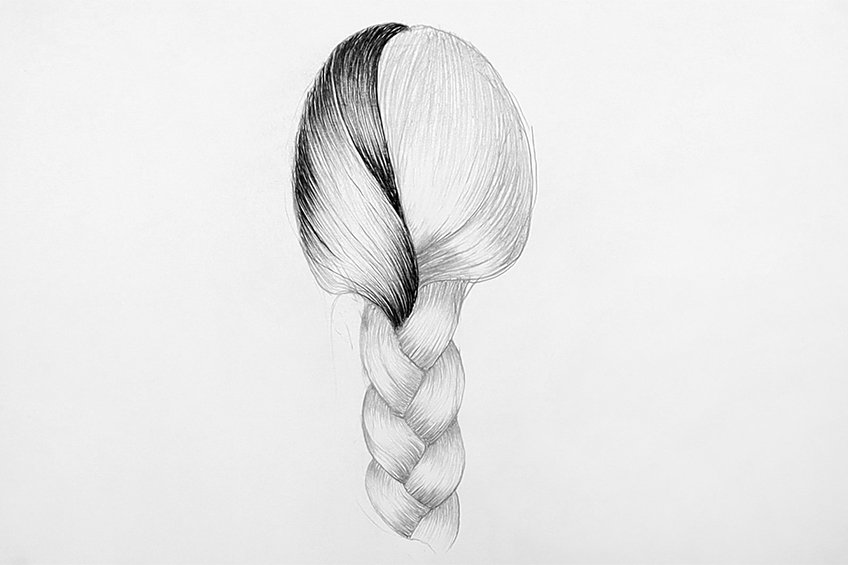
We want to also keep the lightest sections in the middle, which means we will have dark lines at the ends of each knot or section of hair.
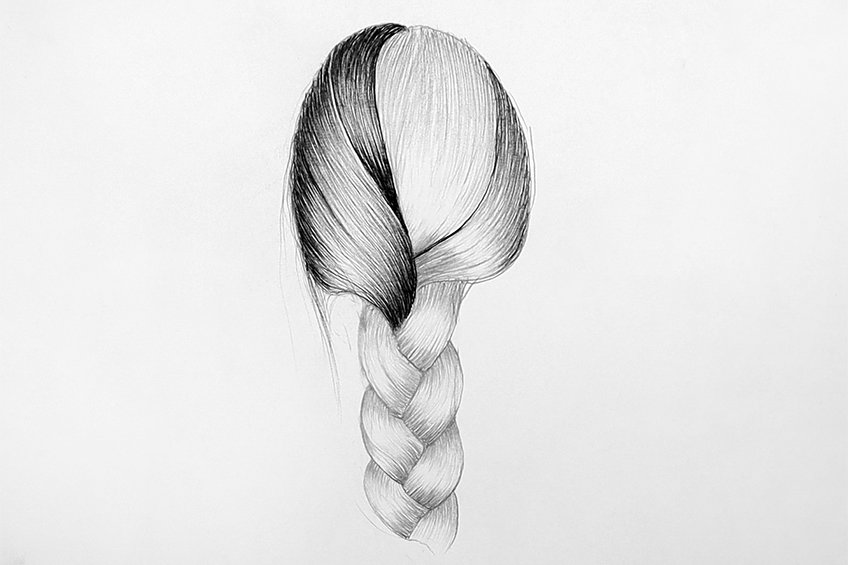
You must take your time with each section of hair in your drawing as you attempt to create shadows and highlights by adding lines. Each section within the hair of the drawing should have a moment of shine to it.
We create this by adding darker lines to the ends or overlapping sections within the hair.
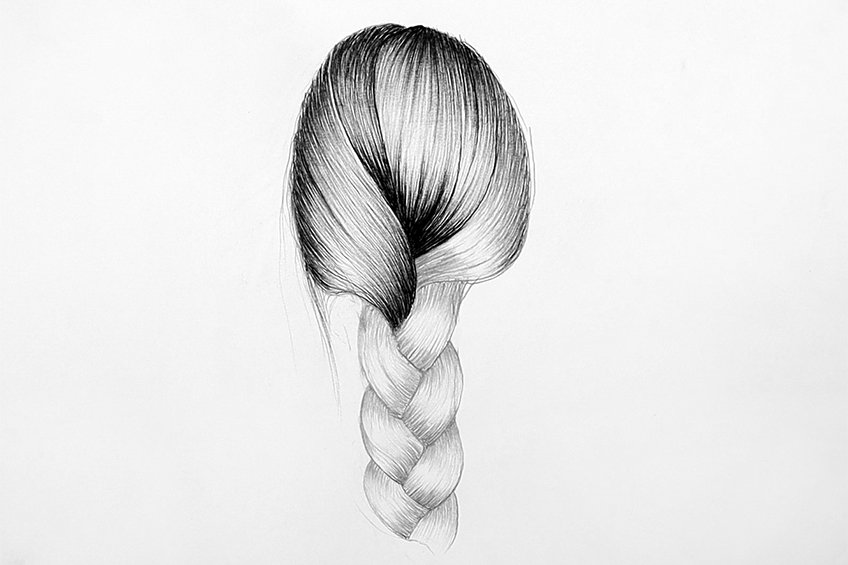
If you take your time adding in lines within each major section in the hair, we will slowly see the shadows and light form within the hair more distinctly. Again, the hair is sectioned off into three major parts, we want to work in these dark and light lines within each section.
Do this before moving on to the next step.
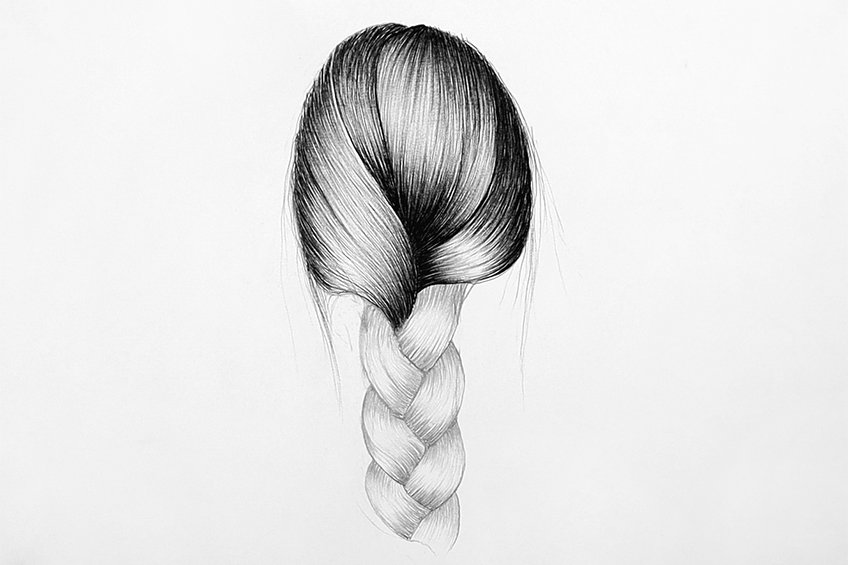
Step 6: Adding Pen Shading to the Braids
We now can add details to each knot within the braided hair. This is a more simplified version of what we have just done with the hair on the head.
We want to make sure we follow the same drawing process of adding lines into each knot, having the darkest lines situated near the overlapping sections of each knot.
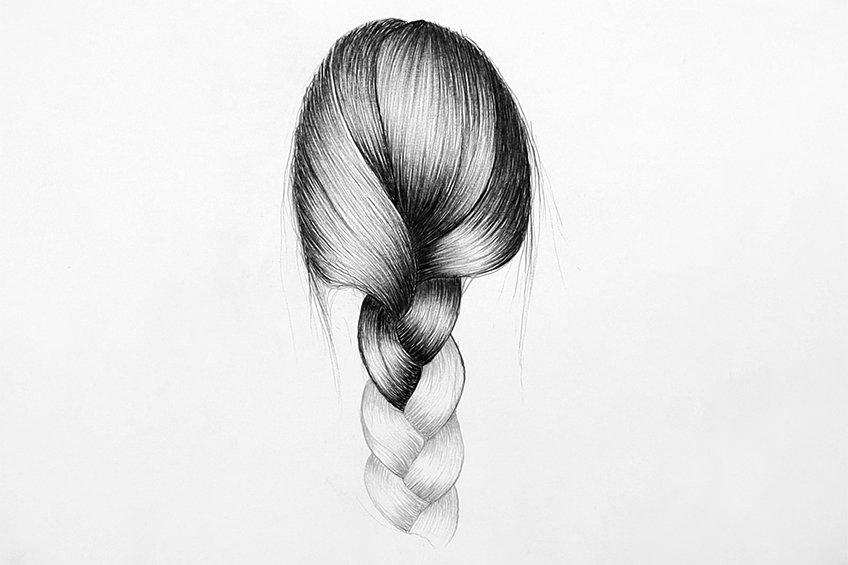
Make sure you take a break if you feel fatigued. The drawing process can easily become strenuous and it’s always a great idea to take a break so that you come back to the artwork with a refreshed mind.

You can always darken the shadowed areas by going over the lines with more lines to give the braided hair drawing more contrast.
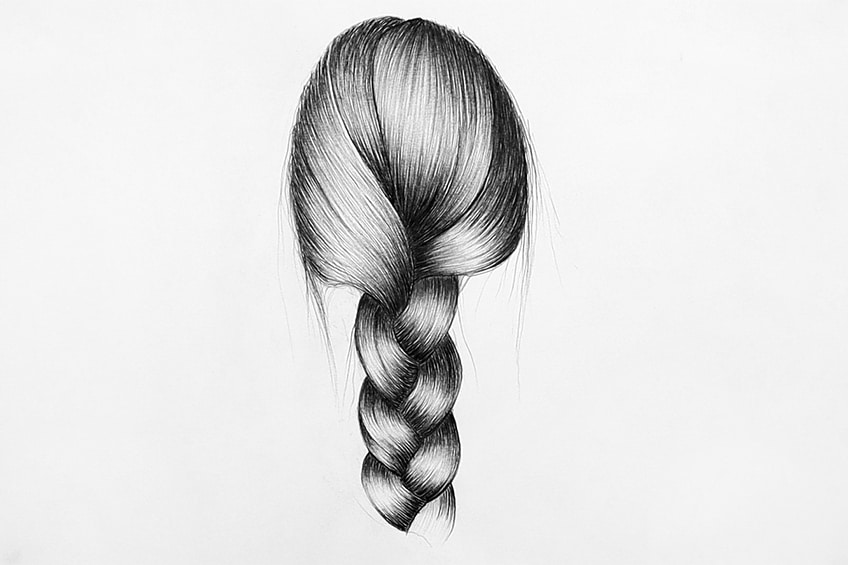
Once you have the drawing process down, it’s simply about taking your time and being patient.
Tips to Remember
- Work out the pencil sketch first. You want to make sure that you have the pencil braids sketch complete before moving on and using a pen
- Use lines for shading in the hair. Drawing braided hair is different from drawing other objects, we represent the shadows and highlights by using lines
- Take your time. Remember, we are literally drawing strands of hair, which means it should take some time.
- Take a break. The drawing process can get strenuous, so remember to take a break.
- Use the flick of the wrist. As you learn how to draw braided hair, you will find that the use of the flick-of-the-wrist helps to create a seamless line gradient between thick and thin.
The process of drawing braided hair is not difficult, it just takes time. Once you understand the formation process using the zig-zag line it is quite easy to develop the braid sketch. Once you have the shape of the braided hair, it is simply a matter of adding n a set of lines to create the effect of hair. As you learn how to draw braided hair, you will find that the process should take time which will lead to the best results.
Frequently Asked Questions
How Do You Draw the Knots in Braids?
Learning how to draw braids may seem complicated because of the knot style within the hair. This is quite a simple structure to draw if you use the right technique. The best way to do this is by drawing a zigzag line down the page. From there, at every point of the zig-zag line, you will draw a line in an arch shape. This arch shape will curve upward and in on itself until it connects to the previous line from the tip of the zig-zag. This process will be continued until you have created a sequence of knots within a length that you are satisfied with. You can extend this zig-zag line as long as you would like, and you then can simply add the arch-like lines at the tips of each zig-zag point.
How Do You Shade in Hair?
Once you have the general shape of the braids drawn, you will find that there are a series of knot shapes that fold into one another. We can add shading by drawing a series of lines or strokes along with the form of each of those knots. Wherever the knots stop, as they move under the previous knot, is where the lines will start from. You want to avoid extending these lines too long into each knot but rather create a set of short strokes. This will give more shadow near the overlapping sections of each knot and leave highlights in the rest of the knot. By doing this, we create light and shadow within the hair, making it more three-dimensional in its structure.
Matthew Matthysen is an educated multidisciplinary artist and illustrator. He successfully completed his art degree at the University of Witwatersrand in South Africa, majoring in art history and contemporary drawing. The focus of his thesis was to explore the philosophical implications of the macro and micro-universe on the human experience. Matthew uses diverse media, such as written and hands-on components, to explore various approaches that are on the border between philosophy and science.
Matthew organized various exhibitions before and during his years as a student and is still passionate about doing so today. He currently works as a freelance artist and writer in various fields. He also has a permanent position at a renowned online gallery (ArtGazette) where he produces various works on commission. As a freelance artist, he creates several series and successfully sells them to galleries and collectors. He loves to use his work and skills in various fields of interest.
Matthew has been creating drawing and painting tutorials since the relaunch in 2020. Through his involvement with artincontext.org, he has been able to deepen his knowledge of various painting mediums. For example, watercolor techniques, calligraphy and lately digital drawing, which is becoming more and more popular.
Learn more about Matthew Matthysen and the Art in Context Team.
Cite this Article
Matthew, Matthysen, “How to Draw Braids – Create Your Own Braided Hair Drawing.” Art in Context. June 23, 2022. URL: https://artincontext.org/how-to-draw-braids/
Matthysen, M. (2022, 23 June). How to Draw Braids – Create Your Own Braided Hair Drawing. Art in Context. https://artincontext.org/how-to-draw-braids/
Matthysen, Matthew. “How to Draw Braids – Create Your Own Braided Hair Drawing.” Art in Context, June 23, 2022. https://artincontext.org/how-to-draw-braids/.


