How to Draw a Tongue – In-Depth Guide to Create a Tongue Sketch
Learning how to draw a tongue is a unique activity as the tongue on its own is quite an abstract structure. However, when we contextualize the tongue within the mouth, we begin to see how its shape makes sense. The tongue shape can be fun to draw as it is capable of various forms, in this tutorial we will be drawing the tongue from an image of someone sticking it out of their mouth. Learning how to draw a tongue sticking out is a great way to understand how the tongue is placed within the mouth and how it is placed concerning the teeth. In a tongue drawing, we are not only learning how to draw the tongue, but we are learning how to draw teeth and lips as well. Drawing the mouth is essential to drawing a tongue because as we learn how to draw a tongue sticking out, we will find that we need both teeth and lips to contextualize the tongue.
Table of Contents
A Beginner’s Guide to Drawing a Tongue
In this tutorial, we will be doing a realistic tongue drawing. We will find that the process of a tongue-out drawing is quite simple. Again, because the tongue is quite abstract, we will find that shading and drawing the tongue is quite simple.
Sometimes structures that are strange, such as tongues, can be easy to draw because all they need to seem realistic is to be contextualized by other features.
We will find that we will use a reference image to develop a light tongue sketch, which we will then turn into a more refined realistic tongue drawing. As we go through a few simple steps on how to draw a tongue we will slowly build ability and confidence for drawing other elements of the mouth as well. Let us see what materials we will need.
Necessary Materials
As we learn how to draw a tongue sticking out, we want to make sure we have the correct materials. We want to make sure we have a pencil for developing the tongue sketch in the earlier steps. This means we need a sharpener to keep our pencils sharp and an eraser to rectify any unwanted mistakes. We will also be using a ballpoint pen for our tongue drawing.
Using a pen can add a lot of contrast to the drawing making it a little more vivid and interesting.
For our tongue-out drawing, we will want to make sure we have good paper, you can purchase paper from your nearest stationery shop. Lastly, we will be using a reference image that you can download. You can find all materials through the links below:
- Pencil
- Sharpener
- Eraser
- Pen
Step-by-Step Instructions on How to Draw a Tongue
A realistic tongue drawing requires a process of building the structure through various layers. We begin with a pencil sketch. Starting to form the tongue with a pencil sketch is going to help us slowly build the structure of the tongue and mouth compared to how we see it in the reference image. The reference image will be the guide for the entire drawing process.
As we will proceed to add in some light pencil shading, we will refer to the reference image to guide us. We want the reference image to give us an indication of shadow and light and how it is defined on the tongue and in the mouth.
We will then move on to drawing and shading in pen, to enhance the shadows and features of the tongue-out drawing. Now that we are aware of what the process entails, let us go through the different steps on how to draw a tongue sticking out.
Step 1: Lightly Sketch the Tongue
We want to start with a light sketch of the tongue as we refer to the reference image for guidance. The intention here is to create a light tongue sketch, where we go back and forth between the drawing and the reference image. We want to spend time here tweaking the drawing.
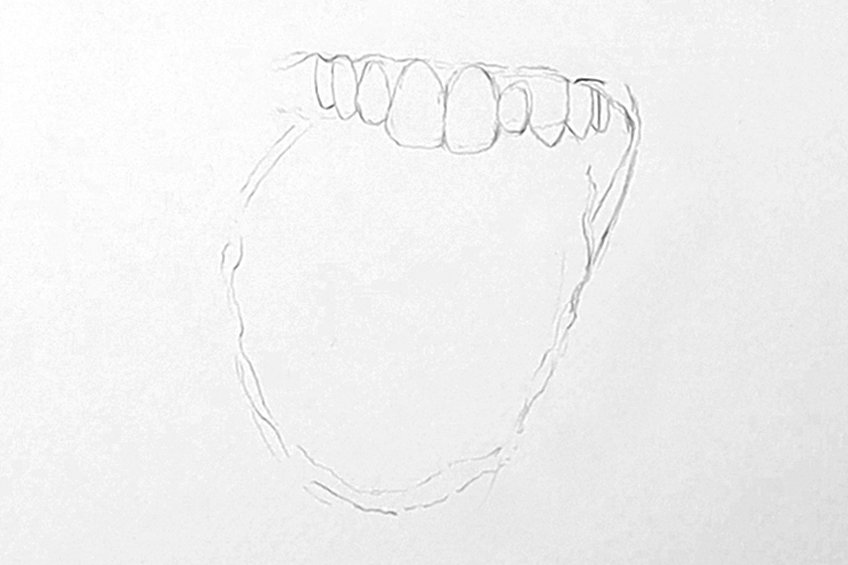
Spending time developing the tongue sketch with our pencils will make the rest of the tutorial much easier. Especially once we move on to shading and drawing in pen. Again, take time to notice the features of the reference image.
For instance, look at how the teeth are placed above the tongue, or how large the gaps are next to the tongue. Consider these kinds of details.
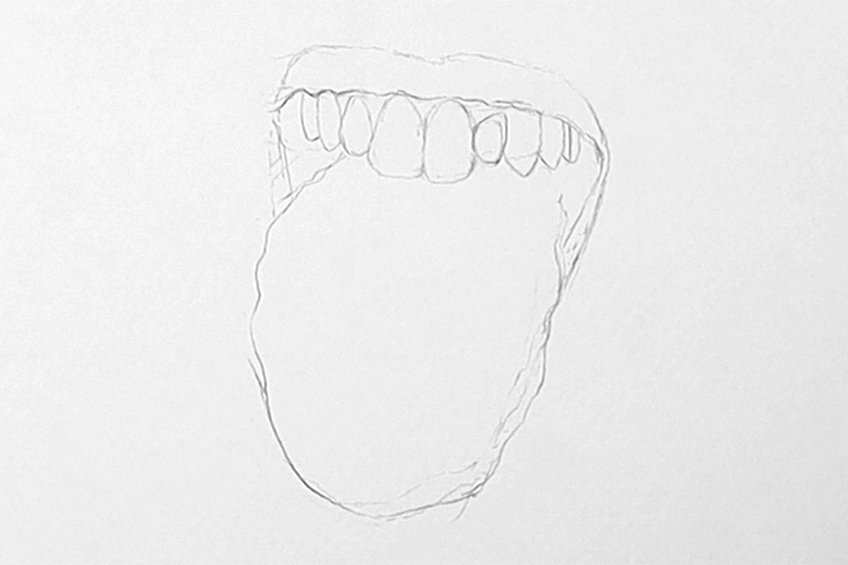
As we draw the tongue notice how the tongue has little indentations along the sides. We want to focus on the linework that forms the tongue, especially the little indentations along the sides of the tongue. We can also color on the dark gaps inside the mouth. Again, make sure you focus on all features, consolidating them before we add some light shading.
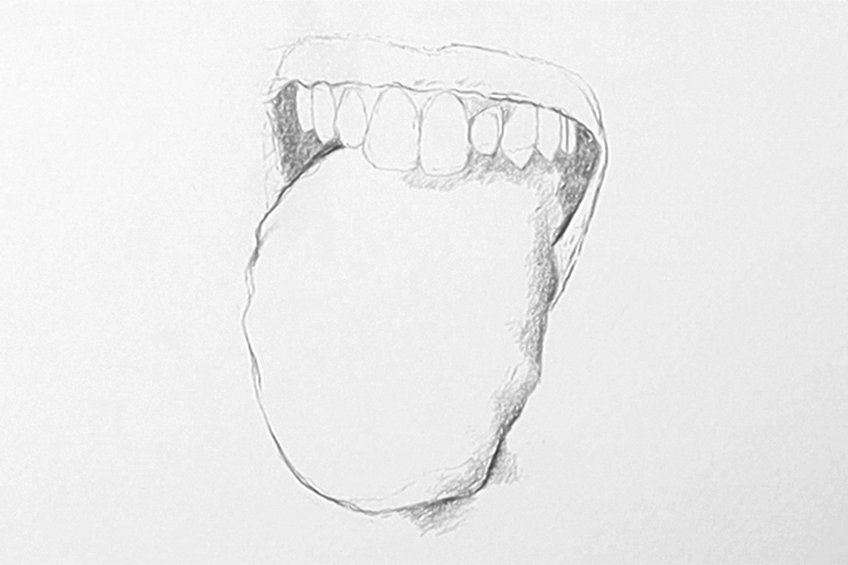
We can also add in-line work within the lips. The lips within the reference image display little indentations within the upper lip. Spend some time referring to the reference image as you add in some line work to sketch out these features within the lip.
Go through your drawing and see how the outlining and light sketch resembles the reference image.
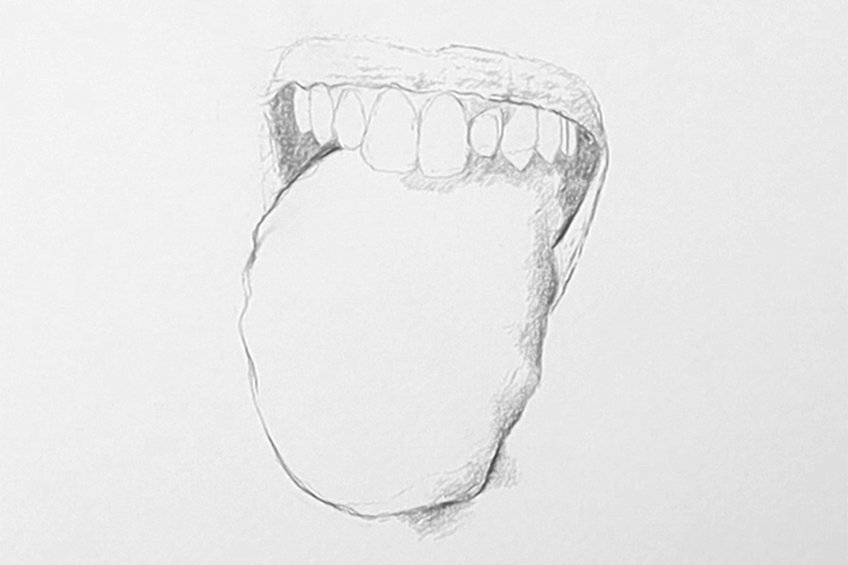
Step 2: Adding Light Pencil Shading
This is where we bing to refine our drawing by adding in some light shading with our pencils. We still want to constantly refer to the reference image as we see how the shadows are formed in the features of the image.
We can see that there are various shadows from darker ones within the mouth to more subtle shadowing that forms along the sides of the tongue.
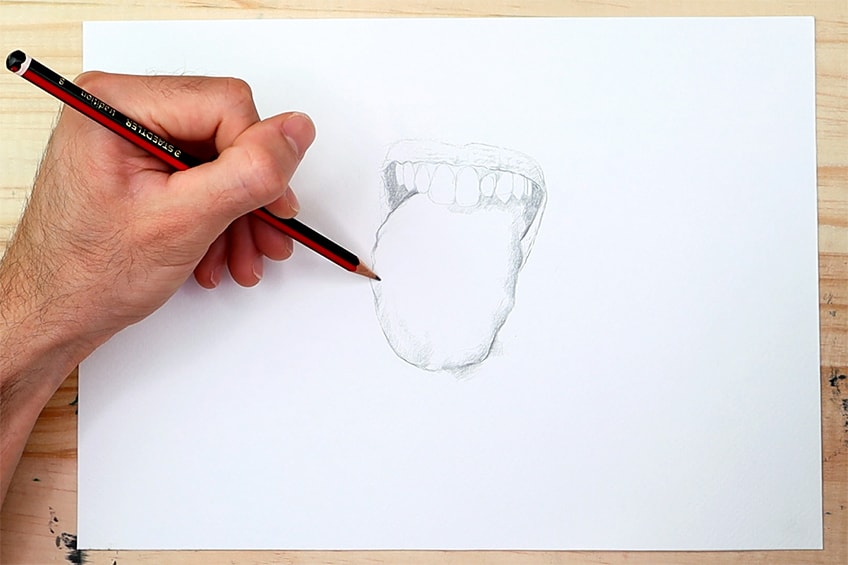
As we add some light shading to our drawing, we want to pay attention to the various little indentations and curves within the tongue. Especially near the bottom of the tongue where the tongue has some curvature that creates shadowing near the tip. Another area to notice is the light shadowing that the teeth cast onto the tongue.
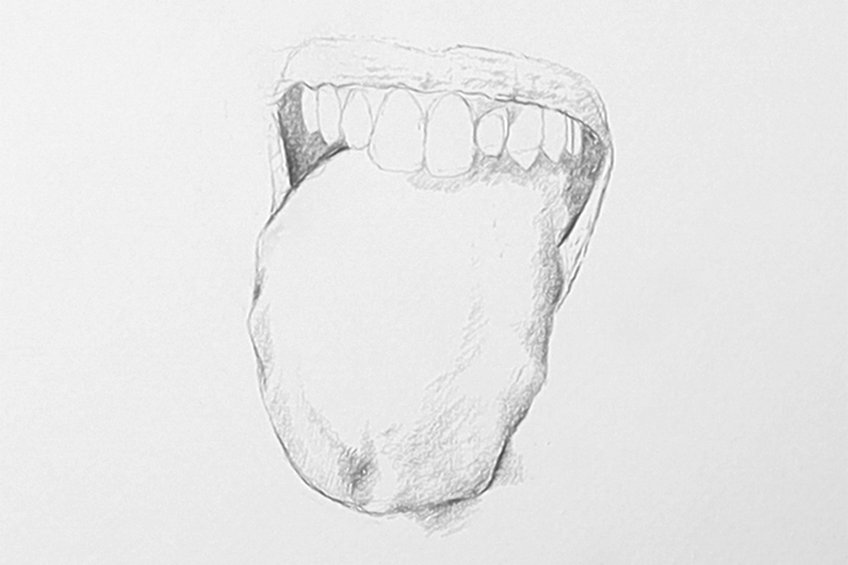
We also want to notice how the shadows form on the lip within the reference image. The lip defines a light shadowing that is darker on the right side and lighter on the left side. We want to work the shadows into the little indentations within the lip.
Take your time going back and forth between the reference image and the drawing.
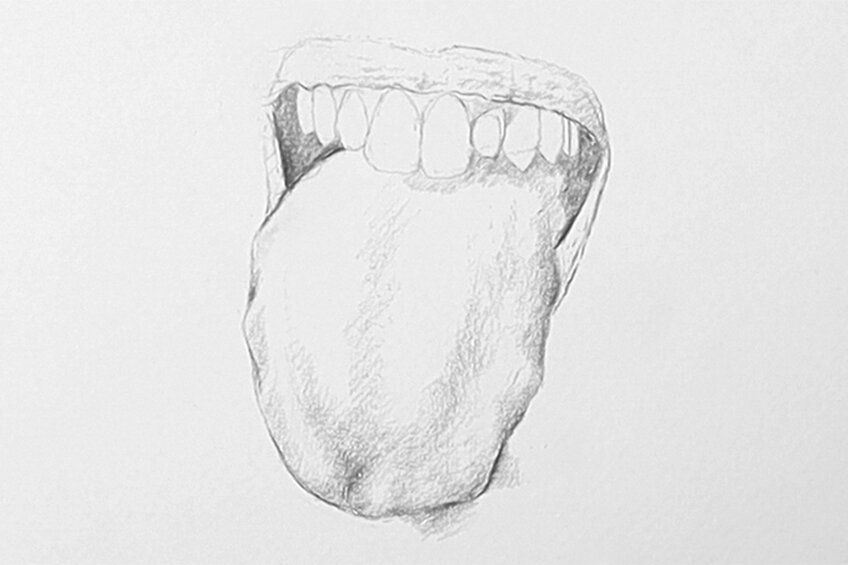
Continue with this process of adding in some light shading, paying attention to how the shadows are formed within the reference image. Again, you want to make sure that you are using the reference image to guide your shading process. Especially when shading the tongue, as the tongue has very subtle shadows.
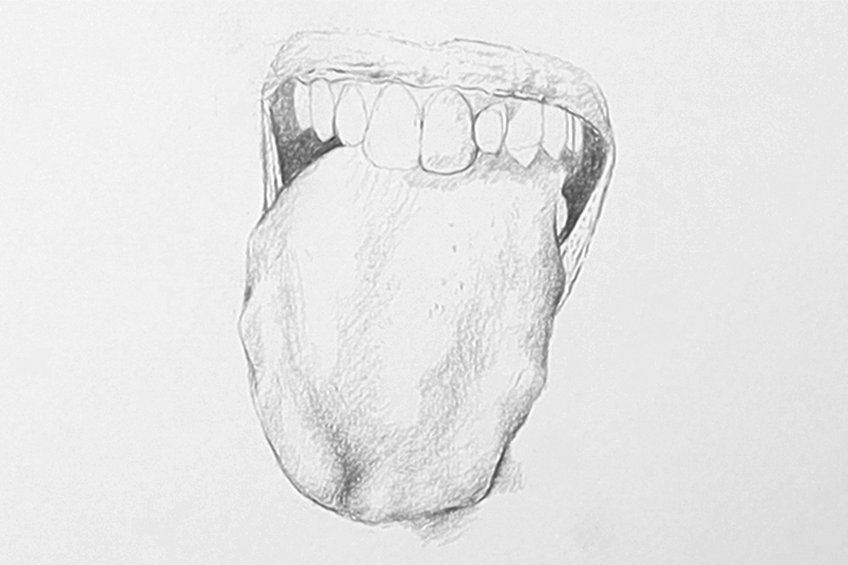
We can see that the reference image shows a tongue that has various tonal values within it. This is because the tongue has a strange texture, which is different in color. More so, the tongue also has slight curvature which is creating darker and lighter sections.
Make sure you spend time on the tongue as you add in some light shading.
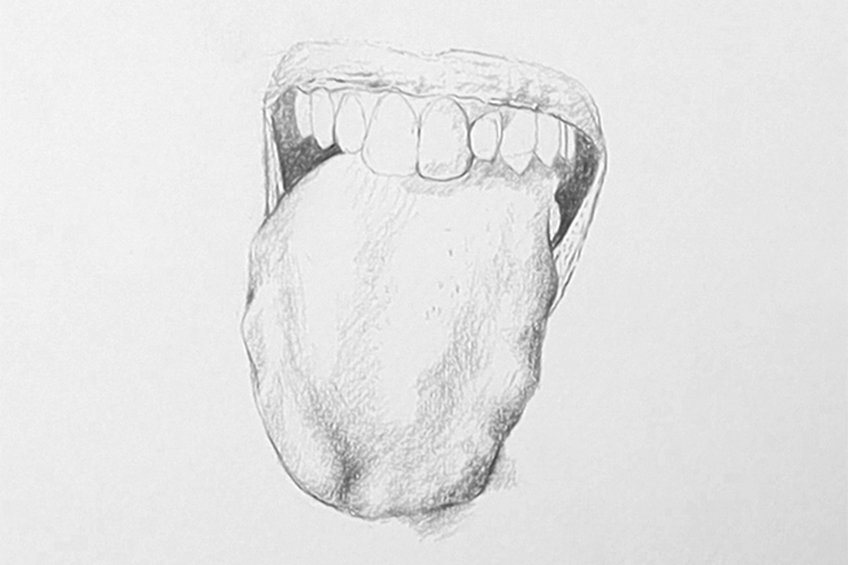
Another feature where we can add in some light pencil shading is the teeth. Even though teeth are considered to be white, this is not entirely true. This is because there is a glossy shine to the teeth which gives them some tonal variation. Make sure to analyze the reference image as you add in some light shading to the teeth.

Step 3: Shading the Teeth and Mouth with Pen
We now can proceed to shade in the drawing with our pens. We want to be cautious as we shade in the drawing with a pen. Using ballpoint pens allows us to utilize the same concept of pressure as we would with a pencil.
The harder we push the darker the marks, remember this as you proceed to shade in the tongue drawing with your pen. Let us begin with the gaps at the sides of the mouth.
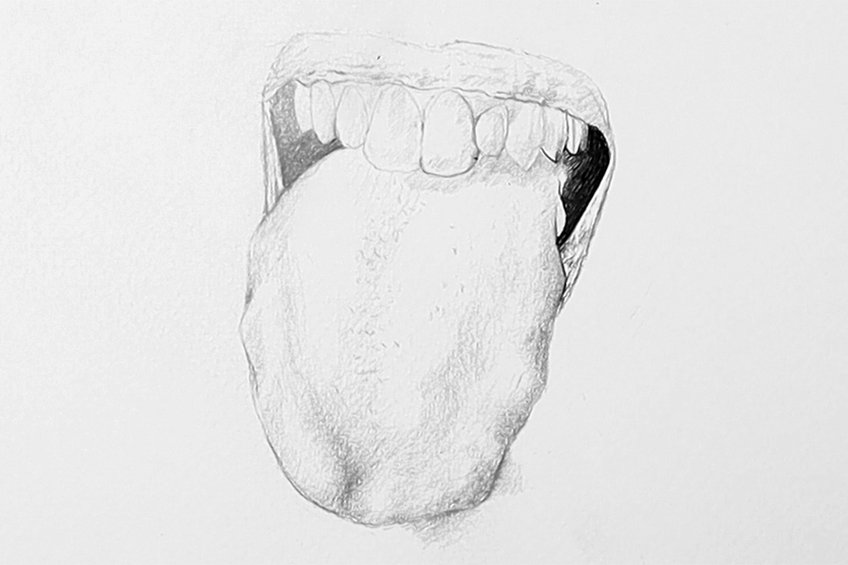
Start by shading the darkest parts of the mouth on the right side in the gaps. We can see how the reference image shows the shadows lightening from the gaps in the mouth as they form under the teeth on the tongue. We can also add in the very faint and subtle shading on the teeth. We want to use both the pencil marks as well as the reference image to guide our pen shading process.
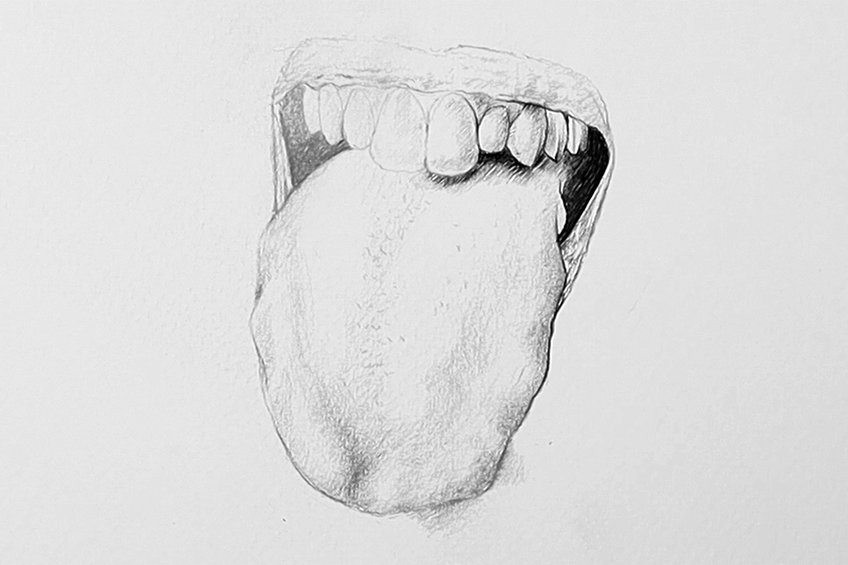
As we continue to add shadows within the drawing, we want to make sure we are using both the pencil marks and the reference image to guide our shading process. Always refer to the reference image to help you.
Remember to keep your hand light in pressure when shading with a pen.
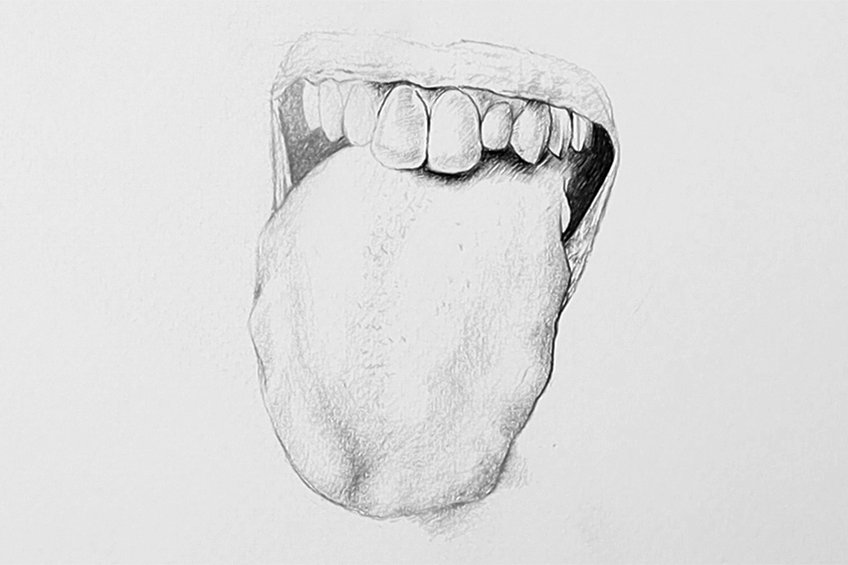
The shadows within the gums and teeth are very subtle. As you constantly refer to the reference image make sure you keep these marks light. Remember to pay attention to the pressure that you apply to your pen as you shade in these areas.
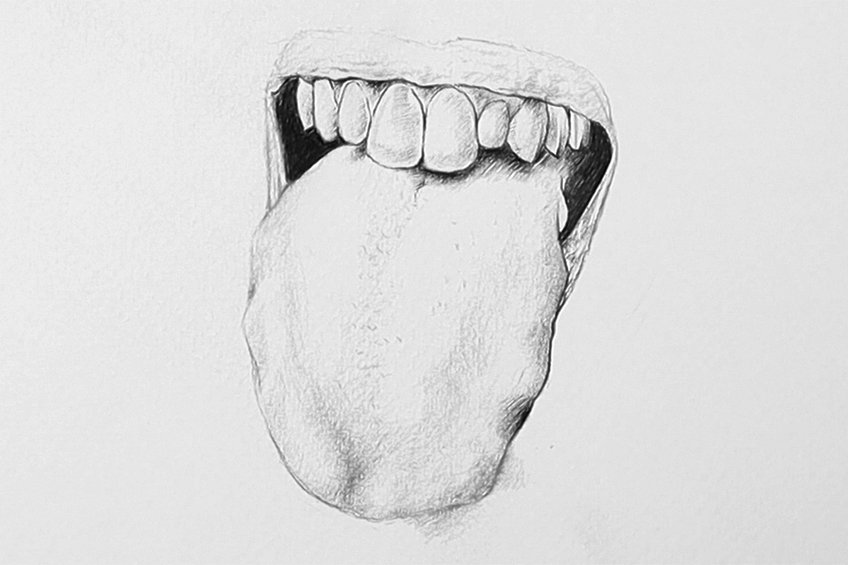
As you go through each tooth of the mouth you want to make sure that you add light shading to every tooth. Make sure you zoom into the reference image to give you a clearer depiction of how these shadows are formed in the teeth.
We can achieve these shadows with light hatching marks within the teeth.
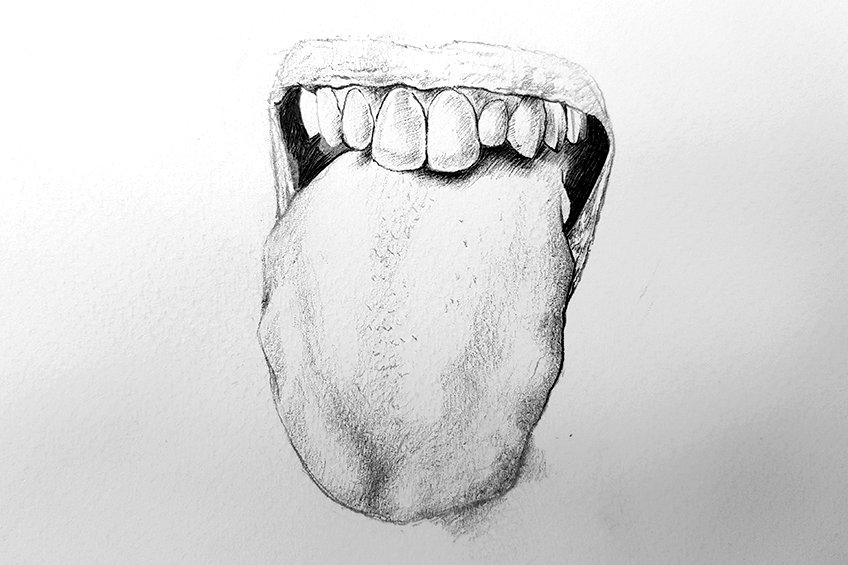
Step 4: Shading the Tongue with Pen
Let us begin to shade the tongue on the right side. Within the reference image, we can see that the shadowing is predominantly on the right side of all the features within the reference image. This means we want to make sure that the shading is predominantly on the right side.
We can carry on this process by adding in the shadows that form on the right side of the tongue.
We want to carry on adding in the shadows within the tongue as we constantly refer to the reference image for guidance. We want to make sure that we use our pencil shading marks to give us an indication of high light or dark we should shade in various areas of the tongue with our pens.
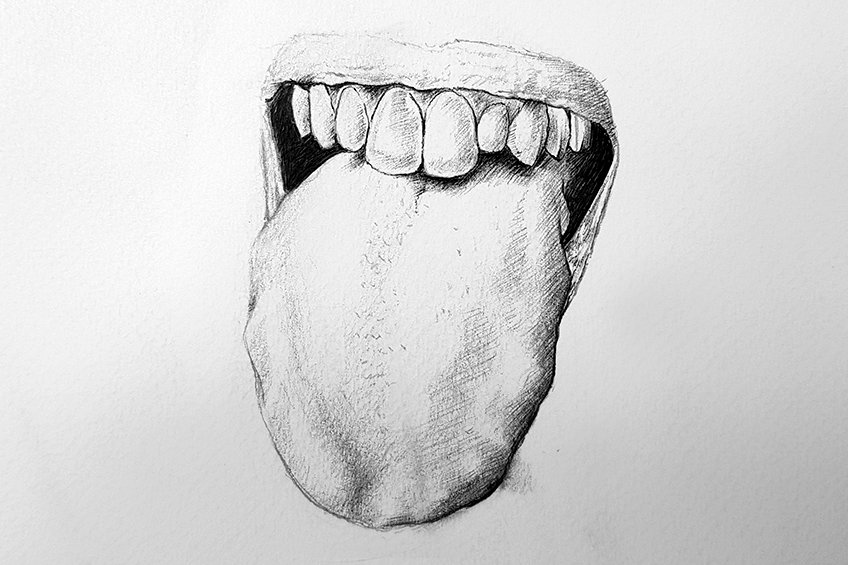
The shadows within the tongue are very subtle. We want to remember this as we notice the pressure that we apply to our pens whilst shading. We can also add in some faint lines and dots within the tongue that run along the center of the tongue.
This will give the tongue a more accurate depiction of its texture. Continue shading the tongue as you carefully move through the whole tongue.
Step 5: Shading the Lips with Pen
As we come to the final step where we shade the lips, we want to make sure we are going through the process of shading as carefully as we can. We want to allow the pencil marks and the reference image to keep us engaged with the shading process.
Make sure you notice the little lines within the lip and how the shadows are darkest on the right side of the lip.

We can see that the reference image depicts the shadowing within the lips to be quite broken up. This is because the lips have a unique structure that has various indentations. We depict this quality within the lips by creating these little vertical gradients that run through the lip. We can also depict the texture by subtle line work within the lip.

Adding in the shadows within the lips can be tricky so remember to take your time. Again, the shadows aren’t homogenous and smooth but are quite sporadic and spaced. This gives the lip a realistic texture. So, make sure to refer to the reference image to guide you in the shading process.
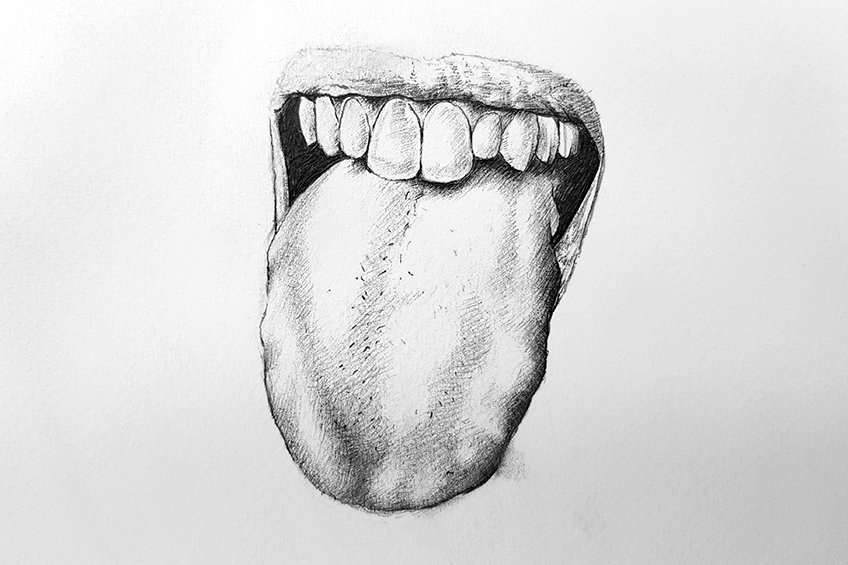
Continue with this process until you have completed the lip, going from the darkest areas of shadow to the lightest. Adding in little horizontal lines can give the small and subtle cracks that are unique to the texture of a lip.
Again, as long as you constantly refer to the reference image as you draw with the pen you should have the best chance of defining the lip more accurately in your tongue drawing.
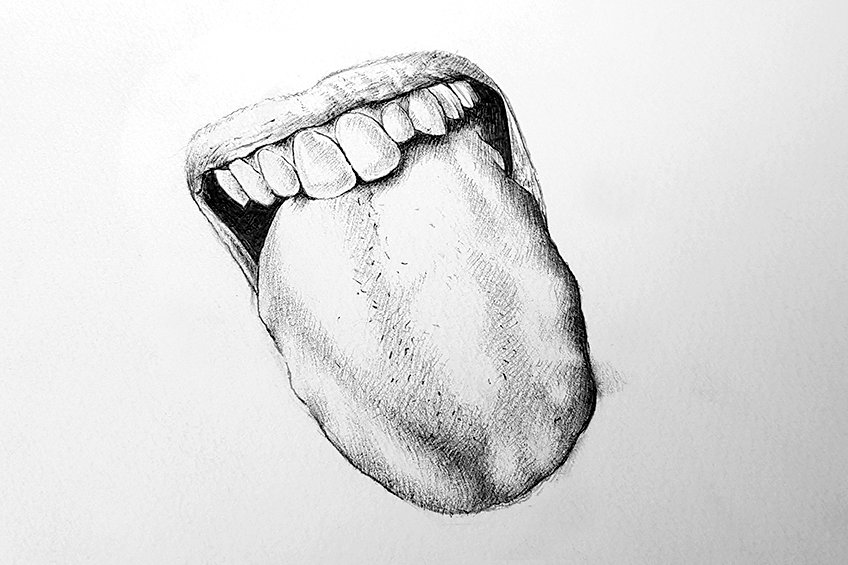
That is it, a tutorial on how to draw a tongue. Realistic tongue drawing doesn’t have to be complicated. We want to just take our time, and this is the most important skill for drawing. Patiently working through each feature of the drawing can take time so remember to take breaks.
There you have it, a few simple steps on how to draw a tongue sticking out!
Tips to Remember
- Always take it slow. Drawing takes time and patience to go through each step slowly.
- Keep your pencil sharp. When drawing something with intricate details you always want to keep your pencil sharp
- Make sure you consolidate the drawing before moving on to the pen. Make sure the drawing is complete in pencil before moving on to the steps that use a pen.
- Have scribble paper for your pen. Sometimes ink clogs up in the pen, so it’s always a good idea to scribble some ink on a scrap piece of paper before drawing or shading in pen.
- Always watch to pressure applied to the pen. Remember, the harder you push the darker the marks.
- Have fun with the process. Learning something new can be difficult, so break it up and take it easy.
A realistic tongue drawing is about understanding the way light and shadow are formed on the structure. These two concepts are what make a drawing look realistic. As you develop the tongue sketch into a more refined tongue drawing, you want to work out how the shadows are formed within the features. Again, a tongue also doesn’t exist in isolation, contextualizing the tongue is an important part of making a tongue drawing. So, make sure you focus on all aspects of the tongue drawing and not just the tongue. Lastly, always remember to take your time when drawing in pen.
Frequently Asked Questions
How Do You Draw a Tongue Sticking Out?
We begin with developing the shape of the tongue and how it fits in the mouth. A good suggestion is to have a reference image to guide you in developing the tongue sketch. As you learn how to draw a tongue sticking out you will want to constantly refer to the reference image as you slowly form each feature of the drawing. By doing this back and forth between the reference image and drawing you will find that you will erase and redraw until it correctly resembles the reference image. From there you want to add in some shading, by doing this we will slowly give the tongue out drawing more dimension. This means we want to, again, refer to the reference image and see how shadows are defined on the tongue within the reference image. From there we want to shade in the drawing focusing on each feature one at a time, using the reference mage to guide our drawing process.
How Do You Draw a Realistic Tongue?
You will always want a reference image when attempting to draw something realistic, especially if it is unique like anatomical structures. What makes anything realistic within a drawing is the shading. The shading represents how the object interacts with light. All objects deflect light and cast shadows to some degree, this means, when drawing something realistically we want to imitate this quality. As we attempt to represent shadow and light within a drawing, we want to constantly refer to a reference image, as we only make light shading marks. Once we have established the shading with lighter marks, we can then darken the marks and heighten the contrast by layering our shading with darker pencils or other dark mediums like pens. However, make sure you grasp the concept of light and shadow and how real-life objects define these concepts within their structures.
How Do You Draw the Texture of a Tongue?
The main way to add detailing to a tongue drawing is by utilizing shading. By adding shading and using shading as a means of creating dimension within a tongue. By doing this we add shadow to the structure which gives it a more three-dimensional quality. However, adding in little lines and dots can be another way to define the texture of a tongue. However, we want to add in these details by using a reference image to give us an accurate depiction of how to place these marks within the tongue. We want to add these features in tandem with the shading process. By using both the shading and little moments of lines and dots we will find that we create the rough texture with a tongue drawing.
Matthew Matthysen is an educated multidisciplinary artist and illustrator. He successfully completed his art degree at the University of Witwatersrand in South Africa, majoring in art history and contemporary drawing. The focus of his thesis was to explore the philosophical implications of the macro and micro-universe on the human experience. Matthew uses diverse media, such as written and hands-on components, to explore various approaches that are on the border between philosophy and science.
Matthew organized various exhibitions before and during his years as a student and is still passionate about doing so today. He currently works as a freelance artist and writer in various fields. He also has a permanent position at a renowned online gallery (ArtGazette) where he produces various works on commission. As a freelance artist, he creates several series and successfully sells them to galleries and collectors. He loves to use his work and skills in various fields of interest.
Matthew has been creating drawing and painting tutorials since the relaunch in 2020. Through his involvement with artincontext.org, he has been able to deepen his knowledge of various painting mediums. For example, watercolor techniques, calligraphy and lately digital drawing, which is becoming more and more popular.
Learn more about Matthew Matthysen and the Art in Context Team.
Cite this Article
Matthew, Matthysen, “How to Draw a Tongue – In-Depth Guide to Create a Tongue Sketch.” Art in Context. June 20, 2022. URL: https://artincontext.org/how-to-draw-a-tongue/
Matthysen, M. (2022, 20 June). How to Draw a Tongue – In-Depth Guide to Create a Tongue Sketch. Art in Context. https://artincontext.org/how-to-draw-a-tongue/
Matthysen, Matthew. “How to Draw a Tongue – In-Depth Guide to Create a Tongue Sketch.” Art in Context, June 20, 2022. https://artincontext.org/how-to-draw-a-tongue/.


