How to Draw Lips – A Guide to Creating a Realistic Mouth Drawing
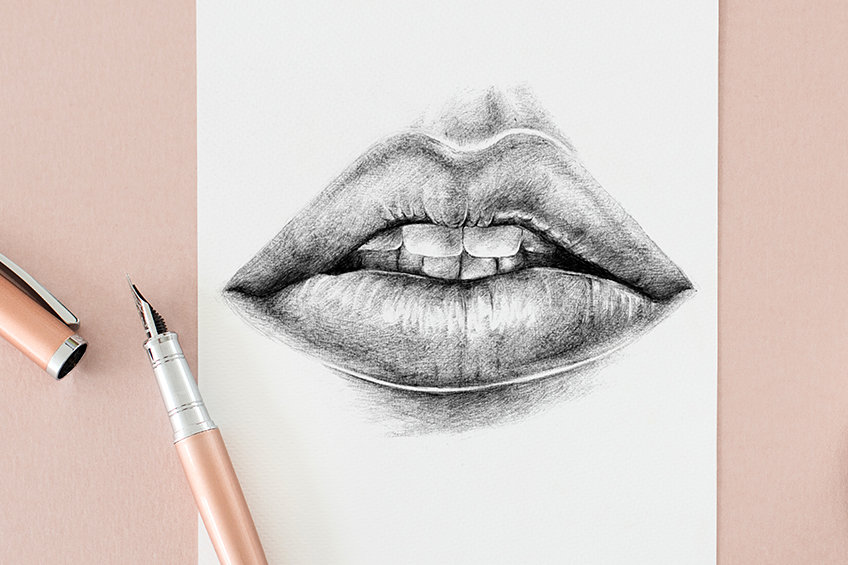
All mouths are different and their form can communicate a great deal of information. However, the details that contextualize the mouth can be tricky to draw. The drawing of lips is an interesting task as they resemble the epidermis but have a more smooth texture. Mouth drawing is predominantly about the drawing of the lips being correct. From the lips outline to the shading of the lips sketch. With that being said, in this tutorial we will be learning how to draw realistic lips that are depicted slightly open, giving us a small sight of the teeth. Mouth drawing is about perfecting the lips, so we will be paying close attention to this aspect of the mouth.
Table of Contents
Necessary Materials
In this tutorial as we learn how to draw lips, we should always consider which medium will produce the best results when we tackle a drawing such as this. Since we will be doing a mouth drawing, using a series of pens and pencils is optimal.
Pen and pencil often work well in tandem with one another as the pencil can create a good layer to draw the finer details on top of with a pen. So here is what we will need:
- A good set of pencils (Derwent Graphic pencils recommended)
- A ballpoint pen
- Micron pen
- A steel ruler
- An eraser
- A sharpener
- Good paper (200 g/m – 250 g/m recommended)
- Source material (could be from your phone or a printed image)
Analyzing Before We Draw
Let us take a moment to consider our source image before we begin the drawing process. When we look at the mouth in our source image, what we can see is a set of well-moisturized lips slightly perched open. When the lips are moist, they often develop a shine. This shine effect is a big aspect of what we want to achieve in our lips drawing part of the tutorial.
Lastly, the upper lips, as they are slightly tilted downward, are generally darker than the bottom lip which is pressed outward and receives greater light exposure. These are some general ideas to keep in the back of our minds as we go through this tutorial.
Step 1: Measuring and Grid Marks
We first want to make a horizontal line in the middle of our page. We can do this by measuring the page both vertically and horizontally and then dividing both those numbers in half to find the middle of our page. Once you have found the middle of the page you can draw a horizontal line, about 15cm long. Bear in mind, that you can do this drawing in whatever size you like but these steps are specifically related to the scales used within this tutorial. Then we want to draw a line vertically through our horizontal line.
We can find the middle of our horizontal line by deciding 15cm by two and then drawing a vertical line through that point. We want to have a general cross-line grid to give us a better advantage for scaling our mouth correctly.
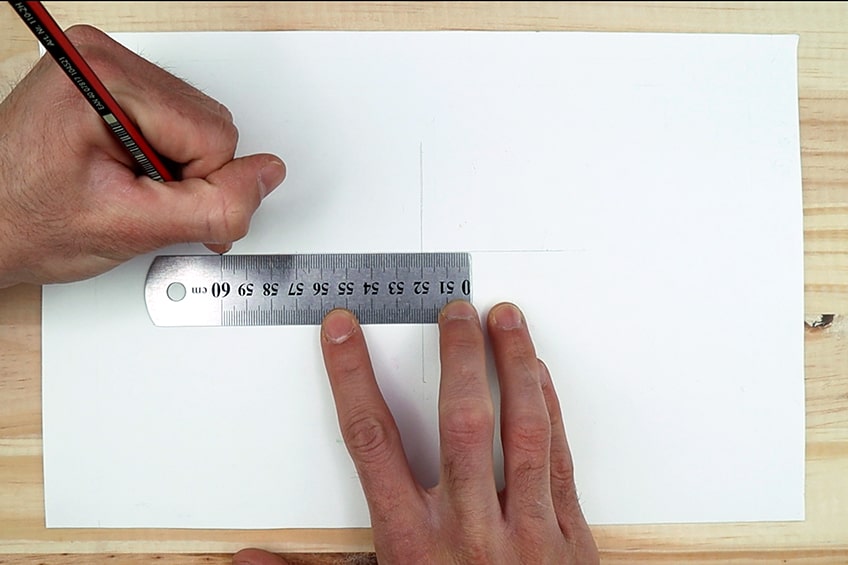
From your vertical line you want to measure your 7.5cm on each side, starting from the vertical line, and then make a point on each side. This is where the edge of the mouth will form from and end. The drawing of lips is a tricky part of this tutorial, so we want to spend time here getting this right.
Step 2: Scaling the Lips
The mouth is essentially the lips. Knowing how to draw lips is what will make the mouth look real. However, we want to know how to draw realistic lips by paying close attention to our source image which predominantly is showing us the lips that slightly cover the teeth. With your H pencil begin drawing the upper lips starting with the outer parts.
We can use the two points that we made to indicate where we can begin from.
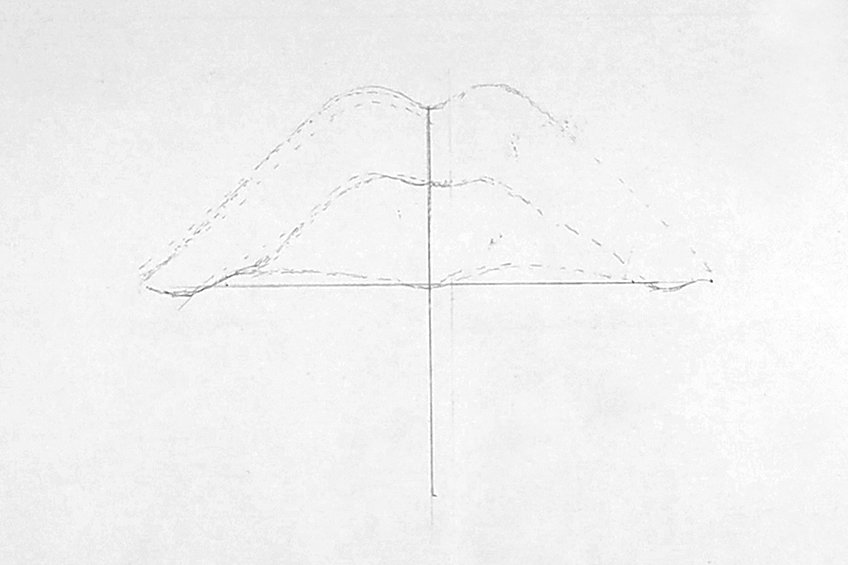
As we draw, we can erase and fix as we go along. Getting the shape of the lips takes time as the scale between the upper and bottom lips are slightly different. With our H pencil, we want to create an arch-type shape that begins the curve and dips towards the vertical line. As we refer to our source image, spend time trying to represent the upper lip shape until you are satisfied.
Once we have done this we want to give the upper lip a light shading with our pencil, which will help identify its shape more accurately.
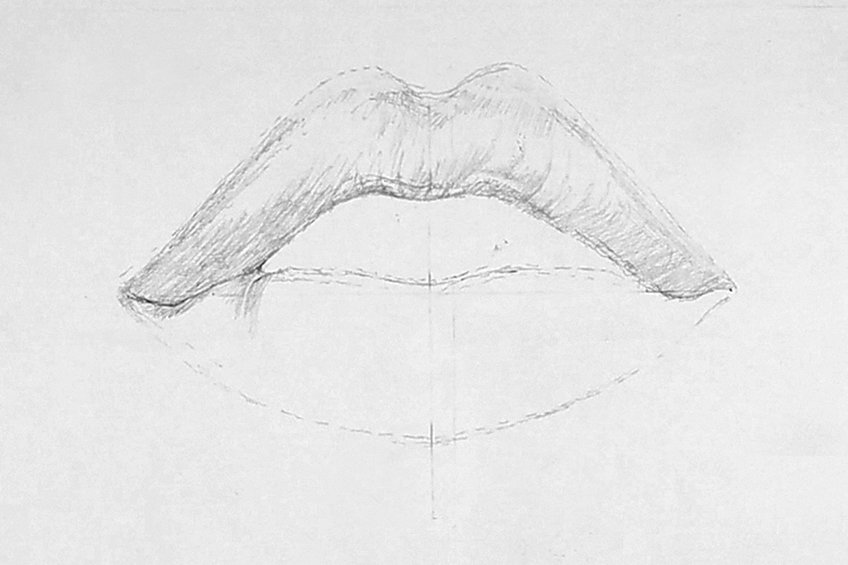
Once we have done this we can begin to draw the bottom lip. Knowing how to draw realistic lips is about knowing their shape. The bottom lip is an upside-down type of arch. However, it has a more subtle curvature than that of the upper lip. Using your H pencil begin to draw the bottom lip as you refer to your source image.
Once you have done so give it a light shading with your pencil as it will help identify the scale and shape more correctly.
Step 3: Shaping the Lips and Teeth
This is where we finalize the lips outline. What we want to do now is spend time looking at our source image and, with our eraser and pencil, try to consolidate the shape of the lips sketch. This step is about working through the drawing with our H pencil, or your lightest pencil available.
We want to develop a back-and-forth type of action between referring to our source image and drawing what we see.
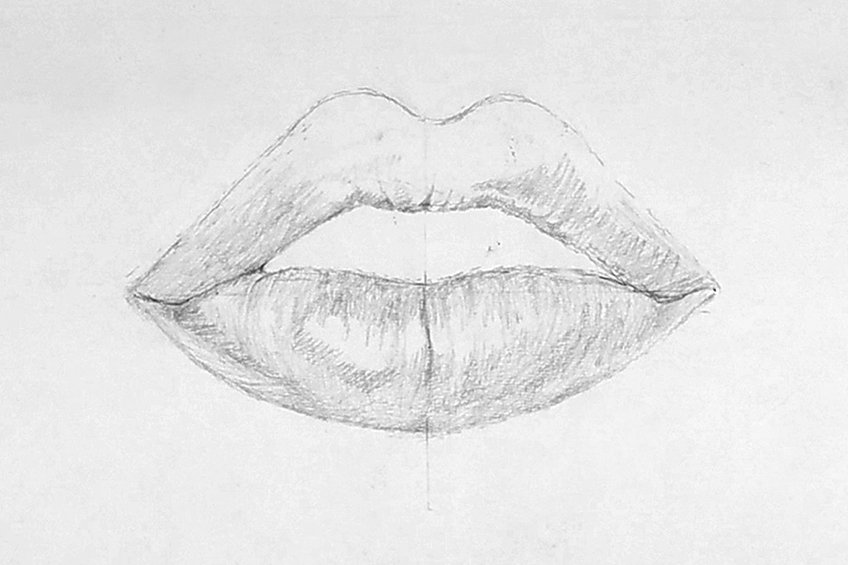
For instance, we can make light shading marks that indicate where exactly we will shade within the drawing. Take note of the upper lip and its slight indentation on its part that starts to roll into the mouth. The source image displays a dark shading under the top lip. The upper lip also portrays a darker tone, so keep this in mind as you attempt to finalize your lips sketch.
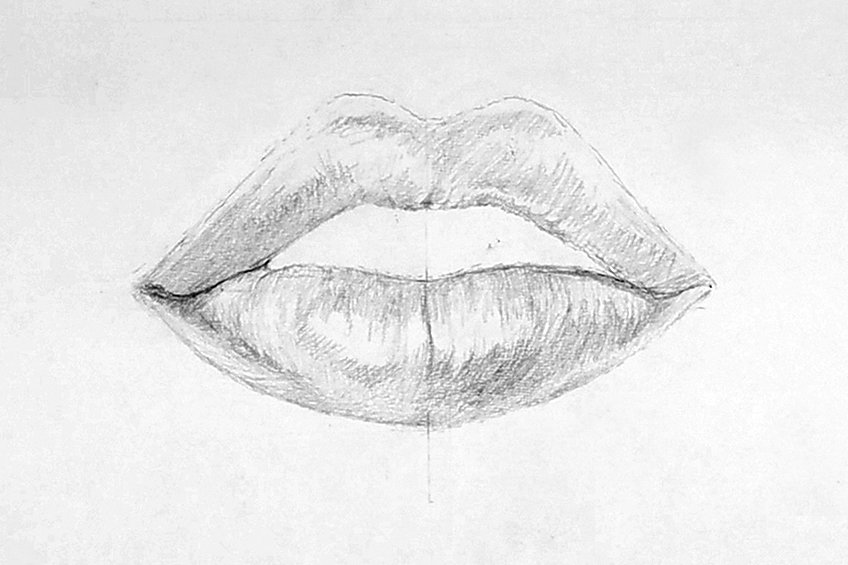
What we also want to do is as we draw, take a moment to step back now and then and look at your lips sketch holistically. As we draw we can lose sight of the actual shape of the lips, it is important to spend time tweaking the shapes of the lips sketch as you go.
This step is vital for knowing how to draw realistic lips in the end.
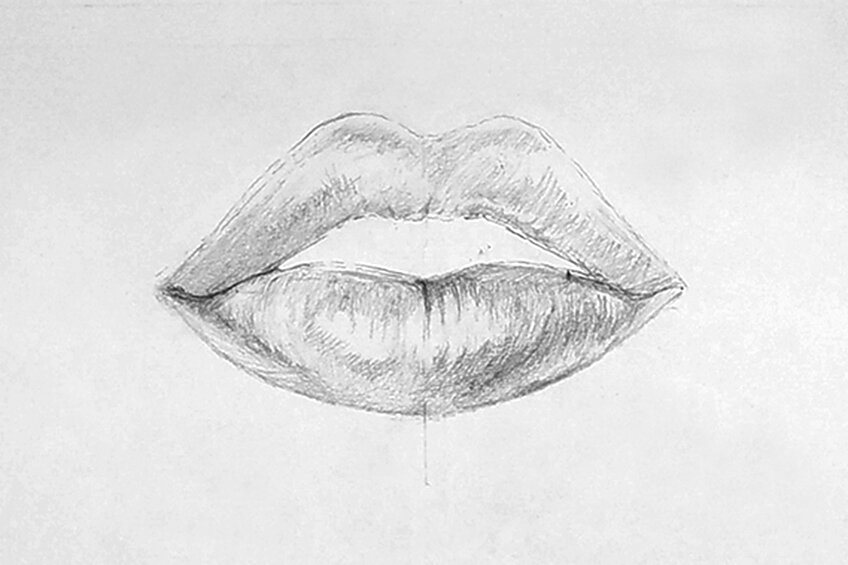
As we shape the lips outline with our light pencil, something to remember is that the bottom lip is always slightly larger than that of the top lip. This is another way to understand how to draw realistic lips. This is because the upper lip for one is just generally smaller but the bottom lip also protrudes slightly more forward than that of the top lip.
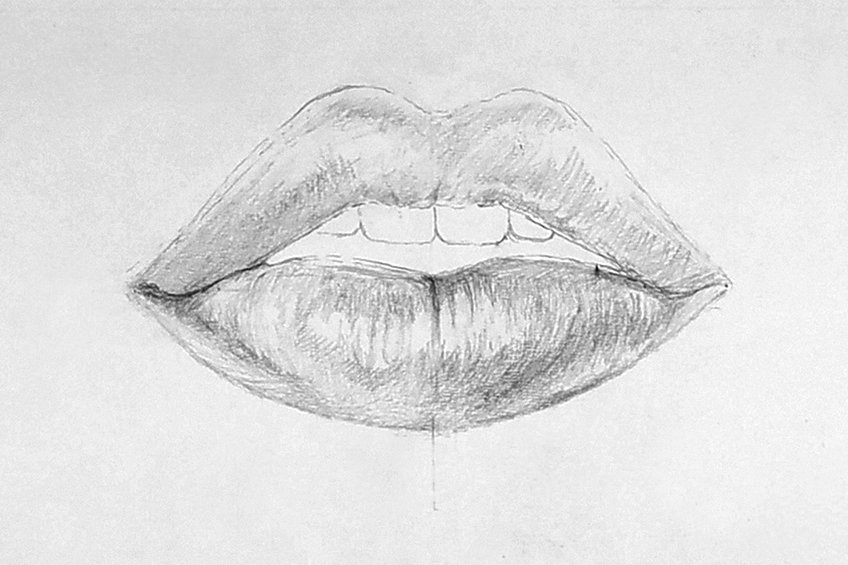
Once we have the general shape we can start to draw the teeth. Teeth can be tricky, a good suggestion is to scale them according to how they fit in the mouth of the source image. You can follow the source image and see how the top and bottom lip describe which tooth is placed where.
Another good suggestion is to start with one of the front two teeth and see where they form from the upper lip.
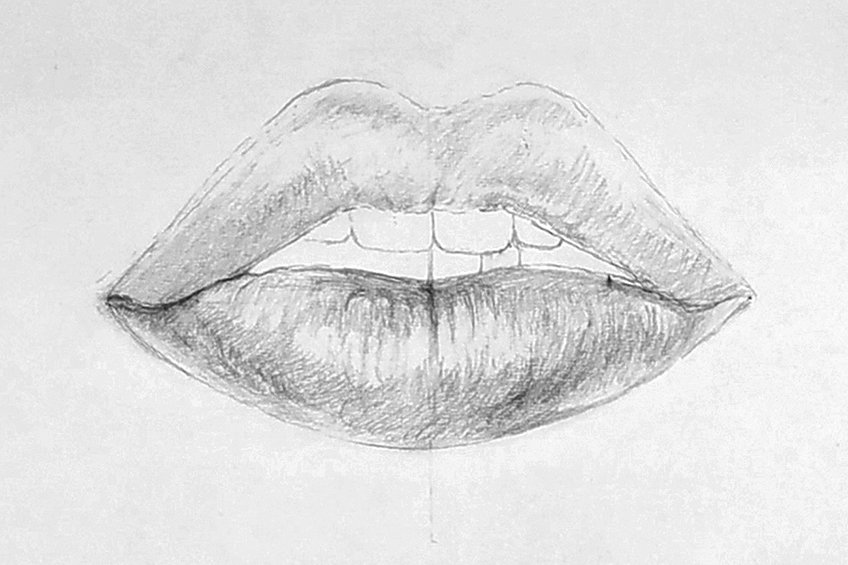
Spend time working on the teeth. Use your light pencil as you do this and feel free to use your eraser as you draw the teeth and tweak it until you feel that they are accurately placed in the mouth. Notice how the teeth should interact with the lips outline near the inner mouth.
Step 4: Shading the Upper Lip with Pen
We can now begin shading with a pen. If you are still not sure about the shape of your lips drawing, go back to the previous step and spend time consolidating the shape of the lips outline. Once we have done this, with your 02mm Micron pen begin to make indicative marks within the darkest aspects of the mouth.
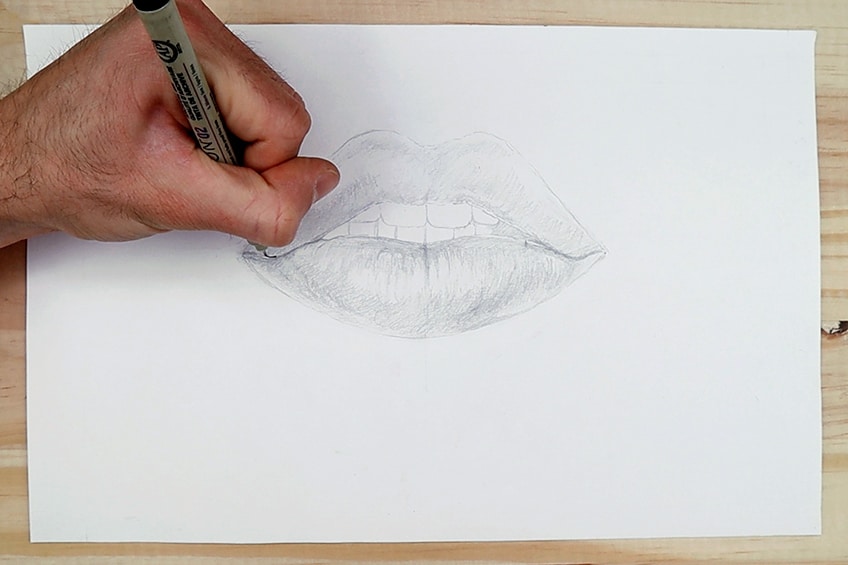
We can do this by starting with the corners of the mouth and working through the mouth as you refer to your source image. The corners of the inner parts of the mouth drawing are where the darkest moments are.
This is also a helpful way to develop the rest of our shading from a starting point.
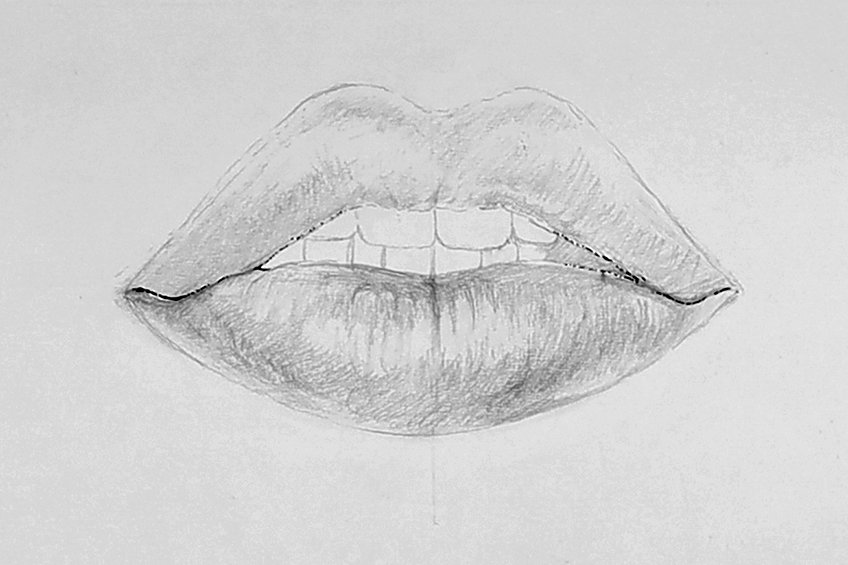
We can now take our ballpoint pens and begin shading. Let us begin with the upper lip and begin to shade in the shadows that sprout from the corners of the mouth. We can do this as we refer to the source image and see how the upper lip is slightly darker in tone compared to the bottom lip.
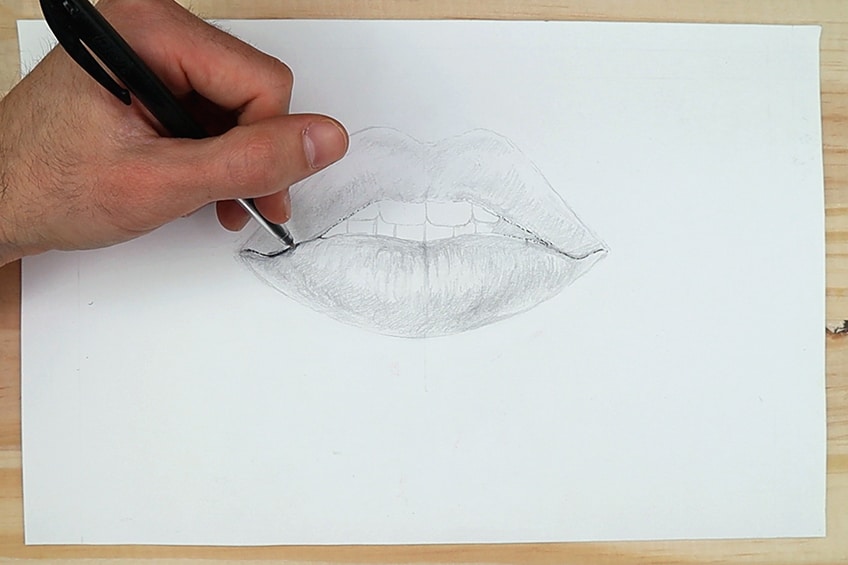
Start working through the whole upper lip as you compare it to the source image. As you shade, take note of the dark shadows at the bottom of the upper lip. The shadows vary in the top lip as they deviate in various directions.
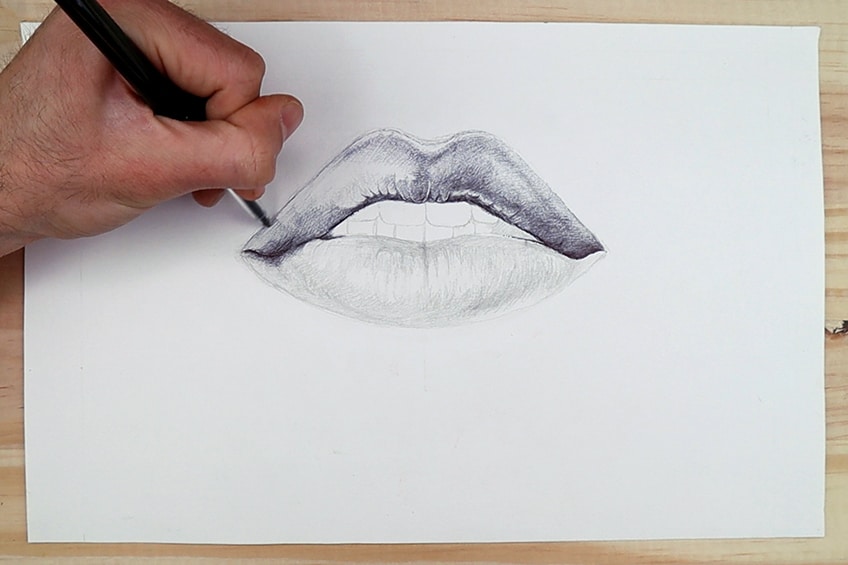
As you shade the upper lip take a moment to look at your source image from an arm’s distance. Notice the lip’s outline and see how the middle portion of the upper lip is slightly lighter than the upper edges and the lower part closes the opening of the mouth.
As you shade with our pen make sure you keep your pressure light and hand tilted. Slowly and patiently apply a layer over layer.
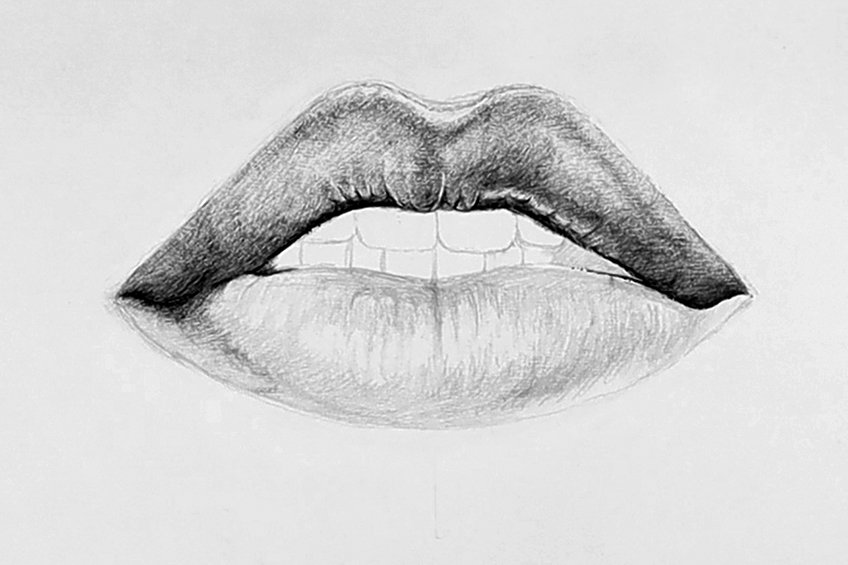
Step 5: Shading the Lower Lip with Pen
As you analyze your source image, let us take note of the lips outline, more specifically how the bottom lip’s shadows fall on the bottom lip. The bottom tip protrudes at its upper portion and curves inward toward the chin at its lower portion.
We can see this by how the shadows form on the sides of the bottom lip.
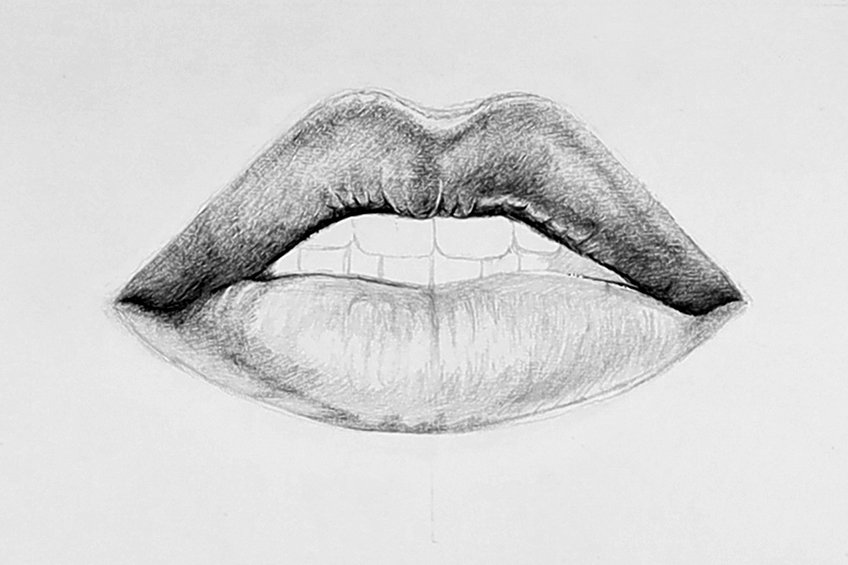
With your ballpoint pen shade from the corners of the mouth in a downward fashion toward the bottom center point of the bottom lip. We can do this lightly as the general tone of the bottom lip’s shadows forms this way.
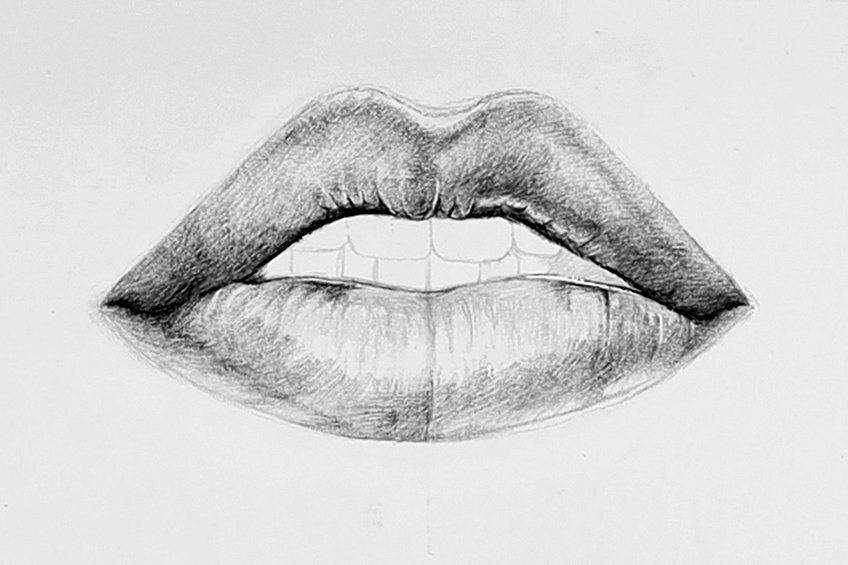
As we shade from the sides inward, the most tricky aspect is getting the shine on the lip. As we shade lightly, remember that the fine line indentations in the lip are not visible when we look at a lip holistically. We only see these wrinkles in the lip when they are large.
With this in mind try lightly shading around the light reflection on the bottom lip.
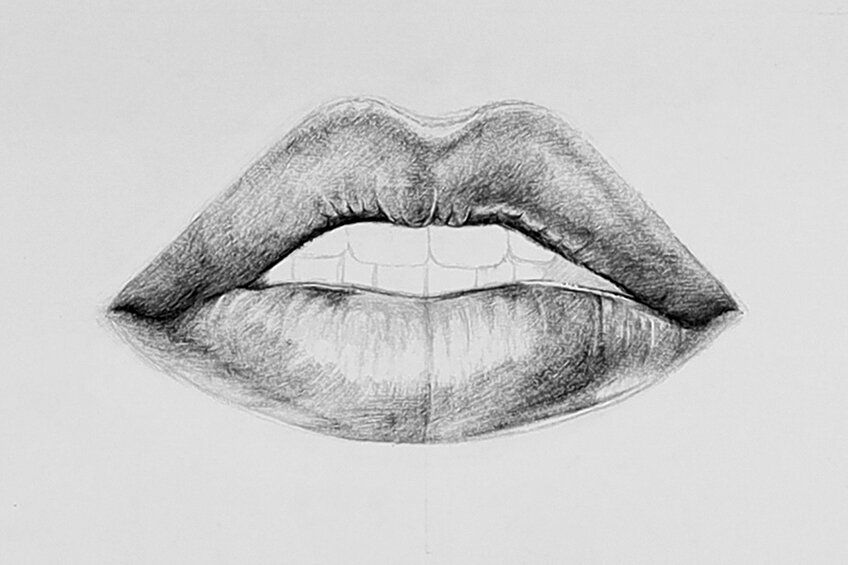
Demarcate a vacant area in the middle-upper portion of the bottom lip and lightly shade with your ballpoint pen around this vacant area. Take note of how the lip is generally darker near the opening of the mouth.
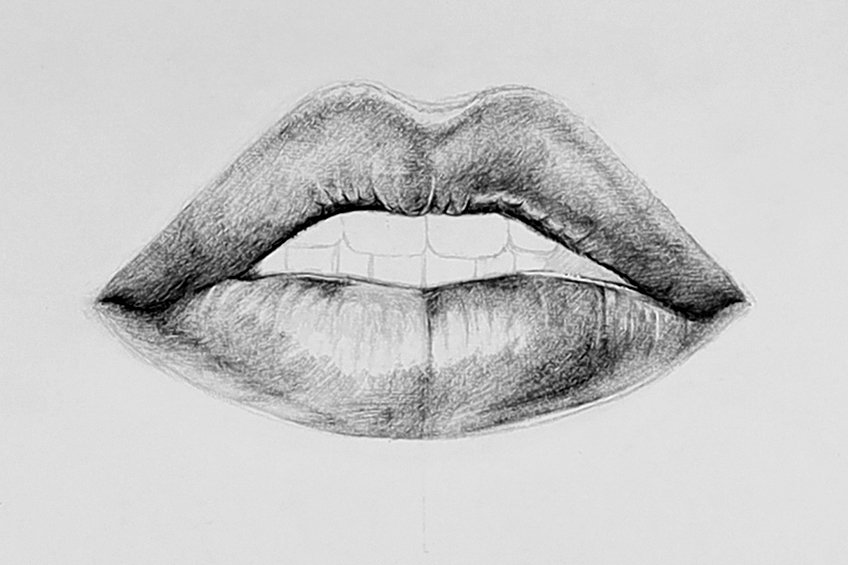
As you shade the upper portion of the bottom lip, notice how this seems like a dark rim line along the top of the bottom lip. Draw these marks with your ballpoint pen, a good suggestion is to make short slight strokes from the top of the bottom lip into the middle of the bottom lip.
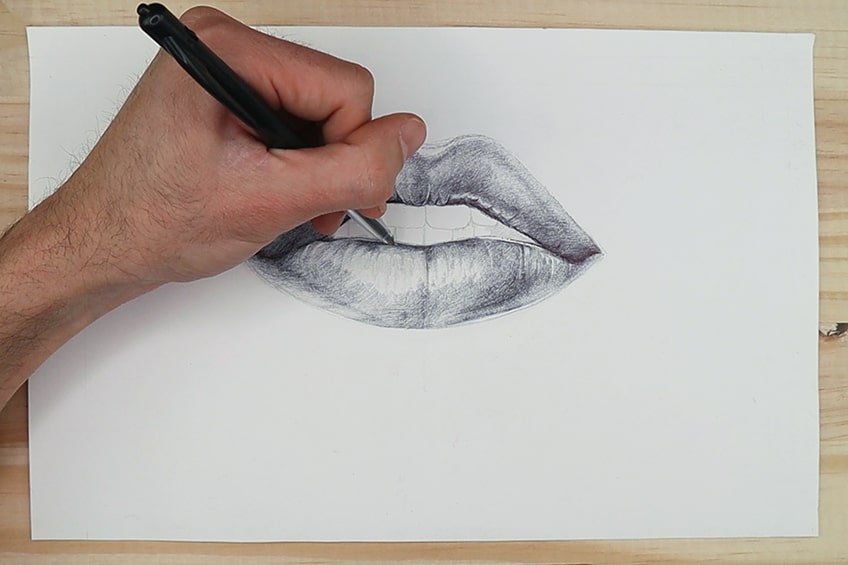
As we proceed with our lip sketch, we can start making light marks around the center of the bottom lip. What we can do is make light shading marks with our ballpoint pen from the outsides of the lip moving in.
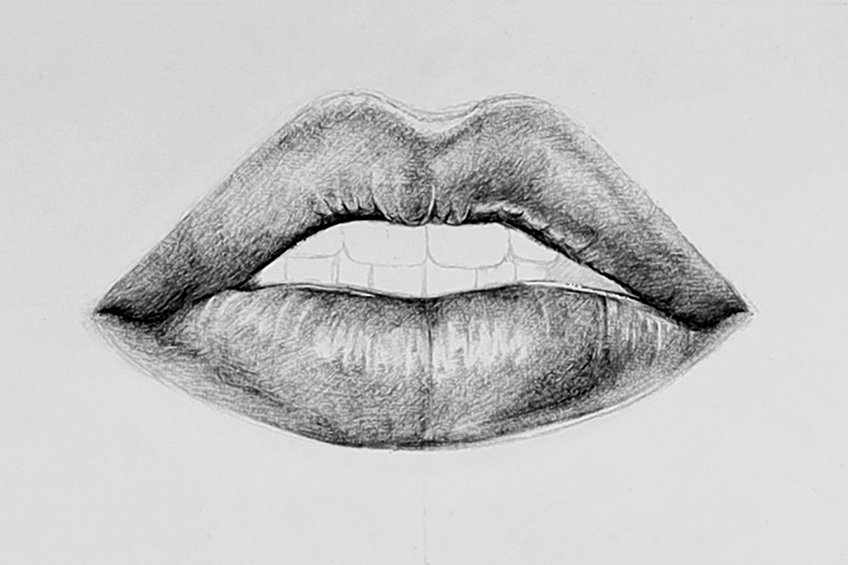
We can do this by working our shading from the upper part of the bottom lip moving inward. We can do the same from the bottom of the bottom lip moving inward. As we do this the idea is to make our shading edge off into little tips in the center of the lip.
This is going to give the effect of the shine.
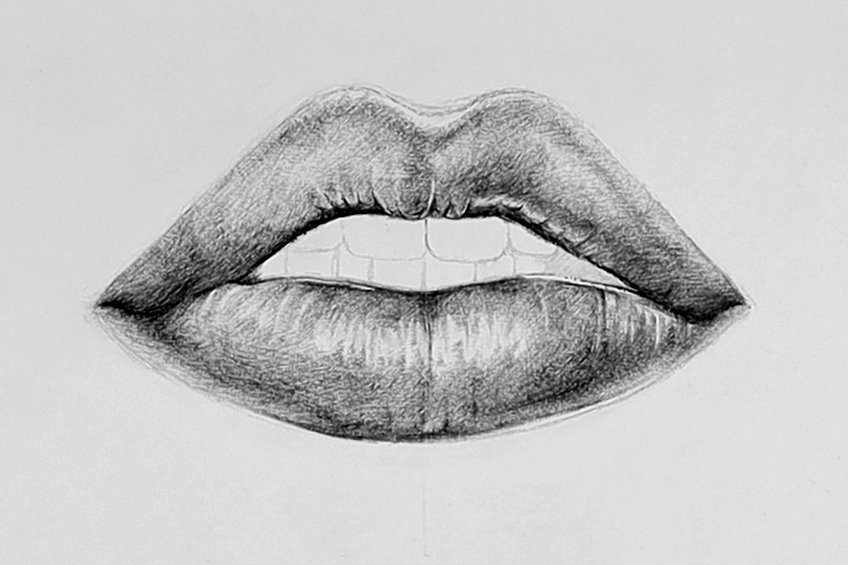
Step 6: Shading Inside the Mouth
Similar to the shading of the lips, we will shade from the corners of the mouth with our ballpoint pen. If you take a look at the source image, what we will see is that the corners inside the mouth display a sense of darkness.
However, this darkness gets lighter as it moves toward the teeth to the front teeth.
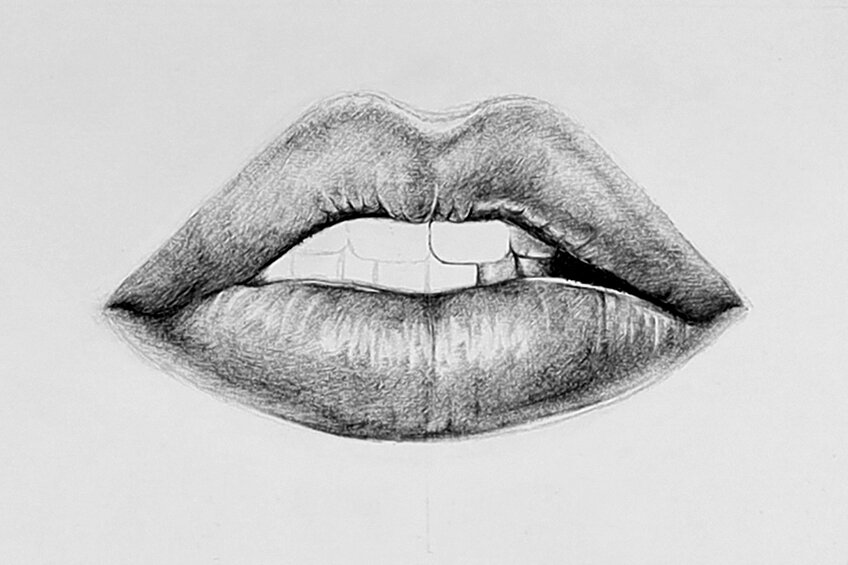
Take note of the teeth in the source image and see how there are slight shadows on the teeth. This shadowing is an effect of the upper lip blocking light from coming into the mouth. As we shade the teeth, focus on your source image and pay attention to each tooth as you carry on shading.
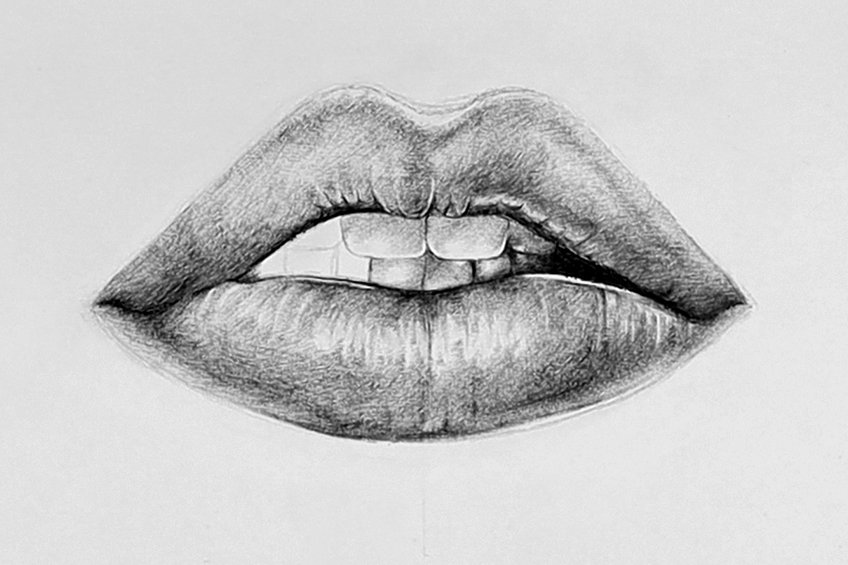
As we go through all the teeth, it is important to note that the front teeth slightly fall over the bottom teeth. This overbite makes the bottom row slightly darker than the upper row. A good suggestion is to first shade all teeth in a lighter tone.
As you analyze your source image, begin to shade the darker moments at the bottom.
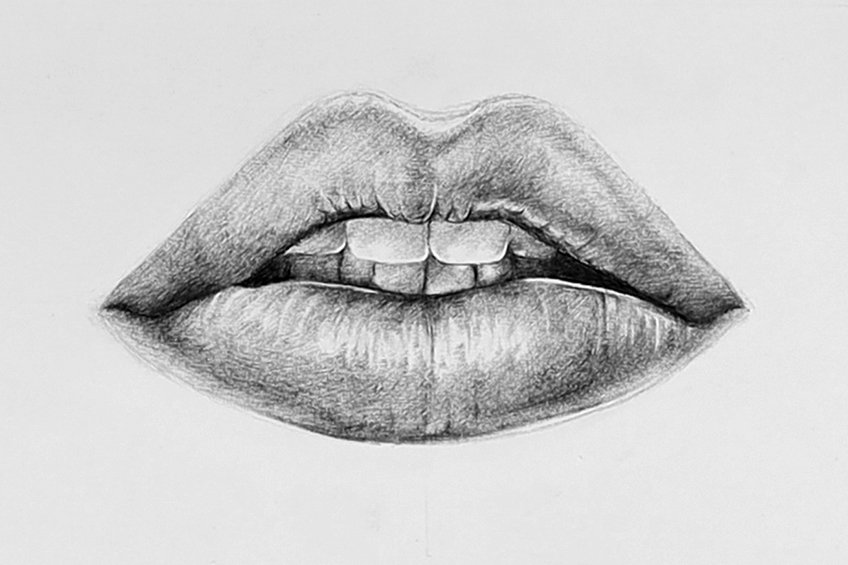
What we can do is go over our shading marks and finalize them with moments of darker shading where it is necessary. Analyze your source image as you do this, going back and forth between the drawing and your source image. Take time with this last check-up.
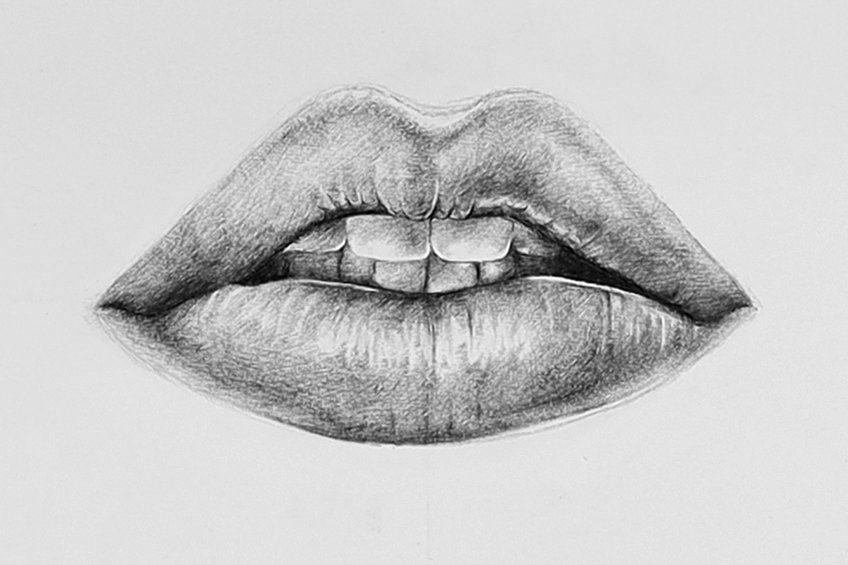
Step 7: Shadows Around the Mouth
Now we will draw the slight shadow under the bottom lip and the philtrum above the top lip. We do this by taking our H pencil and begin to refer to our source image and make marks according to the way it is depicted in our source image.
Keep these marks light so it makes it easier to shade over.
As we shade the shadow under the bottom lip, make note of the slight light rim around the edge of the bottom lip. This line of light will help to develop a separation between the shadow and the lip. We can shade this shadow with our ballpoint pen. This shadow has a gradient from dark to light as it extends out from under the lip.
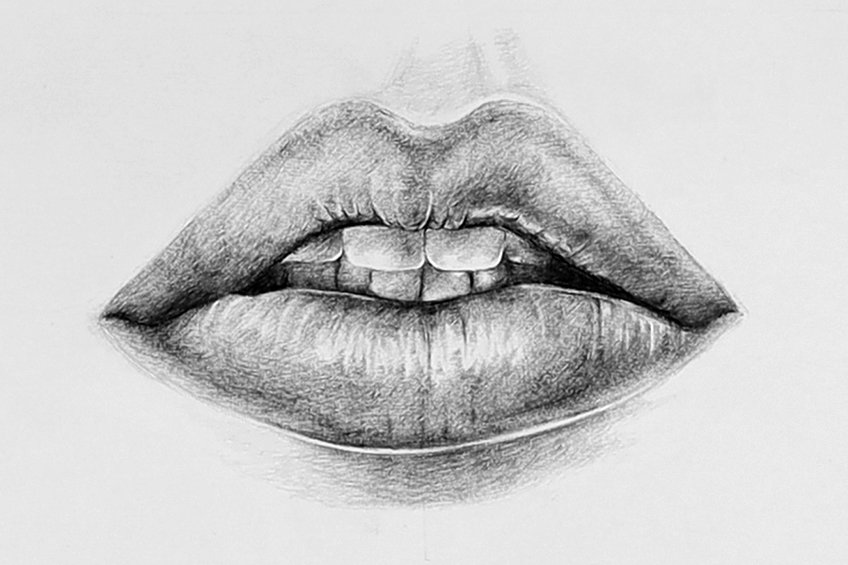
As we take note of the philtrum in the source image, we can see that it is very faint. As we shade with our ballpoint pen, remember to keep it light as we layer these shades slowly and to take note of the two protruding dents.
These dents cause the shadow to fall in the center of the philtrum as you shade.
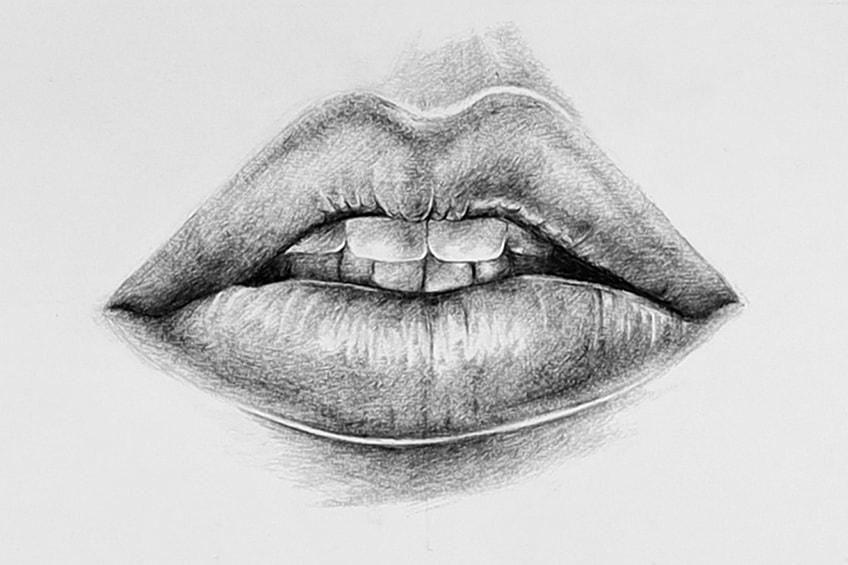
We can shade slightly darker on each side of the dents that protrude. Shading on each side and in the center of the philtrum is what will bring the dents out and produce that three-dimensional effect. As we shade we should also see how the philtrum does not connect with the upper lip creating a light effect.
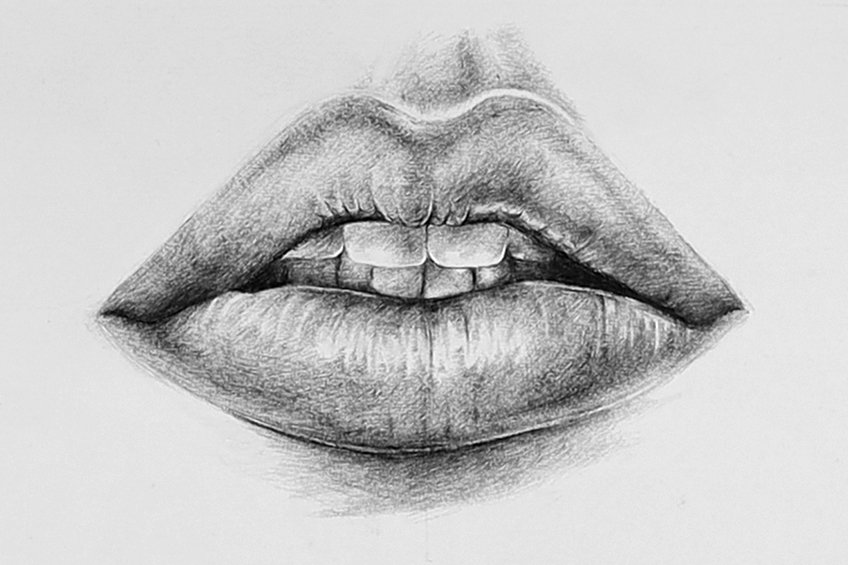
Lastly, let us go back to the bottom lip and slightly shade the light line at the edge of the bottom lip. The bottom lip’s slight line of light on the edge of the lip is very faint, therefore it is effective if we slightly shade over it.
This will make sure that it is not hyper-contrasted.
Tips to Remember
- Drawing lips is all about the scale of the upper lip compared to the bottom lip. So we want to spend time making sure the proportions are right before shading.
- The shine on the bottom lip should be slowly worked around. Then, as the last step of shading the bottom lip, you slowly draw sharp marks into that vacant area on the lip. This creates the effect of a shine.
- The darkest moments are generally found in the mouth. The mouth should portray shadows fading outward from the mouth.
- The upper lip is always slightly darker than the lower lip as it is tilted downward.
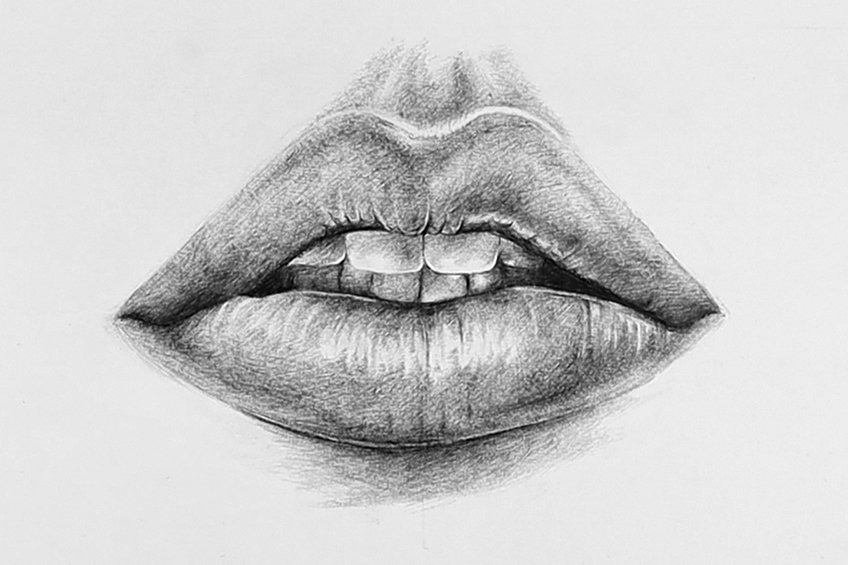
Drawing lips is the trickiest aspect of a mouth. This is because its texture is smooth in a way that is very specific and not like skin. When we achieve this quality, we do so by spending time on the little light reflections in the lip. In the case of this tutorial, it was showing a well-moisturized pair of lips that will reflect light off of their surface. Lastly, we want to get the shapes well proportioned and correctly sized. Always spend time in the beginning stages perfecting the shape and scale before shading.
Frequently Asked Questions
How Do I Draw Feminine Lips?
Drawing feminine lips is tricky because lips can be androgynous when removed from the face. However, feminine lips generally are defined in a drawing as more voluptuous. This means they tend to be slightly more prominent in the way they protrude. However, this is only one way of achieving the quality of femininity in lips through a drawing as all lips are different.
How Do I Draw Realistic Lips?
Learning how to draw lips or any realistic anatomical structures is about understanding shadow and structure. With learning how to draw lips specifically, their texture is very smooth which can give off a slight reflection of light. This quality is the essential aspect to keep in mind when learning how to draw realistic lips. This interaction with light produces various shadowing around the lips and in the mouth, so keep the concept of light and shadow in mind when doing a mouth drawing.
Which Lip Is Darkest on the Mouth?
When learning how to draw lips we need to grasp their structure in comparison to one another. The top lip is always darkest as it is slightly tilted downward which gives less of a reflection at eye level. It’s all dependent on the direction from which you view the lips but generally speaking, we should make the upper lip slightly darker. This is also because the bottom lip is rounder which gives it greater potential for reflecting light from any direction. This is a good tip for how to draw realistic lips in a mouth drawing.
Matthew Matthysen is an educated multidisciplinary artist and illustrator. He successfully completed his art degree at the University of Witwatersrand in South Africa, majoring in art history and contemporary drawing. The focus of his thesis was to explore the philosophical implications of the macro and micro-universe on the human experience. Matthew uses diverse media, such as written and hands-on components, to explore various approaches that are on the border between philosophy and science.
Matthew organized various exhibitions before and during his years as a student and is still passionate about doing so today. He currently works as a freelance artist and writer in various fields. He also has a permanent position at a renowned online gallery (ArtGazette) where he produces various works on commission. As a freelance artist, he creates several series and successfully sells them to galleries and collectors. He loves to use his work and skills in various fields of interest.
Matthew has been creating drawing and painting tutorials since the relaunch in 2020. Through his involvement with artincontext.org, he has been able to deepen his knowledge of various painting mediums. For example, watercolor techniques, calligraphy and lately digital drawing, which is becoming more and more popular.
Learn more about Matthew Matthysen and the Art in Context Team.
Cite this Article
Matthew, Matthysen, “How to Draw Lips – A Guide to Creating a Realistic Mouth Drawing.” Art in Context. June 17, 2022. URL: https://artincontext.org/how-to-draw-lips/
Matthysen, M. (2022, 17 June). How to Draw Lips – A Guide to Creating a Realistic Mouth Drawing. Art in Context. https://artincontext.org/how-to-draw-lips/
Matthysen, Matthew. “How to Draw Lips – A Guide to Creating a Realistic Mouth Drawing.” Art in Context, June 17, 2022. https://artincontext.org/how-to-draw-lips/.


