How to Draw a Leaf – All About Realistic Leaf Drawing
Learning how to draw a leaf is a fun exercise because all leaves are different and have unique shapes and details. There are many different leaves to draw and they can be used in all sorts of ways for artworks and creative ideas. Leaves can also contextualize a scene in a drawing, like autumn leaf drawings for instance which have a unique aesthetic and can be a great addition to a winter or autumn setting. Learning how to draw leaves is also a great way to advance your shading skills, as you develop a simple leaf sketch into a more realistic leaf drawing. This tutorial gives you a few simple and easy-to-draw leaves, broken down into a few digestible steps that are easy to follow.
Table of Contents
An Easy Guide to Drawing Different Leaves
The process of learning how to draw a leaf is quite simple when it is broken down into a step-by-step process. In this tutorial, we develop a simple leaf sketch, where we focus on establishing the fundamental shapes and then tweak and change that to look like a more realistic leaf drawing. All leaves have unique shapes and patterns, and in this tutorial, we will look at some classic leaves to draw that can be used in a variety of different art ideas.
As we learn how to draw a leaf in different forms and shapes, we will find that the process of creating realistic leaf drawings is not difficult but simple and fun. That being said let us see what we will need for this tutorial on how to draw a leaf.
Instructions on How to Draw Different Leaves
Learning how to draw a leaf is a fun activity because all leave different in various ways. In this tutorial on how to draw a leaf, we will be creating four realistic leaf drawings, that have various structures and forms. Out of the various leaves to draw, we will be drawing winter-styled leaves and we will be drawing summer-styled leaves. We will go through the basic process of drawing each leaf, where we will transform a simple leaf sketch into a more refined realistic leaf drawing. Now that we know what to expect, let us go through this tutorial on how to draw a leaf.
How to Draw a Banana Leaf
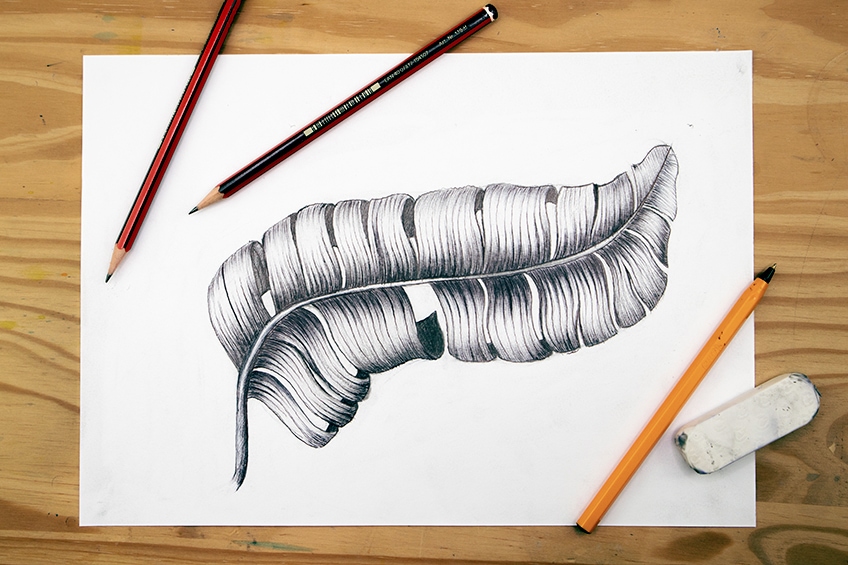
Banana leaves are very different from common leaves that we find on trees, as they are massive in size and have a very smooth texture. Their aesthetic can be associated with a tropical or summery landscape and can be used in various drawing ideas. The banana leaf is a beautiful long leaf, which is interesting and fun to draw. The process is really simple, let us take a look at how to draw a banana leaf.
Step 1: Sketch Out the Shape
We can begin by taking our HB pencils and drawing a simple spearhead shape. However, we can give a slight curve to this shape, implying a little more leaf-like motion to the structure. We want to make sure that the stem runs through the center, dividing the shape into two sections.

From here, we can begin to give the banana leaf sections. Banana leaves’ leaves split, so we want to capture this by drawing sections along the stem using the spearhead shape to guide us.
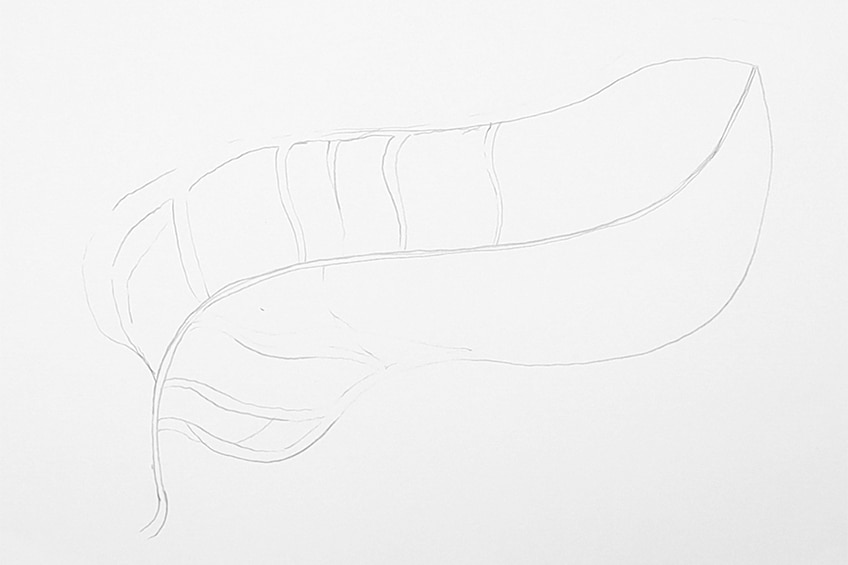
As we draw sections to indicate splitting in the leaf, we want to make sure that we go along the form of the spearhead lines. Each section can have a little curve that goes behind the leaf or flattened on top, this is the quality of the banana leaf.
Step 2: Refine the Shape of the Leaf
We want to make sure we work with our erasers and pencils to maintain the spearheaded shape whilst drawing sections in the leaf that are splitting. We want to also add curvature to some of the split sections, to give more length to some of them. Work this out until you are satisfied with the leaf drawing.

Step 3: Add Light Shading
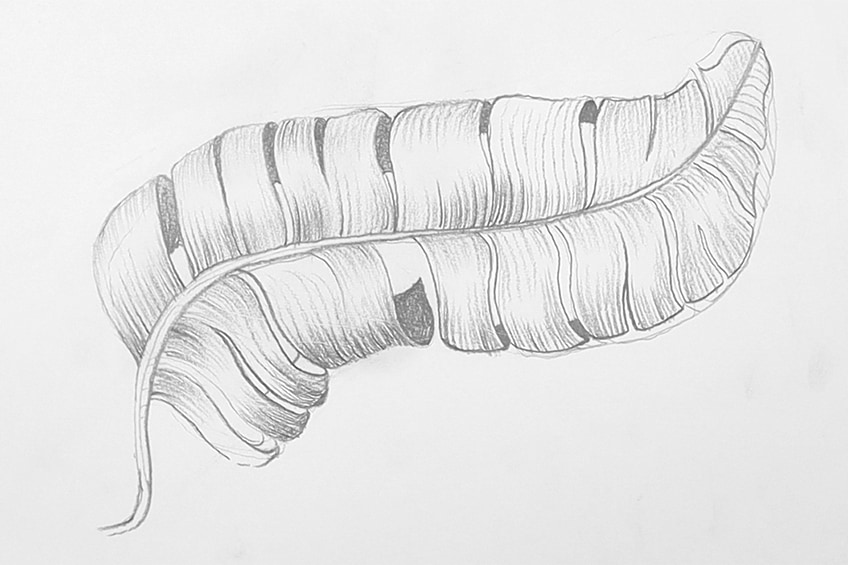
From here we will begin to add some light shading with our pencils. Using your 2B pencil, start from the bottom of the leaf and go through each split section in the leaf. We want to add little strokes from the stem, moving outward toward the top of each split section.

As we add lines in each split section of the leaf, we will start to see how in create that smooth line texture that is unique to the banana leaf. These little lines can be added to the top and the bottom of each split in the leaf. They should be drawn moving toward each other, leaving space in the middle of the sections in the leaf.
As you add these little lines at the top and bottom of each section in the leaf, the space in the middle will create a shine effect, making the leaf seem smooth.

We want to carry on this process through each split section in the leaf. Once you get a hang of how to add the little line strokes in each little split section of the leaf, you can then proceed to add these shading marks to all the sections in the entire leaf drawing.
Using this line shading technique is a good way to capture the strands and smooth texture that is unique to the banana leaf. For any curved sections in the leaf that fall behind the leaf, you can color them in dark. This gives the impression that a shadow is being cast on those areas of the leaf.
Step 4: Add Darker Shading
Once we have added the pencil shading marks to the different sections of the leaf on both sides, we can now go over them using our ballpoint pens. The pen is going to enhance the contrast a little more, giving the leaf a more vivid quality.
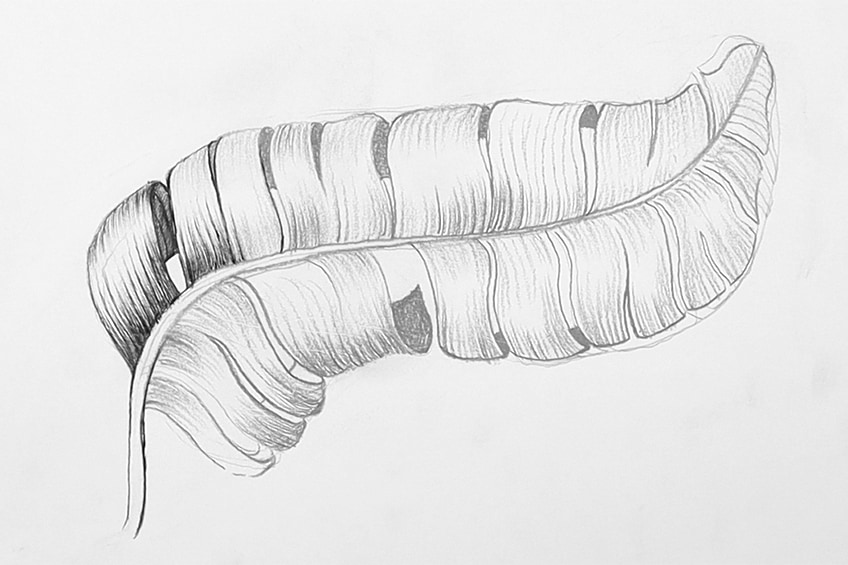
Again, the leaf has splits on either side, which breaks the leaf into various sections. How we shade in these sections is by drawing strokes starting from the base of the stem and moving into the sections. We add the strokes from the top of each section, moving down into these sections again.

This creates a set of shading lines that point toward each other from each end of the sections, leaving a little bit of space in between. By doing this. The left-out space will create a shine effect, making the leaf look smooth.
Try to establish and draw all these shading line marks on one side of the leaf before moving on to the other side. Slowly work your way from the bottom to the top of the leaf.
Once you have completed one side of the leaf and have reached the top of the leaf, start on the other side. A good suggestion is to start from the top of the leaf this time, adding in these lines as you move toward the bottom of the leaf.

The process is the same, we want to make a set of lines over and over again from the stem of the leaf. By doing this, we will create a shading effect in the leaf as well as a set of lines that move along the form of each section in the leaf.
Make sure to take your time, working with a pen can get tiring and can be easily messed up. Take a break if you need to.

Continue this process of adding these little lines in each section of the leaf until you have completed the entire leaf. Make sure to use your pencil marks as a way to guide your shading process.
Continue this process until you have reached the end of the leaf. You should see by now how this shading technique gives the leaf these lines and smooth quality. Take your time with each section in the leaf.
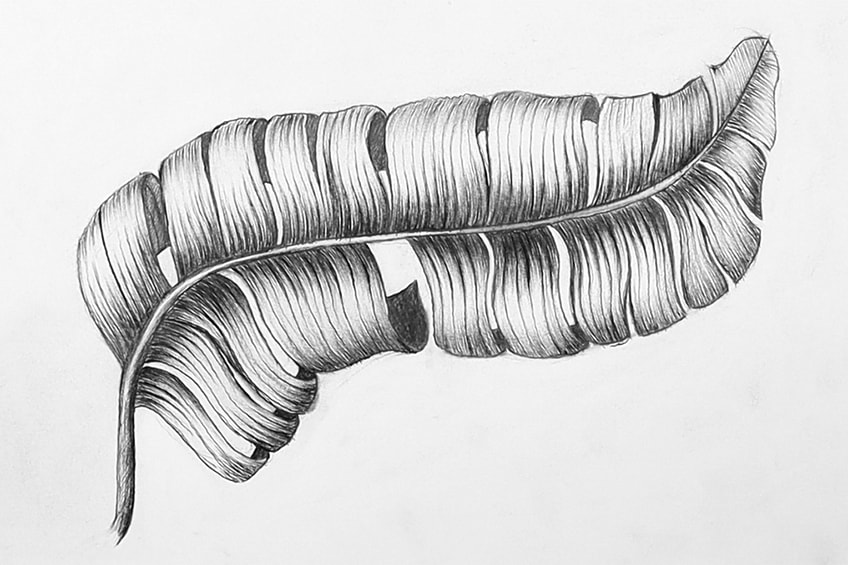
There you have it, a simplified drawing process on how to draw a banana leaf. The most important thing is to take your time, slowly adding the little strokes in each section of the leaf.
How to Draw a Maple Leaf
Let us transition to a more iconic autumn leaf drawing, the maple leaf. This leaf is associated with colder weather and is unique to the winter landscape. The maple leaf can come in all sorts of sizes; however, we will keep it simple for this tutorial. The maple leaf is a beautiful structure, and even works as an artwork on its own.
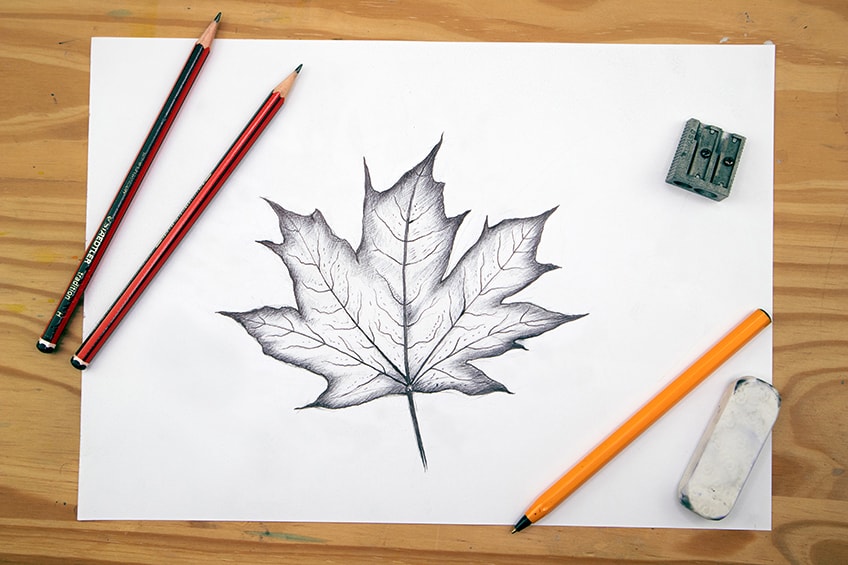
Step 1: Sketch Out the Shape
We start by taking our HB pencils and drawing a set of lines that indicate the different sections in the maple leaf.
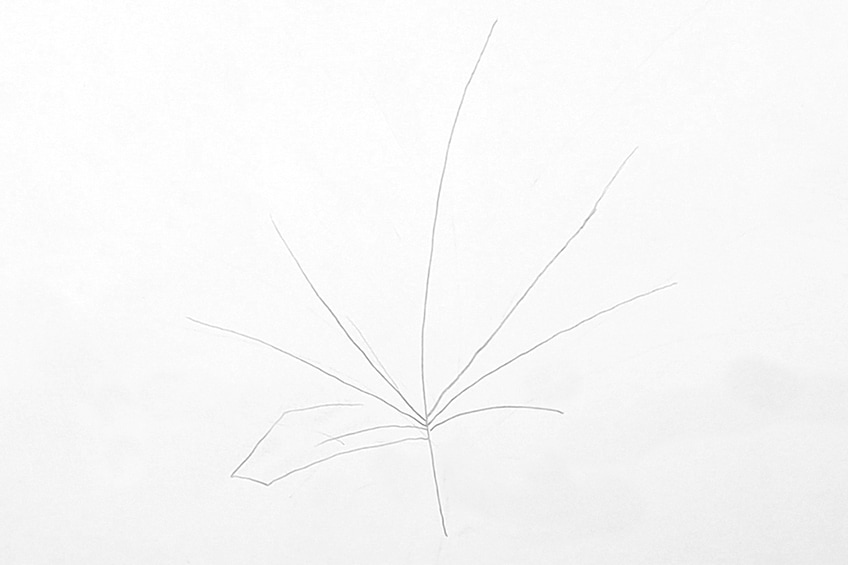
From here we can proceed to draw the basic outline of the maple leaf shape. This shape is a set of arrowheads connected. There are seven sections in the leaf, where the two near the base are smaller and the rest are similar in size.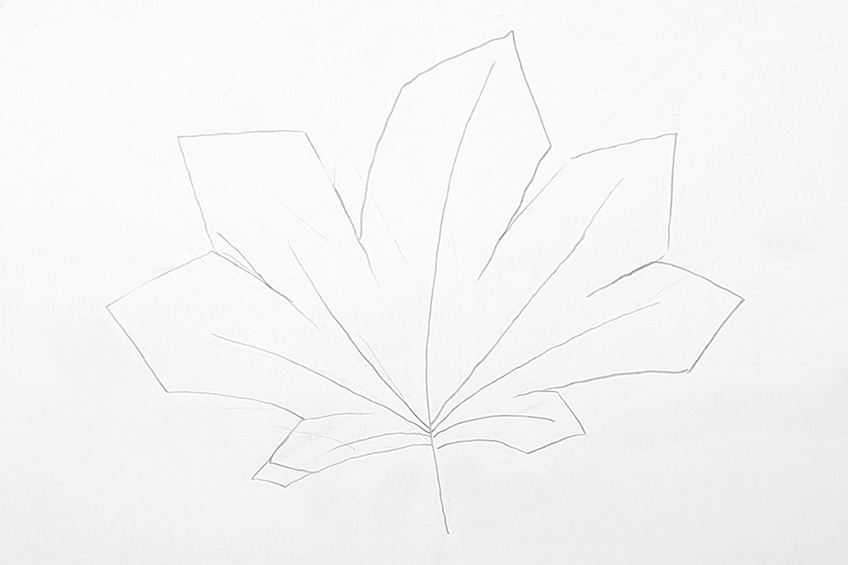
Once we have drawn the generic arrowhead shape, we can now lightly erase our drawing leaving a hint of pencil marks to guide us in forming the leaf.
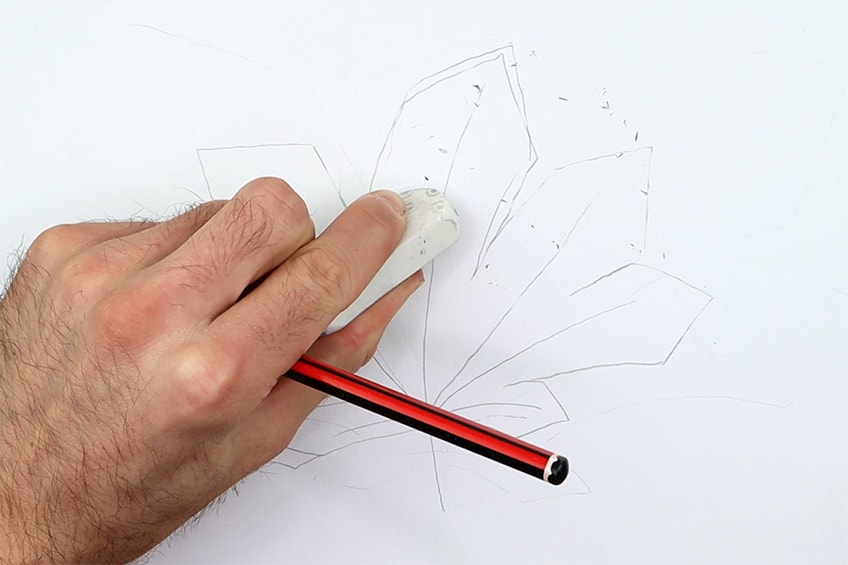
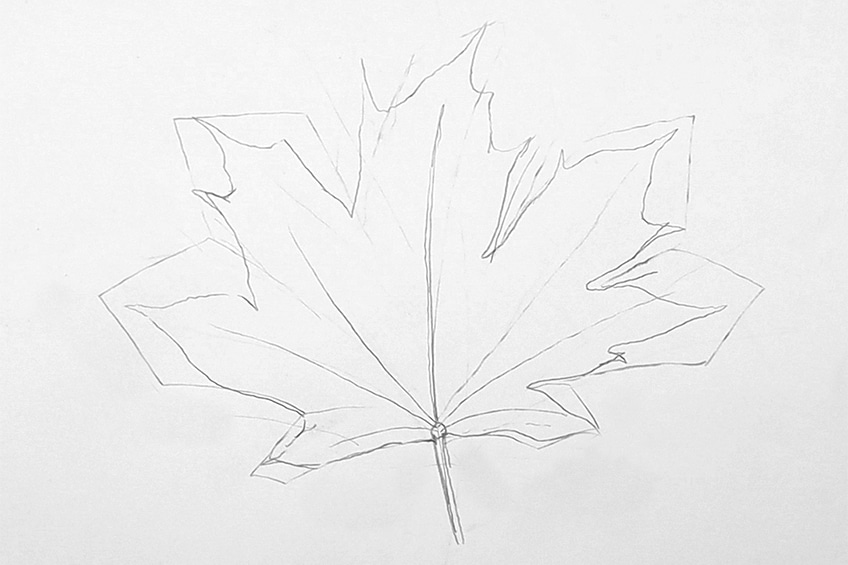
We now want to draw the actual shape of the maple leaf, following the erased lines as a way to guide us in scaling a structure. However, the leaf’s sections can now be drawn a little sharper and less straight.

As you draw the shape of the maple leaf, each section in the leaf can be divided into little sharp edges. Each section should have one or three little horns, or sharp edges, which is more indicative of the maple leaf shape.
We want to do this for each section in the maple leaf, making sure that the lines are not perfectly straight.
Step 2: Refine the Shape of the Leaf
Once we have drawn a simple leaf sketch, we can refine the leaf a little more with light detailing. We can do this by adding little veins along the stems in the maple leaf.
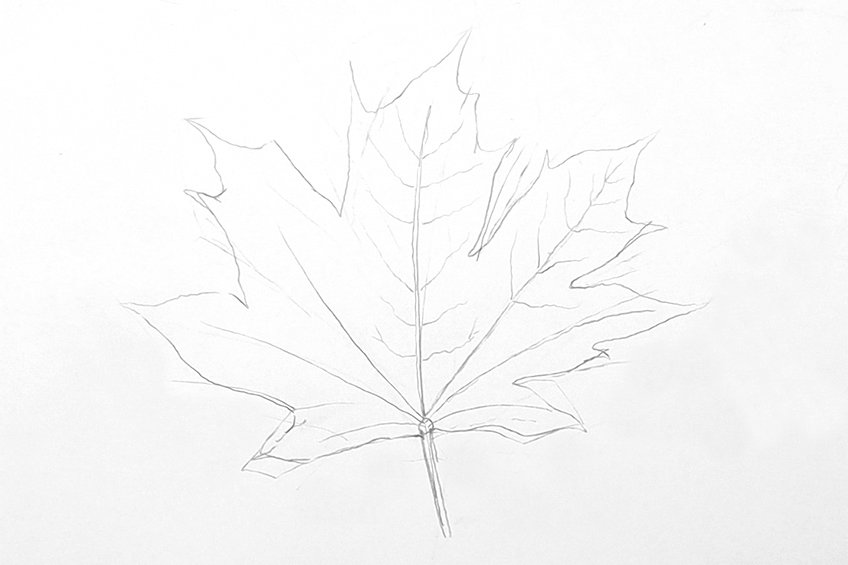
Once we have added the little veins, we can lightly darken the edges of the leaf with our HB pencil, to indicate the burnt edges quality of the maple leaf.
As we add these darker edges to the maple leaf, we will darken this feature over time, which will give the maple leaf its transparent, thin leaf-like effect.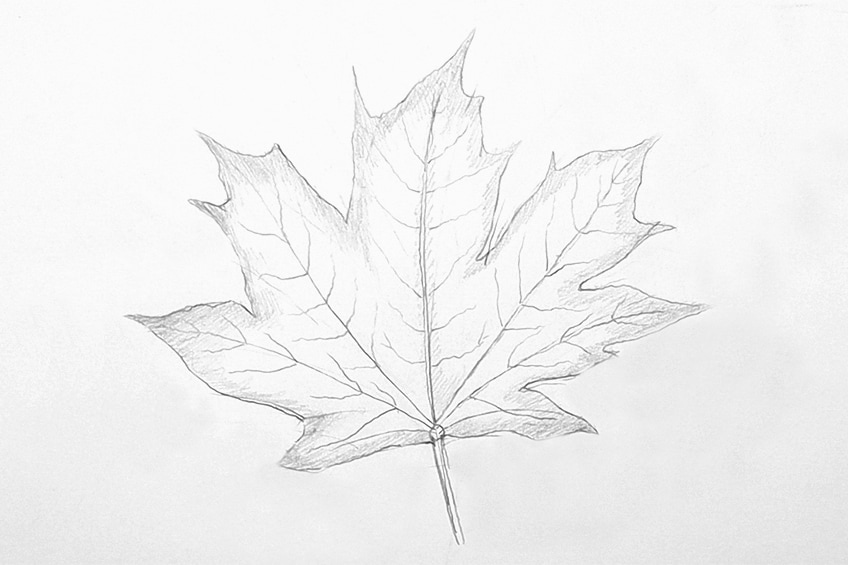
Step 3: Add Light Shading
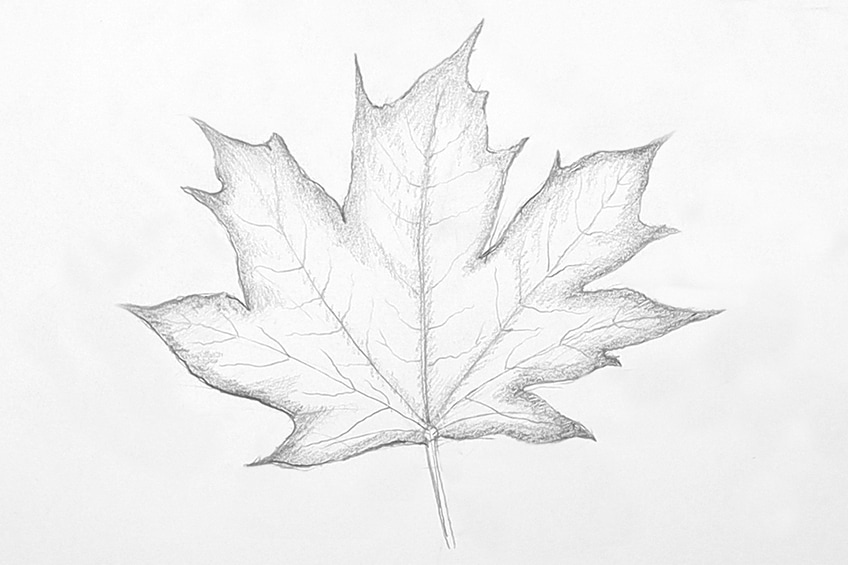
We can now go over the burnt edge quality of the leaf with our 2B pencil. We want to lightly darken the edges of the leaf by outlining the leaf and shading along the edges of the leaf.
We can also add some shading to the body of the leaf. We want to shade where the leaf cuts in from its edges. We can also add shading along the main stems of the maple leaf.
We want to make sure that the shading is as smooth as can be, creating a seamless transition between the dark edges and the lighter body.
Step 4: Add Darker Shading
From here, we can darken our shading and the different feature of the maple leaf using our ballpoint pen. We can start by going over the stems and little veins in the maple leaf.
From here, we can lightly shade over the darkened edges of the maple leaf. We want to do the same as we did with the pencil shading, where we outline the leaf and shade from the outside in.
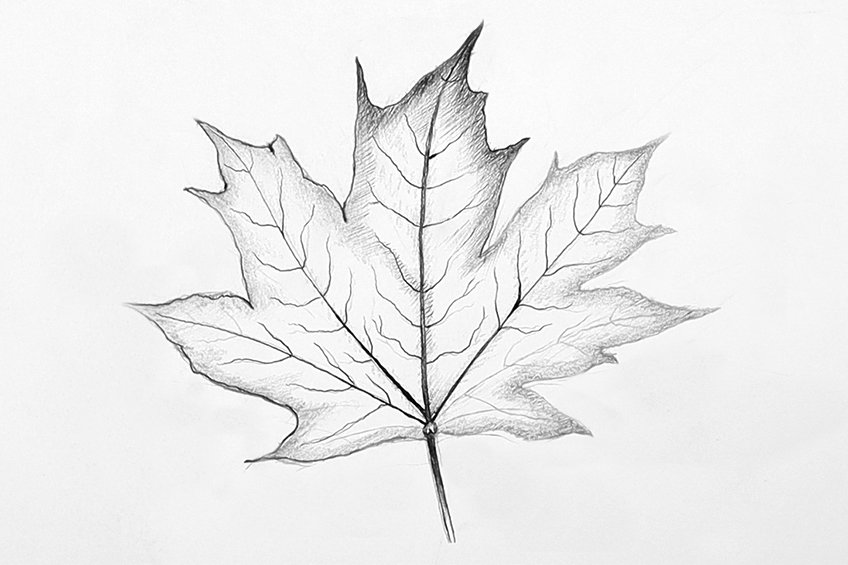
Take your time going over the veins in the leaf, as we as shading along the edges of the maple leaf. By adding in these qualities, we will slowly see the leaf become a little more realistic.
We want to spend time on the shading along the edges of the leaf. We want to make sure that we shade over the pencil marks, using them as a way of guiding us in the shading process.
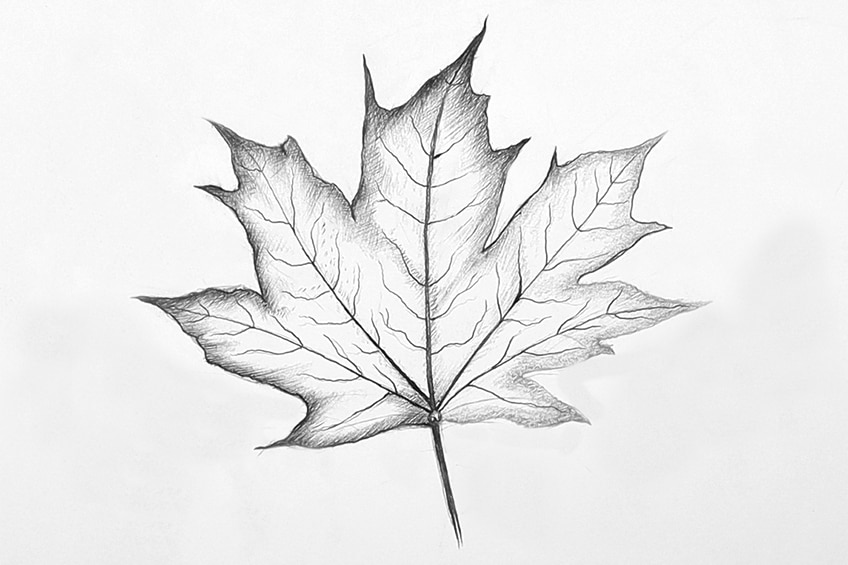
This process we will continue, as well as adding in some light shading in the body of the leaf along the main stems. We want to make sure that the gradient of shading is as seamless as possible from the outer edges into the center area of the leaf.
Once our shading is complete, adding in some little lines and dots in the center of the leaf can hello give the leaf texture. The maple leaf isn’t smooth, so this is a great way to suggest texture on the surface of the leaf.
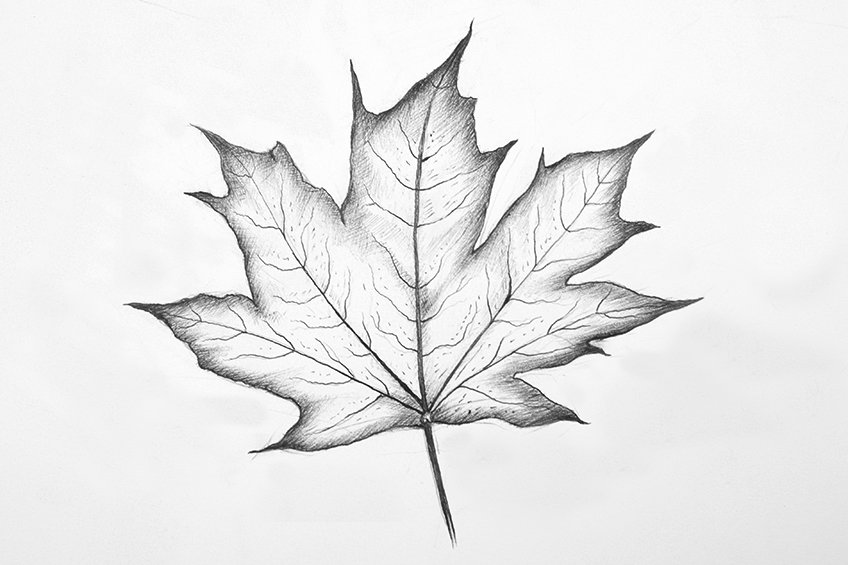
And that’s it; a few simple steps on how to draw a realistic autumn leaf drawing! Creating a realistic leaf drawing is about taking time with the shading process. From there you will start to see how the leaf transforms.
How to Draw a Beech Leaf
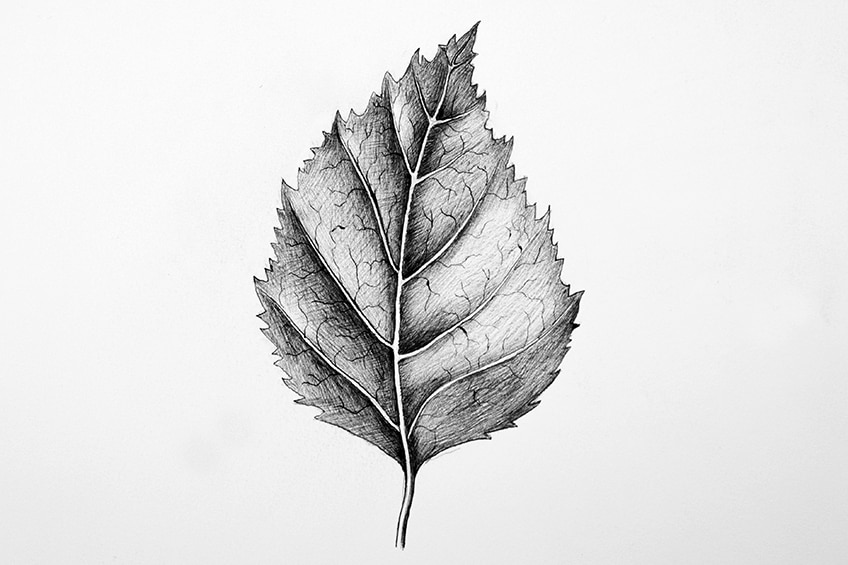
Let’s draw a leaf that is a bit neutral in its aesthetic. The Beech leaf is a simple leaf that can be contextualized within a winter or summer landscape. This leaf is a classically styled leaf that can be beautiful if drawn correctly. The process of drawing a beech leaf is quite simple and fun and can be used in all sorts of artwork ideas.
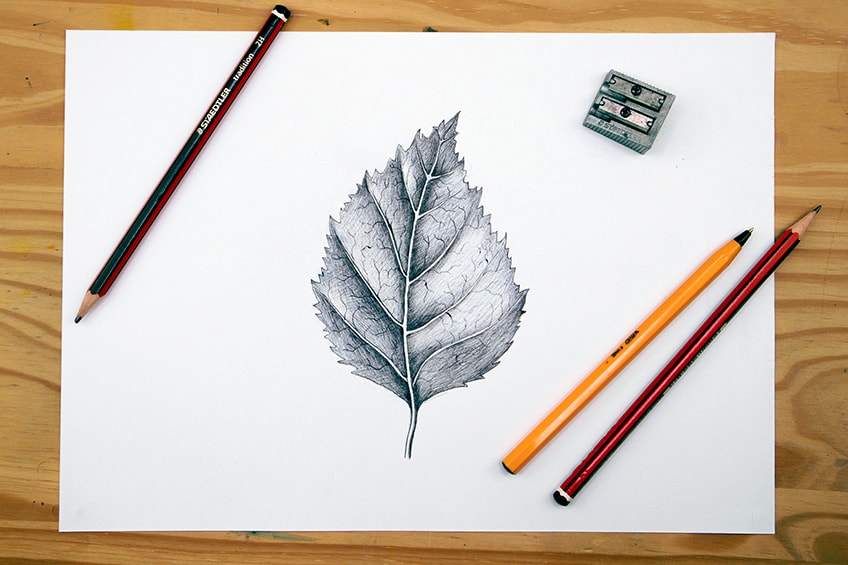
Step 1: Sketch Out the Shape
We can start by drawing a simple spearhead shape using our HB pencils. We can also draw a line through the center of the spearhead shape to define the stem of the leaf.

From here, we can add deviating veins in the leaf that are symmetrical on each side of the stem. These veins can move in an upward direction on each side of the stem.
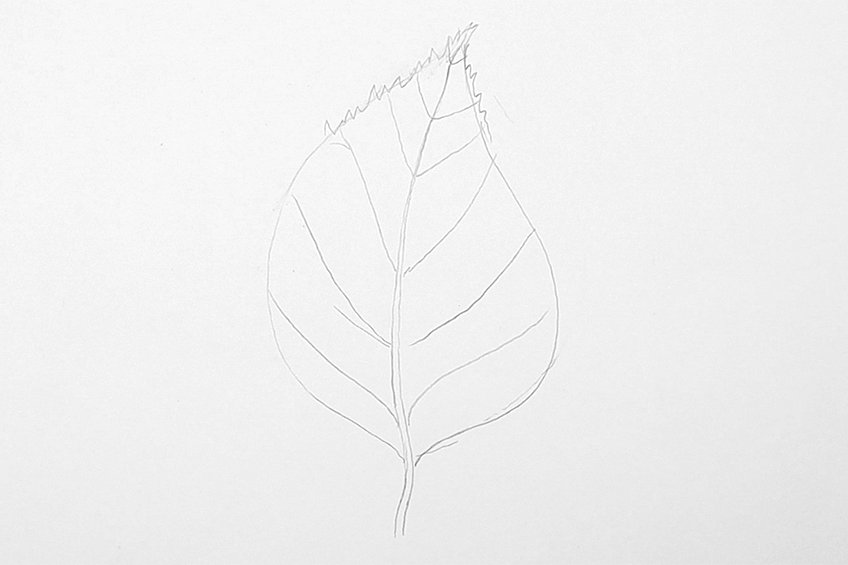
Step 2: Refine the Shape of the Leaf
We can now proceed to contextualize the shape of the leaf by adding little spikes or thorns along the edges of the leaf.
We want to make sure that the veins move toward larger horns on the side of the leaf. The rest of the horns or spikes can be smaller in comparison
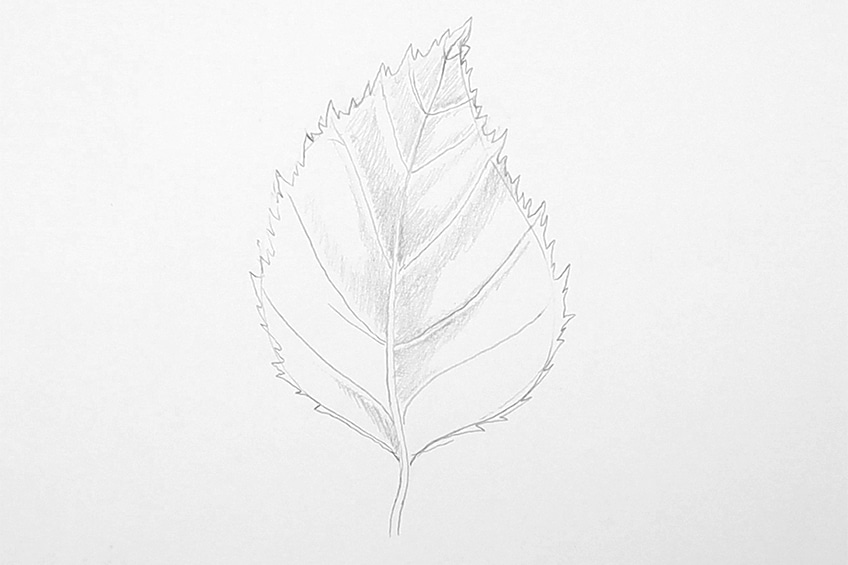
Make sure you use your eraser during this process as you tweak and edit the leaf’s jagged edges to fit in with the veins in the leaf. We can also add some general shading along the veins in the leaf.
Step 3: Add Light Shading
From here, we can use our 2B pencil to slightly darken the shading along the veins and stem in the leaf. We want to shade the leaf, leaving a little gap between the stem and veins. This will give the stem and veins a slight protrusion, giving the leaf three dimensionalities.
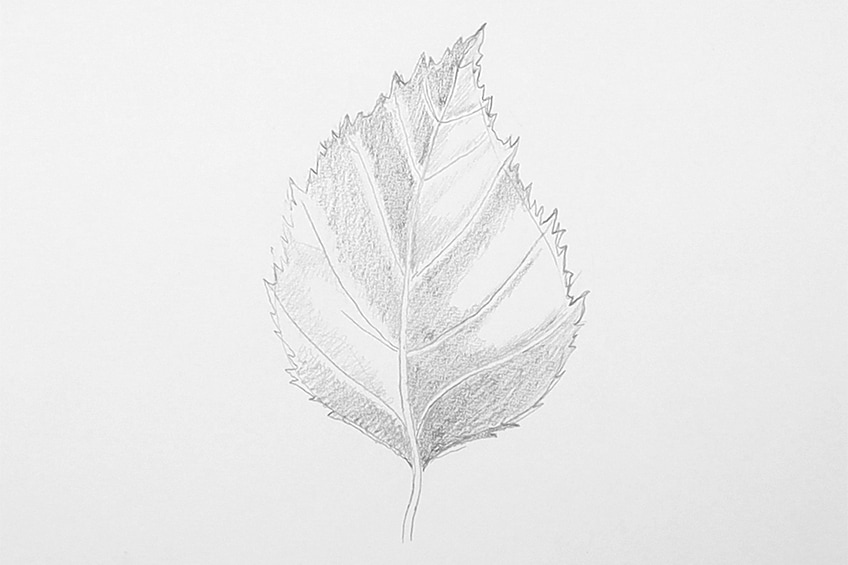
Step 4: Add Darker Shading
From here, we can go over the pencil marks and shading with our ballpoint pens. We want to make sure that we don’t shade over the stems or veins, rather we want to leave the stem and veins open.
As you shade with your pen, you can darken the marks along the stem. You can create a transition between darker and lighter shading from the stem towards the outer edges of the leaf. This will give the leaf more dimension and depth.
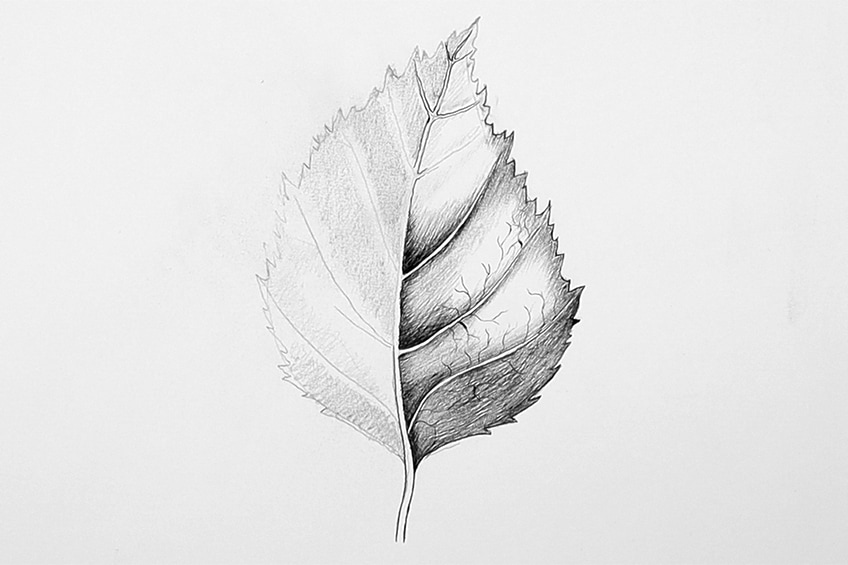
Continue the shading process with your pen, making sure that you use the pencil shading marks as a way of guiding your pen shading process.
Try to complete one side before moving on to the next. Just remember, we want to make sure that we are shading the leaf without touching the stems or veins in the leaf. Make sure you do this carefully.
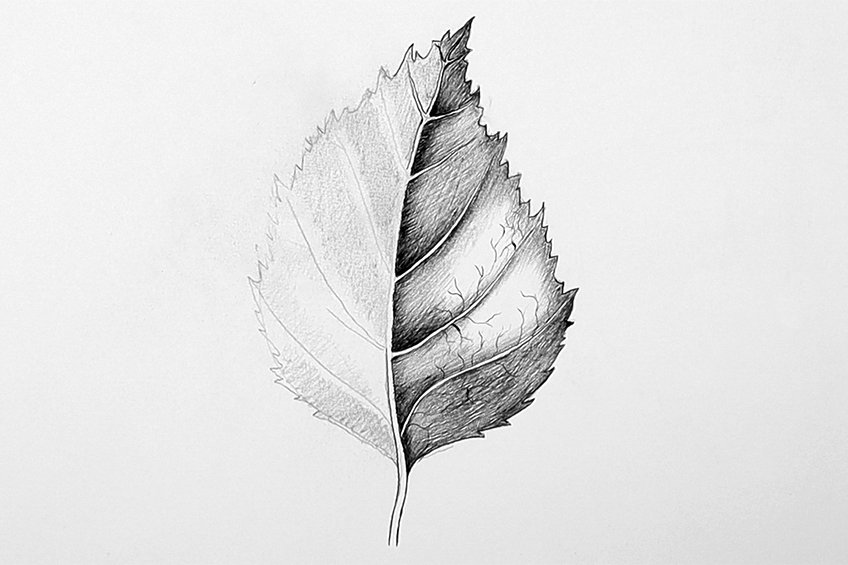
This process can be continued on the other side of the leaf. Remember to take a break, this way you can reengage with your work feeling fresher. This is also a great way to prevent mistakes.
You can also explore making one side of the leaf a little darker, giving the leaf a unique exposure to a light source.
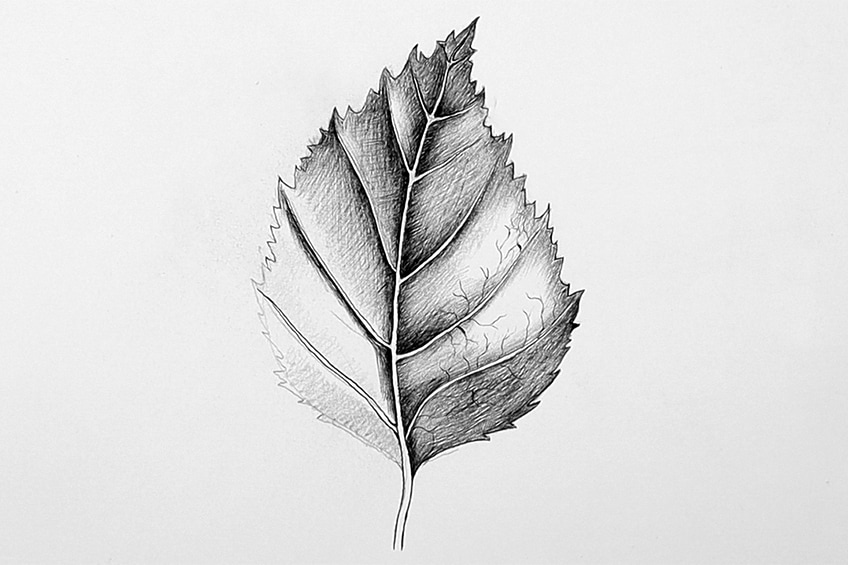
However, the most important thing to remember is to leave out the stem and veins. You want to take your time shading around these finer details. This is going to give the leaf drawing a more realistic composition.
As you shade in the rest of the leaf slowly with your pen, try to shade the jagged edges of the leaf. You want the shading to merge into one another as seamlessly as possible. From here you can draw more little thin veins throughout the leaf, along the larger veins. This will give the beech leaf an additional textural quality which will enhance the leaf drawing a little more. That is the simple process of drawing a classic beech leaf.
How to Draw an Ash Leaf
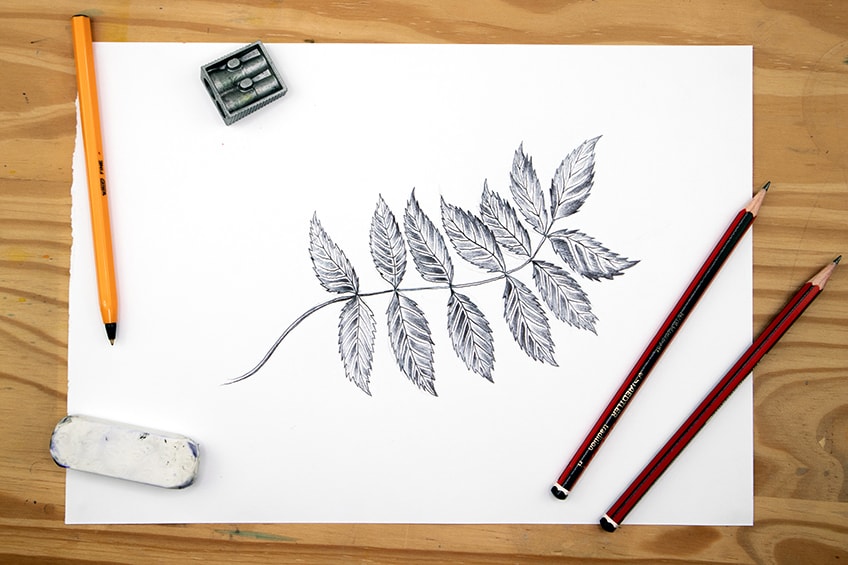
This next leaf drawing is a little different as it is a series of leaves. Similar to the beech leaf, this is quite a classical spearhead leaf shape with little jagged edges. This leaf is also very versatile in its aesthetic and can be used as a feature in so many different artworks and creative ideas. That being said, let’s go through the simple steps of drawing an ash leaf.
Step 1: Sketch Out the Shape
We start by drawing a simple curved line in a horizontal fashion using our HB pencil. From there we can draw a single spearhead shape at the end of the line. We want the spearhead shape to be small.

From there will draw a set of spearhead shapes oolong the line, making them all the same size. We want there to be the same amount on each side of the line., adding subtle curves is okay as they suggested a realistic movement in the leaf.
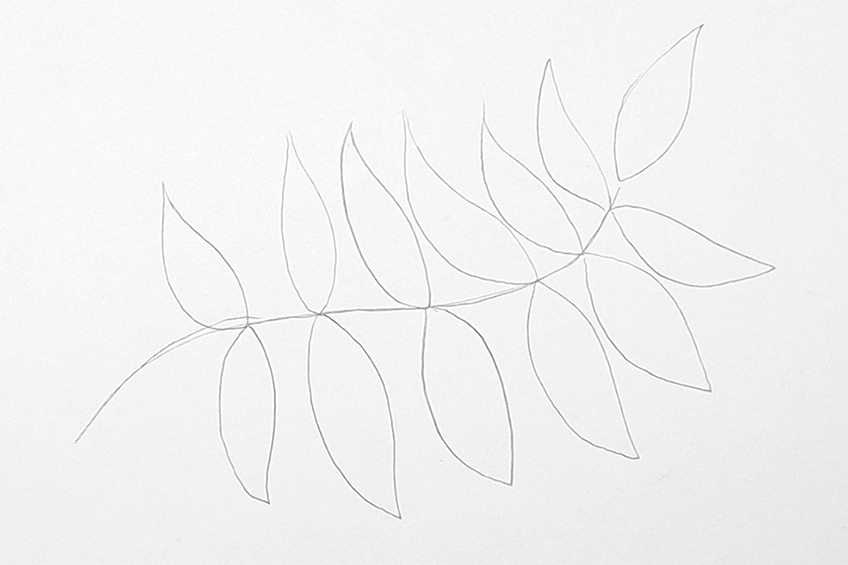
From here we can draw a line through the center of each of the little spearhead shapes. We want to divide the spearhead shape into two equal parts.

Step 2: Refine the Shape of the Leaf
From here we can begin to refine the leaf shape by adding little spikes or thorns along th edges of each spearhead. We can do this as we did for the beech leaf.
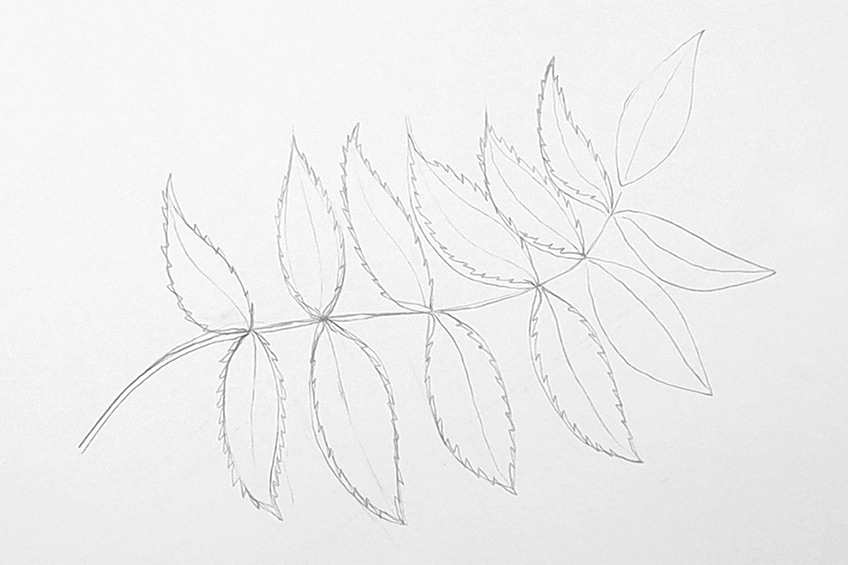
From there, we can proceed to add in little dispersing veins within each little spearhead shape. We want to keep it as symmetrical as possible; this can distort a little depending on whether the spearhead leaf is curved.
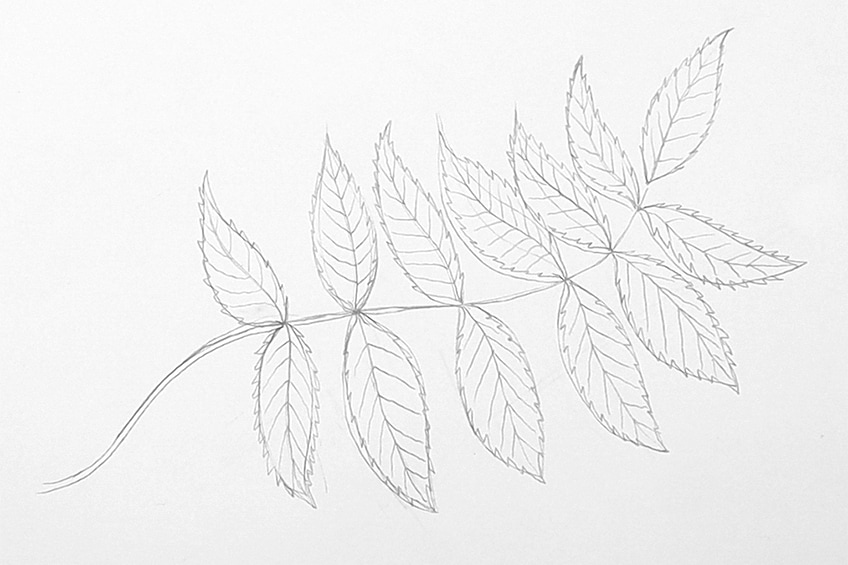
Step 3: Refine the Shape of the Leaf
This time, we don’t need to worry about adding light shading with our pencils because each little spearhead is so small. Rather we want to take advantage of the sharp tip of the ballpoint pen to shade. We can shade in each little leaf, making sure we shade around the stem and the little dispersing veins.
Take your time going through each little spearhead leaf one by one. You want to make sure that you shade in the leaf without shading over the little veins and stem of each little spearhead in the leaf.
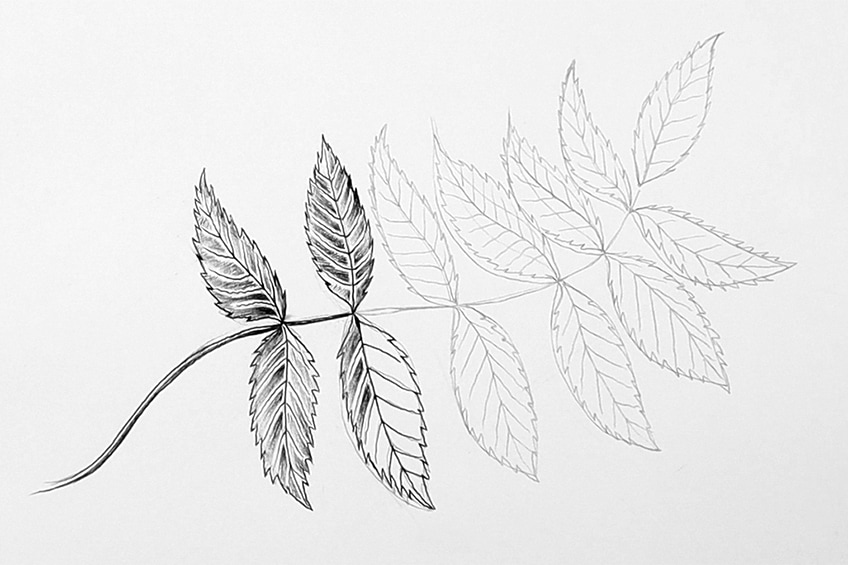
This process will be the same for each leaf. Take your time with each one. You can also go over the main stem with a pen, as well as the little stem and veins in each little spearhead leaf.
Make sure you take a break, as the shading process can be strenuous. When shading in pen you also want to be very focused which can fatigue you. So, be sure to rest in between.
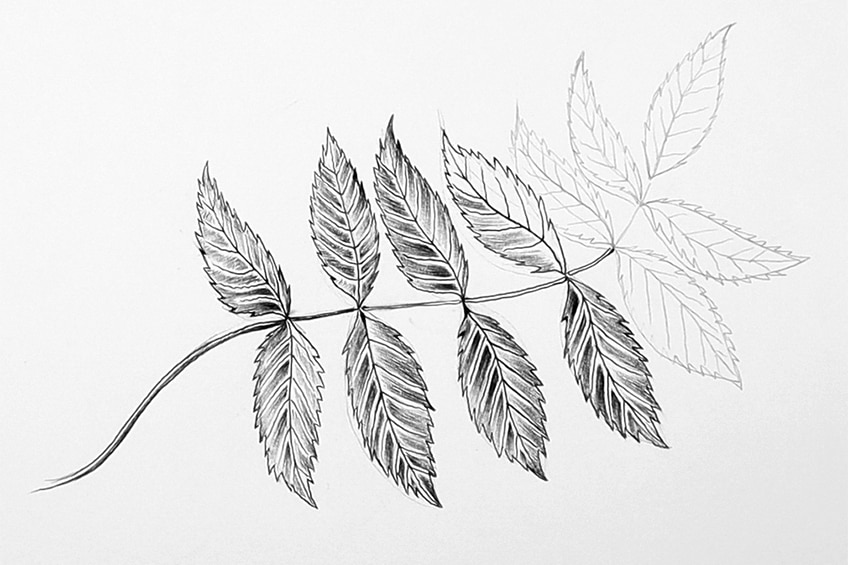
Leaving a little bit of space around the stems and veins in each little spearhead shape gives the leaf more dimension and texture. You can proceed with this shading process until you have gone through each of the little leaves of the ash leaf.

You can also explore giving some leaves a darker or lighter quality. However, as long as you don’t shade over the lines of the veins and stems in the leaves.

There you have it! We have come to the end of the tutorial on how to draw a leaf in various different ways. The ash leaf is a beautiful leaf, just remember to leave the detail of the veins and stem untouched which will give the leaf a little more dimensionality.
Tips to Remember
- Take your time. Drawing can be strenuous and tiring, so take a break and take your time.
- Use the pencil marks. For some leaf drawings, using the pencil marks to guide your pen shading process is essential
- Always work out the shape first. By doing this you make it easier to refine and shade in the leaf.
- Be cautious when using a pen. This medium is great for starker detailing; however, you want to make sure that you be cautious when drawing with a pen.
- Most importantly, have fun. Learning how to draw a leaf is a fun task and making a realistic leaf drawing can be really exciting, so have fun with the process.
There are various leaves to draw, however, in this tutorial we look at how to draw a few simple and easy-to-draw leaves. These leaves can be used in various contexts for various different artworks. Learning how to draw both summer and autumn leaf drawings can give you a good base for adding leaves as a feature to different artworks. The most important thing to remember is to take your time with the shading process, this way you will end up with a more realistic leaf drawing without any silly mistakes.
Take a look at our leaf drawing webstory here!
Frequently Asked Questions
How Do You Shade in a Leaf?
There are many different leaves to draw, which means there are different shading processes for each. For some, such as the beech and ash leaf, we want to accentuate the veins and stems of the leaf. We do this by shading around the stems and veins, which allows those features to stand out, giving the leaf more depth and three-dimensionality. For the maple leaf, we can add shading along its edges. By doing this we capture the thin paper-like quality of the leaf. Whereas for the banana leaf, we work with a line-styled shading approach which can result in a smooth and fiber-like quality that works for the banana leaf. To shade in a leaf and make it a more realistic leaf drawing, you want to make sure you understand which shading technique works well with which leaf structure.
How Do You Shade in the Maple Leaf?
This autumn leaf drawing is a great leaf to draw because of how unique and interesting it looks. The maple leaf has a very unique form as it is quite thin and its texture is quite rough. We capture the thin quality by shading along the edges of the maple leaf. By doing this we give the impression that light peers through its surface in the middle of the leaf. To give the leaf texture, you can add some little lines and dots within the center or body of the leaf. This gives the impression of a grainy texture which is quite unique to the maple leaf. Most importantly, you want to make sure that the different sections of the leaf’s edges have little horn shapes, which makes it look a little more realistic. As you shade in those features, making them darker, the leaf will start to seem more three-dimensional in subtle ways.
Matthew Matthysen is an educated multidisciplinary artist and illustrator. He successfully completed his art degree at the University of Witwatersrand in South Africa, majoring in art history and contemporary drawing. The focus of his thesis was to explore the philosophical implications of the macro and micro-universe on the human experience. Matthew uses diverse media, such as written and hands-on components, to explore various approaches that are on the border between philosophy and science.
Matthew organized various exhibitions before and during his years as a student and is still passionate about doing so today. He currently works as a freelance artist and writer in various fields. He also has a permanent position at a renowned online gallery (ArtGazette) where he produces various works on commission. As a freelance artist, he creates several series and successfully sells them to galleries and collectors. He loves to use his work and skills in various fields of interest.
Matthew has been creating drawing and painting tutorials since the relaunch in 2020. Through his involvement with artincontext.org, he has been able to deepen his knowledge of various painting mediums. For example, watercolor techniques, calligraphy and lately digital drawing, which is becoming more and more popular.
Learn more about Matthew Matthysen and the Art in Context Team.
Cite this Article
Matthew, Matthysen, “How to Draw a Leaf – All About Realistic Leaf Drawing.” Art in Context. January 25, 2023. URL: https://artincontext.org/how-to-draw-a-leaf/
Matthysen, M. (2023, 25 January). How to Draw a Leaf – All About Realistic Leaf Drawing. Art in Context. https://artincontext.org/how-to-draw-a-leaf/
Matthysen, Matthew. “How to Draw a Leaf – All About Realistic Leaf Drawing.” Art in Context, January 25, 2023. https://artincontext.org/how-to-draw-a-leaf/.


