How to Draw a Water Drop – Steps to Create a Realistic Water Droplet
Learning how to draw a water drop is a simple and fun activity that can be a beautiful addition to various artworks. Water droplet drawings can seem so interesting in artwork as it provides another dimension to the art. Waterdrop drawings have an effect of light refraction, which gives them their three-dimensionality. This means that it can function as a three-dimensional feature within a drawing, giving the artwork a more realistic quality. Realistic water drops can be used in many different contexts within art, and learning how to draw a drop of water is a great hack that can provide your artworks with more interesting detailing. However, if you choose to use this skill, learning how to draw a water drop gives you insight into achieving light and shadow within a drawing medium.
Table of Contents
An Easy Guide on How to Draw a Water Drop
A water droplet drawing is quite simple in its construction. To achieve realistic water droplet qualities within a drawing, there are two factors to understand. The first is light, and the second is shadow. Understanding how light refracts within a water droplet and how that casts a shadow will give you insight into how a water droplet is formed in a drawing.
In this tutorial, we will see how our water droplet sketch is transformed into a realistic water droplet!
This is done by the use of shading, which will achieve the light and shadow effect within a water droplet. Learning how to draw a water drop also requires minimal materials. With that being said, let us see what we will need.
Necessary Materials
- HB Pencil
- 2B Pencil
- 3B Pencil
- Eraser
- Good paper (200 g/m – 250 g/m recommended)
Step-by-Step Instructions on How to Draw Water Drops
In this tutorial, we will break down the basic process applied to drawing a realistic water droplet by breaking downlight and shadow. From there we will look at how we can apply this technique to a group of different shaped water droplets. Then lastly, we will see how we can create a more complicated droplet using the shading process. Learning how to draw water drops is quite fun and the shading process is the same for all kinds of water drop shapes.
Understanding how to correctly add light and shadow is what will transform a simple water droplet sketch into a realistic water droplet drawing. Let’s get into this tutorial on how to draw water drops!
Understanding Light and Shadow
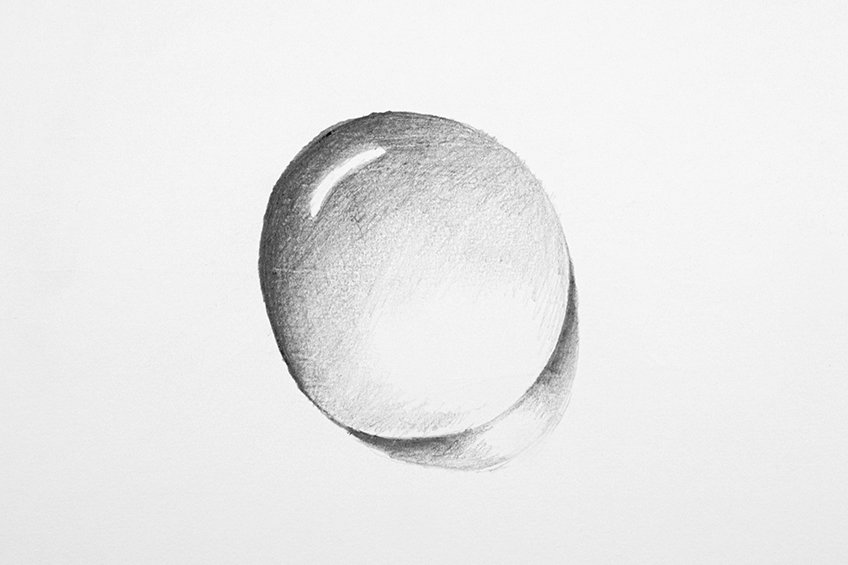
We want to begin by understanding the basic principles associated with drawing a realistic water droplet. We do this by starting simple, by drawing a basic water drop shape.
We want to see how the process of forming light and shadows is formed within the water drop before exploring different and more complex shapes.
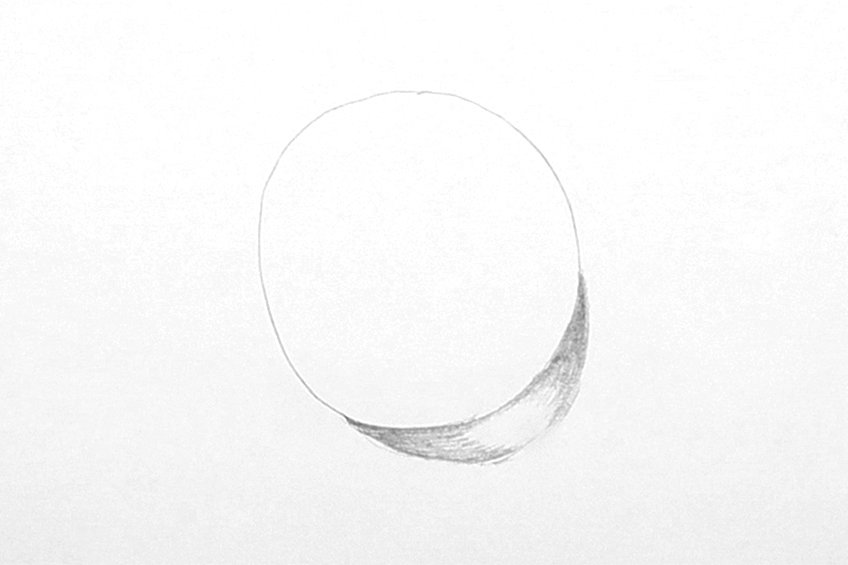
Step 1: Sketching the Water Drop
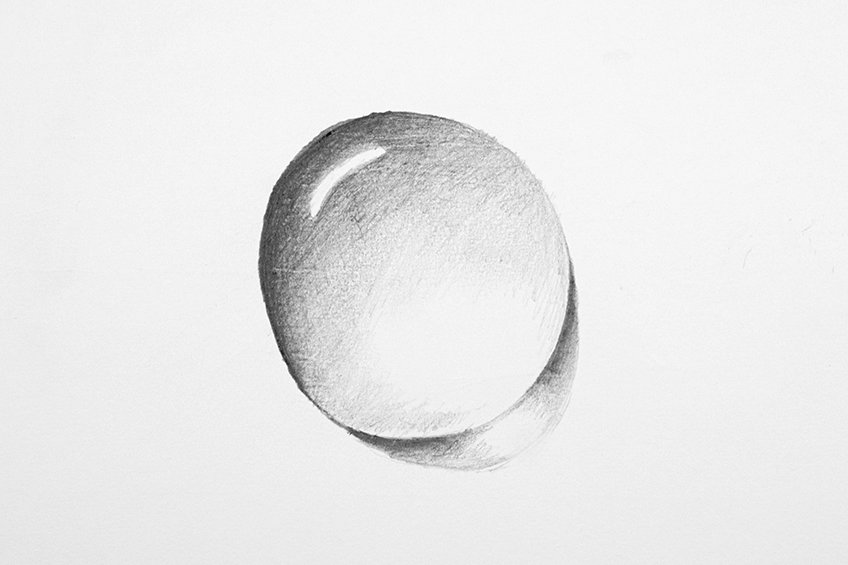
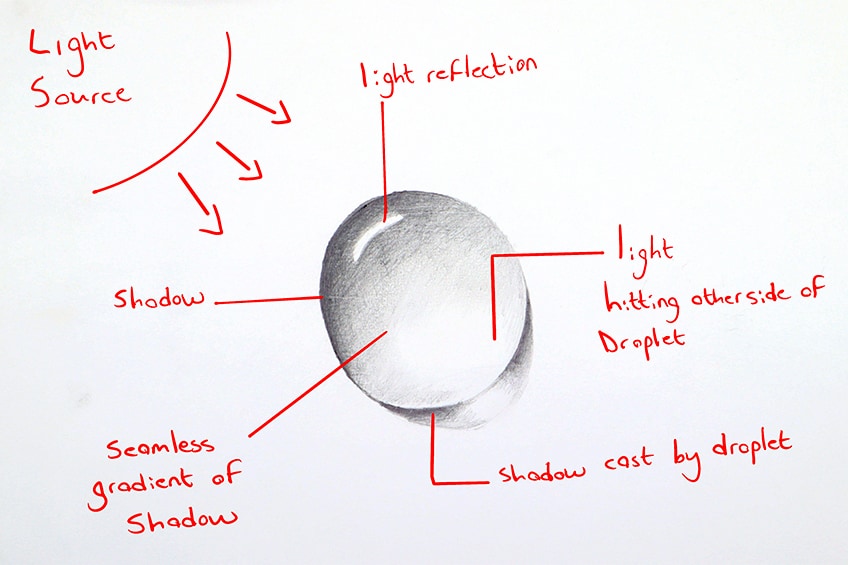
We want to start by drawing a simple circle shape with our HB pencil, keeping our water droplet sketch light. From there we can add a slight arch-like shadow on one side of the circle. This is representing a shadow that the droplet would cast on a surface.
However, we want to keep the middle of the shadow open, as this will represent light moving through the droplet.
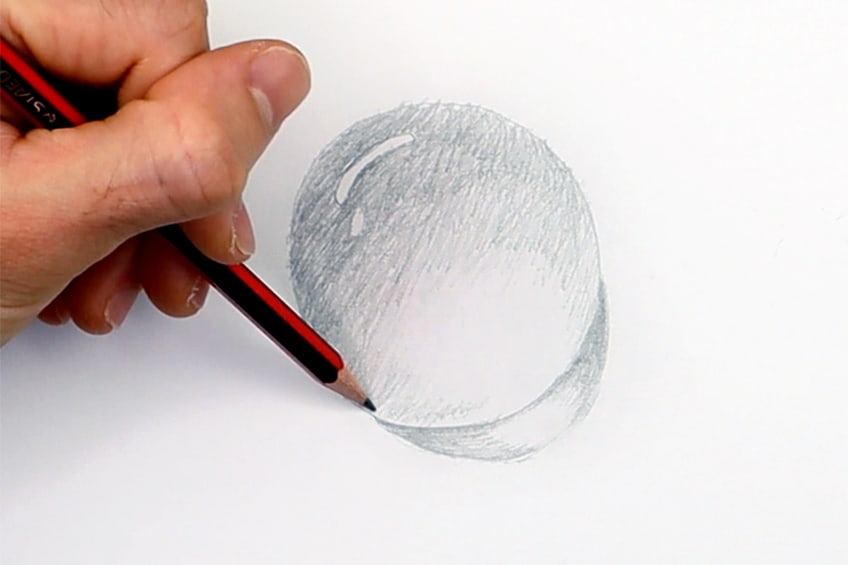
Step 2: Adding Light and Shading
We want to now create a light reflection on one side of the circle, which we will shade around. This little light reflection will form the shape of a little circle or curved shape and will be drawn in the circle. You want to keep it small and round.
Make sure it is on the side opposite to the shadow that the droplet is casting onto the surface.
Step 3: Adding Darker Shading
This is where we darken our shadows with some darker shading, we can use our 2B and 3B pencils for this. We want to darken the shadow that is in the circle, making a smooth transition from dark to light. We want the shadow in the circle to be as seamless as possible.
This will give the water droplet a realistic quality of shadow.
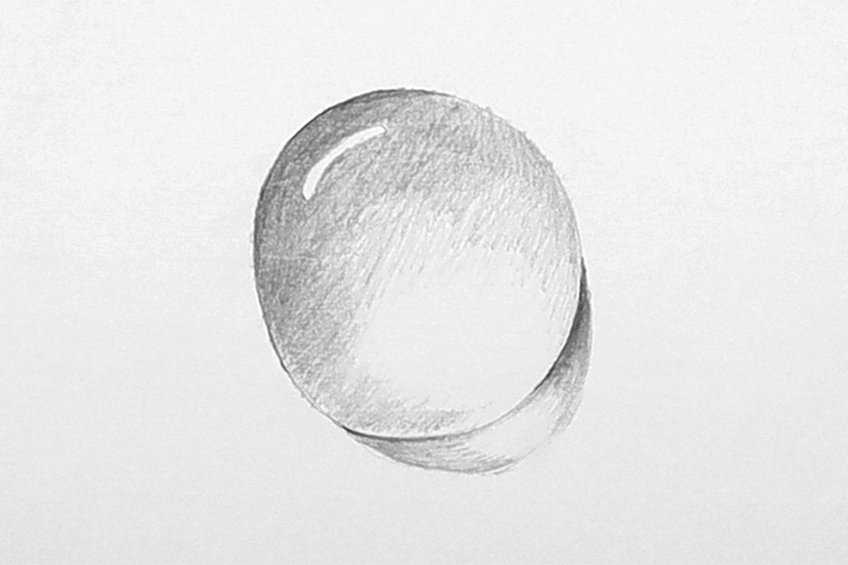
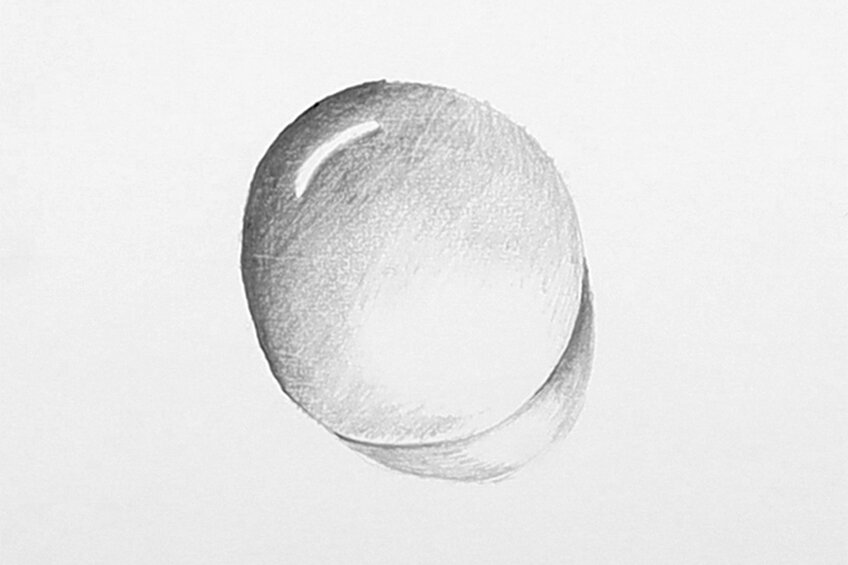
This indicates the reflection of the light source.
Drawing Different Water Droplets Shapes
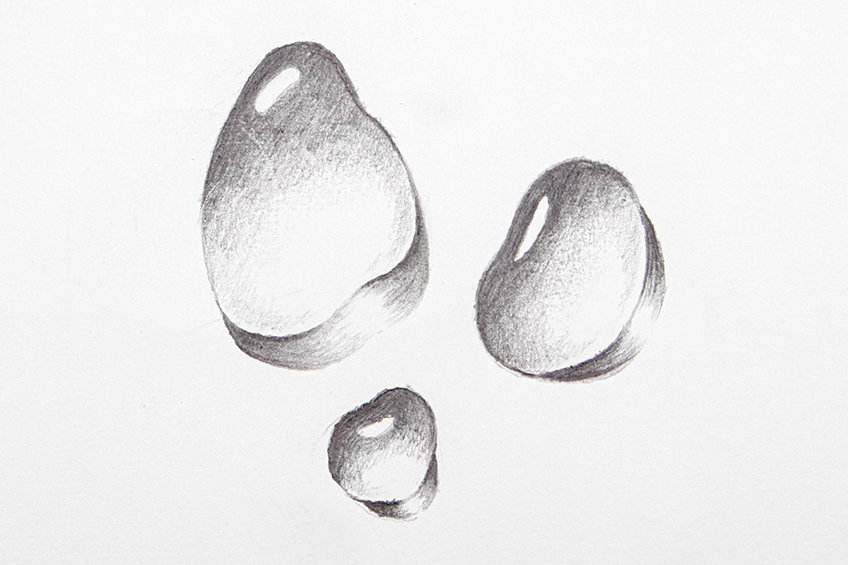
We now can be a little playful with our water droplets by giving them different curvatures in their form. Playing around with different forms of water droplets can provide you with the challenge of adding the techniques you have just learned to different shaped water drops.
However, the process is the same and is quite easily applicable to other water drop forms.
Step 1: Sketching the Water Drops
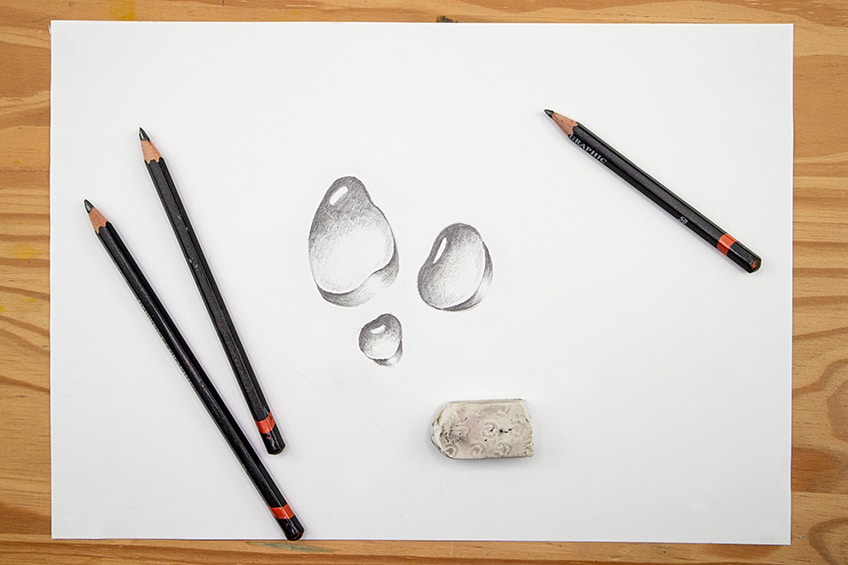
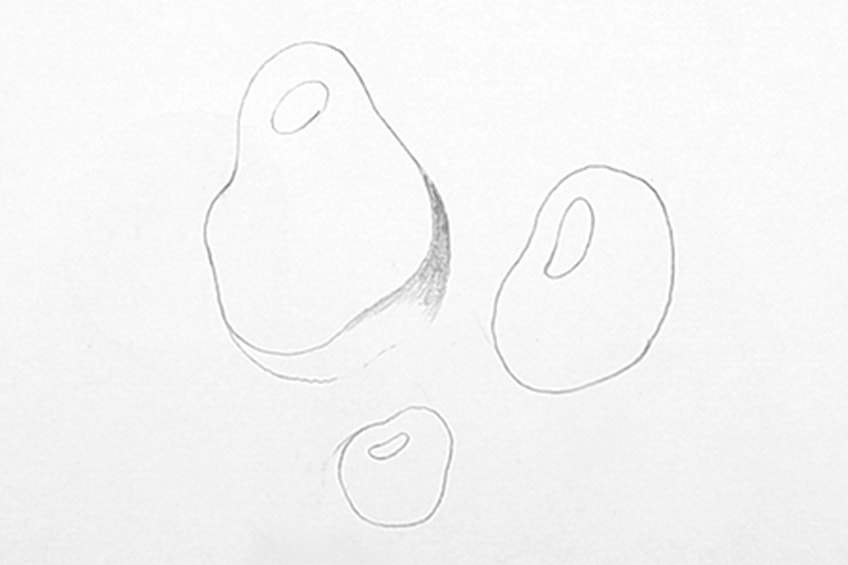
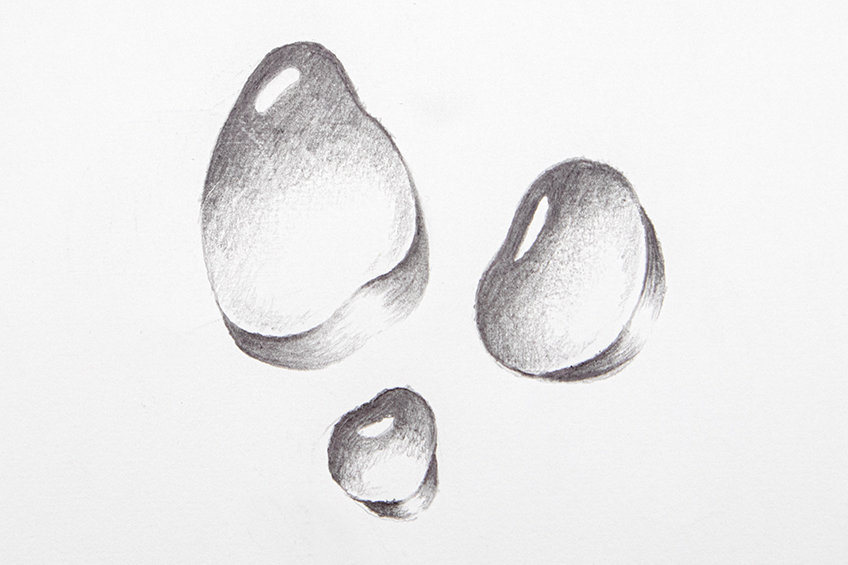
We can begin by sketching out our water droplets. As you sketch out your water droplets try to make them different in size, maybe one large, medium, and small in comparison to one another. As you add curvature, try to keep it simple.
This makes it easier to work with the shadow and light technique.
Step 2: Adding Light and Shading
Once you have the shape of your water droplets you can start to work on the different elements, like the shadow in and around the droplet as well as the little reflection of light. Remember, start light, working with an HB pencil to get the shadow gradients and placements correct at first.
From there you can apply more shading to darken your shadows.
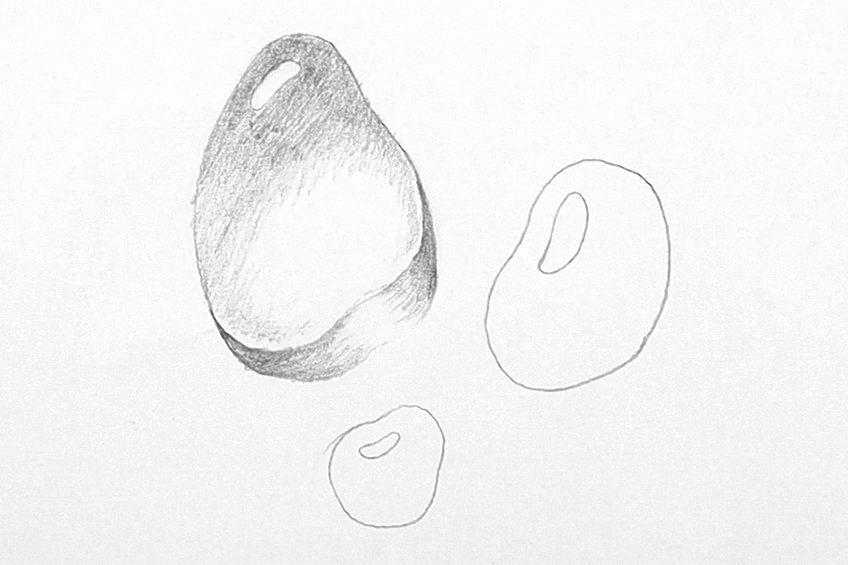
Step 3: Adding Darker Shading
From there you can slowly begin to darken your shading by working with your 2B pencil and 3B pencil. Adding some darker shading will enhance the contrast within the water droplet giving it a more realistic effect of shadow and light.
It is best to start with one droplet and then move on to the next once you finished with one.
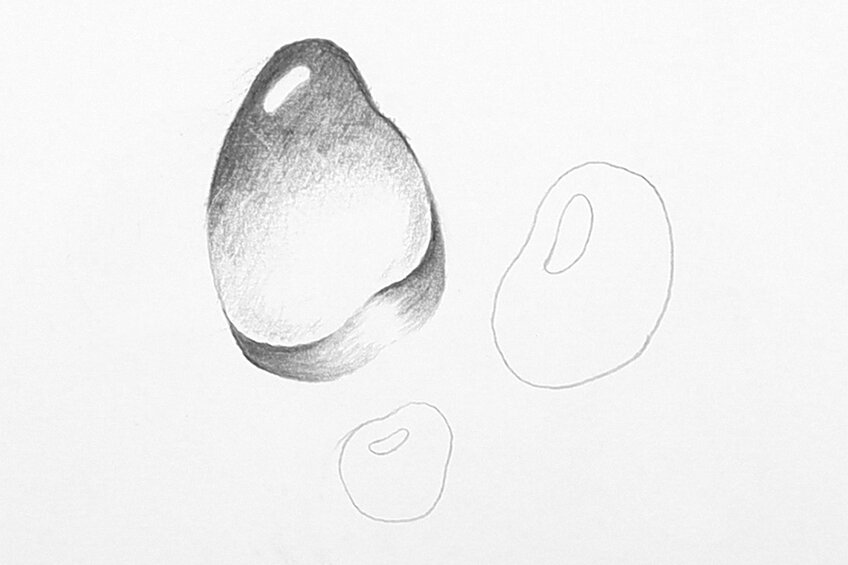
Step 4: Applying the Process to the Rest
From there you can apply the same process to the rest of the droplets. Creating water droplet drawings, where there is a group of them is also another way of making it seem realistic. When there is a grouping of water droplets and the natural elements affect them all the same it gives it a realistic effect.
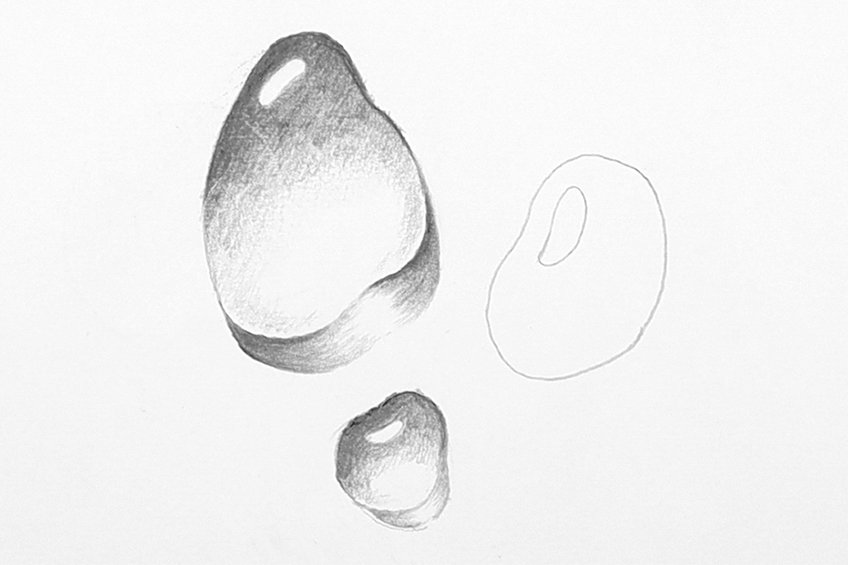
This will give your water droplet drawing a realistic quality as they would all be exposed to the same light source.
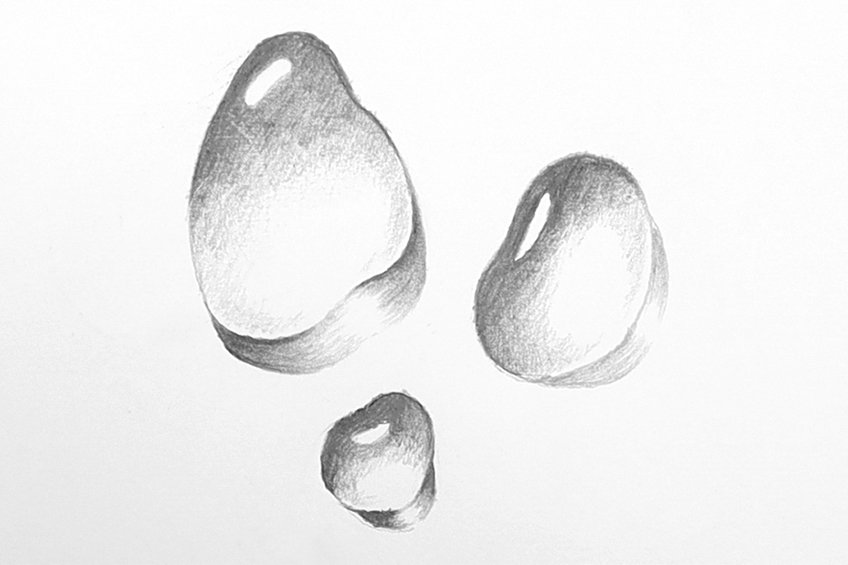
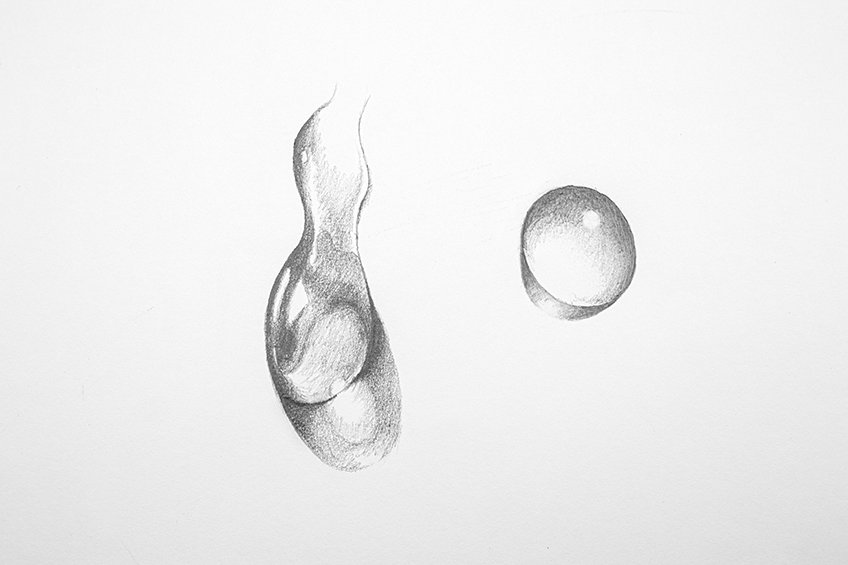
Additional Information on Complex Water Droplet Shapes
Now that you understand the process of drawing realistic water droplets, you can use these techniques to practice and apply them to other shapes. However, some water droplet shapes can be more complex, which can create interesting light and shadow refractions.
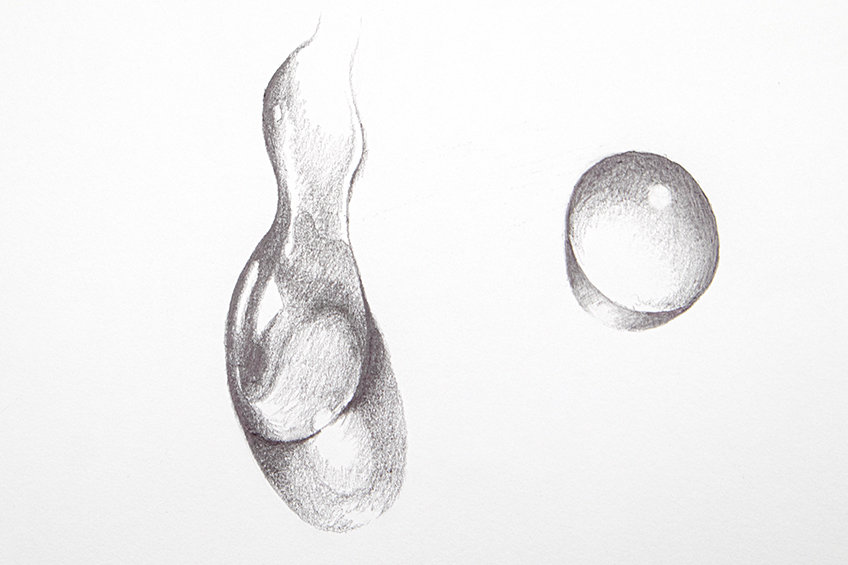
So make sure to use a reference when drawing a non-circular water droplet.
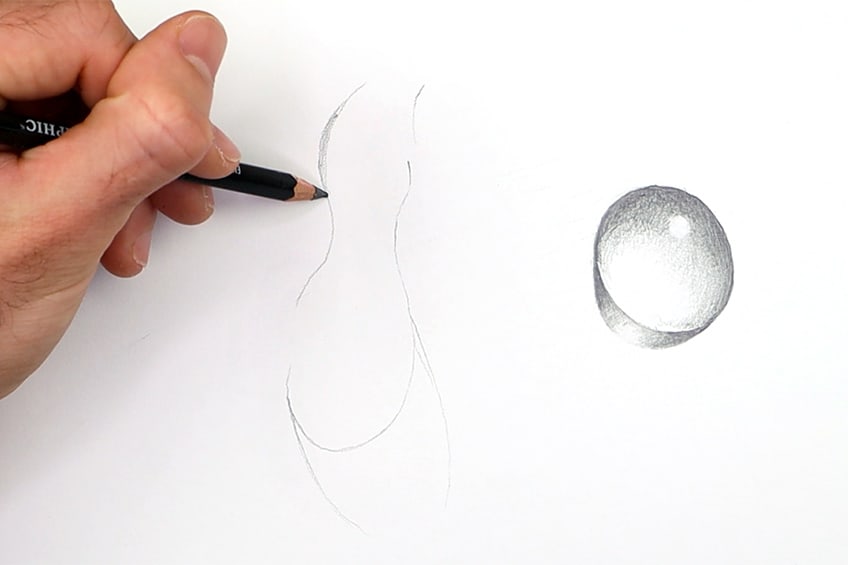
Often, this means that there will be different tonal variations as the droplet distorts the surfaces that it interacts with. This can create sharp lines that form within the droplet.
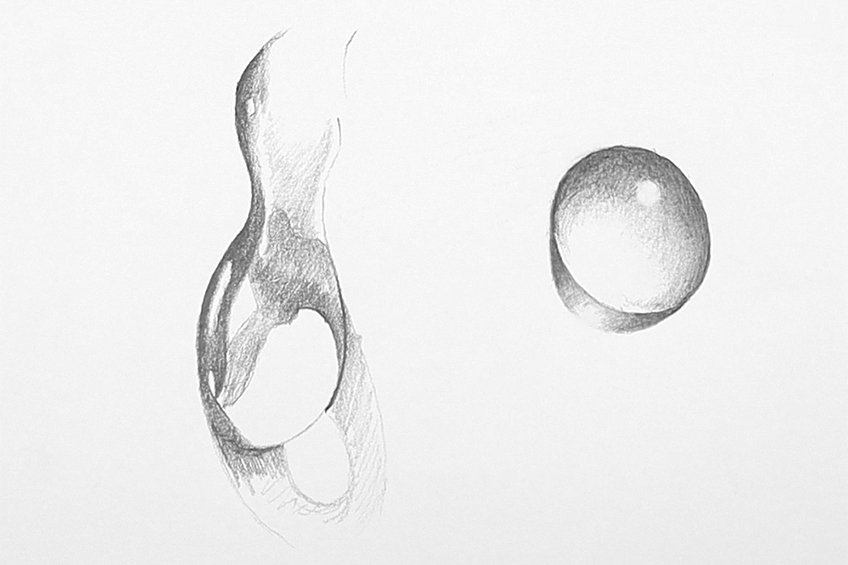
However, the details within the droplet change slightly due to its shape, and that’s where it’s a matter of analyzing water droplets for reference.
Tips to Remember
- Take your time. When learning how to draw something, allow yourself to be patient and work on it. Skills take practice.
- Make your shading seamless. Water drops don’t have any edges or hard surfaces, which means you want to have your shading transitions as smooth as possible.
- Light refracts in water droplets. Remember, that means that the position of the light is different from that of solid objects as it moves through the object.
- Have fun! Most importantly, enjoy learning how to create the light and shadow effect in a water drop drawing.
Learning how to draw water drops is quite simple, however, it requires some preliminary research and investigation into light and shadow within the structure of water droplets. Once you understand how light and shadows form in water droplets you will have a more efficient drawing process for creating a realistic water droplet. From there exploring different forms and shapes in your water drop drawings will become second nature as you come to understand how to represent shadow and light in each water drop.
Frequently Asked Questions
How to Capture Shadow in a Water Droplet Drawing?
A water droplet drawing is strange because it is not a solid object. This means that the refraction of light within the water droplet makes the water drop cast shadows strangely. The shadows in a water droplet can be formed in all sorts of ways, most important thing to remember is that there is a shadow that faces toward the light source. This means that there is a shadow on the side of the droplet near the light source and there is a shadow on the opposite side of the droplet away from the light source. Since a water droplet is a transparent object light shines directly through, but it also distorts the shadow. To achieve this quality, you create shadows around both sides of the droplet. One that is seen through the droplet and one along the side of the droplet that is cast by the droplet.
How to Capture Light in a Water Droplet Drawing?
When drawing a realistic water droplet, you want to consider that light is being refracted through the droplet. This means that we will see a light source create shine on the surface of the droplet by creating a light spot on one side. We will also create light inside the droplet by the seamless transition of shading from shadow to light. This means that the water droplet has light reflecting off its surface as well as the light that penetrates the droplet and moves through the droplet. Light moves through a droplet unlike solid objects, where it has to move around the object. The same works for shadow which is why we see shadow and light on both sides of a water droplet.
How to Draw Different Water Droplet Shapes?
You can play around with different shapes by looking at the form of different water drops. Bear in mind, that the best way to capture these qualities in a realistic water droplet drawing is by researching how waterdrops form on surfaces. This means you want to keep the rounded bubble-like quality that is natural to the form of water droplets. From there it’s a matter of achieving the light and shadow within and around the water droplet itself. Learning how to draw a drop of water in different shapes is also a great way to upskill yourself and develop your knowledge of light and shadow within a drawing context.
Matthew Matthysen is an educated multidisciplinary artist and illustrator. He successfully completed his art degree at the University of Witwatersrand in South Africa, majoring in art history and contemporary drawing. The focus of his thesis was to explore the philosophical implications of the macro and micro-universe on the human experience. Matthew uses diverse media, such as written and hands-on components, to explore various approaches that are on the border between philosophy and science.
Matthew organized various exhibitions before and during his years as a student and is still passionate about doing so today. He currently works as a freelance artist and writer in various fields. He also has a permanent position at a renowned online gallery (ArtGazette) where he produces various works on commission. As a freelance artist, he creates several series and successfully sells them to galleries and collectors. He loves to use his work and skills in various fields of interest.
Matthew has been creating drawing and painting tutorials since the relaunch in 2020. Through his involvement with artincontext.org, he has been able to deepen his knowledge of various painting mediums. For example, watercolor techniques, calligraphy and lately digital drawing, which is becoming more and more popular.
Learn more about Matthew Matthysen and the Art in Context Team.
Cite this Article
Matthew, Matthysen, “How to Draw a Water Drop – Steps to Create a Realistic Water Droplet.” Art in Context. July 5, 2022. URL: https://artincontext.org/how-to-draw-a-water-drop/
Matthysen, M. (2022, 5 July). How to Draw a Water Drop – Steps to Create a Realistic Water Droplet. Art in Context. https://artincontext.org/how-to-draw-a-water-drop/
Matthysen, Matthew. “How to Draw a Water Drop – Steps to Create a Realistic Water Droplet.” Art in Context, July 5, 2022. https://artincontext.org/how-to-draw-a-water-drop/.


