How to Draw Flowers – A Step-by-Step Guide for Simple Flower Drawings
For many years, artists and botanists have studied flowers and practiced the art of drawing flowers to capture all their intricate details and characteristics. Flower drawing is a popular subject amongst beginner and professional artists. Learning how to draw flowers can be very easy and fun! In this tutorial, you will learn the basics of how to draw flowers; their petals, buds, leaves, and stems, as well as create a variety of eight simple flower drawings.
Table of Contents
- 1 Flowers in Art
- 2 Our Flower Drawing Tutorials
- 3 How to Draw Flowers: List of Tools and Materials
- 4 How to Draw Flowers: Observing the Flower
- 4.1 Step 1: Create Three Circles with a Pencil and a Compass
- 4.2 Step 2: Draw a Small Circle in the Center of Your First Circle
- 4.3 Step 3: Divide Your Circle into Five Equal Parts
- 4.4 Step 4: Divide Your Second Circle into Five Equal Parts and Add the Petals
- 4.5 Step 5: Follow Steps Three to Four for Your Third Circle and Add More Details
- 4.6 Step 6: Begin Drawing with Pen
- 4.7 Step 7: Practice Drawing Flower Blossoms, Buds, Leaves, and Stems
- 4.8 Step 8: Combine the Above Steps to Create a Drawing of a Flower Branch
- 4.9 Step 9: Add Color to Your Flower Drawing
- 5 How to Draw Flowers: Eight Simple Flower Drawings
- 5.1 Drawing a Poppy Flower
- 5.1.1 Step 1: Create a Frame Using a Pencil
- 5.1.2 Step 2: Sketch in the Stem and Basic Flower Shape
- 5.1.3 Step 3: Add the Petals to Your Poppy Flower
- 5.1.4 Step 4: Begin Outlining Your Flower Sketch with a Pen
- 5.1.5 Step 5: Erase the Pencil Lines and Continue Adding More Detail and Texture
- 5.1.6 Step 6: Add Color
- 5.2 Drawing a Rose Flower
- 5.2.1 Step 1: Create a Frame Using a Pencil
- 5.2.2 Step 2: Sketch in the Stem and Basic Flower Shape
- 5.2.3 Step 3: Add the Petals to Your Rose Flower
- 5.2.4 Step 4: Begin Outlining Your Flower Sketch with a Pen
- 5.2.5 Step 5: Erase the Pencil Lines and Continue Adding More Detail and Texture
- 5.2.6 Step 6: Add Color
- 5.3 Drawing a Sunflower
- 5.3.1 Step 1: Create a Frame Using a Pencil
- 5.3.2 Step 2: Sketch in the Stem and Basic Flower Shape
- 5.3.3 Step 3: Add the Petals to Your Sunflower
- 5.3.4 Step 4: Begin Outlining Your Flower Sketch with a Pen
- 5.3.5 Step 5: Erase the Pencil Lines and Continue Adding More Detail and Texture
- 5.3.6 Step 6: Add Color
- 5.4 Drawing a King Protea Flower
- 5.4.1 Step 1: Create a Frame Using a Pencil
- 5.4.2 Step 2: Sketch in the Stem and Basic Flower Shape
- 5.4.3 Step 3: Add Lateral Lines to Your Protea
- 5.4.4 Step 4: Begin Outlining Your Flower Sketch with a Pen
- 5.4.5 Step 5: Erase the Pencil Lines and Continue Adding More Detail and Texture
- 5.4.6 Step 6: Add Color
- 5.5 Drawing Lavender
- 5.5.1 Step 1: Create a Frame Using a Pencil
- 5.5.2 Step 2: Sketch in the Stem and Basic Flower Shape
- 5.5.3 Step 3: Add Fine Petals to Your Lavender Flower
- 5.5.4 Step 4: Begin Outlining Your Flower Sketch with a Pen
- 5.5.5 Step 5: Erase the Pencil Lines and Continue Adding More Detail and Texture
- 5.5.6 Step 6: Add Color
- 5.6 Drawing a Hydrangea Flower
- 5.6.1 Step 1: Create a Frame Using a Pencil
- 5.6.2 Step 2: Sketch in the Stem and Basic Flower Shape
- 5.6.3 Step 3: Add the Petals to Your Hydrangea Flower
- 5.6.4 Step 4: Begin Outlining Your Flower Sketch with a Pen
- 5.6.5 Step 5: Erase the Pencil Lines and Continue Adding More Detail and Texture
- 5.6.6 Step 6: Add Color
- 5.7 Drawing Tulip Flowers
- 5.7.1 Step 1: Create a Frame Using a Pencil
- 5.7.2 Step 2: Sketch in the Stem and Basic Flower Shape
- 5.7.3 Step 3: Add the Petals to Your Tulip Flower
- 5.7.4 Step 4: Begin Outlining Your Flower Sketch with a Pen
- 5.7.5 Step 5: Erase the Pencil Lines and Continue Adding More Detail and Texture
- 5.7.6 Step 6: Add Color
- 5.8 Drawing a Cosmos Flower
- 5.8.1 Step 1: Create a Frame Using a Pencil
- 5.8.2 Step 2: Sketch in the Stem and Basic Flower Shape
- 5.8.3 Step 3: Add the Petals to Your Cosmos Flower
- 5.8.4 Step 4: Begin Outlining Your Flower Sketch with a Pen
- 5.8.5 Step 5: Erase the Pencil Lines and Continue Adding More Detail and Texture
- 5.8.6 Step 6: Add Color
- 5.1 Drawing a Poppy Flower
- 6 Frequently Asked Questions
Flowers in Art
Flowers often feature as the primary subject within formal themes of still-life, which challenges artists to create balanced compositions. Flowers are also iconic symbols of playing in nature from childhood. Making a flower sketch may have been one of the first doodles or drawings you may have created as a child.
This just goes to show how easy it can be to draw flowers!
Our Flower Drawing Tutorials
- Tulip Drawing
- Hydrangea Drawing
- Lily Flower Drawing
- Poppy Flower Drawing
- Orchid Drawing
- Magnolia Flower Drawing
- Hibiscus Flower Drawing
- Calla Lily Drawing
- Lotus Flower Drawing
- Peony Flower Drawing
- Daffodil Drawing
- Dandelion Drawing
- Daisy Flower Drawing
- Sunflower Drawing
- Cherry Blossom Drawing
- Forget-me-now Flower Drawing
- Carnation Flower Drawing
How to Draw Flowers: List of Tools and Materials
Before you begin, there are a few important tools and materials you will need to gather. Although this tutorial uses a variety of media, you are encouraged to simply use what you have available to create a unique flower sketch.
List of Materials
- Your choice of paper
- Pencils
- Eraser
- Compass
- Pens of your choice
- Watercolor pencils
- Paintbrushes and water container
- Painting palette
- Ruler
- Masking tape
How to Draw Flowers: Observing the Flower
Flowers can be viewed as simple shapes, triangles, circles, and curves. Flowers have intelligence which occurs through symmetry and repetition. This means we can break flowers down into simple shapes, forms and patterns.
In this section, we will look at how to draw a flower blossom, as well as learn how to start adding finer details and colorwork to your flower sketch.
Step 1: Create Three Circles with a Pencil and a Compass
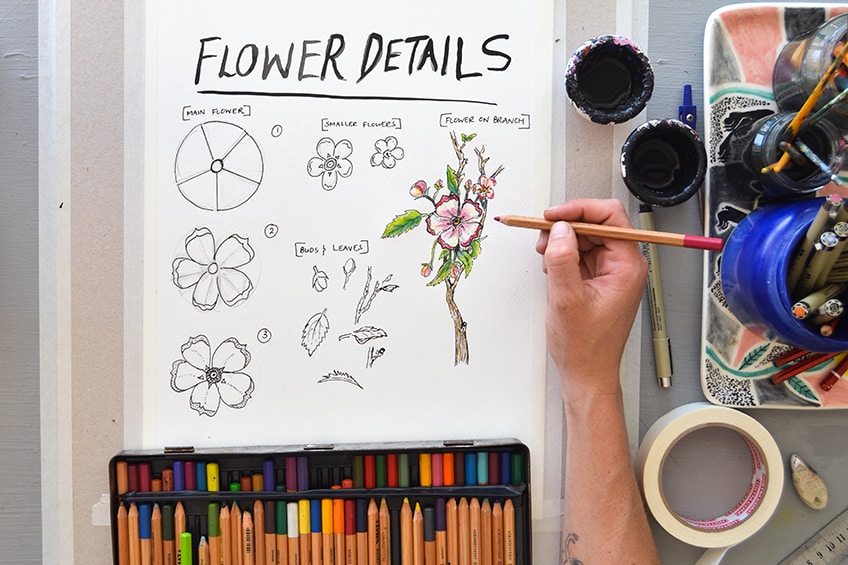
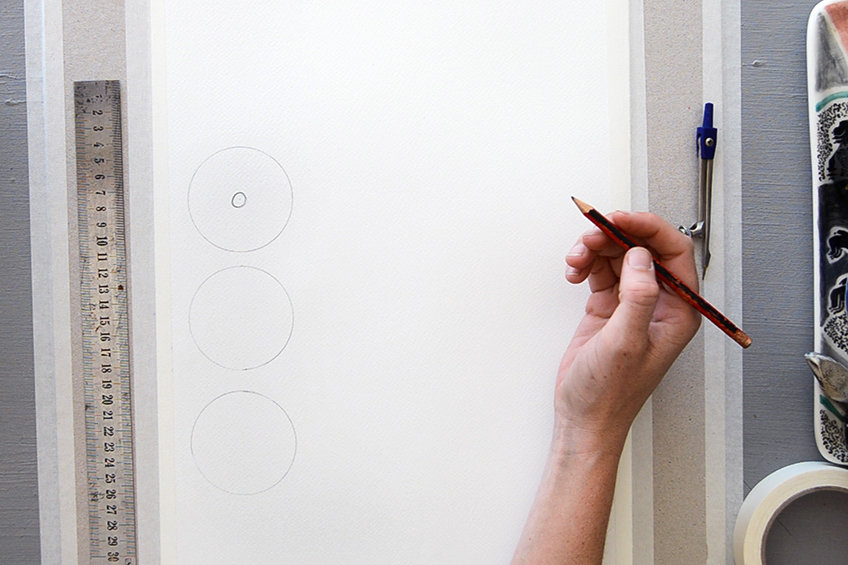
Begin learning how to draw flowers by drawing three identical circles with a pencil and compass on paper. These circles can be placed anywhere on your working page. In this tutorial, the artist has placed them directly below one another to show the process of how the general form and shape of the flower can come together.
If you do not have a compass, do not be afraid to try your go at freehand – you can do it!

Step 2: Draw a Small Circle in the Center of Your First Circle
Next, draw a small circle in the center of one of your circles. This will represent the pistil of the flower, which is based at the heart of the flower. It is not important to know every part of the flower, but it is necessary to know which parts of your flower are important to include.
Step 3: Divide Your Circle into Five Equal Parts
In the same working circle, draw five lines of equal width apart to create five segments. Dividing the circle in this way will help you place the basic foundation work for your petals.

Step 4: Divide Your Second Circle into Five Equal Parts and Add the Petals
Next, start working into your second circle. Segment your circle into five equal parts, as done previously, and begin adding each petal within the space of the circle and its segments. Observe the shape of your flower’s petals; are they curved at the tips or pointed?
Once you have added five petals to your flower sketch, you will start to see your flower drawing start coming together.
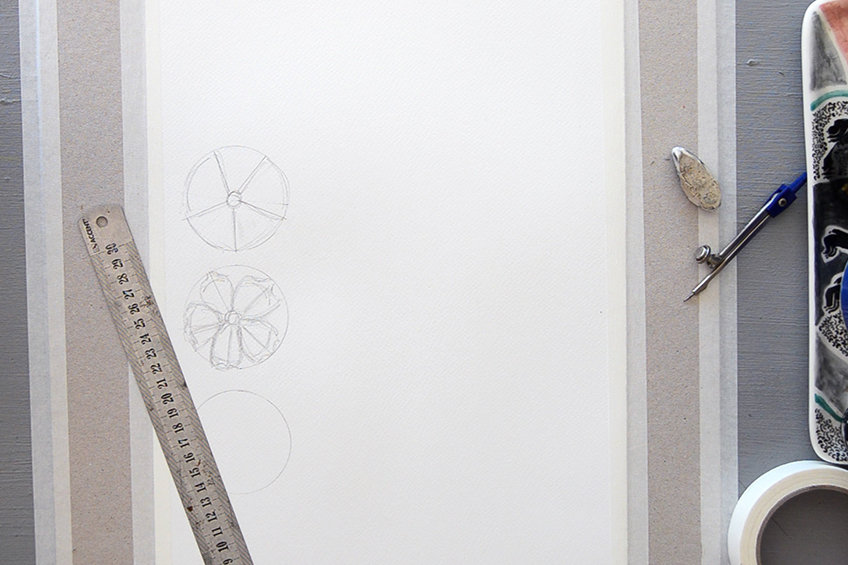
Step 5: Follow Steps Three to Four for Your Third Circle and Add More Details
Follow steps three to four for the third circle. Then, add more detail to the center of the flower with a pencil, working towards the textures and lines of the petals. Once you have these foundations down, you will discover a consistent pattern that you can apply to most of your flower sketches.
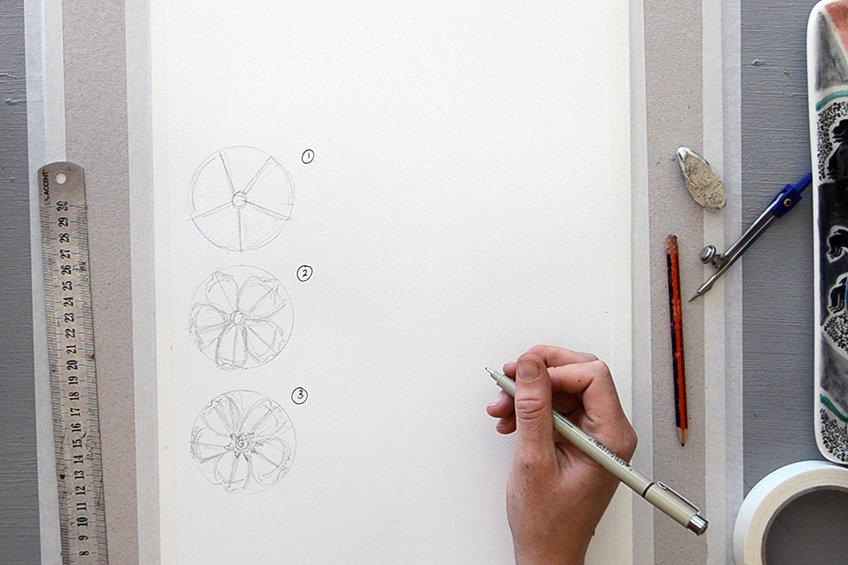
Step 6: Begin Drawing with Pen
Using a pen, or marker, fill in your linework to make your practicing flower sketch permanent. Using a pen will help create striking details, as well as assist when creating texture and tonalities between light and dark.
If you do not have a pen, you are encouraged to continue experimenting with different pencils.
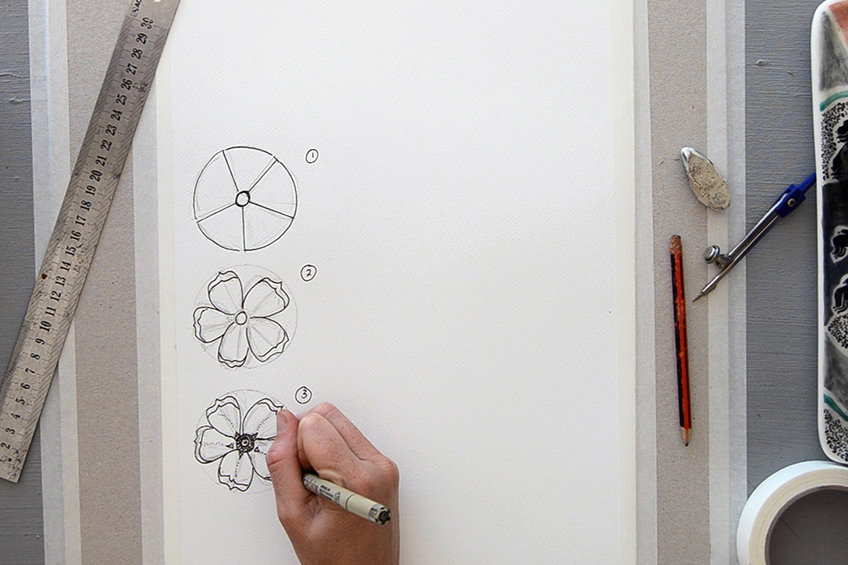
Step 7: Practice Drawing Flower Blossoms, Buds, Leaves, and Stems
By now, you should be relatively warmed up and ready to start observing other parts of the flower. Try drawing a few flower blossoms free hand. Then begin studying the buds, leaves, and stems of your flower.

Step 8: Combine the Above Steps to Create a Drawing of a Flower Branch
Now is the time to test the steps you learned above to create a free-form flower drawing. This includes the flower and its buds, leaves, and stems. Begin by working on the foreground sections first. Work towards the background sections last.
These include the leaves peeking out behind the blossoms or stems that are hidden by leaves.
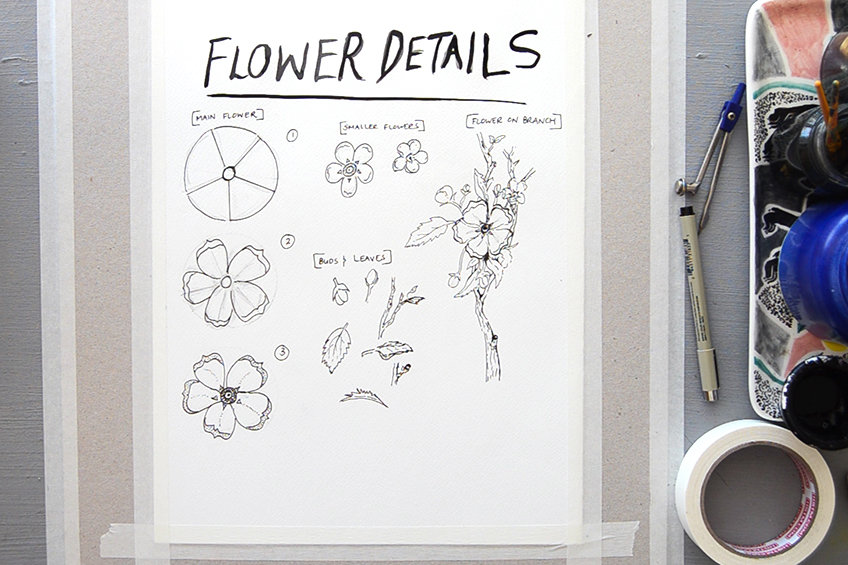
Step 9: Add Color to Your Flower Drawing
This is where your flower really comes to life! If you are working with pencils, watercolors, or markers, it is important to first observe the color palette that exists within your flower. Begin adding light layers of color to your flower blossom first, working towards the leaves and stem.
Continue working in the layers until you are happy with your flower sketch.

How to Draw Flowers: Eight Simple Flower Drawings
Now that you have had a little bit of practice with getting to know the shapes and forms that exist within flowers, you can apply your newly learned skills from above to create a variety of eight different types of flower drawings.
By following six easy steps, you can start creating a range of eight flower drawings.
Drawing a Poppy Flower
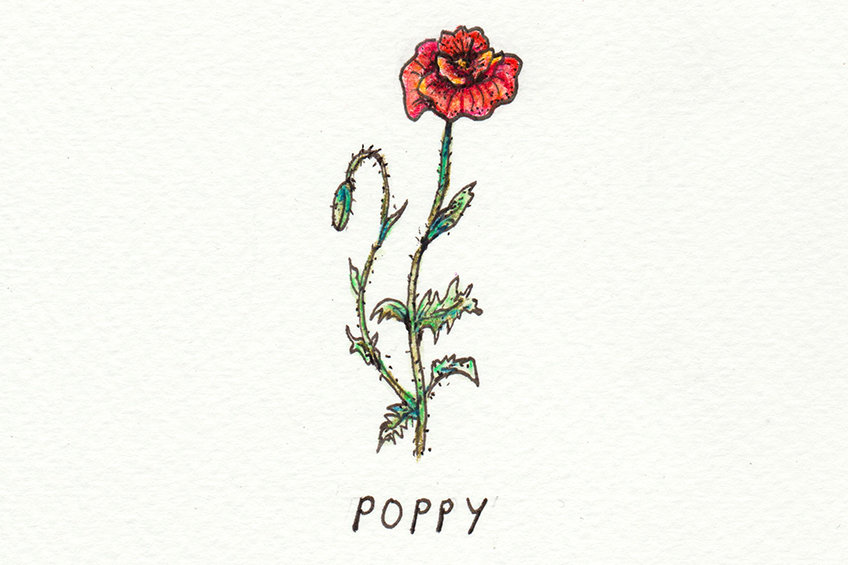
The very first flower we will learn how to draw is a poppy. Poppies are known for their brilliance in red and their symbolism of remembrance. Although they may seem a bit complicated, they are really easy to draw!
Step 1: Create a Frame Using a Pencil
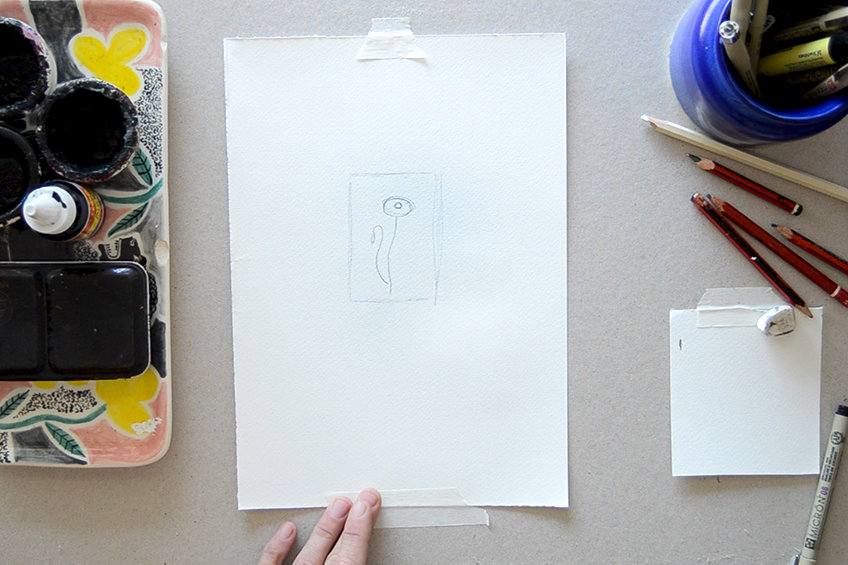
Create a frame with a pencil to format the placement of your flower drawing. This will help you decide how to crop and frame your flower composition.
Step 2: Sketch in the Stem and Basic Flower Shape
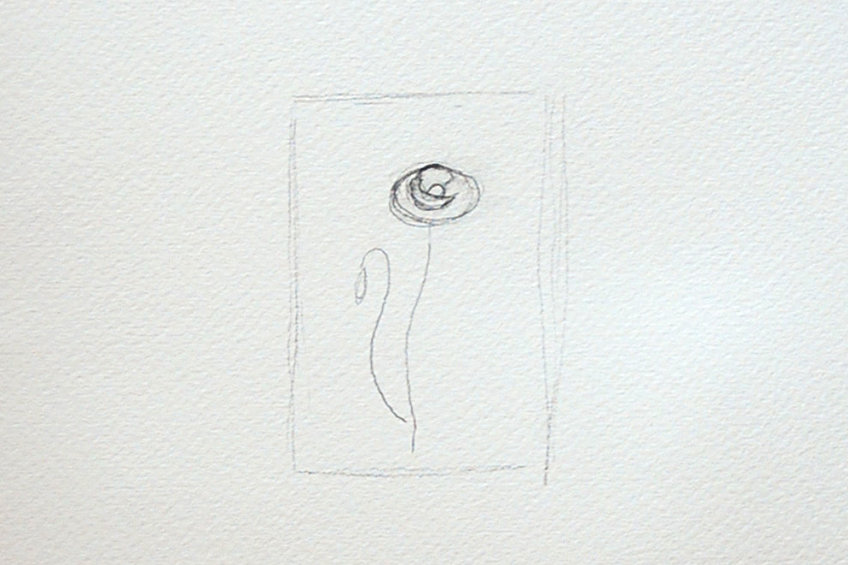
Create a rough outline of the poppy’s stem and flower. Mark the center of the poppy flower with an oval shape. Think of the way poppies tend to blow in the wind. They are bouncy and buoyant, yet fragile.
Try to capture these characteristics in the way the flower sits on top of the stem, as well as the way the stem curves.
Step 3: Add the Petals to Your Poppy Flower
From the oval shape at the center, start outlining the first petals. There should be four main petals that create the defining folds of the poppy.
Step 4: Begin Outlining Your Flower Sketch with a Pen
Start finalizing your flower by outlining your pencil work with a pen. Begin with the poppy’s petals first. Notice that their petals are soft and wavy. Try to capture this characteristic of the poppy’s petals.
Work downwards towards your stem and leaves.

Step 5: Erase the Pencil Lines and Continue Adding More Detail and Texture
Remove any existing pencil lines and planning with an eraser. Begin adding more detail and texture to your poppy drawing by working into the lines and shadows created by the petals. Add more detail by adding tiny veins to the leaves and fine hairs to the stem.
Step 6: Add Color
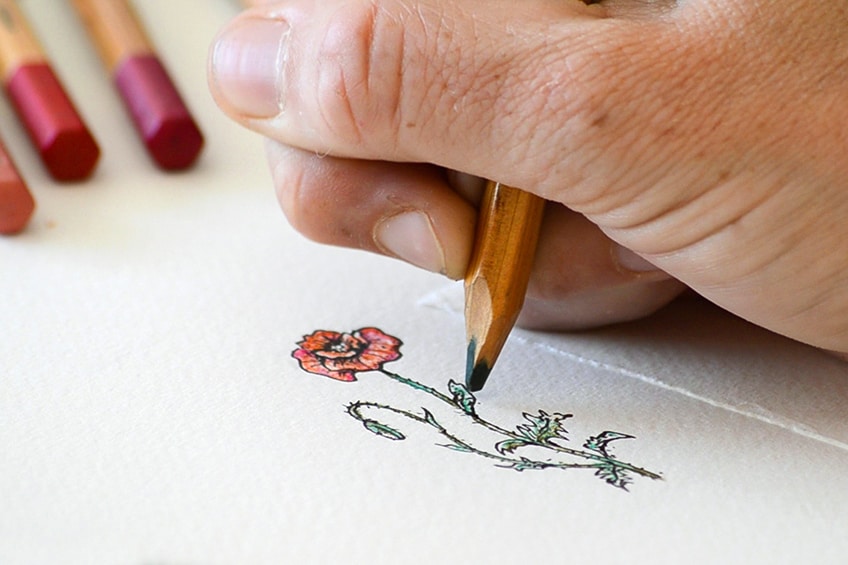
This has got to be the most satisfying part of bringing your flower drawing to life! Using pencils, watercolors or markers, begin adding soft layers of color to your flower starting with the petals. Work downwards towards the stem and leaves.
Keep adding layers of color until the initial flower sketch is full of vibrancy.
Drawing a Rose Flower
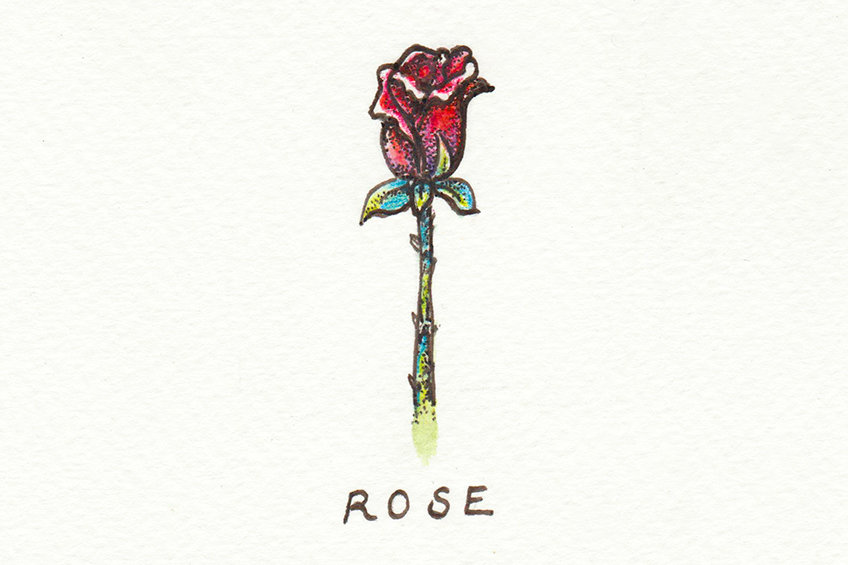
There is no doubt about it – roses must be some of the most iconic flowers. The rose represents a multitude of feelings and emotions. The beauty and essence of this flower are truly unique, which makes it a popular subject for artists.
Step 1: Create a Frame Using a Pencil
Create a frame with a pencil to format and place your flower composition. This will help you plan your flower sketch.
Step 2: Sketch in the Stem and Basic Flower Shape
Start by creating a rough outline of the rose. The flower holds a bud- or bell-like shape, so make sure to capture the form of your flower just right. Add your stem and then place a small circle at the top of the flower to center the budding petals.
This will be the point from which you create the unfolding petals.

Step 3: Add the Petals to Your Rose Flower
Start by placing the foreground petals on your flower sketch. Then add the details centering around the middle of the rosebud. Work downwards towards placing the bottom leaves.

Step 4: Begin Outlining Your Flower Sketch with a Pen
Start finalizing your flower by outlining your pencil work with a pen. Begin with the rose’s petals first, then work downwards towards your stem and leaves. Do not hold back on creating bold and contrasting lines.
However, be sure to start small and loose.

Step 5: Erase the Pencil Lines and Continue Adding More Detail and Texture
Once your pen outlines have dried, remove any existing pencil lines and planning with an eraser. Begin adding more detail and texture to your rose drawing by placing marks and lines in the shadows created by the petals.
Add more detail to the leaves and stems by adding veins to the leaves and fine hairs to the stem.
Step 6: Add Color
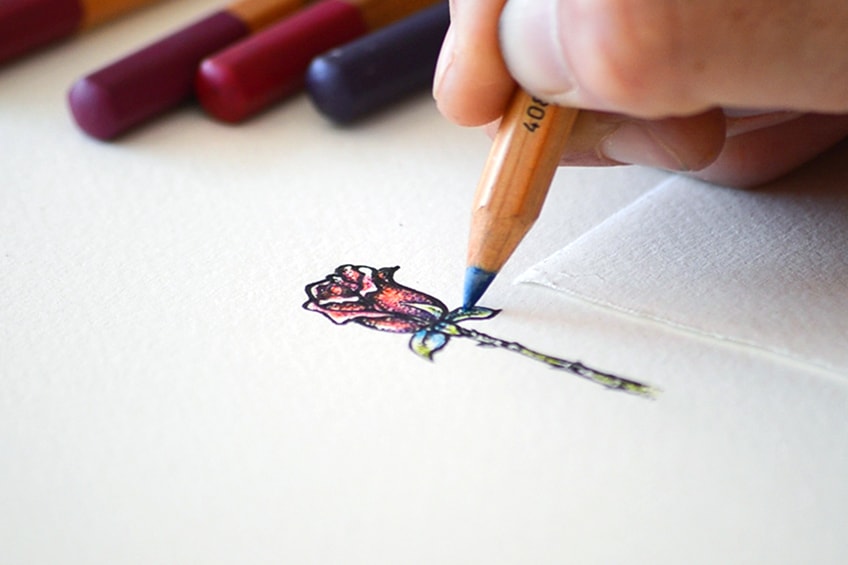
Using pencils, watercolors or markers, begin adding soft layers of color to your poppy flower, starting with the petals. Work downwards towards the stem and leaves. Add layers of color until the initial flower drawing is full of vibrancy.
Once you are happy with your color palette for your flower drawing, you can begin adding washes of water with a fine paintbrush to activate the watercolor in the pencils.
Drawing a Sunflower
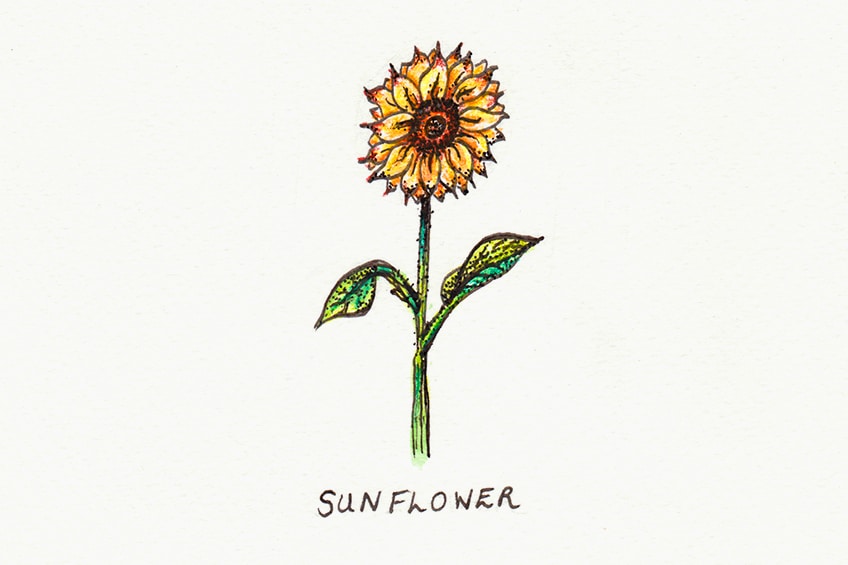
Drawing sunflowers is popular amongst famous artists for its robust nature and vibrancy. Sunflowers are radiant and happy flowers that are well-recognized for the warm energy they spread.
Step 1: Create a Frame Using a Pencil
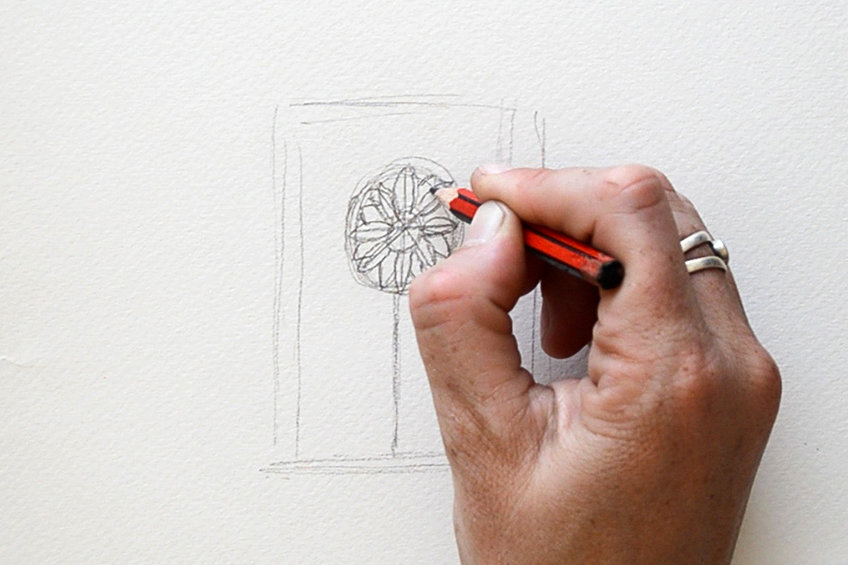
Create a frame with a pencil. This will help format the basic composition of your flower drawing. Start small, but do not be afraid to go big with practice!
Step 2: Sketch in the Stem and Basic Flower Shape
Next, start by drawing in the stem of your sunflower. Sunflowers tend to have very sturdy, straight stems so make sure to capture this strong form. Create the basic flower shape by drawing an accurate circle of the total size of the sunflower’s head. Add another circle in the middle to create the pistil in the center. Next, divide the sunflower into eight sections as shown in the video tutorial.
This will create the foundations for planning the placement of your petals.

Step 3: Add the Petals to Your Sunflower
First, make sure your segments are all equal. Then, begin adding the petals over each line within the outer circle to create eight sunflower petals. Once you have these placed, you can begin adding more petals peeking behind the main petals to complete the flower and give it more dimension.
It is suggested to follow the video tutorial to get a better idea of how to plan your flower before adding pen work.
Step 4: Begin Outlining Your Flower Sketch with a Pen
Start finalizing your sunflower by outlining your pencil work with a pen. Begin with the flower and its petals first. Next, work on the leaves, creating a rough texture along the stem.

Step 5: Erase the Pencil Lines and Continue Adding More Detail and Texture
Erase unnecessary pencil lines. Add more detail and texture to your sunflower sketch with a pen by working into the lines and shadows created by the petals.
Add more detail to the leaves and a fuzzy texture to the stems.
Step 6: Add Color
Begin adding soft layers of color to your flower starting with the petals. You can use pencils or watercolors. Keep adding layers of color until it is full of vibrancy.
You can begin adding light washes of water with a fine paintbrush.

Drawing a King Protea Flower
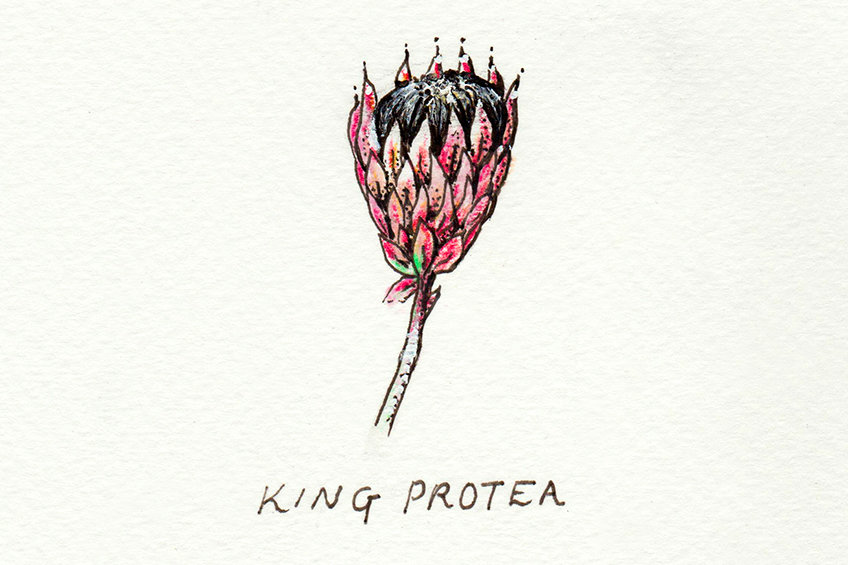
If you have ever heard of a protea, you are most likely already a big fan of these incredibly beautiful plants. Proteas are endemic to South Africa and are completely unique for their root system which survives and thrives in soil with very little nutrients. They require wildfires to seed and bloom abundantly in the Western Cape of South Africa.
Step 1: Create a Frame Using a Pencil
Create a frame with a pencil to format the placement of your flower drawing. If you are a beginner, start small but do not be afraid to go big!
Step 2: Sketch in the Stem and Basic Flower Shape
Sketch in the shape of your flower’s head. The King Protea has a large cup-like shape. Next, sketch the thick stem.
Then, add a semicircle at the center of the top of the flower’s cup.
Step 3: Add Lateral Lines to Your Protea
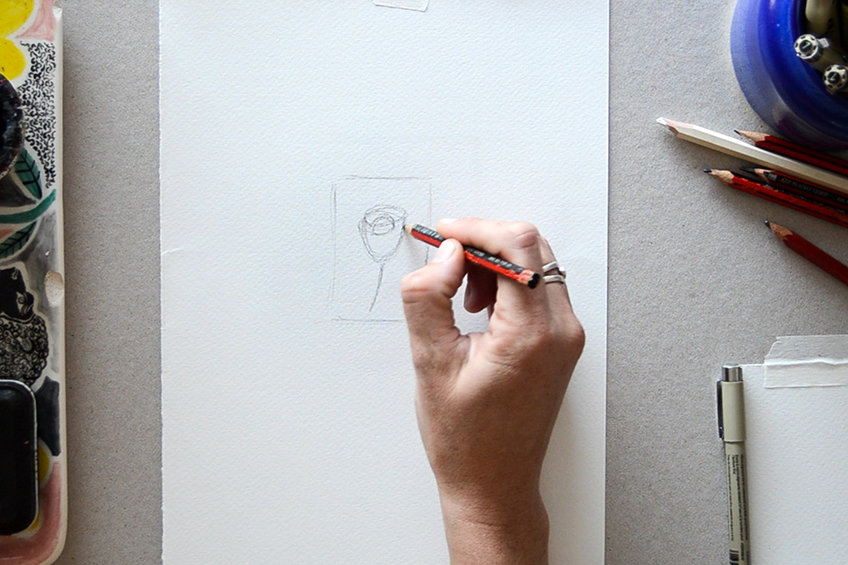
Add some curved, lateral lines that run horizontally along the front side of the protea. Placing this structure will help greatly when building up the layers of petals to your protea.
Step 4: Begin Outlining Your Flower Sketch with a Pen
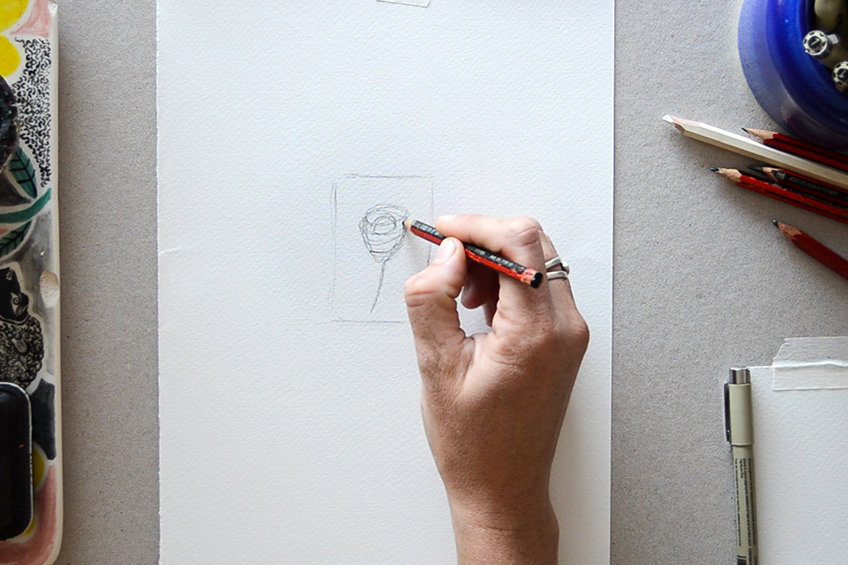
Start finalizing your protea’s petals and leaves by outlining your pencil work with a pen. Begin with the petals first. Then, add fuzzy texture to the flower’s center and work downwards towards your stem and leaves.
Step 5: Erase the Pencil Lines and Continue Adding More Detail and Texture
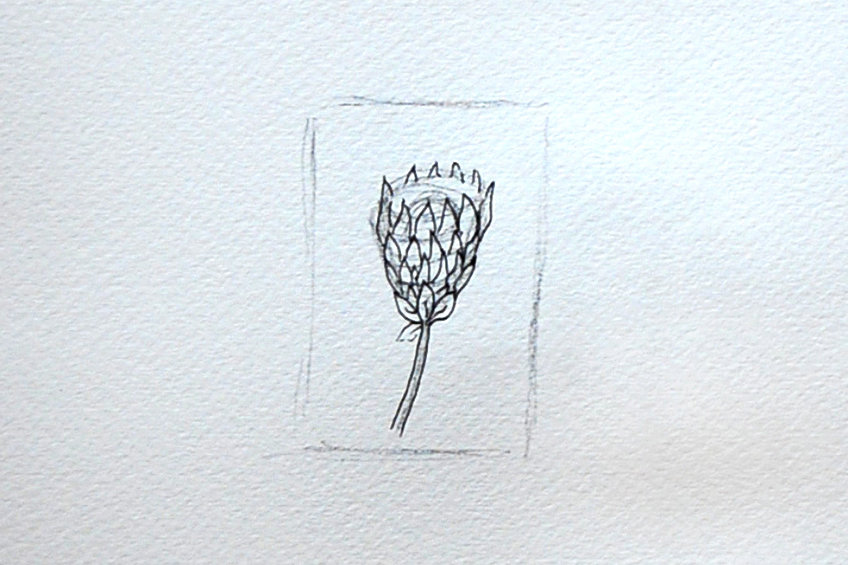
Once your pen outlines have dried, remove any existing pencil lines and planning with an eraser. Begin adding more detail and texture to your flower drawing by adding texture to the thick stem.
Step 6: Add Color
Add washes and layers of color to your protea until you are happy with your color palette for your drawing. If you are using pencils, start with the lighter colors first and work towards including darker tones.
Be careful not to over-work your flower drawing.

Drawing Lavender
Lavender flowers represent a certain state of calmness and purity. Lavender is medicinal and produces an incredible fragrance that can shift any mood or state of mind.

Step 1: Create a Frame Using a Pencil
Create a frame with a pencil to format the placement of your flower drawing. This will assist greatly when deciding how to crop and frame your flower composition.
Step 2: Sketch in the Stem and Basic Flower Shape
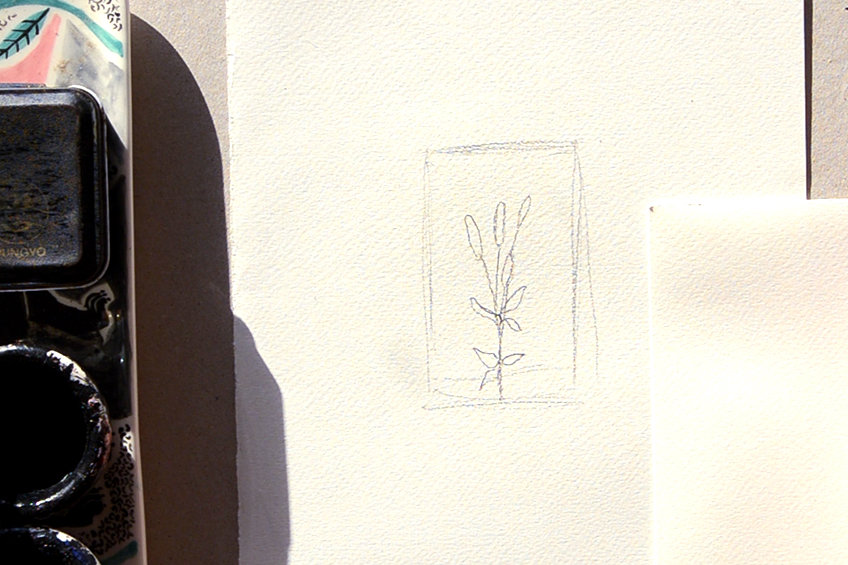
First, sketch the flowers’ shapes. They are elongated buds that sit on thin but strong stems. Once you have placed your flower buds, begin adding the stems and leaves.
Step 3: Add Fine Petals to Your Lavender Flower
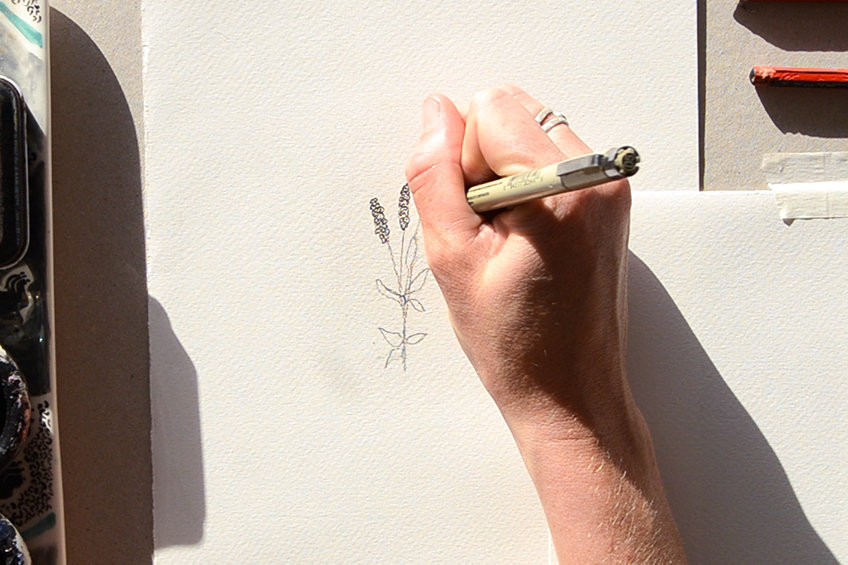
Next, fill your lavender buds with tiny, fine flower petals. If you look closely at a lavender bud, you will notice that it is made up of hundreds of miniature flowers.
You can create interesting shapes and textures by drawing tiny circles and dots within each lavender bud.
Step 4: Begin Outlining Your Flower Sketch with a Pen
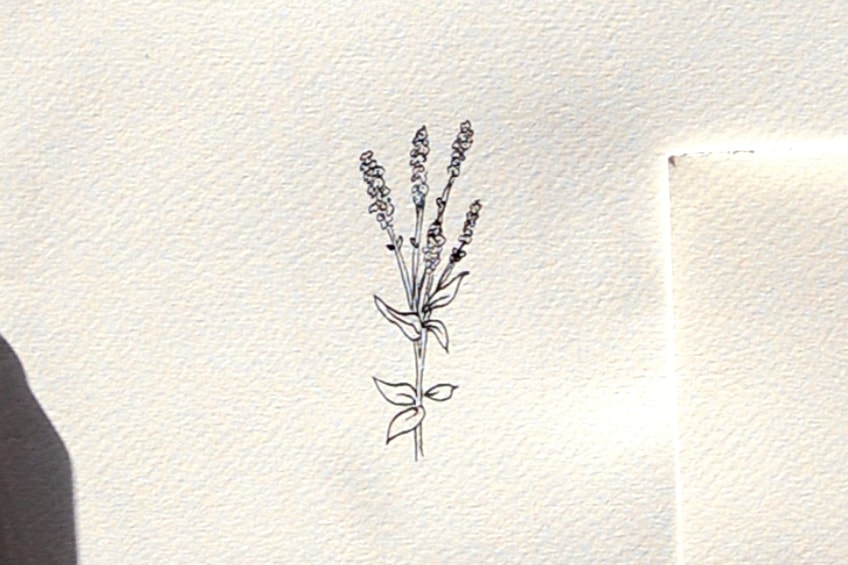
Start finalizing your lavender by outlining your pencil work with a pen. Begin with the flower and its petals first. Create fine lines and details within the lavender bud, then work downwards towards your stem and leaves.
Step 5: Erase the Pencil Lines and Continue Adding More Detail and Texture
Remove any existing pencil lines and planning with an eraser. Begin adding more detail and texture to your lavender drawing. Focus on adding dimension to the flower buds by darkening one side to create depth.
Add the leaves and stems.
Step 6: Add Color
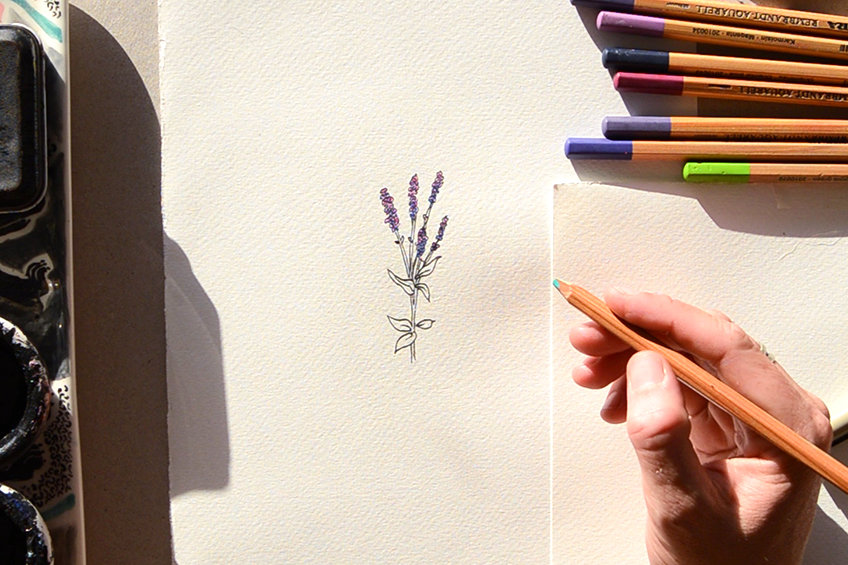
Select your color palette and begin adding color to your lavender drawing. Start with the flower first and work downwards towards the stem and leaves. If you are using watercolor pencils, activate the colors by adding light washes of water over your sketch to make the colors more vibrant.
Drawing a Hydrangea Flower
The hydrangea flower represents grace, beauty, and gratitude. These flowers radiate abundance and regality with all the budding flowers produced on just one main stem.

Step 1: Create a Frame Using a Pencil
Create a basic frame outline with a pencil to format the placement for your flower drawing. This will help center your flower drawing for when you do your planning.
Step 2: Sketch in the Stem and Basic Flower Shape
Begin by drawing one main circle, which will feature the total size of the hydrangea flower. Add the stem at the base of the flower. Next, create an inner circle with a dotted line. Within this smaller circle, mark three points in a triangle with three Xs.
Then place three main flowers over these Xs.

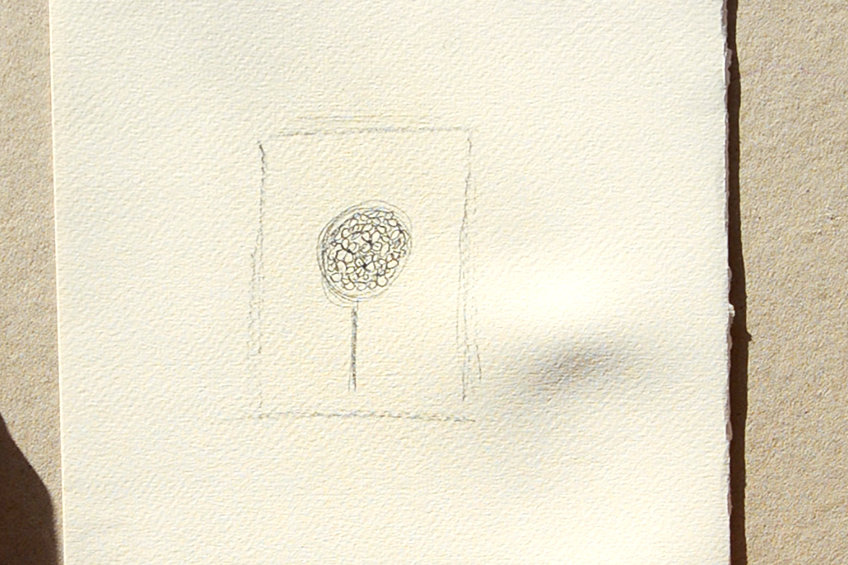
Step 3: Add the Petals to Your Hydrangea Flower
Add more petals to your hydrangea behind these three main flowers. Some of these petals will have different shapes and curves. To give your hydrangea more dimension, make sure to include some petals as though they were being viewed from a side angle.
Step 4: Begin Outlining Your Flower Sketch with a Pen
Start finalizing your hydrangea flower by outlining your pencil work with a pen. Begin with the main three petals first, then add the remaining flowers.
Finally, draw in the stem and leaves.
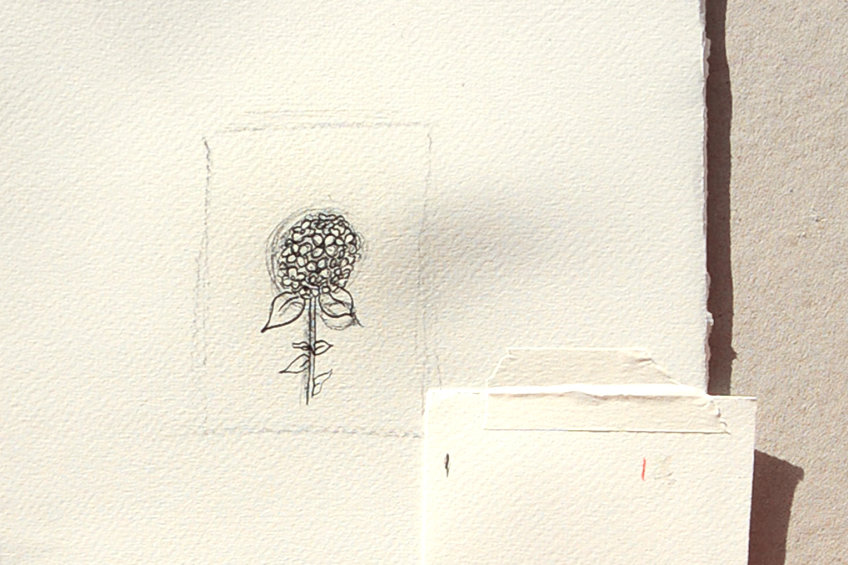
Step 5: Erase the Pencil Lines and Continue Adding More Detail and Texture
Remove any pencil lines with an eraser. Add more detail and texture to your hydrangea drawing. The center of the flower head below the budding flowers should be filled with a pen to make the hydrangea flowers stand out.
Observe the video tutorial for guidance.
Step 6: Add Color
Use pencils, watercolors, or markers to add soft layers of color to your hydrangea flower starting with the petals first. Work downwards towards the stem and leaves. Continue adding layers until your flower is full of color and dimension.
To do this, blend your lighter tones into the darker tones to create the striking color gradients of the hydrangea flower.

Drawing Tulip Flowers
Tulips come in a variety of colors that hold different meanings. They are bold and gorgeous in shape with most varieties being almost perfectly symmetrical. Receiving a single tulip is said to represent perfect love.

Step 1: Create a Frame Using a Pencil
Sketch a frame, or box, with a pencil to format the composition of your flower drawing. This will help greatly while you are planning your tulip drawing.
Step 2: Sketch in the Stem and Basic Flower Shape
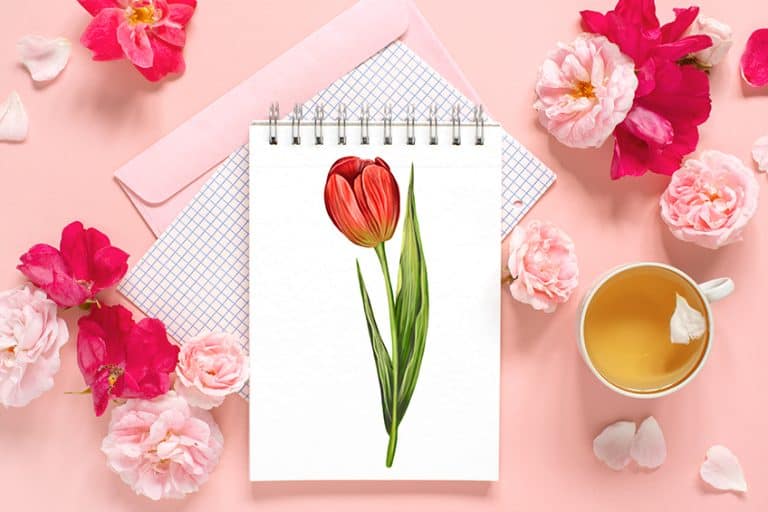
Create the rough outline of the tulip flower in a teardrop shape. Next, observe where the lines fall to create the tightly packed petals of the tulip.

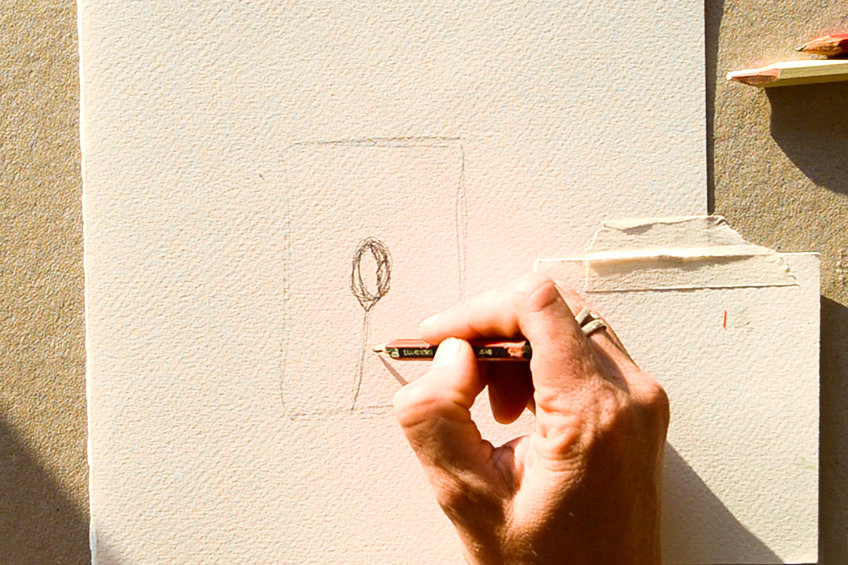
Step 3: Add the Petals to Your Tulip Flower
Place your petals by sketching in the linework that runs alongside the bud of the flower. If your tulip is opening slightly, be sure to sketch the points of the petals as though they are unfolding outwards.
It is recommended to follow the video tutorial here to capture accurate tulip petals.
Step 4: Begin Outlining Your Flower Sketch with a Pen
Finalize your tulip by outlining your planning with a pen. Begin with the petals first, and then work downwards towards your stem and leaves. Tulips are almost always symmetrical, so make sure you have the shape just right before finalizing your drawing.
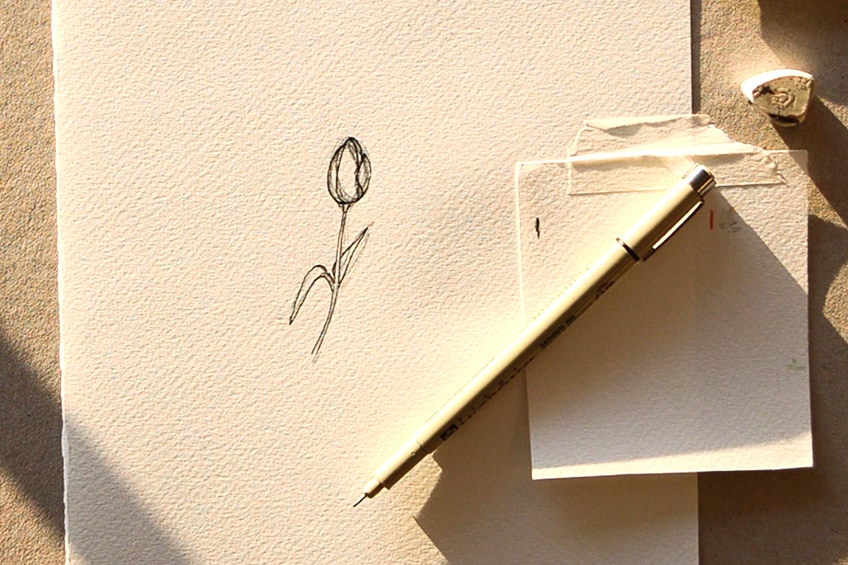
Step 5: Erase the Pencil Lines and Continue Adding More Detail and Texture
Remove any pencil lines with an eraser. Begin adding more detail and texture to your tulip drawing and create a sense of light direction by adding marks and shading to the base of the flower head.
Then add the soft stem and leaves.
Step 6: Add Color
Add soft layers of color to your tulip by starting with the flower head first. Work in the colors of the stem and leaves. Keep adding layers of color until the initial flower sketch is full of vibrancy. If you are using watercolors, you can add washes of water with a fine paintbrush to activate the watercolor in the pencils.
Allow it to dry between layers.

Drawing a Cosmos Flower
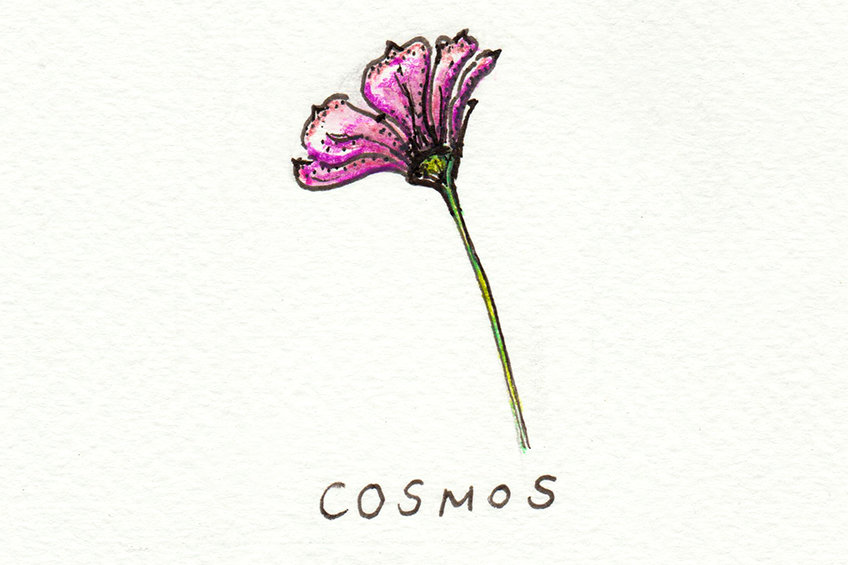
Cosmos flowers are significant for their symbolism of harmony. It makes all the sense when discovering that this flower’s name comes from its orderly petals. Cosmos flowers sit atop long, slender stems which attract all forms of life in nature.
Step 1: Create a Frame Using a Pencil
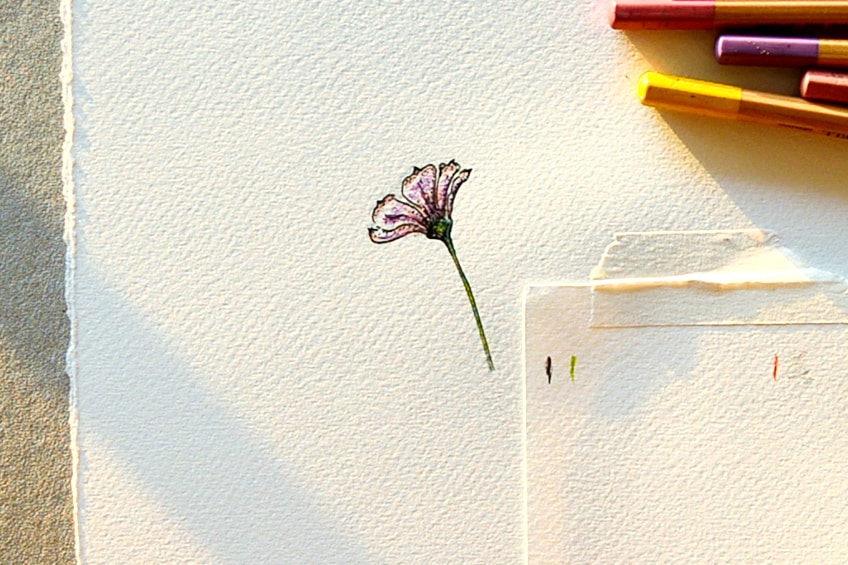
Create a basic sketch of a frame or box with a pencil. This will help you plan the composition of your flower sketch before working into the finer details.
Step 2: Sketch in the Stem and Basic Flower Shape
Sketch in the basic shape of the cosmos flower. The flower head holds a clam- or shell-like shape, so it is important to capture this form before adding petals.
Add a thin line to create the dainty stem.

Step 3: Add the Petals to Your Cosmos Flower
Observe the shape of a cosmos petal and begin adding five to six petals within this clam-like shape. Make sure that each petal is curved and pointed at its ends, and that this shape is filled to the edges of your initial sketch.

Step 4: Begin Outlining Your Flower Sketch with a Pen
Start finalizing your cosmos flower by outlining your pencil work with a pen. Begin with each of the flower’s petals first, then work downwards towards your stem.

Step 5: Erase the Pencil Lines and Continue Adding More Detail and Texture
Remove any lines and pencil marks with an eraser. Add more detail and texture to your flower drawing by adding shading to the base of the cosmos flower.
Continue adding more detail to the leaves and stems.
Step 6: Add Color
Finally, add some vibrancy to your cosmos flower by adding soft layers of color with either pencils, watercolor pencils, or watercolor paint. Once you are happy with your flower drawing, and the range of tonalities and colors created, pack up your materials and observe your beautiful creations!
As you might have discovered in this tutorial, some flowers are easier to draw than others. However, the patterns that exist within flowers can help us identify how to draw flowers as simple shapes and forms. Now that you have a basic understanding of easy flowers to draw, you can continue growing your list of drawings of flowers and observe the beauty of nature.
Frequently Asked Questions
Is It Easy to Create Simple Flower Drawings?
There are a variety of flowers in all shapes and sizes. There is no doubt that some flowers take some close observation and practice to draw, but some flowers can be some of the simplest flower drawings with real character and vibrancy! Some of the easiest flowers to draw are the sunflower, poppy, lavender, or tulip.
Is Drawing a Rose Hard?
Roses are only difficult to draw for the fact that their unfolding petals distract the eye from the flower’s basic shape. A rose is slightly egg-shaped, and the petals unfold around this shape to create. It can be difficult to construct this unfolding shape initially, but by working in layers and following the guidelines above, you will soon be able to capture the perfect rose.

Demi Bucklow is an independent artist and photographer living in Cape Town, South Africa. Since graduating from the University of Cape Town in 2018 from Michaelis School of Fine Art with a degree specializing in fine art photography, she currently works as a freelance artist, content creator and writer. Demi’s particular interests explore a range of multimedia illustration, collage art, photography and videography, darkroom processing and stop-motion animation. Her work is an exploration of nature and its phenomenon – somewhere between art and space.
Artistic practice presents the ability to communicate a vision. It is through techniques of pointillism and realism that form, and substance are explored as a metaphor for matter; super-imposing a thousand marks and points until an image is formed before our eyes. From illustrations to surrealist landscapes, Demi translates corporeality – mixing the obtuse and vacuous with the astute and expressive which leads to a mixture of irrevocable pondering over what is and what could be.
Learn more about the Art in Context Team.
Cite this Article
Demi, Bucklow, “How to Draw Flowers – A Step-by-Step Guide for Simple Flower Drawings.” Art in Context. June 26, 2022. URL: https://artincontext.org/how-to-draw-flowers/
Bucklow, D. (2022, 26 June). How to Draw Flowers – A Step-by-Step Guide for Simple Flower Drawings. Art in Context. https://artincontext.org/how-to-draw-flowers/
Bucklow, Demi. “How to Draw Flowers – A Step-by-Step Guide for Simple Flower Drawings.” Art in Context, June 26, 2022. https://artincontext.org/how-to-draw-flowers/.


