How to Draw Landscapes – Landscape Drawing for Beginners
Landscape drawing for beginners is a great way to learn various skills in a single exercise that enables you to grasp the processes of drawing more deeply. There is various landscape drawing ideas that encompass multiple elements that interact and coexist in the same scene making it a great explorative exercise for drawing. Learning how to represent light and shadow, working with multiple elements, and creating depth are some of the few concepts that will be explored within this tutorial on how to draw a landscape. There are many landscapes to draw but, in this tutorial, we’ll look at how to create a mountain landscape drawing. This landscape drawing will give us the opportunity to explore various drawing techniques and tricks that will teach us to construct a landscape scene.
Table of Contents
A Helpful Guide for Drawing Landscapes
In this tutorial on landscape drawing for beginners, we will be learning how to draw landscapes with a pencil. Pencil drawing is perhaps the most accessible and most important learning experience for artists. Learning how to draw landscapes with pencil gives the artist the opportunity to explore drawing various elements and how they work collectively to make one single landscape sketch. We will learn how to break up the drawing process, which makes the construction of landscape drawing simpler and easier to follow. By the end will have learned various tips and tricks that will help us to refine a simple landscape sketch and turn it into a realistic landscape drawing.
Necessary Materials
In this tutorial, we will be working with a set of very basic tools, as the intention is to understand the fundamental process of drawing a landscape using basic tools. We will be drawing with a pencil, which means we will want to have a decent pencil set. We will also be working with an eraser and a sharpener, to help rectify any silly mistakes we make along the way. We will want to make sure that our pencils are sharp, as this will help to capture finer details for various elements within the drawing. Lastly, we will want to have some good paper, then we should be ready and prepare ourselves for the drawing process. All the materials can be found through the links below:
- Pencil Set
- Eraser
- Sharpener
- Good Paper (200 g/m – 250 g/m recommended)
Step-by-Step Instructions for Landscape Drawing
In this landscape drawing for beginners, we will learn the basic process of drawing a landscape broken up into three main sections; background, midground, and foreground. There are various landscape drawing ideas, however, we will be focusing on how to draw a mountainous landscape that incorporates various elements between the background and the foreground. As we learn how to sketch landscapes, we will go through various ideas to consider as we move from the background to the foreground. Now that we know what to expect, we can get into this tutorial on how to draw landscapes with a pencil.
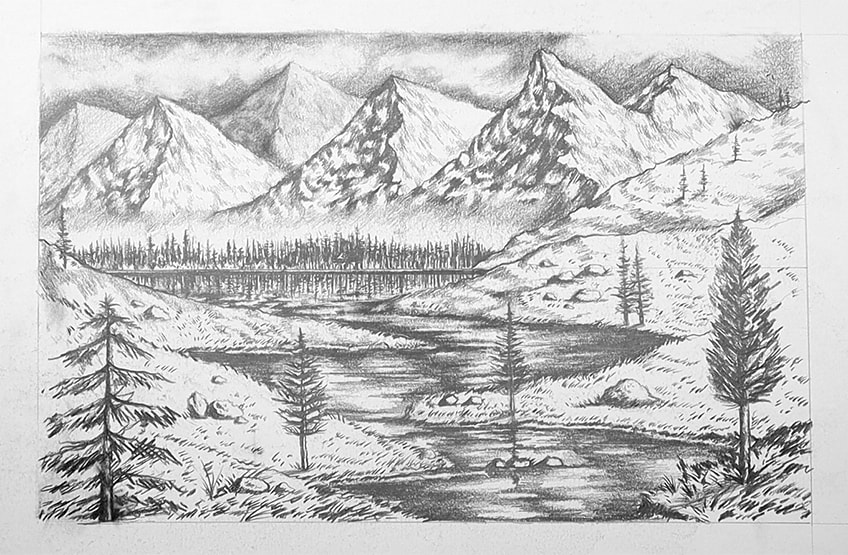
Drawing the Background
With all landscape drawings, perhaps what makes them so beautiful is the depth that they demonstrate. This quality is not difficult to replicate and is more a matter of building the scene from back to front. Once you understand the basic process you can use these skills within your own landscape drawings.
Setting the Scene
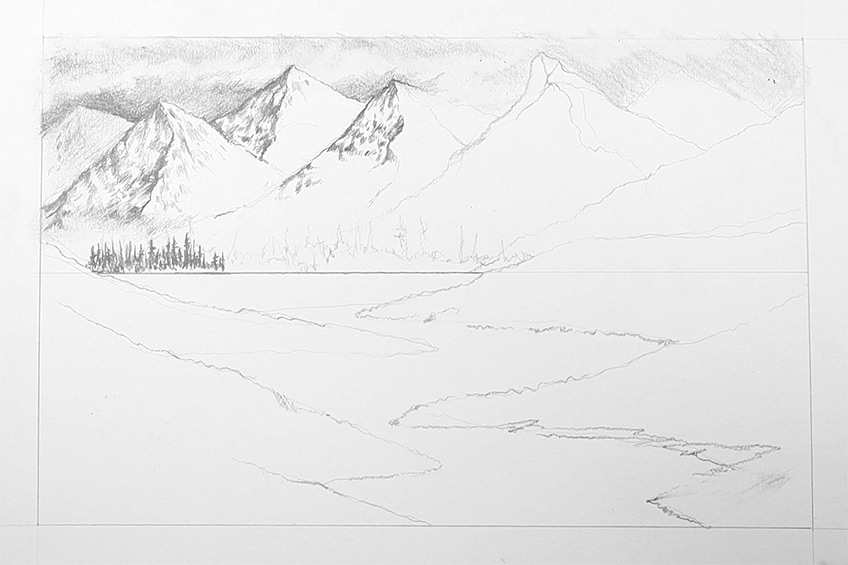
It all starts with setting the scene, which we can do as a basic line sketch. At this point we want to figure out the form ad flow of the scene, so we want to keep our sketch light. Draw a horizon line and begin to sketch in the different spaces of the landscape.
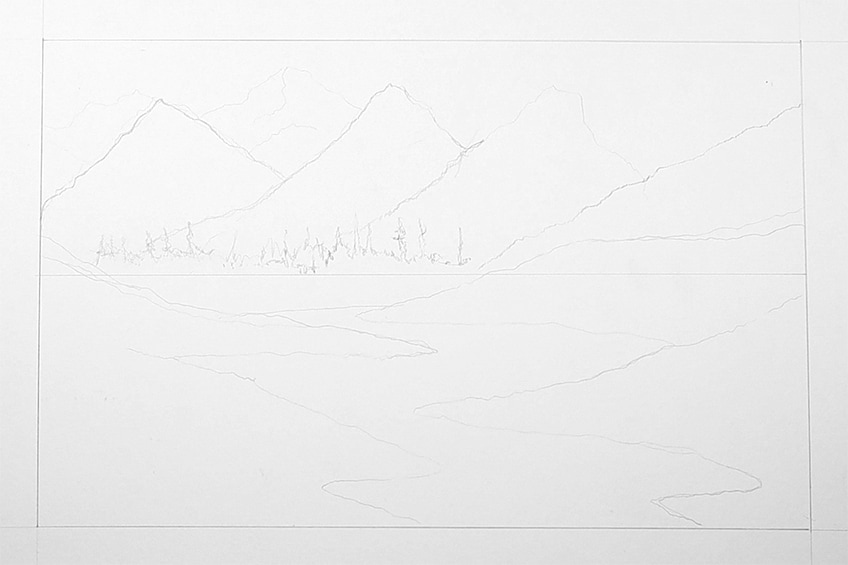
You will find that as we move from background to foreground, we will jump back and forth on occasion to set up the way in which we individually draw the different depths of field. For now, we want to lightly sketch the entire landscape lightly, from background to foreground.
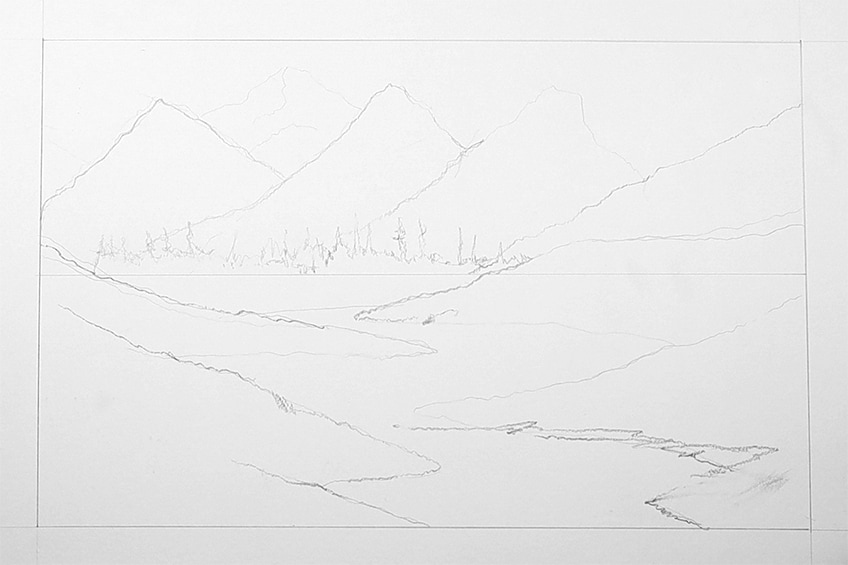
We want to set up the space for the background with the componentry of the foreground and midground. A good suggestion is to incorporate a river that flows from foreground to background, slowly narrowing as it fades into the distance.
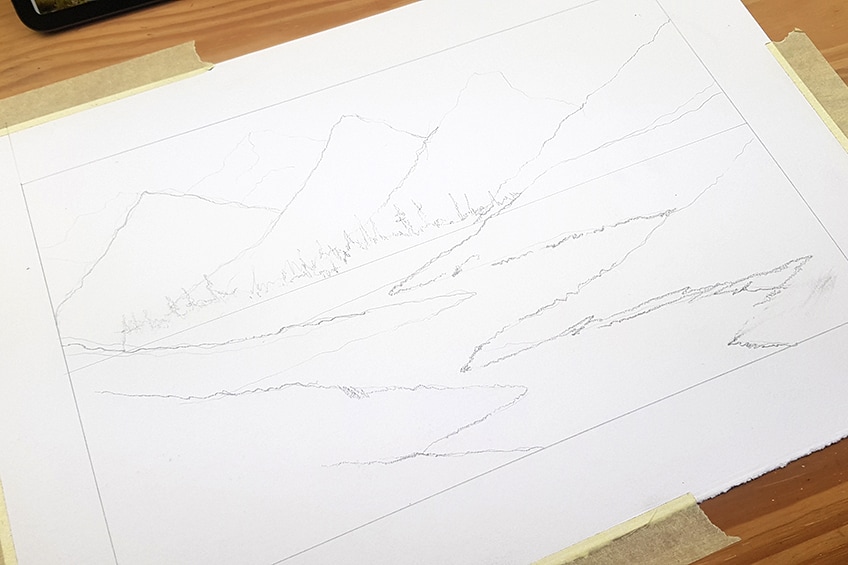
We can also draw rolling hills that veer from outside of the page into the center of the page, helping to create a zig-zagging motion for the river. This provides a nice focal point that leads the eye through the setting.
We want to consider placing elements into the landscape with the idea of scale in mind. Many of the details will become smaller as they move into the distance, we want to keep this in mind as we draw the background.
Incorporating Elements
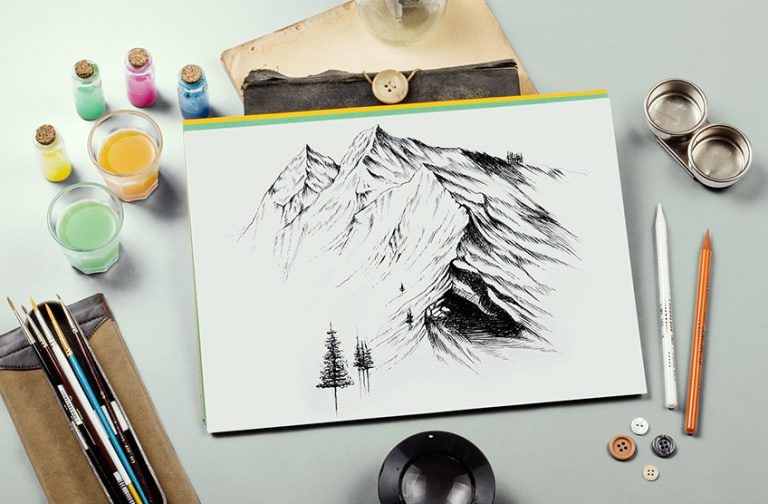
We now want to work with some darker pencils to incorporate elements and details within the background. When it comes to mountains, we want to provide contrast between them and the sky behind them.
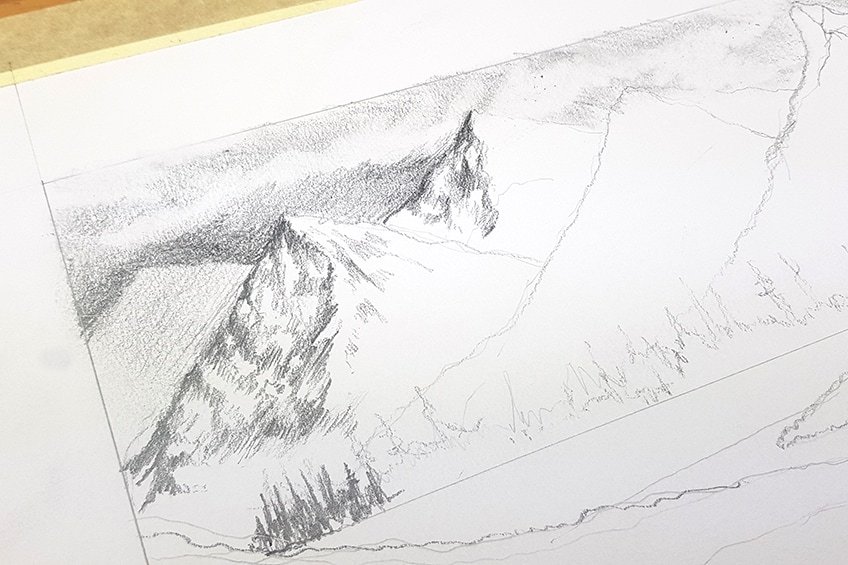
This means that we want there to be a darker shade in the sky whereas the mountains can be slightly lighter. We can also give the mountains a ride that creates a partition between light and dark sides. We want to make sure the light and dark sides are all on the same side for each peak.
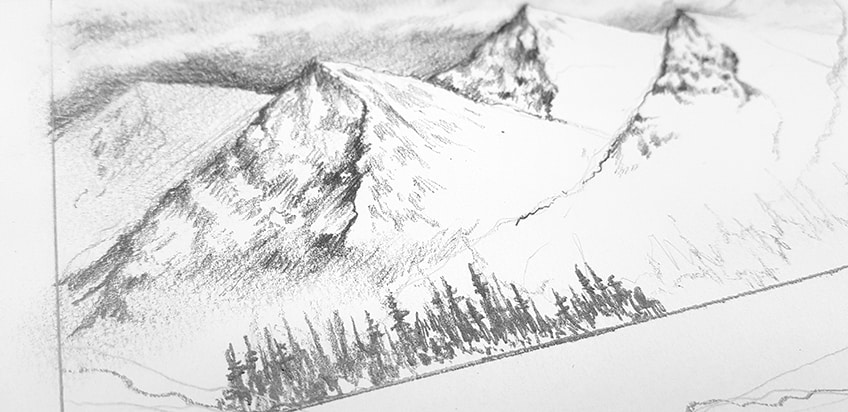
The way in which mountains can be drawn is as if you were shading them in a zig-zag fashion along the side of the slope. Another great element to incorporate at a distance is a forest. Because it is at a distance we can simply and in dark little strokes at the bottom of the mountains.
Drawing a forest and mountains in the background allows you to be more suggestive with your marks because details are less clear when seen at a distance. This is particularly true for mountains and trees.
The intention with both the trees and mountains is to capture the general shape of each. On a mountain side, its moments of shading are scattered along one side of the slope. With trees, it’s sharp little vertical strokes with smaller horizontal ones to suggest branches and foliage.
Suggestive Marks
Details don’t need to be clear when seen at a distance and in most cases, you just want to understand the basic form. Once you understand the basic form of a tree or mountain you can get away with representing them in a realistic way with suggestive marks.
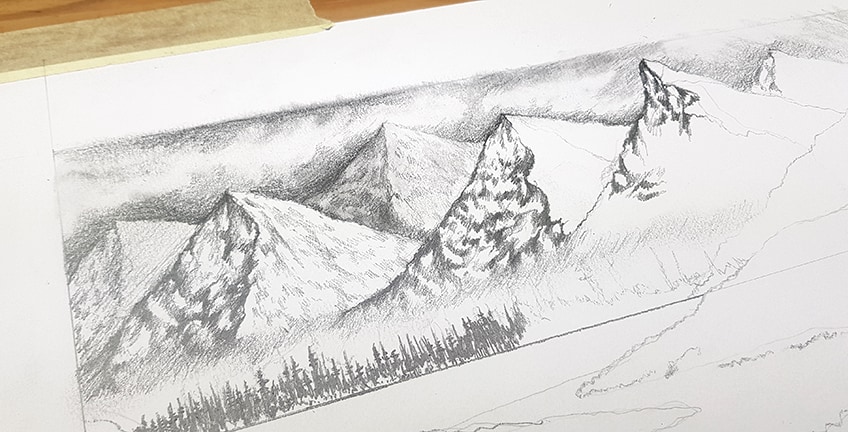
This means that we are quite loose with shading and drawing, more intentional about shadows and forms rather than finer details. Remember, we want to make sure that shadows and light are always consistent.
Once you understand the basic structure and can create suggestive marks to replicate the forms within the structure, you then need to only focus on shadow. Keeping the shadows on one side is a great way to create realism within a structure at a distance.
This process of suggestive marks works well within the details of a landscape set in the background. We can also create clouds with this idea of mark making, whereby we use our eraser to shape clouds in the sky.
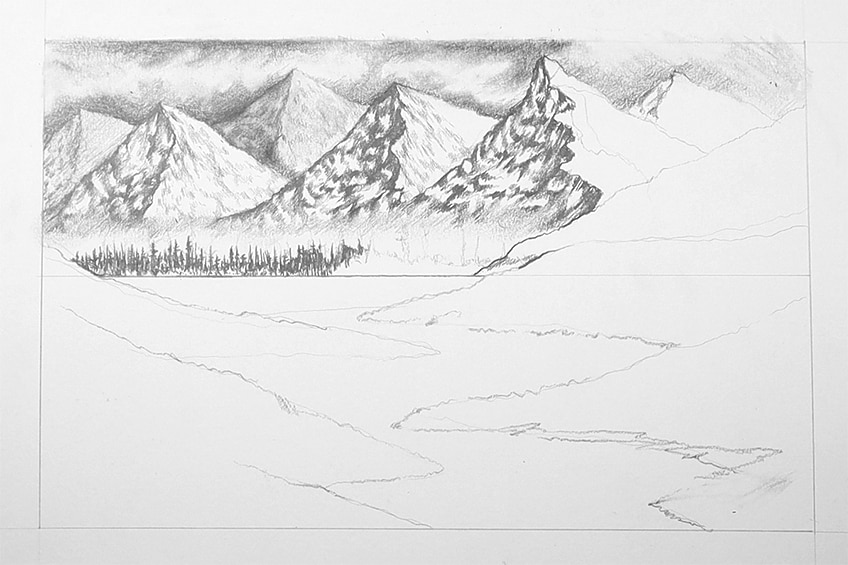
This idea applies to all landscapes, whereby the further the object the less clear it is. Play around with how you represent the qualities of a sky, mountain, or trees by loose mark-making.
Trees are a great feature to incorporate into the different depths of field within a landscape. This is because they are quite abstract and, in many instances, can be drawn with simple techniques.
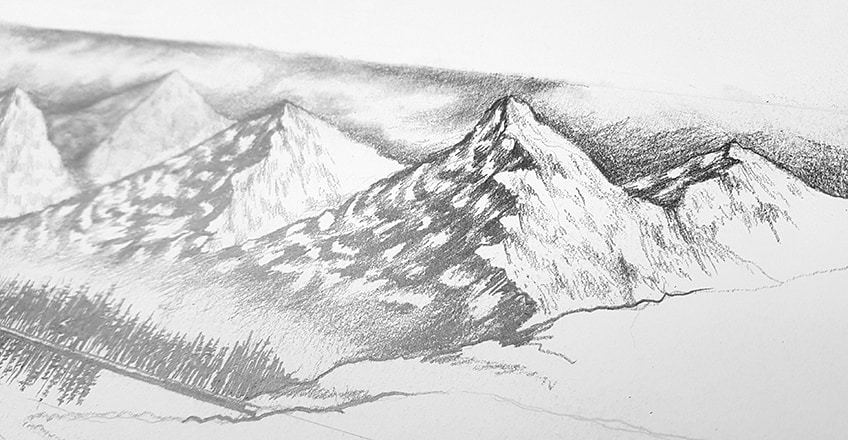
In the case of creating a forest scene that is set in the background, we can simply create a grouping of vertical lines. Adding in some smaller horizontal lines to suggest branches can really establish the form of a forest.
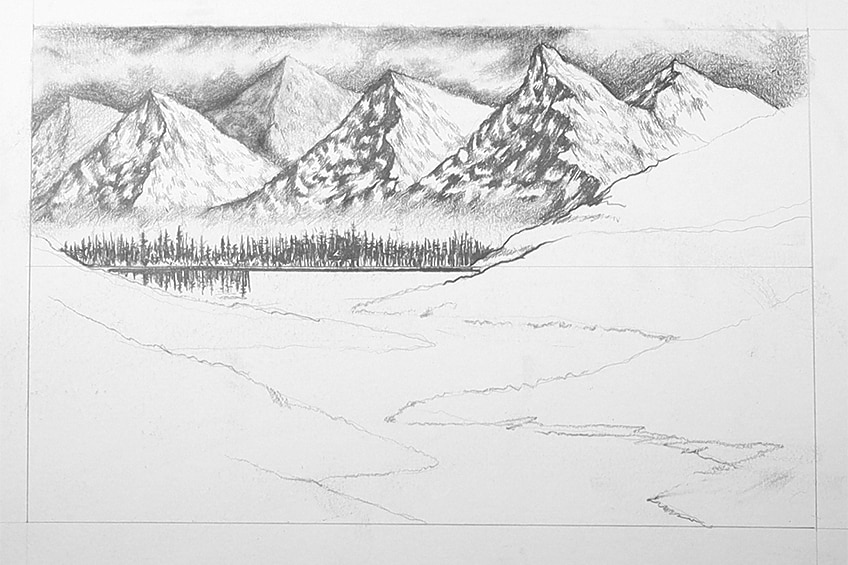
Drawing the Midground
As we seamlessly progress into the midground of our drawing, we will find that the details start to a seamless transition. Having a body of water that flows from the background to the foreground is also a great way to establish this seamless transition. Slowly, we will start to enlarge our features as we move our way to the foreground.
Light and Shadow
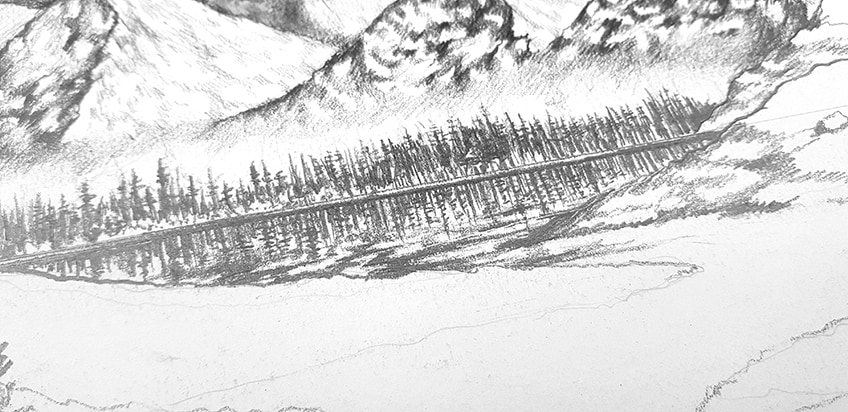
Water is a great tool for exploring the use of light and shadow, as it is a great opportunity to create a realistic effect of reflection. Having a body of water in a landscape is a great tool for creating realistic qualities within a landscape.
Water often reflects the surface above in an exact mirror-like way, which is a great feature to incorporate into a landscape drawing. The effects of reflection in the water are easy to draw and can enhance the realistic quality of the landscape.
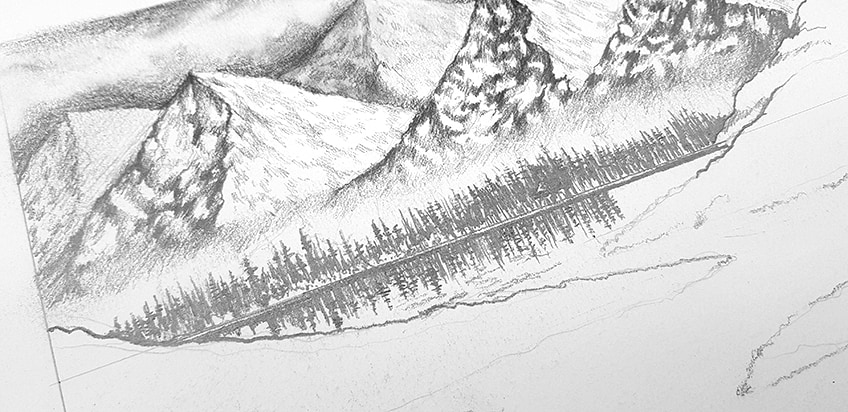
As the water moves into the midground and inevitably the foreground, we will find that the form of the water changes. The way we draw the effect of water is with horizontal shading and line placement.
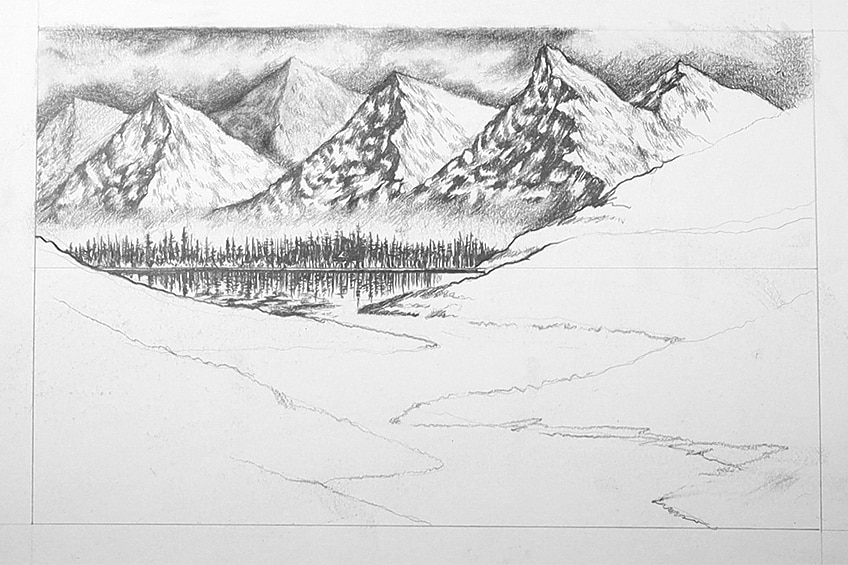
As water becomes more visible, we can create movement in the water by shading the water with zig-zagging marks of shading. Water often is distorting shadows and light, which means we want light and dark moments in the water.
Working With Scale
As we move through the midground, we want to start enlarging elements, the best way to do this is by first setting the largest scale in the foreground. We want to jump to the foreground at this stage just to set an element to help navigate the scale for the midground.
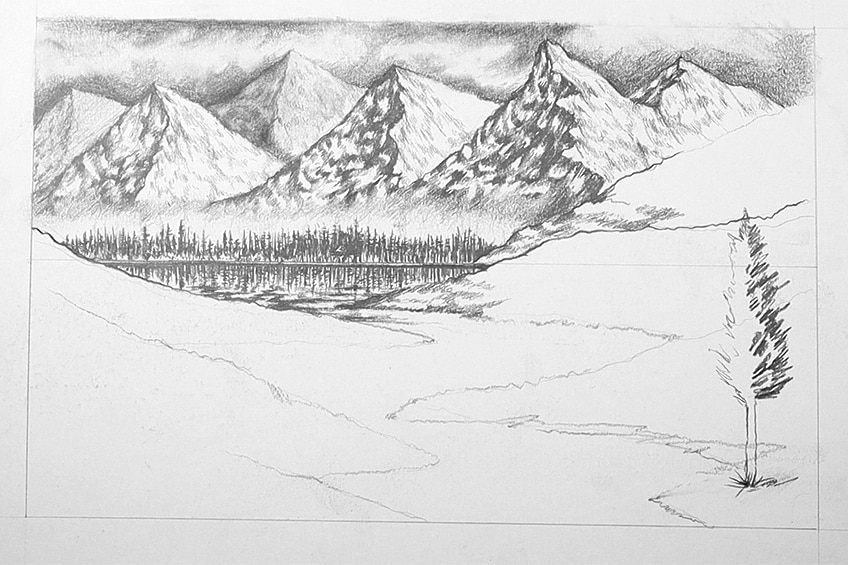
Scale is another major aspect of creating depth within a landscape drawing. Having an element drawn within the foreground is actually a great way to help establish how large elements should be within the midground.
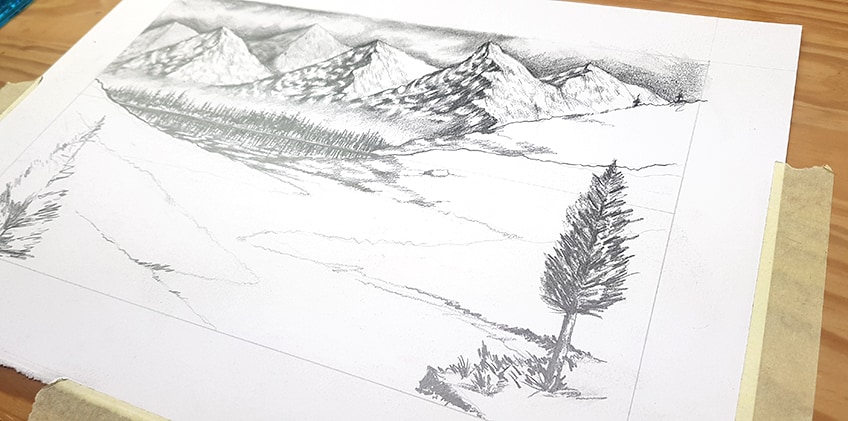
Utilizing all the ideas you have learned so far, we want to start working on more elements and shading into the midground. This means that objects become slightly larger and clearer whilst still staying smaller than the elements within the foreground.
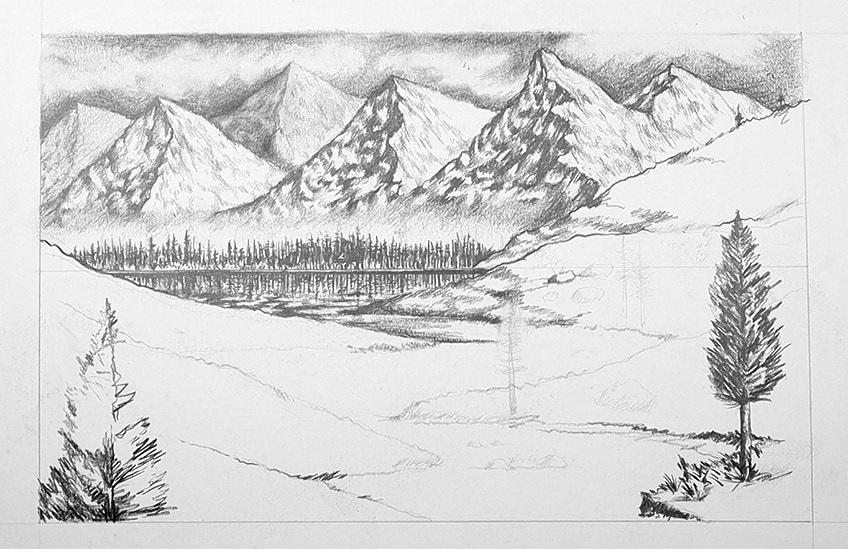
Again, utilize the tree as a means of filling space and indicating scale within the different areas of your landscape. Another great element is the use of rocks.
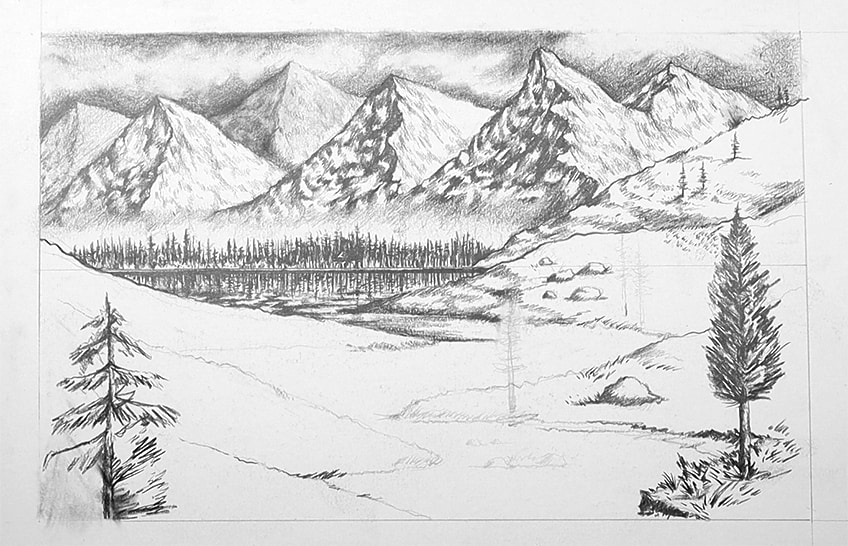
Again, as you start to work your way toward the foreground, you want to start enlarging the elements and making them clearer. Another important aspect to remember is to keep shadows consistently to one side within all the elements.
Remember the suggestive way of shading and drawing in features within the landscape. This is particularly good for creating contours within the mountains and hills that flow in the midground.
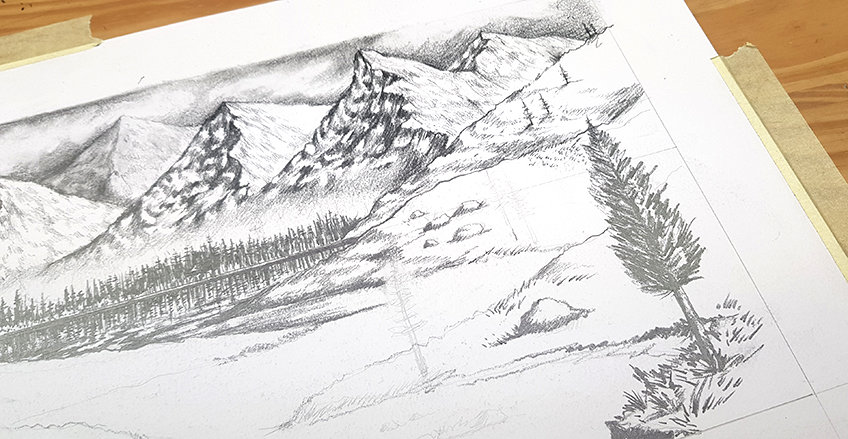
We really want to hit the sweet spot of mid-sized drawing marks and features, between the background and foreground. We want to utilize the skills we have learned within an accurate field of scale.
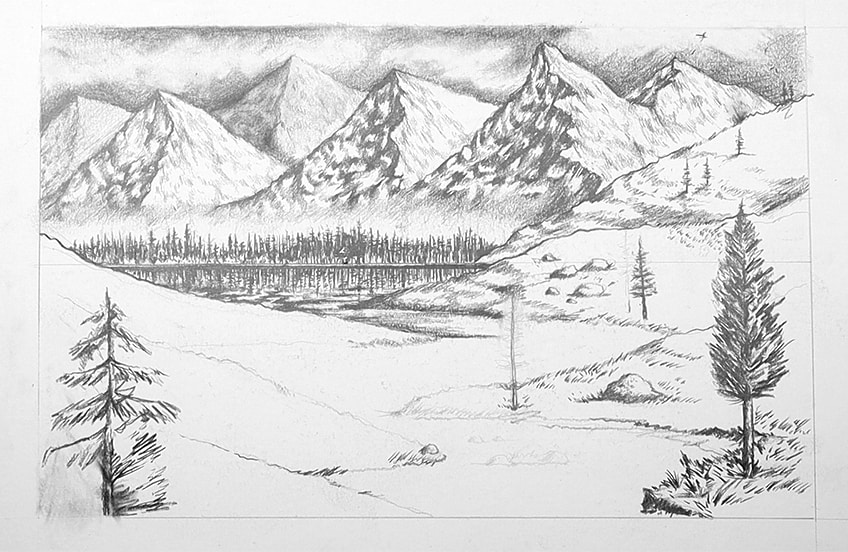
At this point, our drawing will start to slowly merge into the foreground as we start to enlarge objects and give them a more definable form. Really consider how the concept of scale applies to your landscape drawing when moving from the background to the foreground.
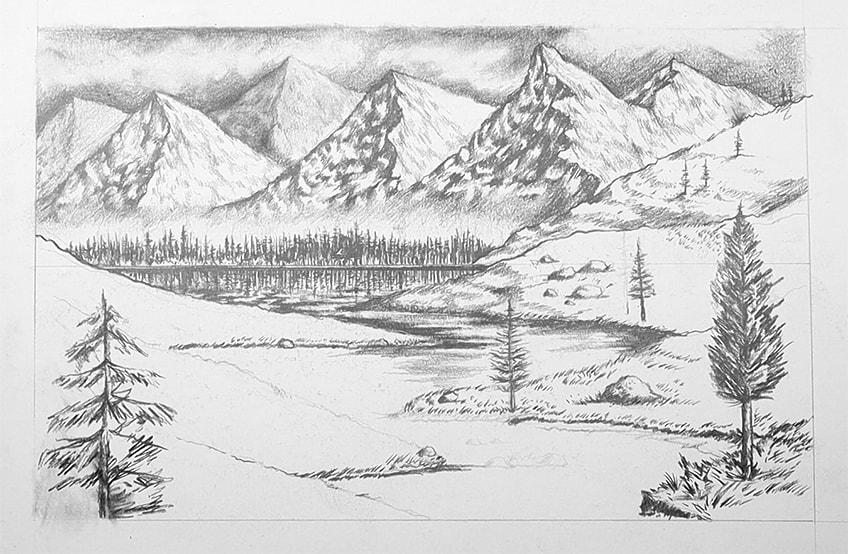
Drawing the Foreground
The process of drawing a landscape is learning about the seamless integration of elements and depths of field that merge from the background into the foreground. As we come to draw the foreground, we will find that there is always a back and forth as we progress within the drawing
Drawing Techniques
Another aspect of drawing landscapes is how we use different drawing styles to depict different elements within the landscape. This is particularly useful when it comes to drawing objects within the foreground.
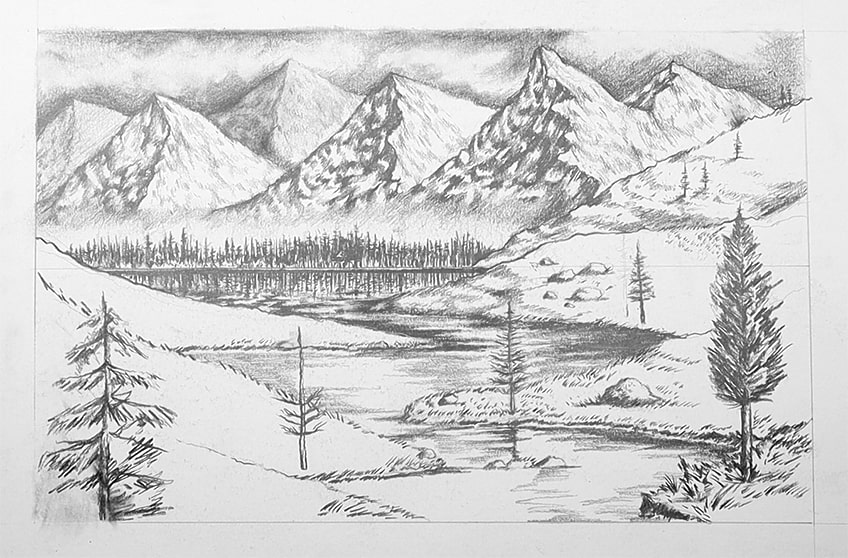
Objects begin to have more clarity in their details, and the use of different pencil thicknesses as well as different mark-making styles can be a great way to emphasize those details. As we come to draw the water, trees, grass, and so on, we can start to explore our range of pencils.
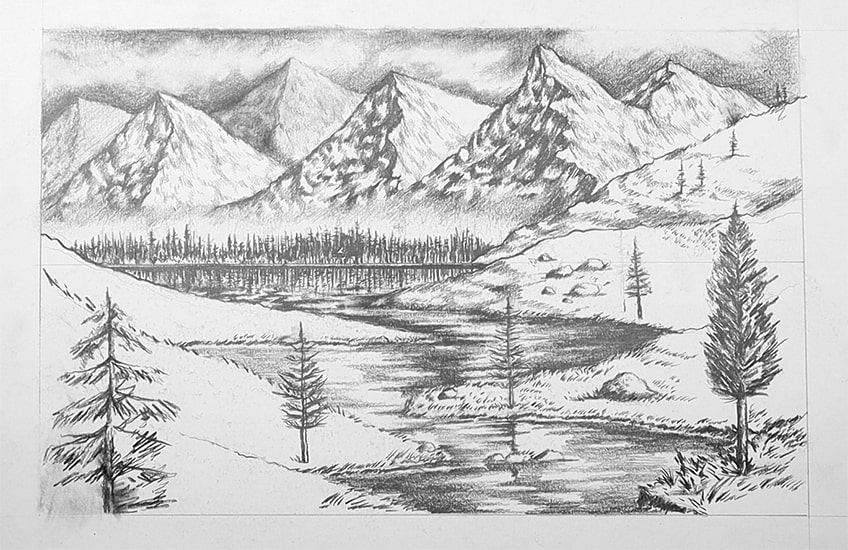
In the case of water, we can start to use dark pencils to provide maximum contrast between the highlights and shadows in the water. We want to consider the elements and how they interact with one another at this point.
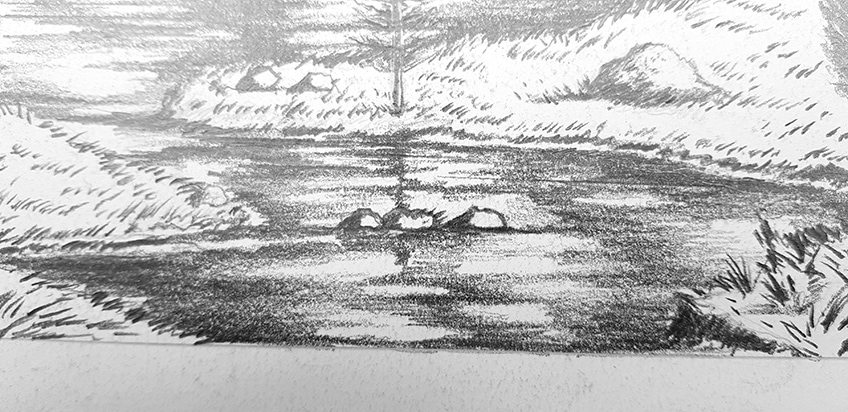
For instance, one example is to use short-handed strokes to create a grass effect within the foreground. Whereas for water we want to have a smooth, zig-zag shading process to create a smooth texture in the water.
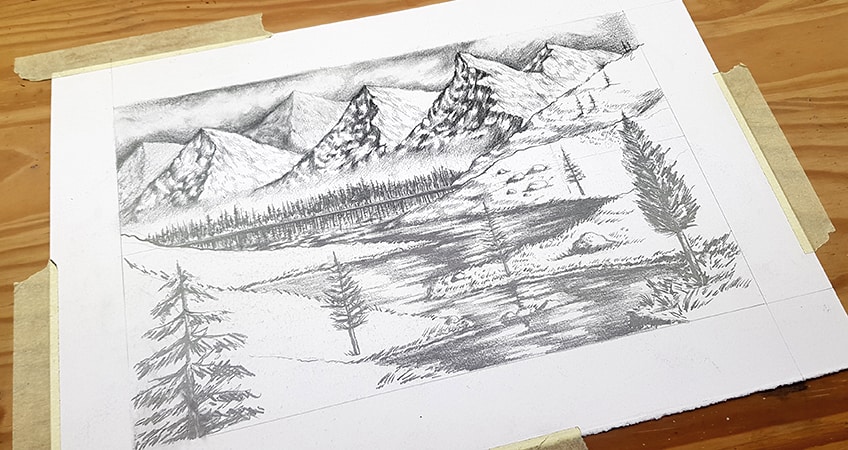
Try to think through the elements that you incorporate into a landscape and see what type of drawing style works as a way of representing that element. We don’t have to abandon the suggestive style of mark-making but we just want a more refined structure within the elements in the foreground.
Contrast and Tonal Values
At this point, we should be using all the different skills that we have learned up until this point. Again, even though we work from background to foreground we will always tweak bits here and there in various depths of field within the landscape.
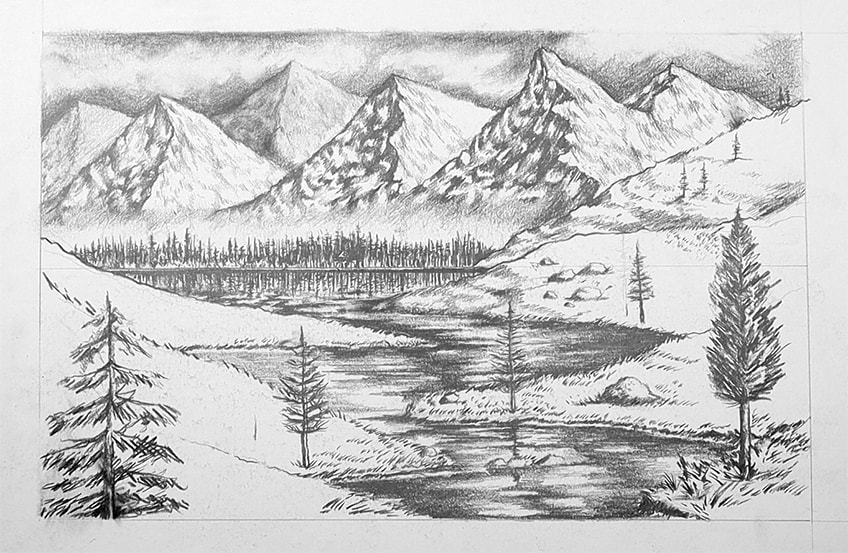
This is particularly true when it comes to darkening and lightening different aspects of a landscape. For instance, keeping contrast between different elements is another way to enhance features within the landscape.
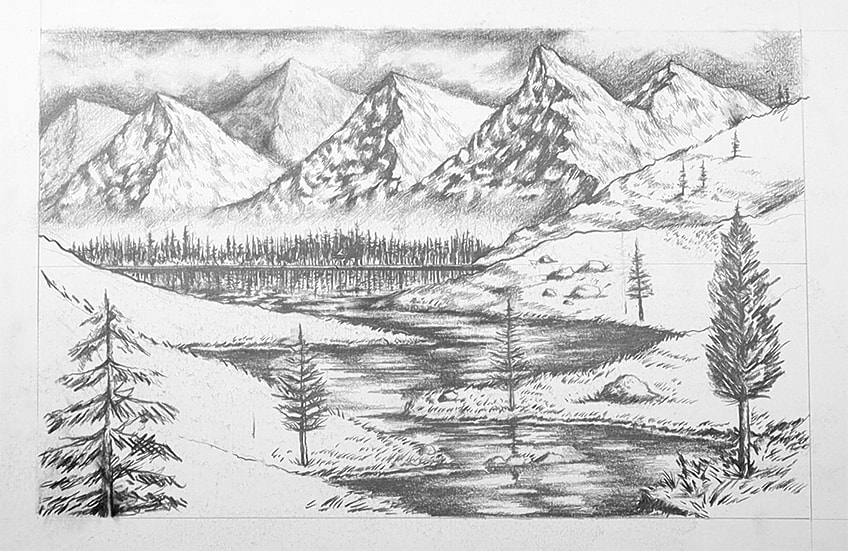
This is particularly important for elements that differ in composition. For instance, keeping water darker than the banks and land that surround it is another great way to emphasize its texture. We want to consider that water is more reflective and therefore will have a darker tonal value.
We want to really think about how we represent shadow and light by the use of certain drawing techniques and how dark they are in their tonal value. Another good example is the trees that sit in the foreground, we want to make sure there is a contrast between the shadowed and lit-up sides.
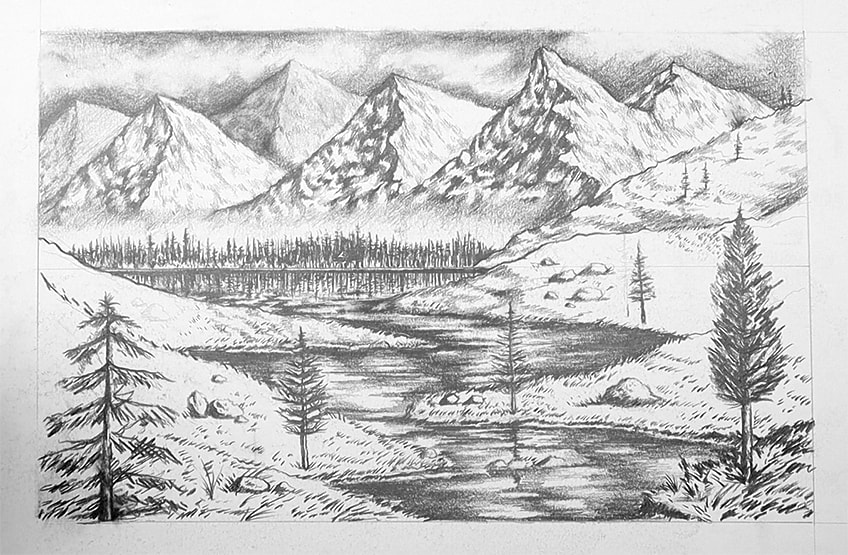
Take your time with the sizes of strokes, how dark they are, and how they can be used to create shadows key thoughts to have when drawing a landscape.
We really want to be mindful of the darkness of pencil marks and how they distinguish elements between the background and foreground. As you come to the later stages of a landscape drawing, being patient with your mark-making is essential.
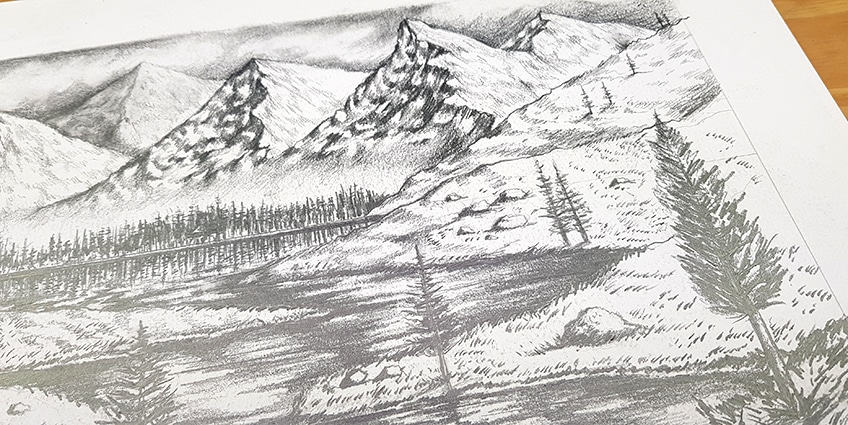
You will find that you want to make certain elements lighter and some darker, to have a healthy amount of contrast and distinction between elements.

Other than that, it is all a matter of patience. And there you have it! Some great ideas to think through as you learn how to draw landscapes. Think through the suggestions mentioned and see how you can incorporate these key concepts into your own landscape drawings.
Tips to Remember
- Consider how you utilize light and shadow. Keeping consistency within the shadows is a great way to enhance the realism of a landscape.
- Focus on scale. Be mindful of how objects that are in closer proximity start to enlarge.
- Work with different styles of shading. Consider different drawing techniques for different elements.
- Take your time. Most importantly, be patient, learn to take a break, and work slowly through each field of depth.
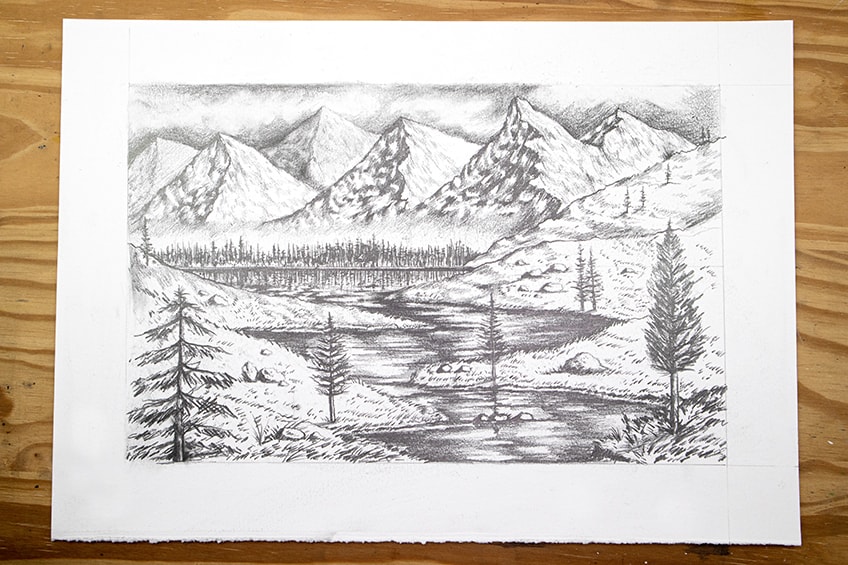
Learning how to draw landscapes with a pencil is an essential skill because the pencil provides a variety of shading and drawing techniques. As you learn how to sketch landscapes and slowly turn them into realistic scenes, the key concepts in this tutorial are great assistance for that drawing process. These concepts can be applied to various landscape ideas and can be used as a guide when exploring different landscapes to draw.
Frequently Asked Questions
How Do You Create Depth in a Landscape?
Landscapes are really a trick of the eye because objects seem to change and distort the further away they are. There are a few ways to create depth within a landscape, the first being, shading intensity. Objects appear to be lighter in the distance because light struggles to travel the distance to meet the eye, so keeping objects fainter in the distance creates depth. The next thing is scale. Objects also appear smaller when they are further away, which means that we want to make objects smaller in the background and then enlarge elements as they move into the foreground. The last thing is clarity and how crips the details of objects are. This is great for drawing because we can draw objects in the distance with suggestive marks rather than clean details. However, we want to make details in the foreground as clear as possible.
How Do You Draw a Mountain?
What’s great about mountains within a landscape drawing is that they are often seen in the distance. This means that we don’t need to worry about drawing mountains in great detail. Rather we want to first capture their form, which we then can work suggestive shading marks into. The form of the mountain is simple, it is generally triangular with a ridge that splits down the middle of the triangular shape. This then has a darker side and a lighter side to suggest that the sun is coming from a single direction. The mountain can change in shape slightly, as long as it veers downward on either side of a ridge that runs through the center of the mountain. Often, we can add a jagged scribble-like shading quality that flows with the slope of the mountain. We don’t need to worry about too much detail because a mountain’s details often become abstract when seen from a great distance.
Matthew Matthysen is an educated multidisciplinary artist and illustrator. He successfully completed his art degree at the University of Witwatersrand in South Africa, majoring in art history and contemporary drawing. The focus of his thesis was to explore the philosophical implications of the macro and micro-universe on the human experience. Matthew uses diverse media, such as written and hands-on components, to explore various approaches that are on the border between philosophy and science.
Matthew organized various exhibitions before and during his years as a student and is still passionate about doing so today. He currently works as a freelance artist and writer in various fields. He also has a permanent position at a renowned online gallery (ArtGazette) where he produces various works on commission. As a freelance artist, he creates several series and successfully sells them to galleries and collectors. He loves to use his work and skills in various fields of interest.
Matthew has been creating drawing and painting tutorials since the relaunch in 2020. Through his involvement with artincontext.org, he has been able to deepen his knowledge of various painting mediums. For example, watercolor techniques, calligraphy and lately digital drawing, which is becoming more and more popular.
Learn more about Matthew Matthysen and the Art in Context Team.
Cite this Article
Matthew, Matthysen, “How to Draw Landscapes – Landscape Drawing for Beginners.” Art in Context. February 11, 2023. URL: https://artincontext.org/how-to-draw-landscapes/
Matthysen, M. (2023, 11 February). How to Draw Landscapes – Landscape Drawing for Beginners. Art in Context. https://artincontext.org/how-to-draw-landscapes/
Matthysen, Matthew. “How to Draw Landscapes – Landscape Drawing for Beginners.” Art in Context, February 11, 2023. https://artincontext.org/how-to-draw-landscapes/.



Helpful article!